
 LinkBack URL
 About LinkBacks


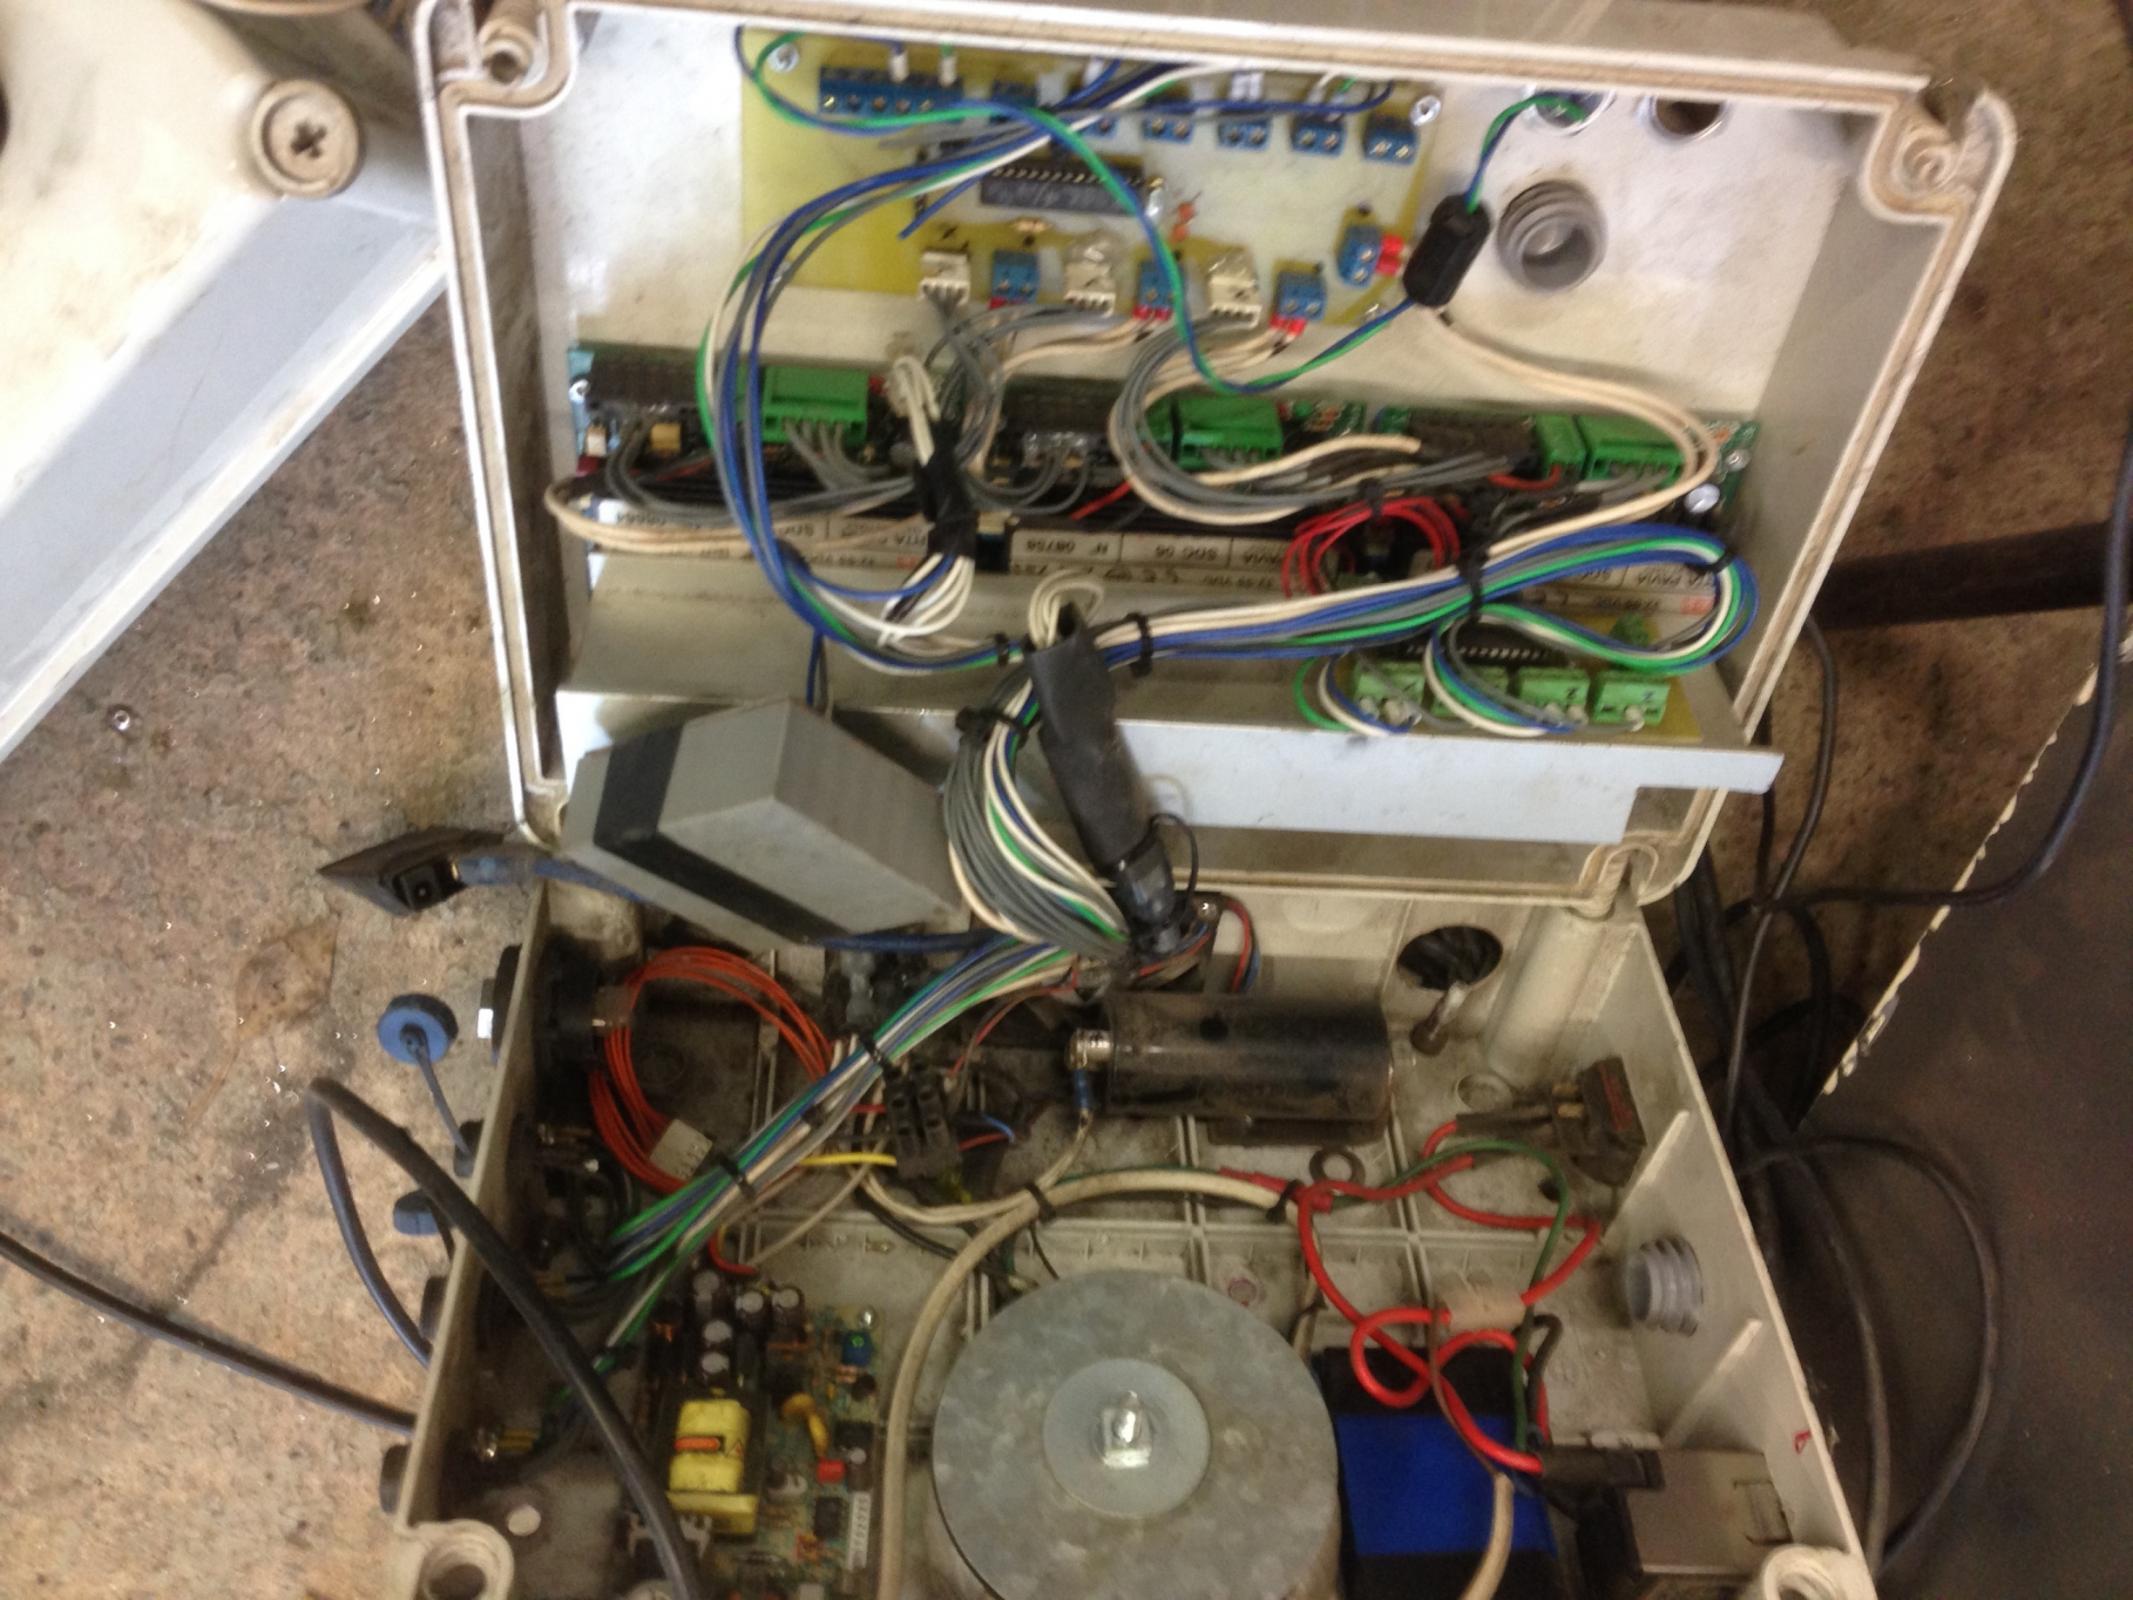
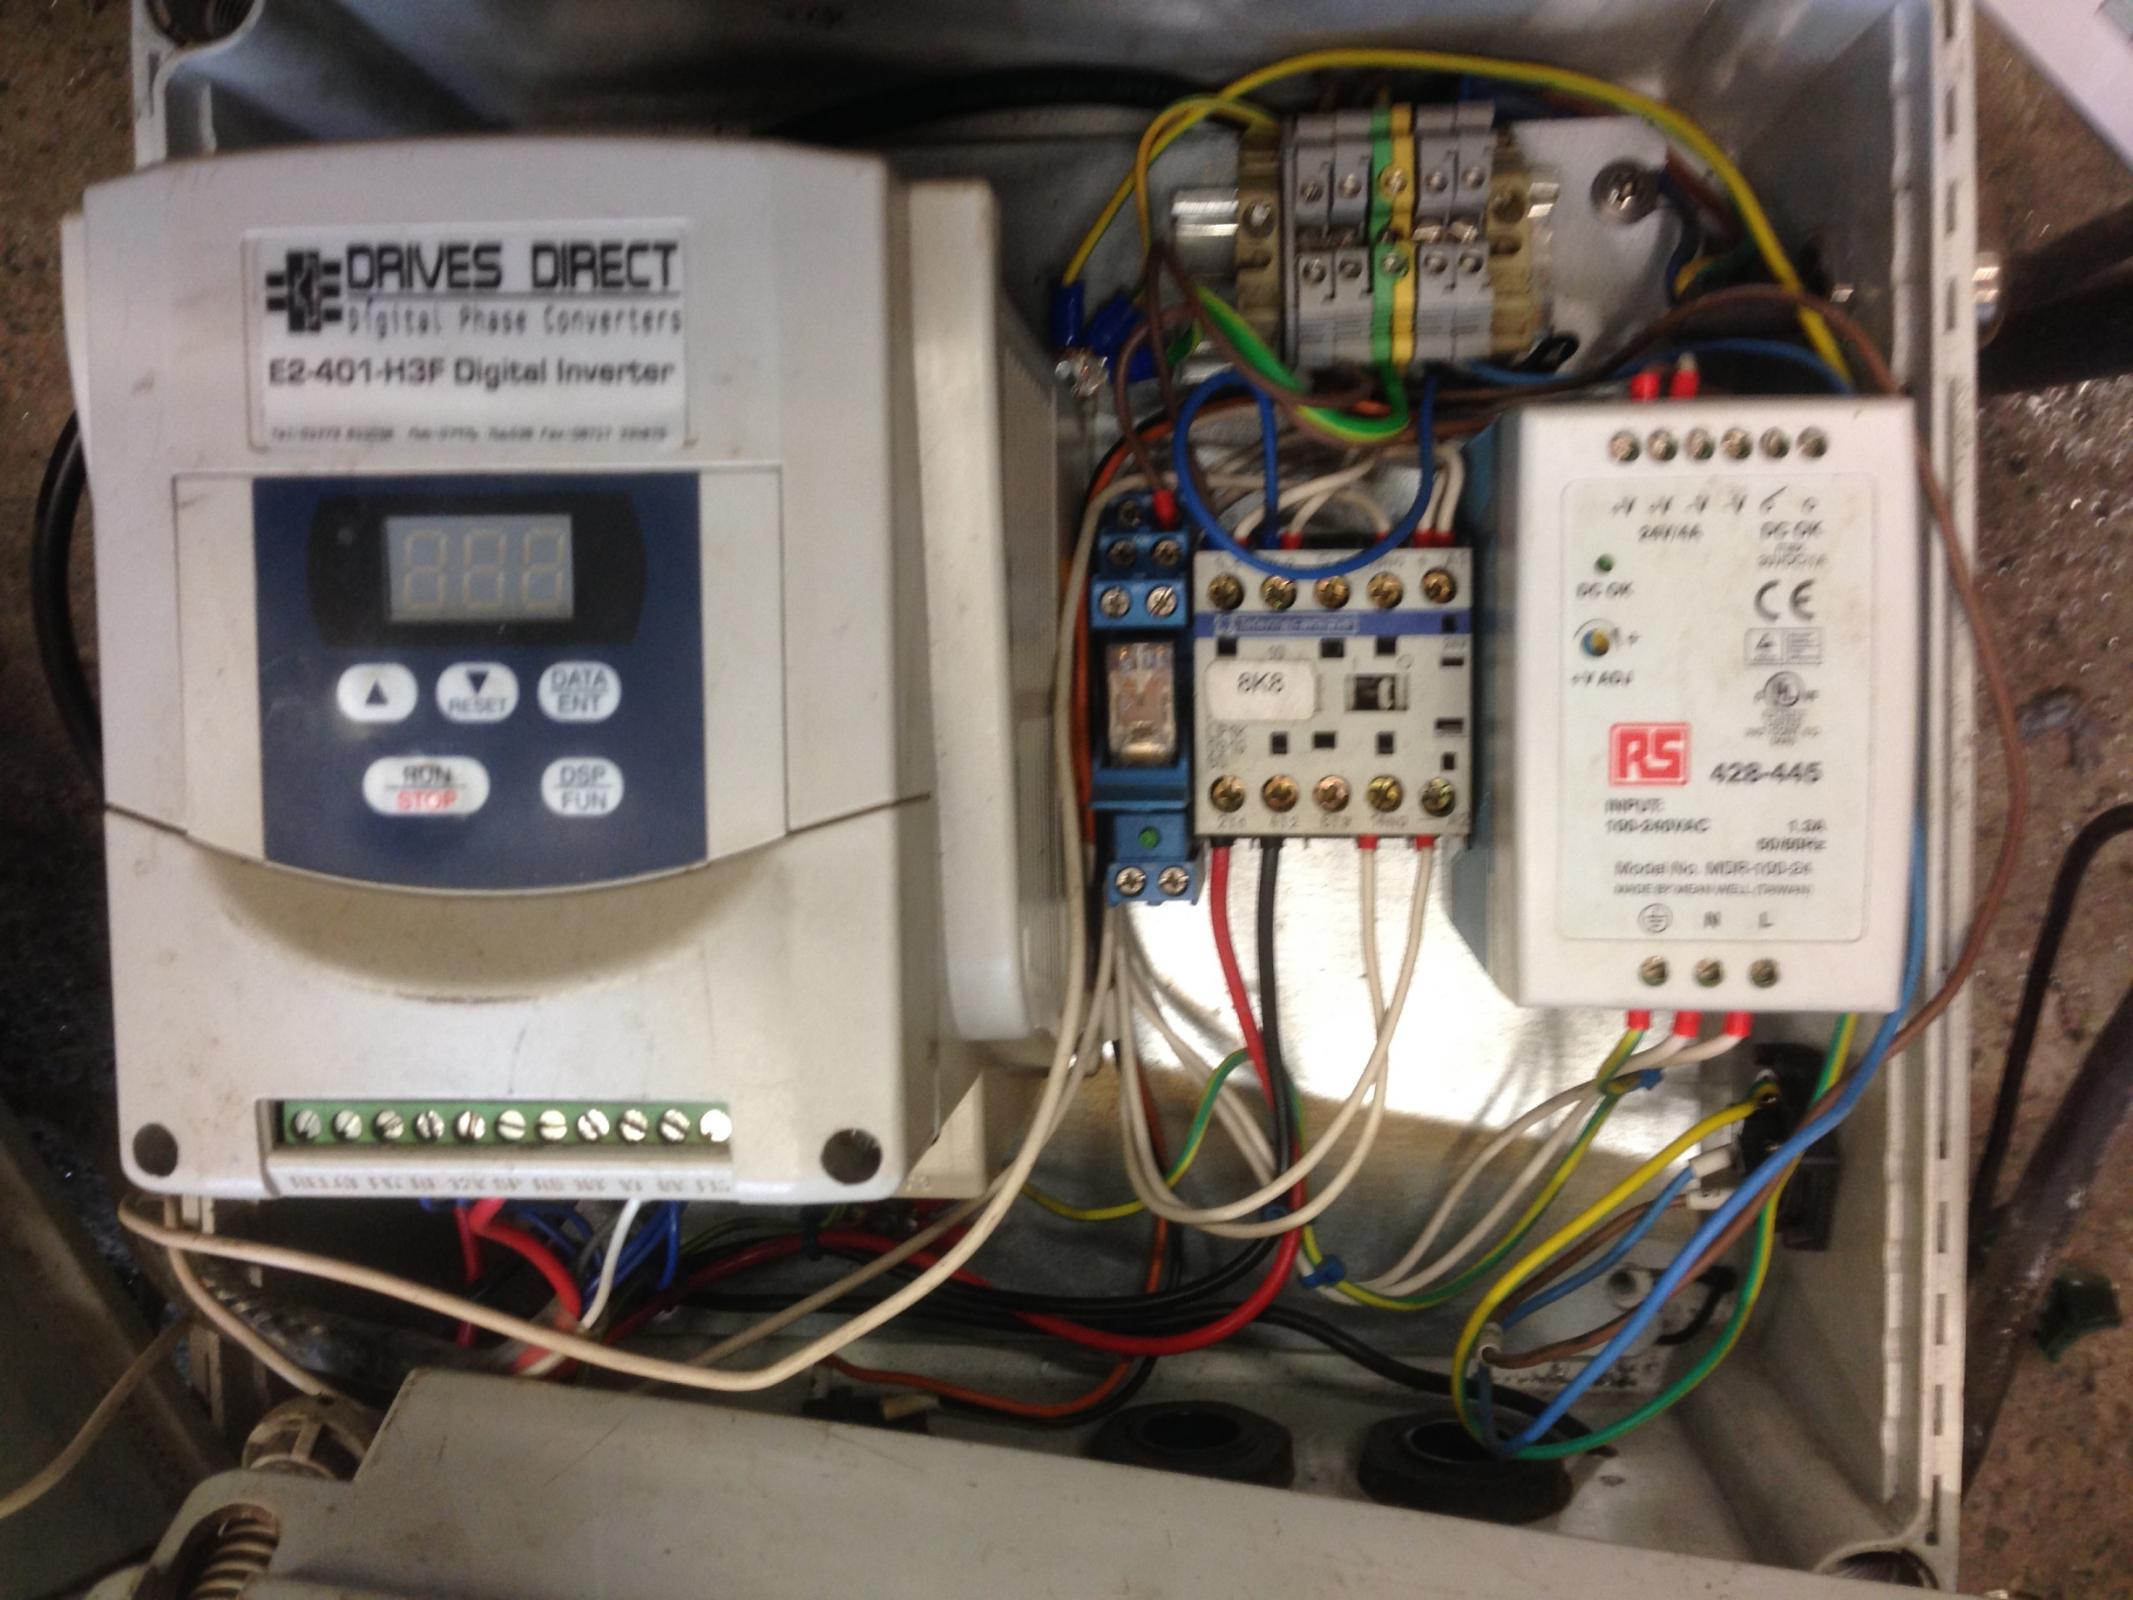
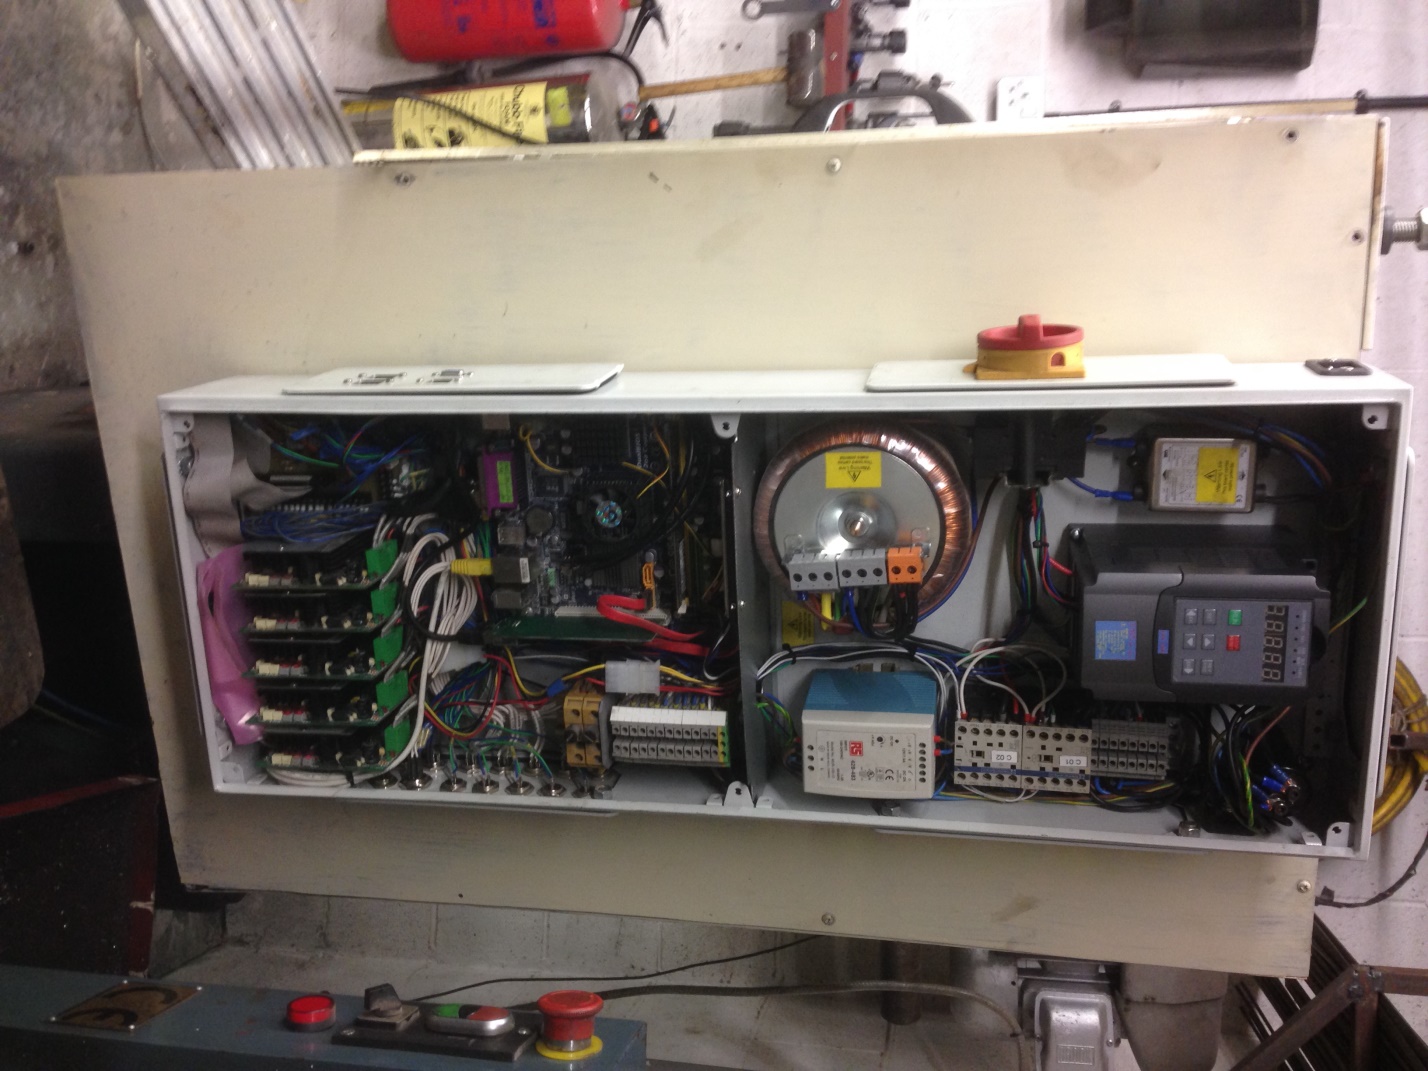
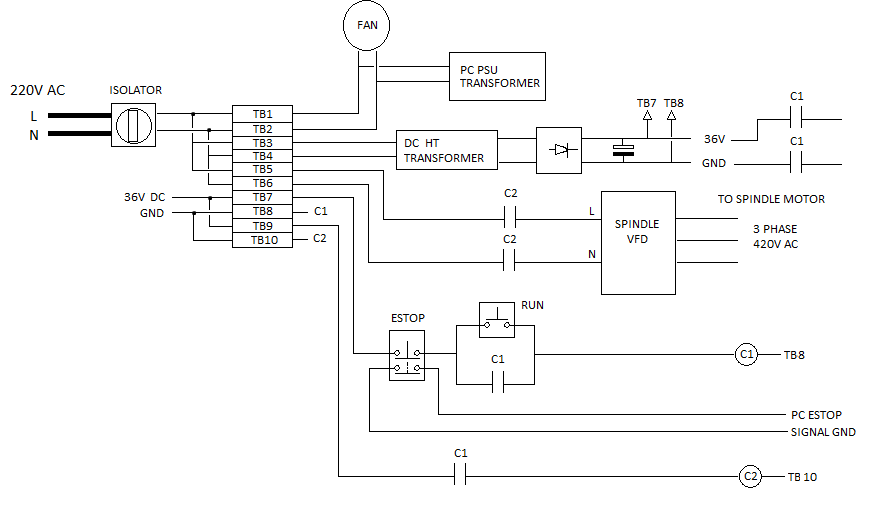
This was the GRBL controller; you can now see why going down the road of rebuilding the machine became necessary
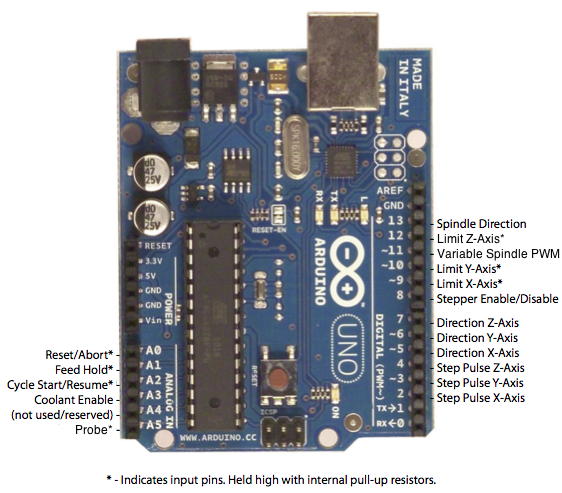
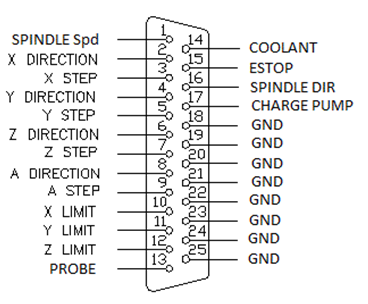
GRBL (actually the firmware) ran on an Arduino Uno. The hardware interface was/is relatively simple and straight forward, the Arduino uno pins are 5v tolerant and easily connect to Stepper drivers. The limit pins are connected to micro switches, the only big issue is the Spindle it required a little bit of signal conditioning and pcb building to get the pwm output for speed to a 0-10v signal for the variable frequency drive (VFD). It turned out the drive was particularly noisy signal wise so the spindle data was carried over a plastic fibre optic. Its not as if technology has all the answers, the fibre could only transmit data at a max baud rate of 2400. Where the Arduino was at 115200 baud.
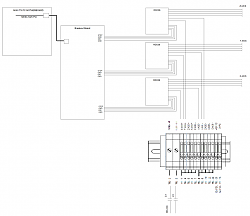
The basic layout of the Arduino based cnc controller
Thanks to the advent of the 3D printer revolution anyone with the desire or basic skills and ability can build a CNC machine. Due to the memory size of the Arduino Atmega 328 IC it is limited in the amount of functionality it can provide, for basic 3 axis machine work its fine. It has no further expansion to allow it to become a fully-fledged controller for a vertical milling centre. Control interface/graphical user displays have been sparse, which has really let the basic Arduino cnc concept down. At some point you make the decision to grow, the Arduino becomes irritating when you can’t handle the tool changes or peck drill holes. The global search will inevitably take the person to linuxcnc.
When you look deeper into the control systems involved in obtaining computer control of machines you very quickly begin to realise the simplicity of controlling the mechanical aspects of a machine. looking at the interface connection for Mach3 and linuxcnc machines you can notice that the wiring methods are not dissimilar.
I’ve just been working on an old Heidenhain controller and was smiling with pleasure at how much I could glean from its wiring without even having the manual. Software is the key, the mechanics will deliver the axis movements but the software is what will give you the full functionality of a machine. The windows/linux pc desktop styled operating system is only just starting to appear in professional machines.
The plan to upgrade,
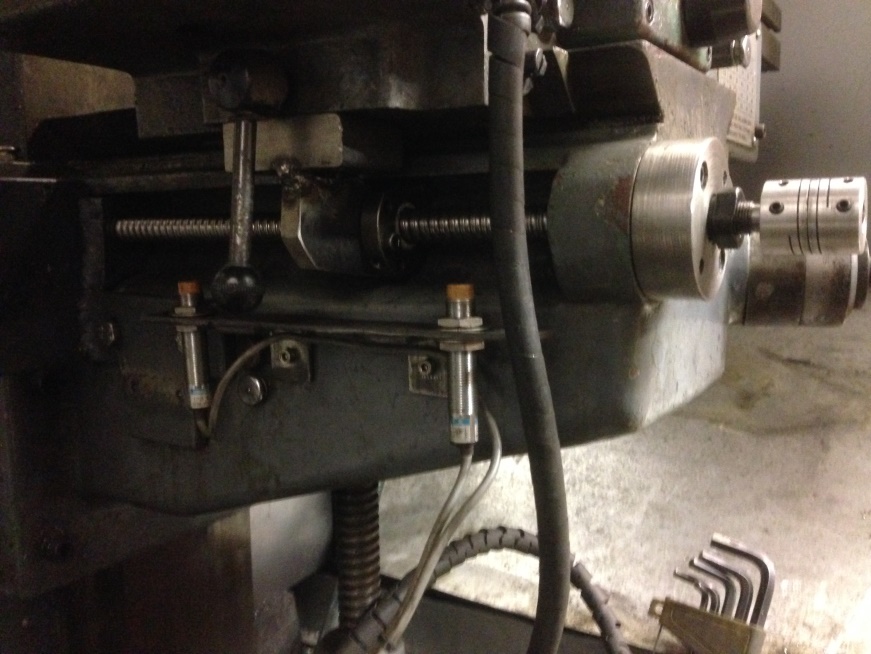
When you get to the point of realising that you can mill a part but it’s not what you hoped it would be and accuracy is for other people then its time to do a teardown and start again. The first upgrade or is it the 3rd or 4th I’ve lost count was to swap out the worm drives for anti-backlash ball screws. Wow, the accuracy was out of this world compared to the old worm drives.
The control/software was still hindering, my views of linuxcnc ive already covered. I chose to go down the pathpilot clone route. It wasn’t a simple decision to make; it was a toss-up between buying a second hand machine or the upgrade. The second-hand machine is still on the cards but the upgrade was already a financial commitment.
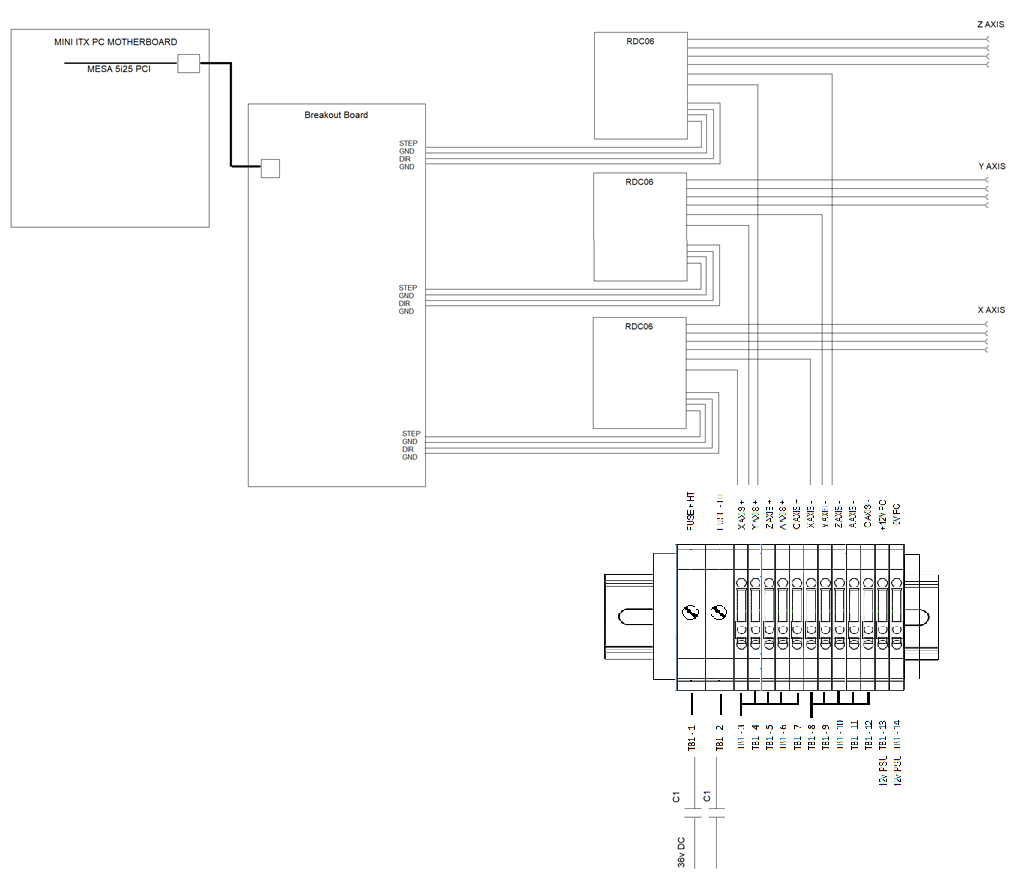
Researching the Tormach hardware and interfacing, I came across details of the Mesa interface card they use, oddly enough its wiring connection looked quite similar to the one above, in fact it’s identical. It wouldn’t have been to hard to simply swap the GRBL board for the mesa interface wiring. I wanted to upgrade the stepper motors from 2Nm nema 23s to 4Nm nema 23s, the transformer needed to be upgraded to supply a higher current and voltage output.
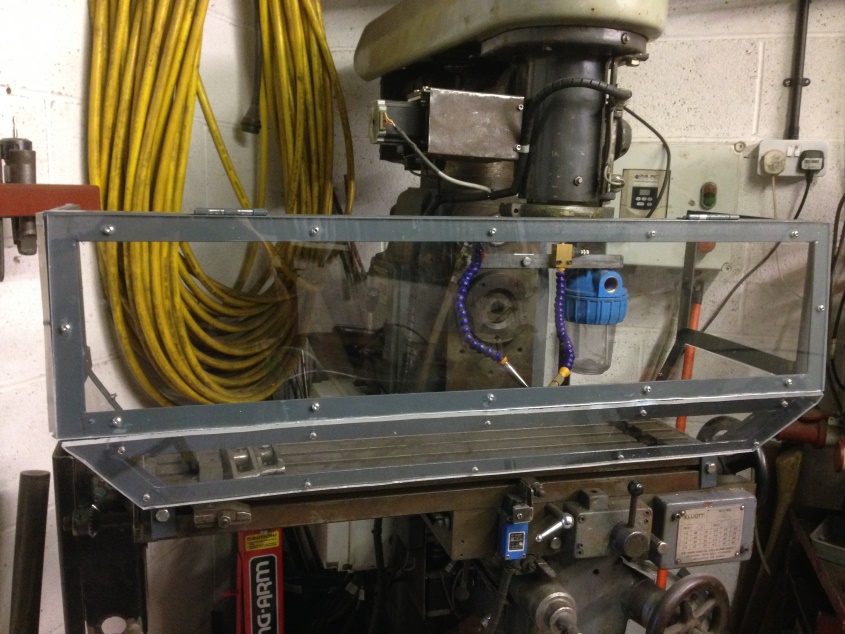
Improving the machine and planning to use it with much greater anger means a proper coolant system was required (bye bye Fog buster) ok perhaps I could adopt both. The enclosure was built for the best practice and health and safety practicality, na - just keep the coolant inside. My apprentice and I decided that we should send a picture to Haas and beg/plead for a VF1 sticker for it, now I have to ask Tormach as I owe them a debt of gratitude.

 Reply With Quote

Bookmarks