Free 186 More Best Homemade Tools eBook:  
Get 2,000+ tool plans, full site access, and more.

User Tag List

Results 1 to 8 of 8

Thread: A very simple lazy Susan welding fixture

  1. #1
    Supporting Member Frank S's Avatar
    Join Date
    Aug 2015
    Location
    Peacock TX
    Posts
    11,212
    Thanks
    1,983
    Thanked 8,787 Times in 4,206 Posts

    Frank S's Tools

    A very simple lazy Susan welding fixture

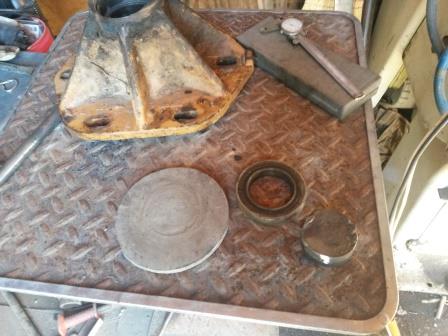
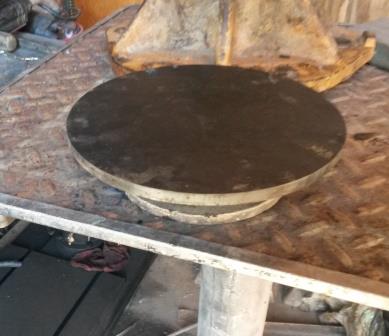
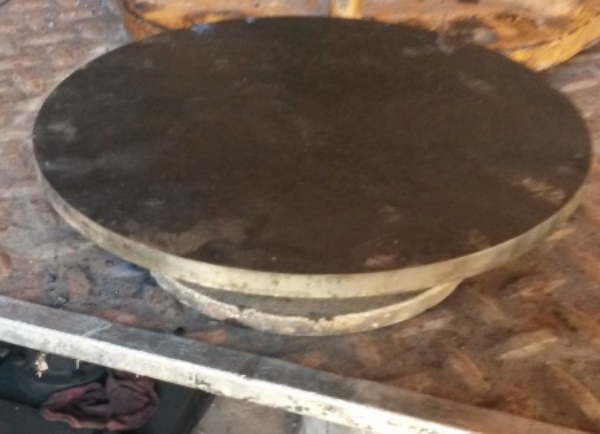
    In addition to my welding table for the repair project I also needed a lazy Susan to rotate the part I needed to weld. No I could have made a 450 mile round trip to our property and spend countless hours trying to remember where another of my fixtures was packed away or I could simply grab a couple of pieces of metal and an old bearing and make one
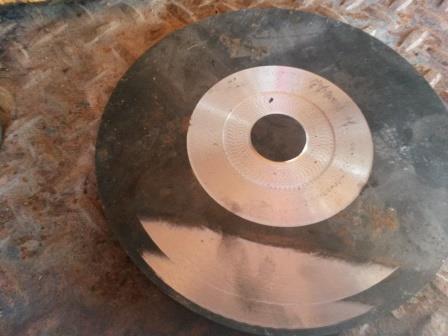
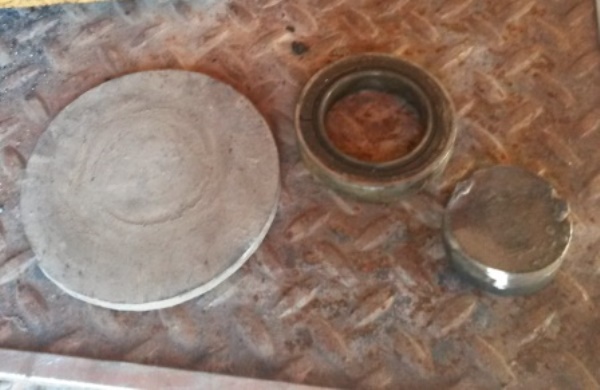
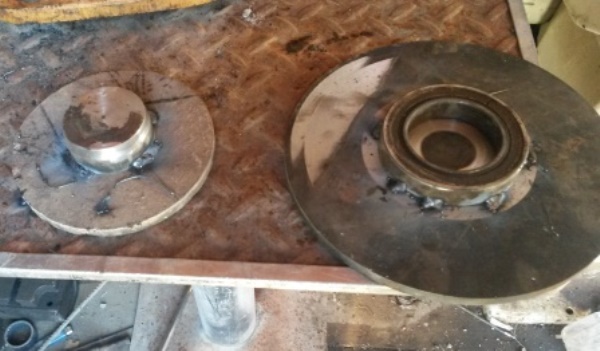
    First I chucked up a round disk and trued up a small area for the bearing to be placed and a relief so that the inner race would not rub then I turned a short stub shaft to fit the inner race. then tacked that to anopther round disk. Since this was most probably only going to be a 1 time use tool I only did the bare minimum of work on it as I needed to get started on the repair as soon as possible.
    A very simple lazy Susan welding fixture-20161128_150033d.jpg A very simple lazy Susan welding fixture-20161128_152655e.jpg A very simple lazy Susan welding fixture-20161128_153127e.jpg A very simple lazy Susan welding fixture-20161128_153155e.jpg
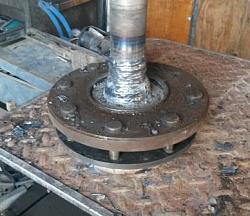
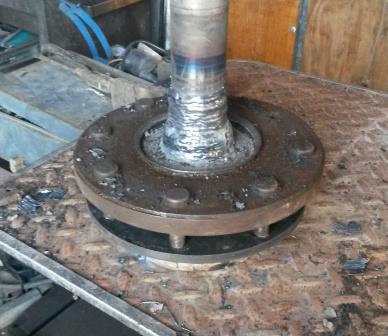
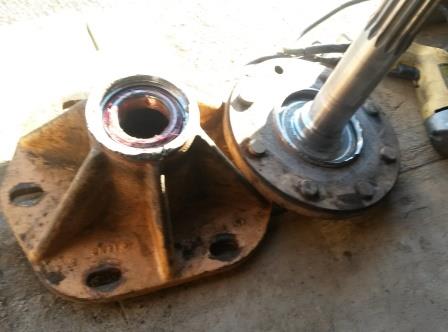
    The shaft is welded and ready for machining
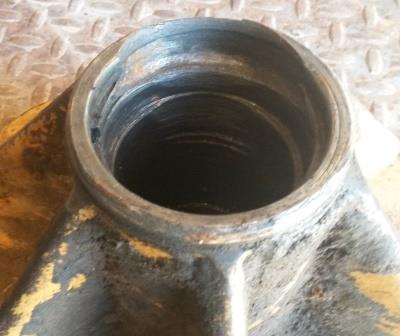
    not shown but the housing was also welded up on the rotator
    A very simple lazy Susan welding fixture-20161128_162722e.jpg A very simple lazy Susan welding fixture-20161129_145028e.jpg
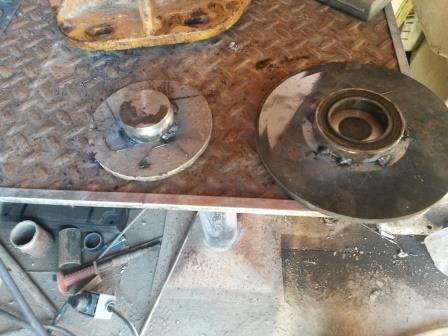
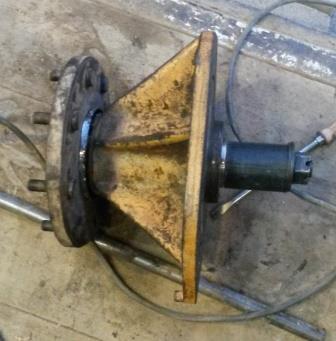
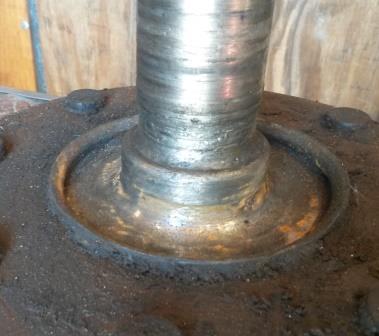
    Fully repaired and assembled with a protection sleeve for the splines
    A very simple lazy Susan welding fixture-20161129_173409e.jpg

    186 More Best Homemade Tools eBook
    Last edited by Frank S; Dec 2, 2016 at 11:11 AM.
    Never try to tell me it can't be done
    When I have to paint I use KBS products

  2. The Following 2 Users Say Thank You to Frank S For This Useful Post:

    Paul Jones (Dec 3, 2016), PJs (Dec 5, 2016)

  3. #2
    Content Editor
    Supporting Member
    DIYer's Avatar
    Join Date
    Aug 2013
    Posts
    3,056
    Thanks
    772
    Thanked 1,852 Times in 1,653 Posts


    Thanks Frank S! We've added your Lazy Susan Welding Fixture to our Welding category,
    as well as to your builder page: Frank S's Homemade Tools. Your receipt:


    2000 Tool Plans

  4. #3

    Join Date
    Mar 2016
    Location
    Wilmington, NC
    Posts
    8
    Thanks
    0
    Thanked 4 Times in 3 Posts
    I am not a machinist but I do some backyard welding. Can such a fixture be made if one cannot machine parts -- using readily available materials -- like a hub, etc? I assume the yellowish part does the rotating? Or is the the part with the wheel lugs? I probably just not looking at it correctly -- looks real solid. Thank you for sharing.

  5. #4
    Supporting Member Frank S's Avatar
    Join Date
    Aug 2015
    Location
    Peacock TX
    Posts
    11,212
    Thanks
    1,983
    Thanked 8,787 Times in 4,206 Posts

    Frank S's Tools
    We might have a little confusion here these are the parts for the lazy Susan
    the first pic shows 3 of the basic componants the bearing the stub shaft and the plate that welds to the stub shaft then was tacked to the table
    A very simple lazy Susan welding fixture-20161128_150033s.jpg
    The 2nd pic shows the bearing tacked to the top plate and the stub shaft tacked to the base plate
    A very simple lazy Susan welding fixture-20161128_153127s.jpg
    the 3rd pic shows the Lazy Susan tacked to the table
    A very simple lazy Susan welding fixture-20161128_153155s.jpg
    The yellow part was the skid steer housing that needed welding on the inside and machined for a new bearing and oil seal
    Here is a close up of the damage
    A very simple lazy Susan welding fixture-20161128_144722d.jpg
    This is the damaged axle shaft
    A very simple lazy Susan welding fixture-20161128_144741d.jpg
    this is the repaired housing with the new bearing installed and the shaft
    A very simple lazy Susan welding fixture-20161129_160220e.jpg
    This is the completed repair
    A very simple lazy Susan welding fixture-20161129_173409e.jpg
    I'm sorry for any confusion that may have been caused.
    And in answer to doug42190's question yes a simple lazy Susan can be made using materials at hand. The bearing that I used was a pull out from something I had repaired I put all new bearings in the machine but a few of these ball bearings still spun freely so I used it since I was in a hurry and did not need to make a robust permanent fixture I merely tacked it in place. Essentially it is what I consider a throwaway tool as the welding current passing through the bearing will eventually erode and pit the bearing making it unusable. However in the past I seen bearings used in fixtures such as this one last for hundreds of hours of nearly continuous welding
    Last edited by Frank S; Dec 5, 2016 at 04:04 PM.
    Never try to tell me it can't be done
    When I have to paint I use KBS products

  6. The Following 3 Users Say Thank You to Frank S For This Useful Post:

    C-Bag (Dec 6, 2016), Paul Jones (Dec 6, 2016), PJs (Dec 6, 2016)

  7. #5

    Join Date
    Mar 2016
    Location
    Wilmington, NC
    Posts
    8
    Thanks
    0
    Thanked 4 Times in 3 Posts
    Frank -- thank you very much for the additional words and pictures. After reading it and looking at your new pictures, it all made sense. You must have had to build up the bearing surface on the axle and then machine it to tolerance for the new bearing and seal -- I get it -- when I first saw it I thought the hub (the part with the wheel studs) WAS the lazy Susan -- now I get it. I see how an actual hub might be used as a lazy Susan -- but I do understand the process you used. Thank you very much for taking the time to walk me through this.

    Doug

  8. The Following User Says Thank You to doug42190 For This Useful Post:

    PJs (Dec 6, 2016)

  9. #6
    Supporting Member C-Bag's Avatar
    Join Date
    Aug 2015
    Location
    California, central coast
    Posts
    720
    Thanks
    689
    Thanked 876 Times in 471 Posts

    C-Bag's Tools
    Good job Frank, I was lost too, great explanation 2nd time around. I'm sure the skid steer guy was happy you were able to save that axel and housing, I'm always shocked at the prices of that stuff!

    And good job Doug speaking up when something isn't clear. I was determined I wasn't going to be guy THIS TIME who didn't quite get it and had to ask what was I missing. You saved me

  10. The Following User Says Thank You to C-Bag For This Useful Post:

    Paul Jones (Dec 6, 2016)

  11. #7
    Supporting Member Frank S's Avatar
    Join Date
    Aug 2015
    Location
    Peacock TX
    Posts
    11,212
    Thanks
    1,983
    Thanked 8,787 Times in 4,206 Posts

    Frank S's Tools
    Sorry guys, I sometimes take for granted that everyone automatically knows whatt I have done and often do not fully explain my processes or what is actually going on when I do them.
    Ordinarily when I would repair a housing and or a shaft such as the one in this case I would have placed both in an oven for several hours prior to welding either of them to both bake any residual oils out oils out of the parts and to bring them up to a more optimum temperature for welding. Additionally I would have preferred to have used a different filler material and shielding gas that way I could have gotten into what is called a spray arc mode which would have provided a much smoother deposit thus negating the probabilities of creating hard spots, particularly inside of the housing Shafts are a little easier since a small amount of preheat will aid in the transfer of the filler that plus the fact that you have more freedom of gun positioning and distance control.
    Ultimately I would have preferred to have used my long gone exothermic metalizing oxy/Hydrogen powder spray torch to have done the build up or someday buy one of the newer technologies that use arc plasma and atomized wire for repairs such as this. But those things are expensive for no more than I figure that I would ever use one.
    I do however need to build a new powered rotary positioner and an oven or a forge for preheating
    Never try to tell me it can't be done
    When I have to paint I use KBS products

  12. The Following 2 Users Say Thank You to Frank S For This Useful Post:

    Paul Jones (Dec 6, 2016), PJs (Dec 6, 2016)

  13. #8

    Join Date
    Mar 2016
    Location
    Wilmington, NC
    Posts
    8
    Thanks
    0
    Thanked 4 Times in 3 Posts
    C-Bag, You are certainly welcome. I am not the least bit bashful about asking questions -- once I am absolutely clear that there is something I am not getting -- a piece of the puzzle that I just can't see for myself.

    Frank, thank you again for taking the time and having the patience to help teach folks like me. I have seen many of your posts and I am in awe of your artistry with metal.
    Thanks,
    Doug


    186 More Best Homemade Tools eBook

Thread Information

Users Browsing this Thread

There are currently 1 users browsing this thread. (0 members and 1 guests)

Bookmarks

Posting Permissions

  • You may not post new threads
  • You may not post replies
  • You may not post attachments
  • You may not edit your posts
  •