 LinkBack URL
 About LinkBacks
Totally agree. I’ve seen a few but this one made me cry from laughing so much.Originally Posted by Frank S


Totally agree. I’ve seen a few but this one made me cry from laughing so much.

Thanks, Moby Duck for chiming in on the acid/ alkali flavors of RTV -
for me just to delve deeper into the type I've got -
it smells of acetal acid, and it will only come into contact with plastics and stainless bolts anyhow.
Thanks to others pitching me forward with silent cheers and discrete appreciations-
guess there's nothing more sweet than seeing another fellow human getting deeper into trouble?
You all read the headline - and already felt the smell of blood - right?
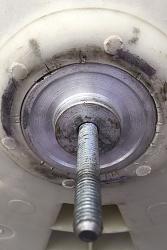
1) Bearings and oil seal has arrived - no problem there. (Uh-oh... Here we go...).
2) Old bearings in the freezer for Stage 1 cooling to -25 deg C since last nite,
tryouts with CO2 extinguisher (Stage 2) down to -70 ish deg C will soon commence.
(Trying a quick "in-and-out" to get the feel of the play when cold, and the time for it setting in).
I can always pull/ whack an old bearing out - with the new ones I'll only have one shot at it!
I unfortunately don't have a 3" mike to check dia before and after freezing...
-Yes, Frank I'll get my Arctic Grade mittens for this job, thank you!
Yup - I'll also start with the smaller bearing as a "worst case", as the bigger will shrink even more.
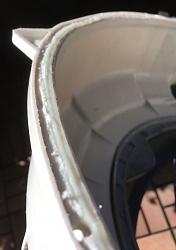
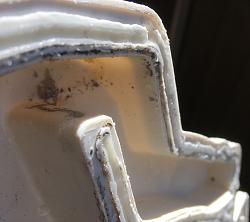
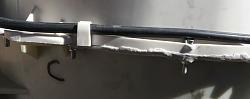
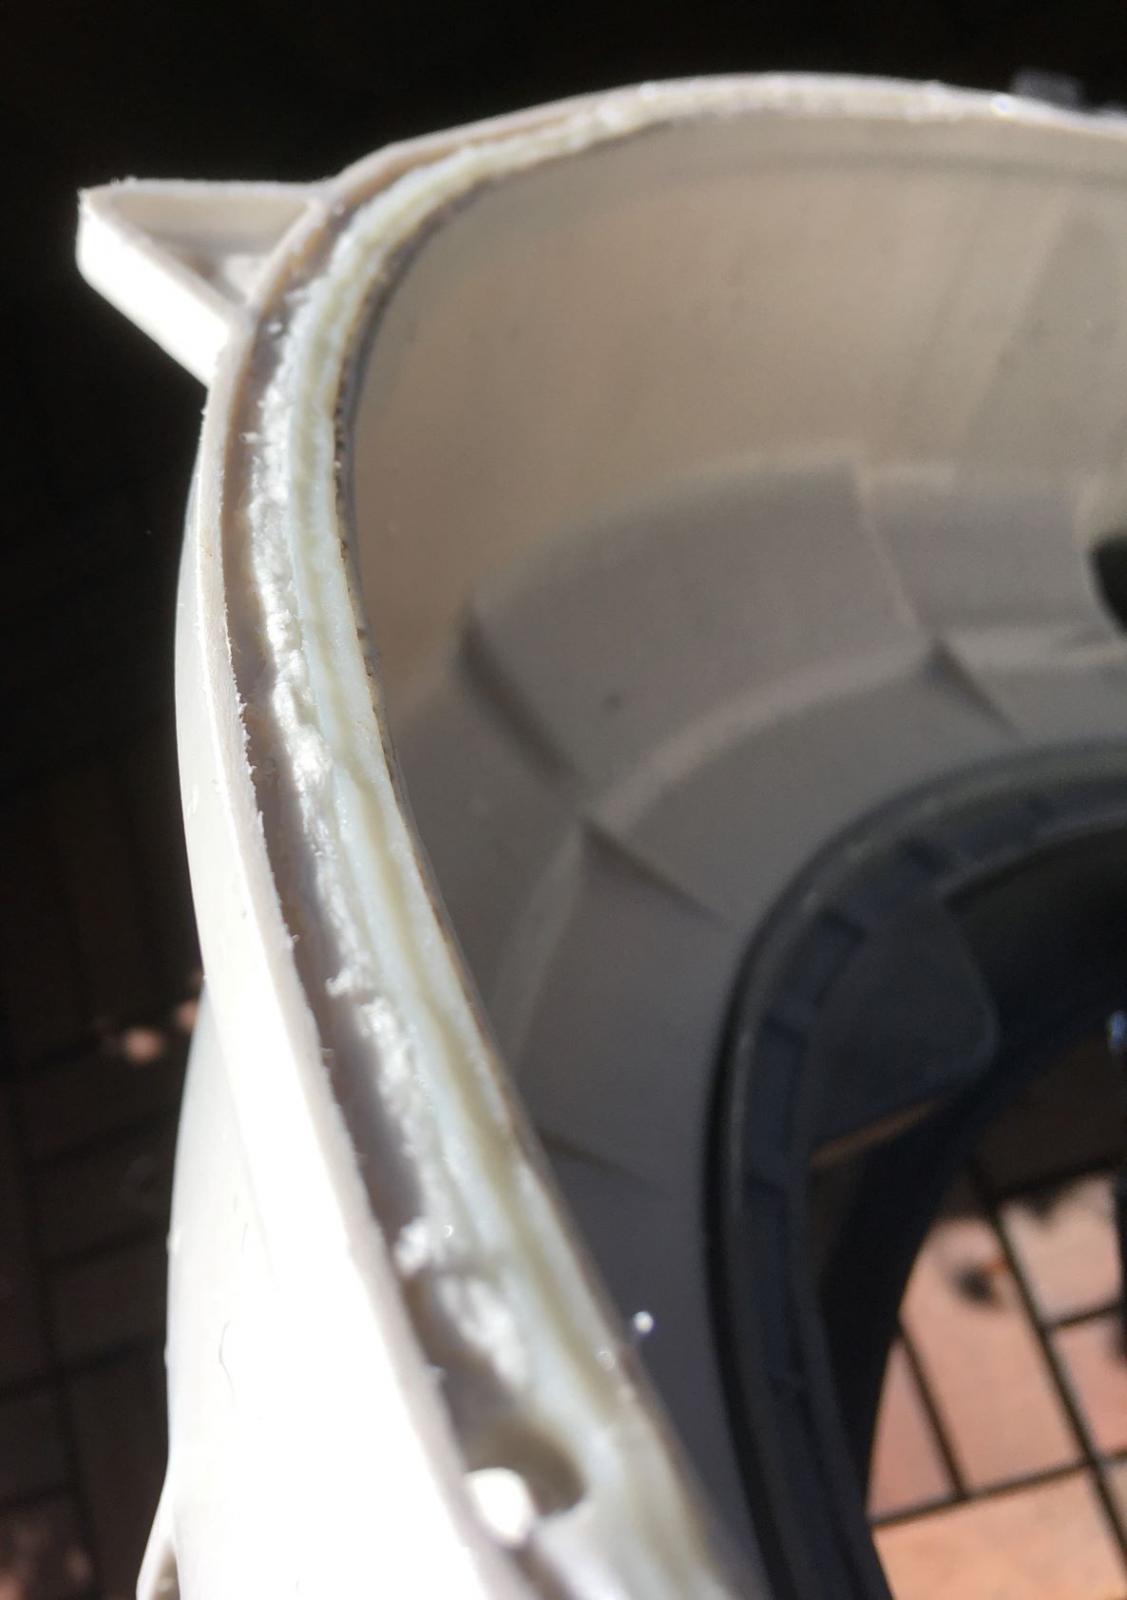
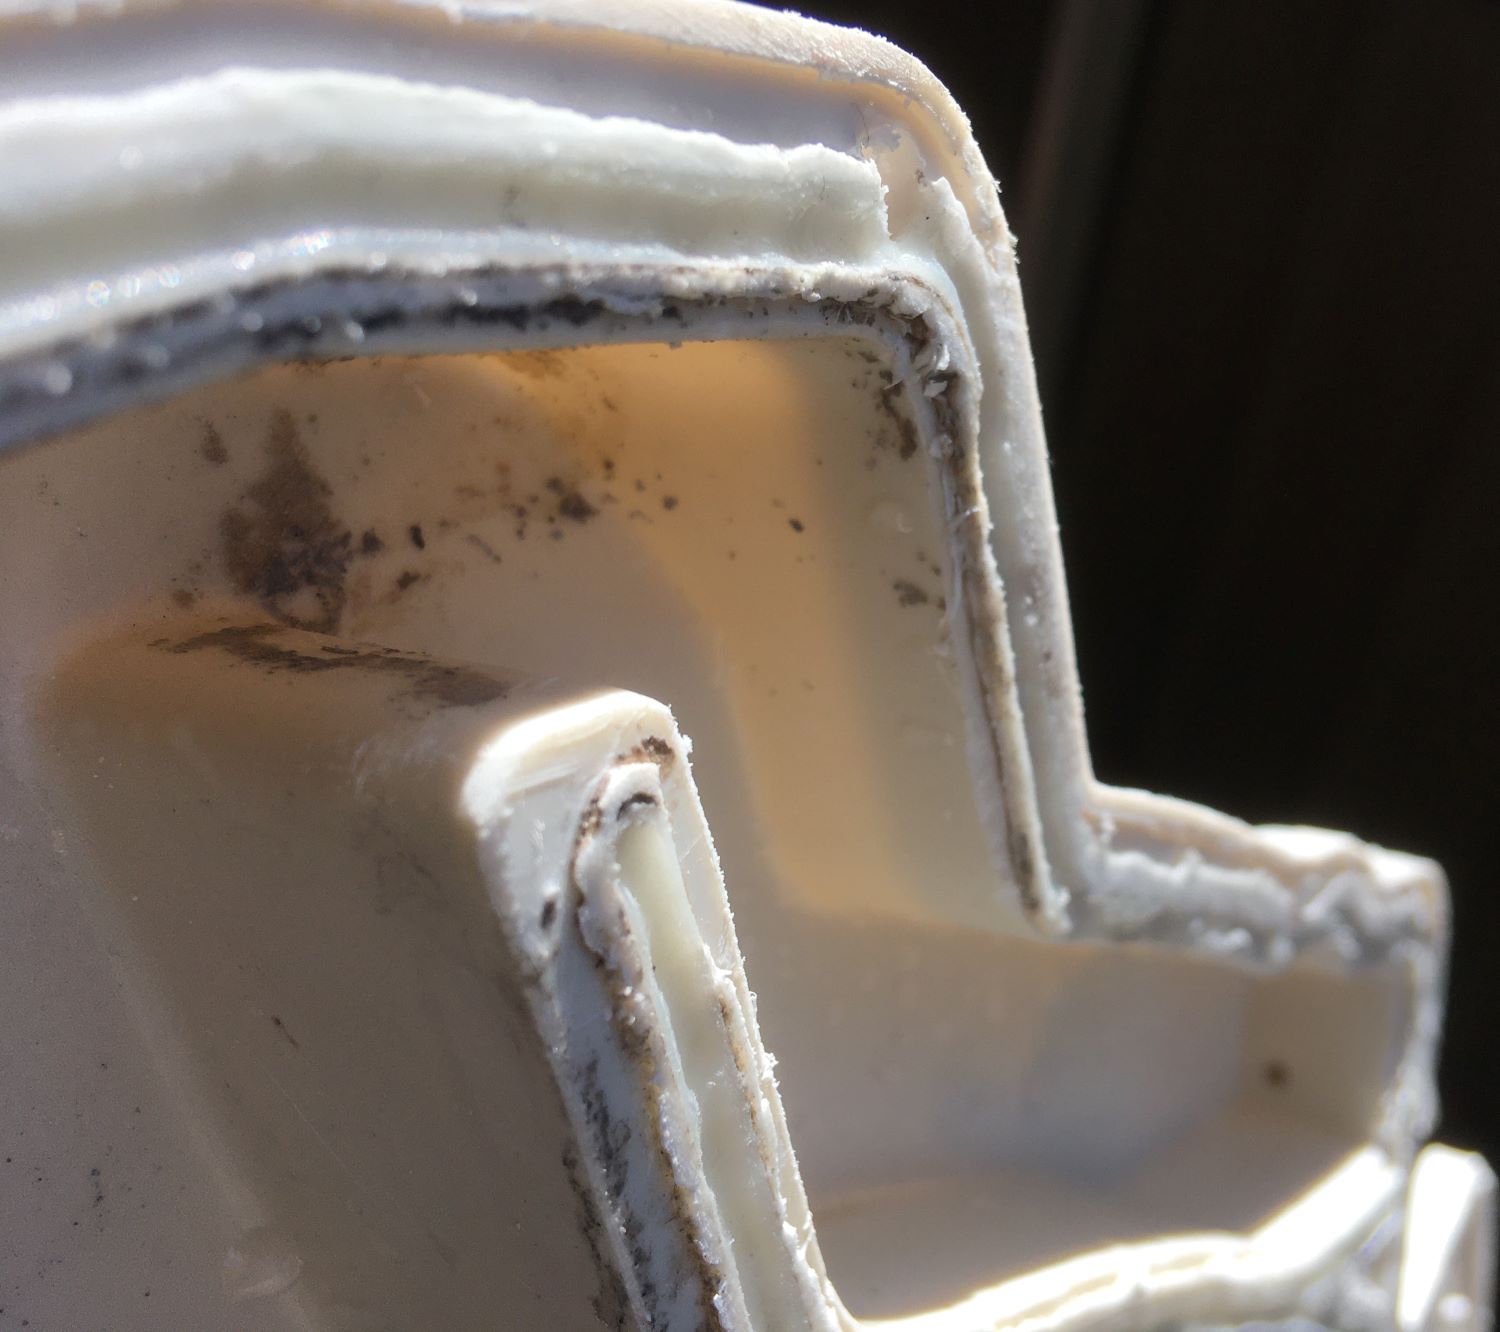
3) As per some readers' excellent suggestions, I've decided to carve out an "O-ring groove" around the tub's perimeter,
to have something for the RTV seal to stick into when the drum whirrs along at 1600 rpm.
Hence I figured a DIY tip for my soldering iron would do as a DIY "curved hot chisel".
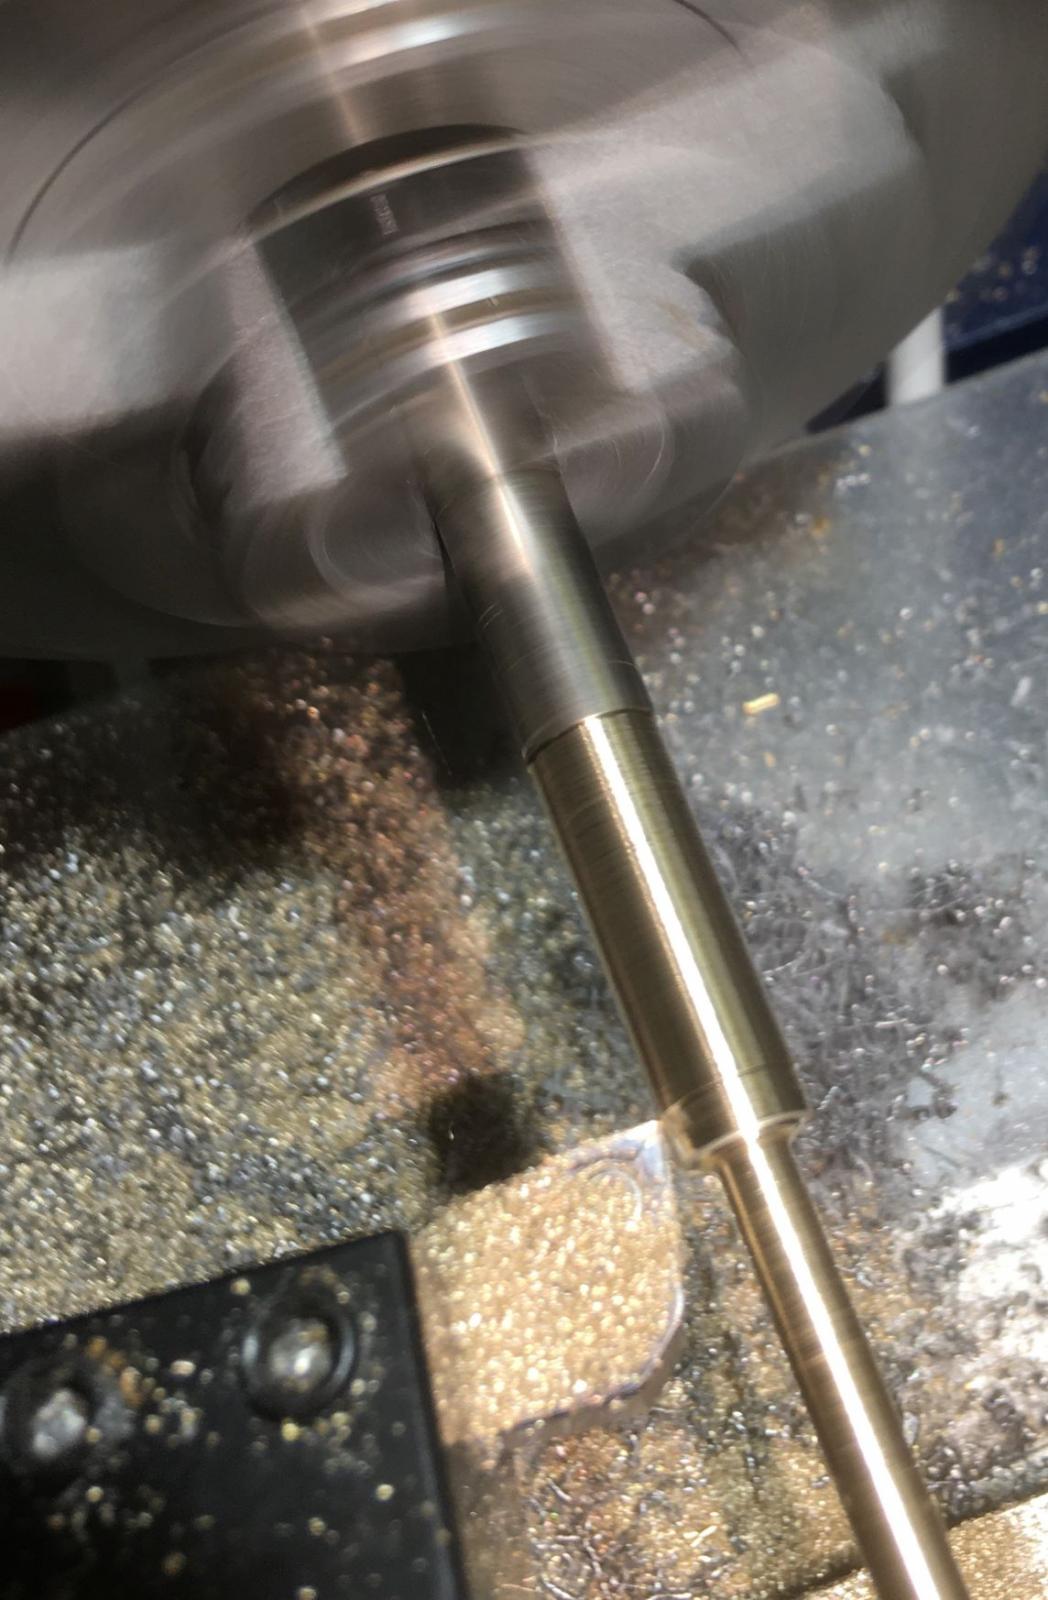
Chucking up a piece of 6 mm brass (former electrical plug pin) taking it down to 4,2 mm:
then drilling a 2,5 mm hole, 1/2" deep, taper the end, file half of it off: a 10 min job, and voila:
Plugged in, waited for a 2 minute warm-up, and off I went (sorry: no pics).
Worked like a charm, "the swarf" curled up nicely and out of the chisel groove.
After about 1/4 of the perimeter (and 5 minutes) the soldering iron finally died,
a quickie resistance check proved that the (sealed) heating element's nichrome wire now is "permanently open".
There's certain times I think some tools fails me when I need them the most, just to spite me - only for the heck of it.
So - Plan B: I can't score another soldering iron 'til tomorrow.
Have to make the bearing tryout tonite.
My hands will be filled (not frozen) up - so no pics there either.
Guess I'll return with Pt 5, whether you want it or not.
Toolmaker51 (May 27, 2020)

Certainly this gave birth to concept of vibratory finishing tubs.
Shaken, not stirred.
Sincerely,
Toolmaker51
...we'll learn more by wandering than searching...
Yeah, a rapt audience. Silent jeers and indiscreet appreciations; symptomatic of the COVID19, sheltering, dramatic media labeled "lockdown", fashion statement masks, vinyl gloves, hooked tools for door handles, toilet paper shortages and all the other nonsense.
Next thing you know, Tom Hanks will focus on COVID19 in High School graduation speech, as a mark in history like V-J Day, Kennedy's assassination, 9-11 or Y2K.
Sincerely,
Toolmaker51
...we'll learn more by wandering than searching...
Short followup on the (relative) progress of the DIYed "RTV O-ring/ seal tub perimeter groove":
Ditched the promising "sodding iron" due to lack of contemporary devices available with a replaceable tip.
"Modern" ones comes as a complete "sodding station" at a pretty steep price (for a Cheapo like me) -
not the temp controlled all-in-one iron I bought for 20 bucks 30 years ago.
Tip & heating element is today "a unit" instead... -Now, where did I hear that word recently?
I'm also NOT needing a whole & heavy "station" in my portable tool portfolio for those night calls
Instead: Armed with my Ferm (Dremel) and its flexible shaft (discount find)
and an appropriate 3 mm rotary burr i give the following report of Proper Dremel Handling:
(Provide yourself with patience and humility - this isn't something personal against you,
any other idiot taking on this job will suffer just like you.) :
1) Hang the Dremel high (but not in the cable, Stupid!), let the shaft hang freely downwards.
2) Grease the inner flexible shaft thoroughly before starting. Then every hour of service.
3) Run only 'til you can feel the warmth off the flexible shaft, let it take a cool-off break.
My guesstimate is a 50% duty cycle at 10 minutes on/ off.
4) Don't run it wide open - minimum speed is plenty enuff.
5) Use goggles, hearing protection, gloves and a non-synthetic coverall. Be "positively elsewhere" - i. e. outside, far away.
Yup - those tiny statically charged plastic shards from the burr will stick to anything synthetic,
and though the tool & shaft is happily just whirring along, the resonant sound from the burr working the tub is "impressive",
and NOT something your next of kin or neighbor will take for the approximate hour it takes to finish off.
6) Use a small planer to rid the edge of the unintended ridges the burr inevitably will create, sand the edge.
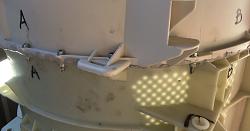
Then the next easy step - fit the bearings, drum, seal up the tub joint and bolt the whole shebang together.
-But that's the beddy-bye story for another day, kids!''
Disclaimer: No responsibility will be taken, either explicitly or implied for any actions taken in accordance to
(or defiance of) the above mentioned "Natural Law of Dremel Usage". So there.
Last edited by DIYSwede; May 28, 2020 at 02:11 PM. Reason: Lawyer Lingo added
Toolmaker51 (May 28, 2020), WorkerB (May 28, 2020)

On our workbench we have a Hakko FX-888 (dial, not digital) and a Metcal RF heated one. The Metcal replaced an Unger and the Hakko replaced the Metcal. The Hakko tips aren't free but not expensive and last a long long time.
I haven't used the Metcal in a long time, guess I should sell it before we move.
The Hakko soldering station and the hot-air station are both going with us. Hakko confirms they work on 50Hz with no problem (and verified on my test setup) so I'm not letting those get away!
Firstly - I'm not putting down "sodding stations" per se - [I use Weller stations often at work] -
merely whining of the non-availability of an inexpensive, temp-controlled 75 W-ish, exchangeable tip iron
to stash into my already filled and heavy "Get-go tool portfolio".
I just can't cram a station in there, and I'd need the "bonus" weight like a hole in the head.
Then, secondly - the whole point (no pun intended) of the operation was fitting my DIYed scoop point in -
which simply cannot be done in a sealed tip unit - it doesn't matter how inexpensive or uncheap it is.
BTW: -Please tell us a little how you built your 230V 50Hz test setup, in "The Land of Round Doorknobs", Jdurand!
(Note: This post might be concieved as being rude - which is NOT my intention)
Last edited by DIYSwede; May 29, 2020 at 11:20 AM. Reason: Caution added


Round door knobs, I don't like them either so we changed our entry door knob out for a proper handle and don't get me started on what I think of our split phase 120v and no 3ph in houses
Never try to tell me it can't be done
When I have to paint I use KBS products
Saturday Noon, 3 weeks to Summer solstice: Sunshine, still +20 C in the shadow, mild breeze.
Time to "gittit done"... That means: Everything to get the tub and its innards sealed up for a 72 hr cure...
Some of you happy few readers still bearing (no pun) with me, might remember the CO2 extinguisher ball bearing freezer idea.
Well - the test on the previous night left me with a pretty good conclusion from the old bearing freezing test:
Starting with a 100 C heated Aluminum bearing seat, moving in with a frozen ("-70-ish" C, as my IR thermo bottoms out at -50)
bearing almost instantly pulls the heat from the very heat conductive Al, making it "Insta-Shrink" on the bearing,
as Al thermal expansion also is bigger than steel's. So neither heat nor cold will be applied to the new bearings - mere force.
(Example: I make Al round stock by pouring the melt into steel tubes - stock only get a loose fit within when it's cold again)
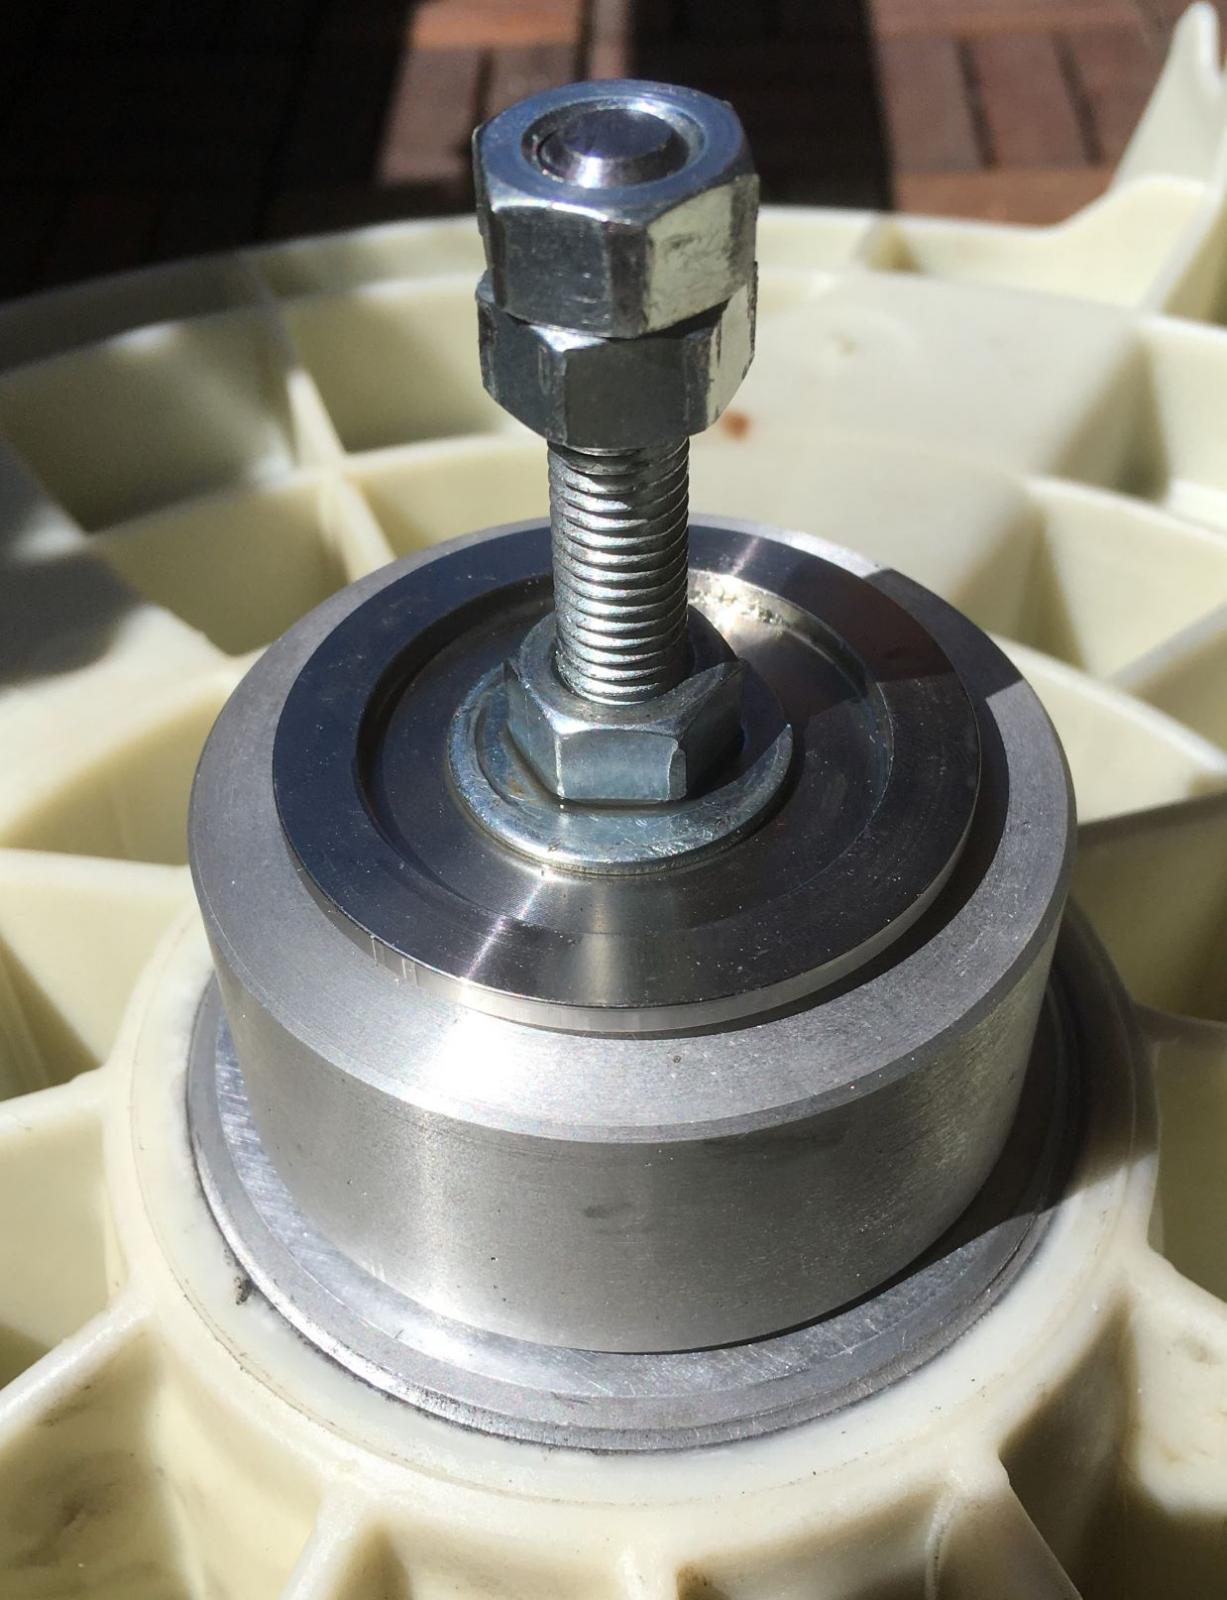
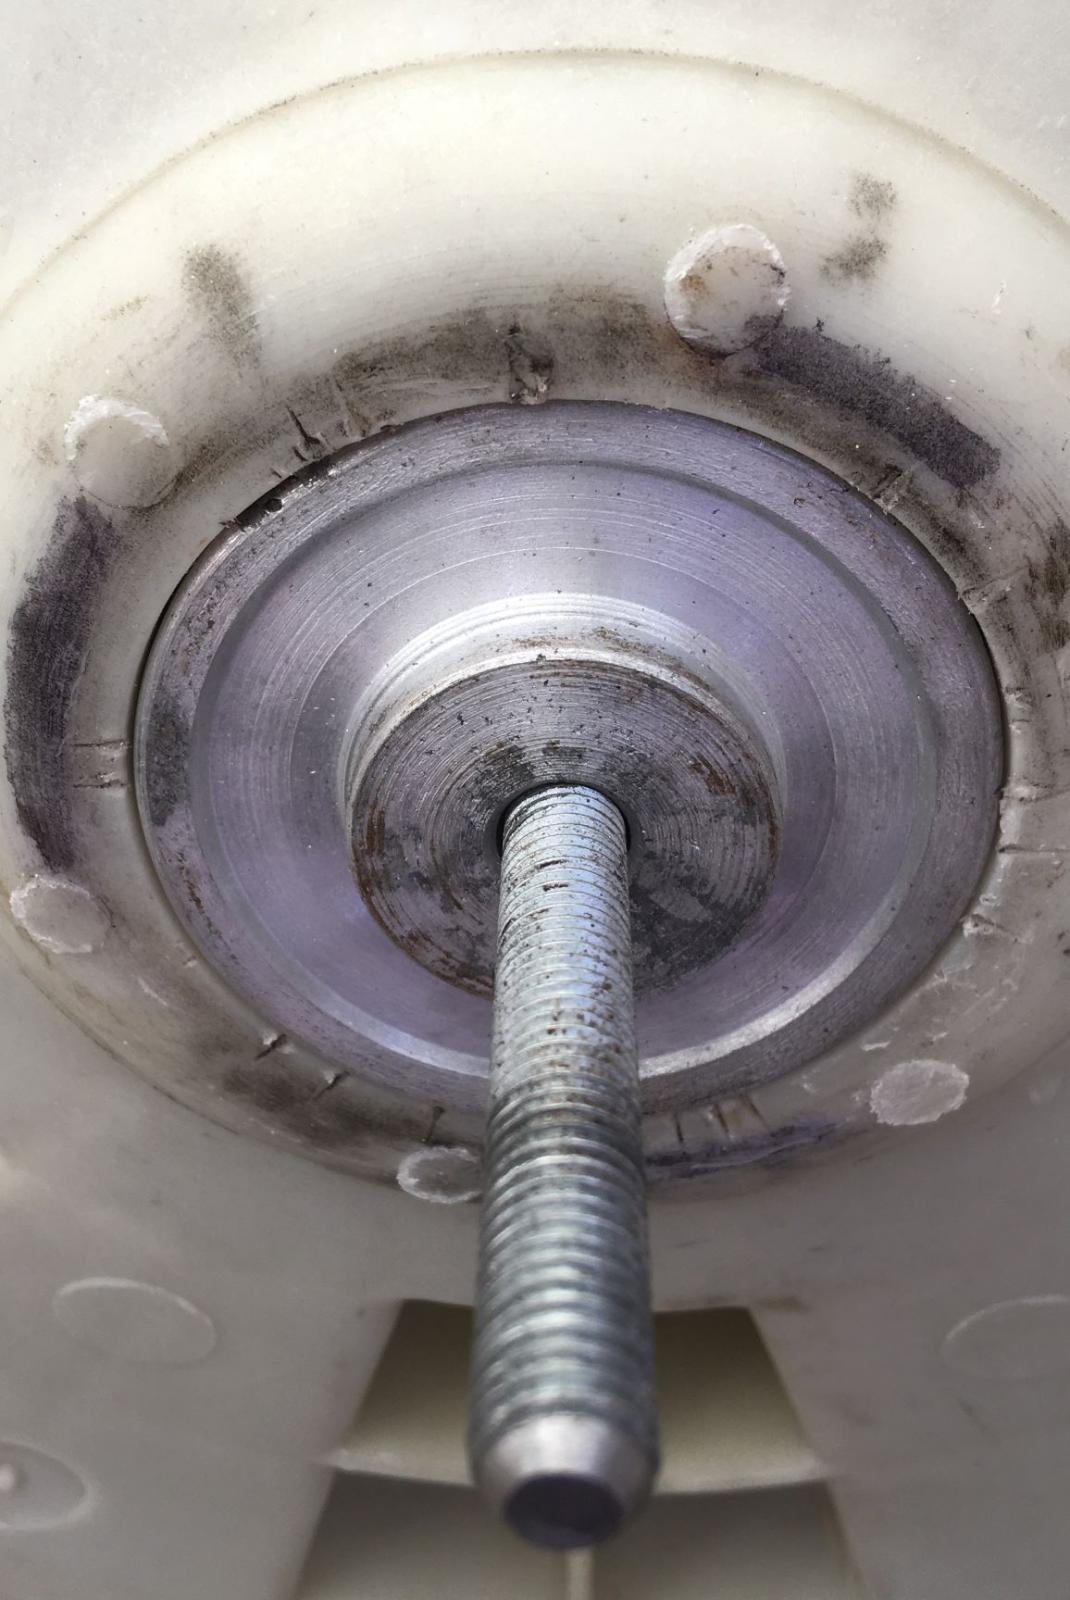
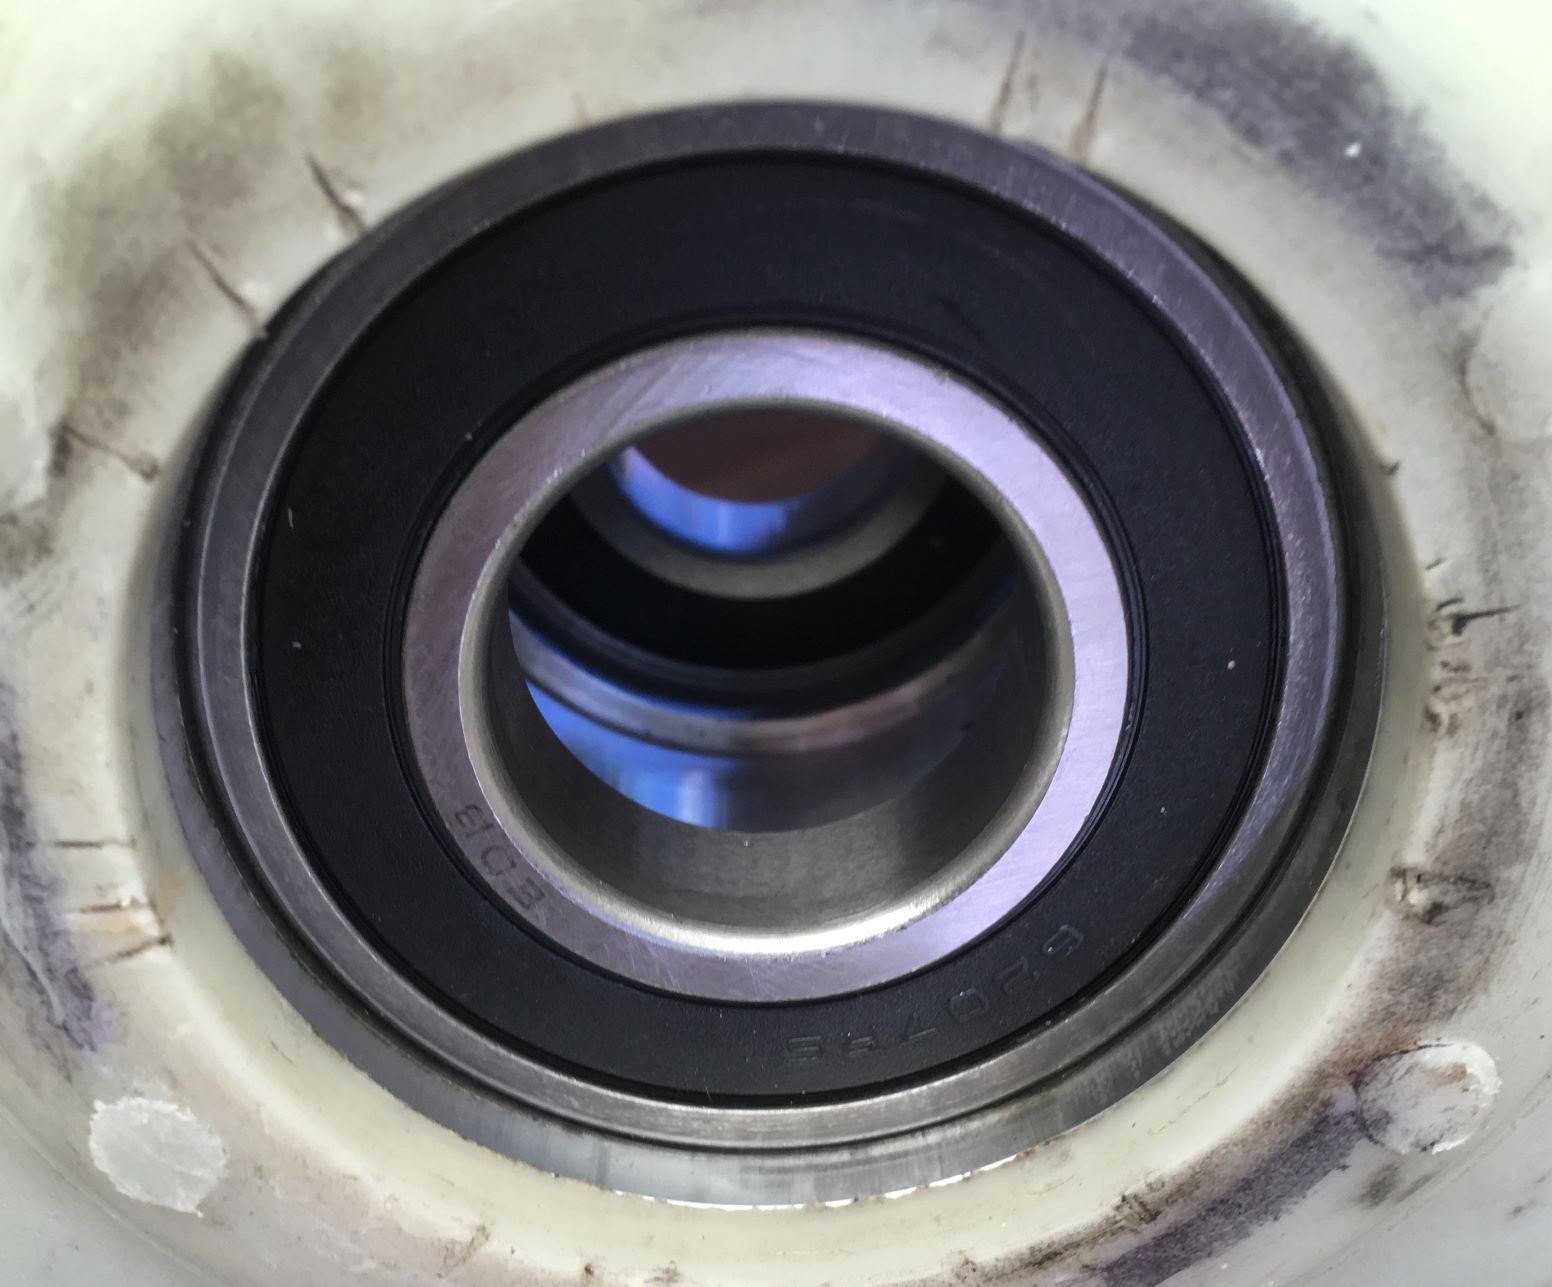
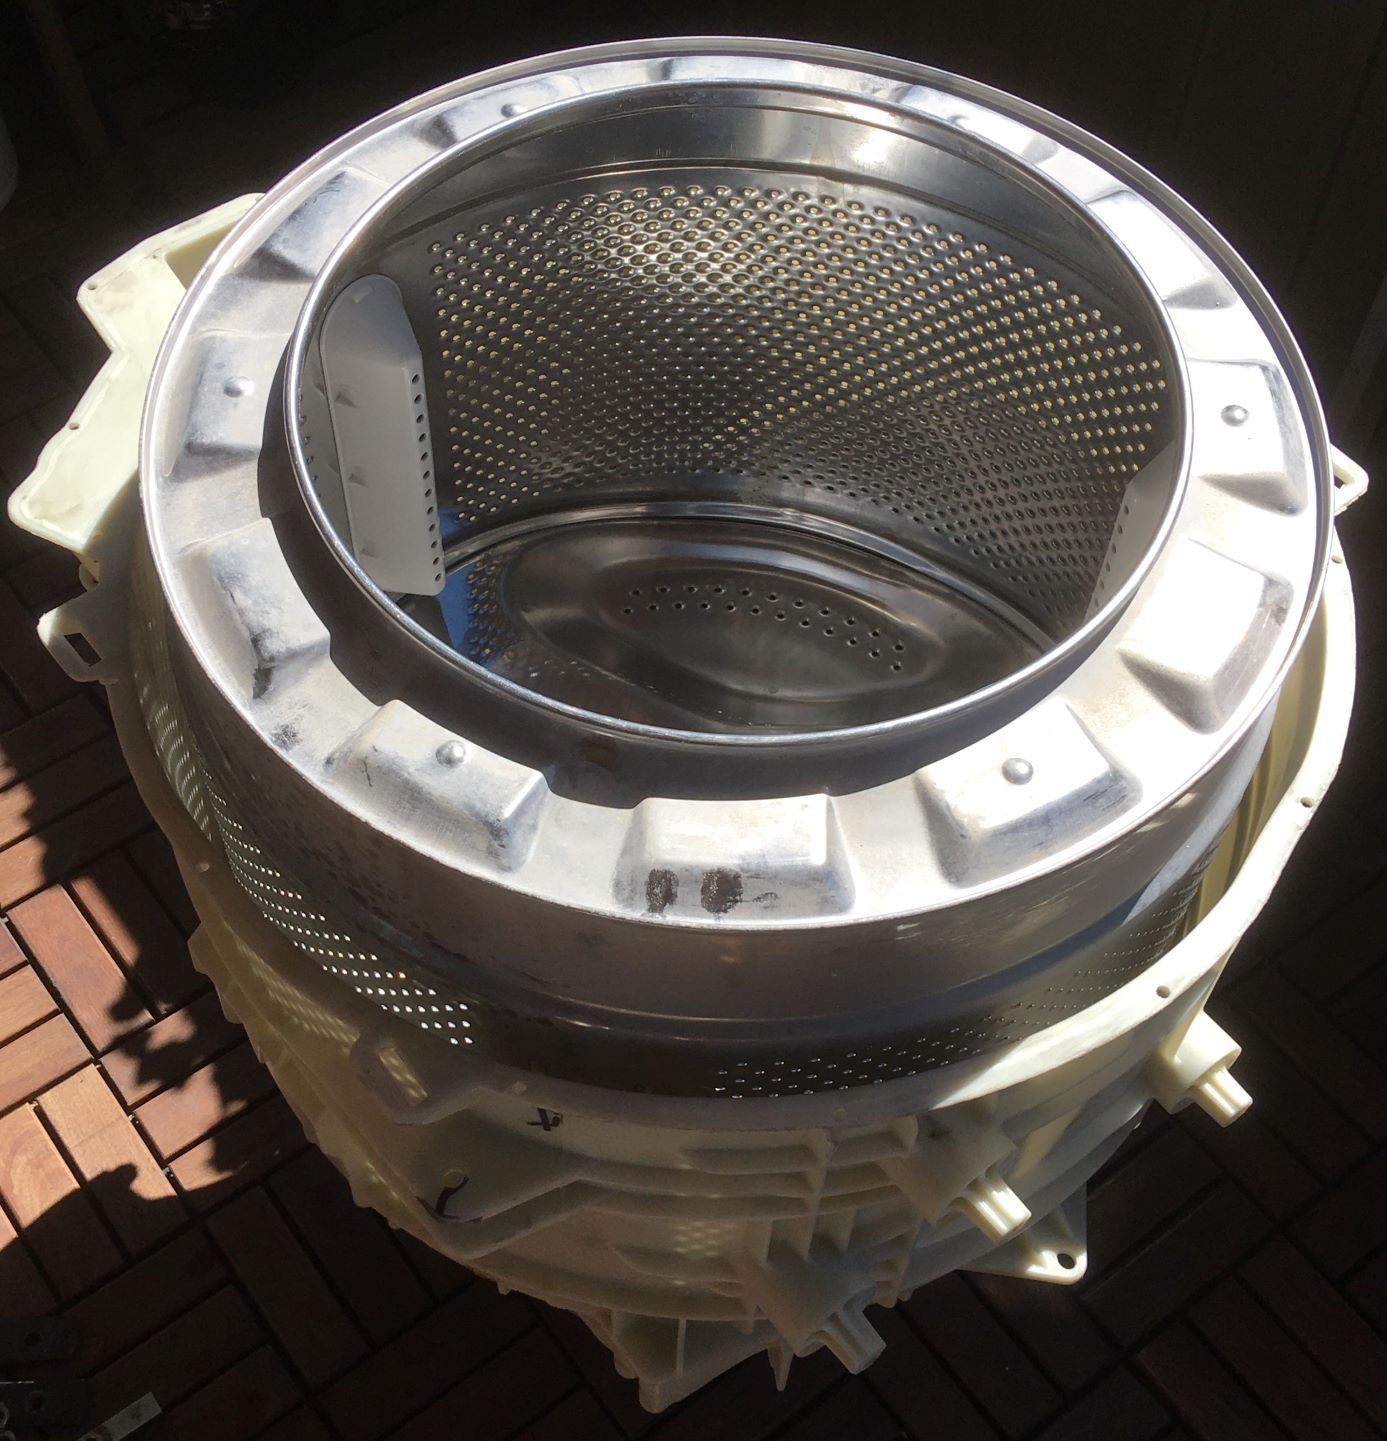
Starting out with the bearings and their ass'y hardware:


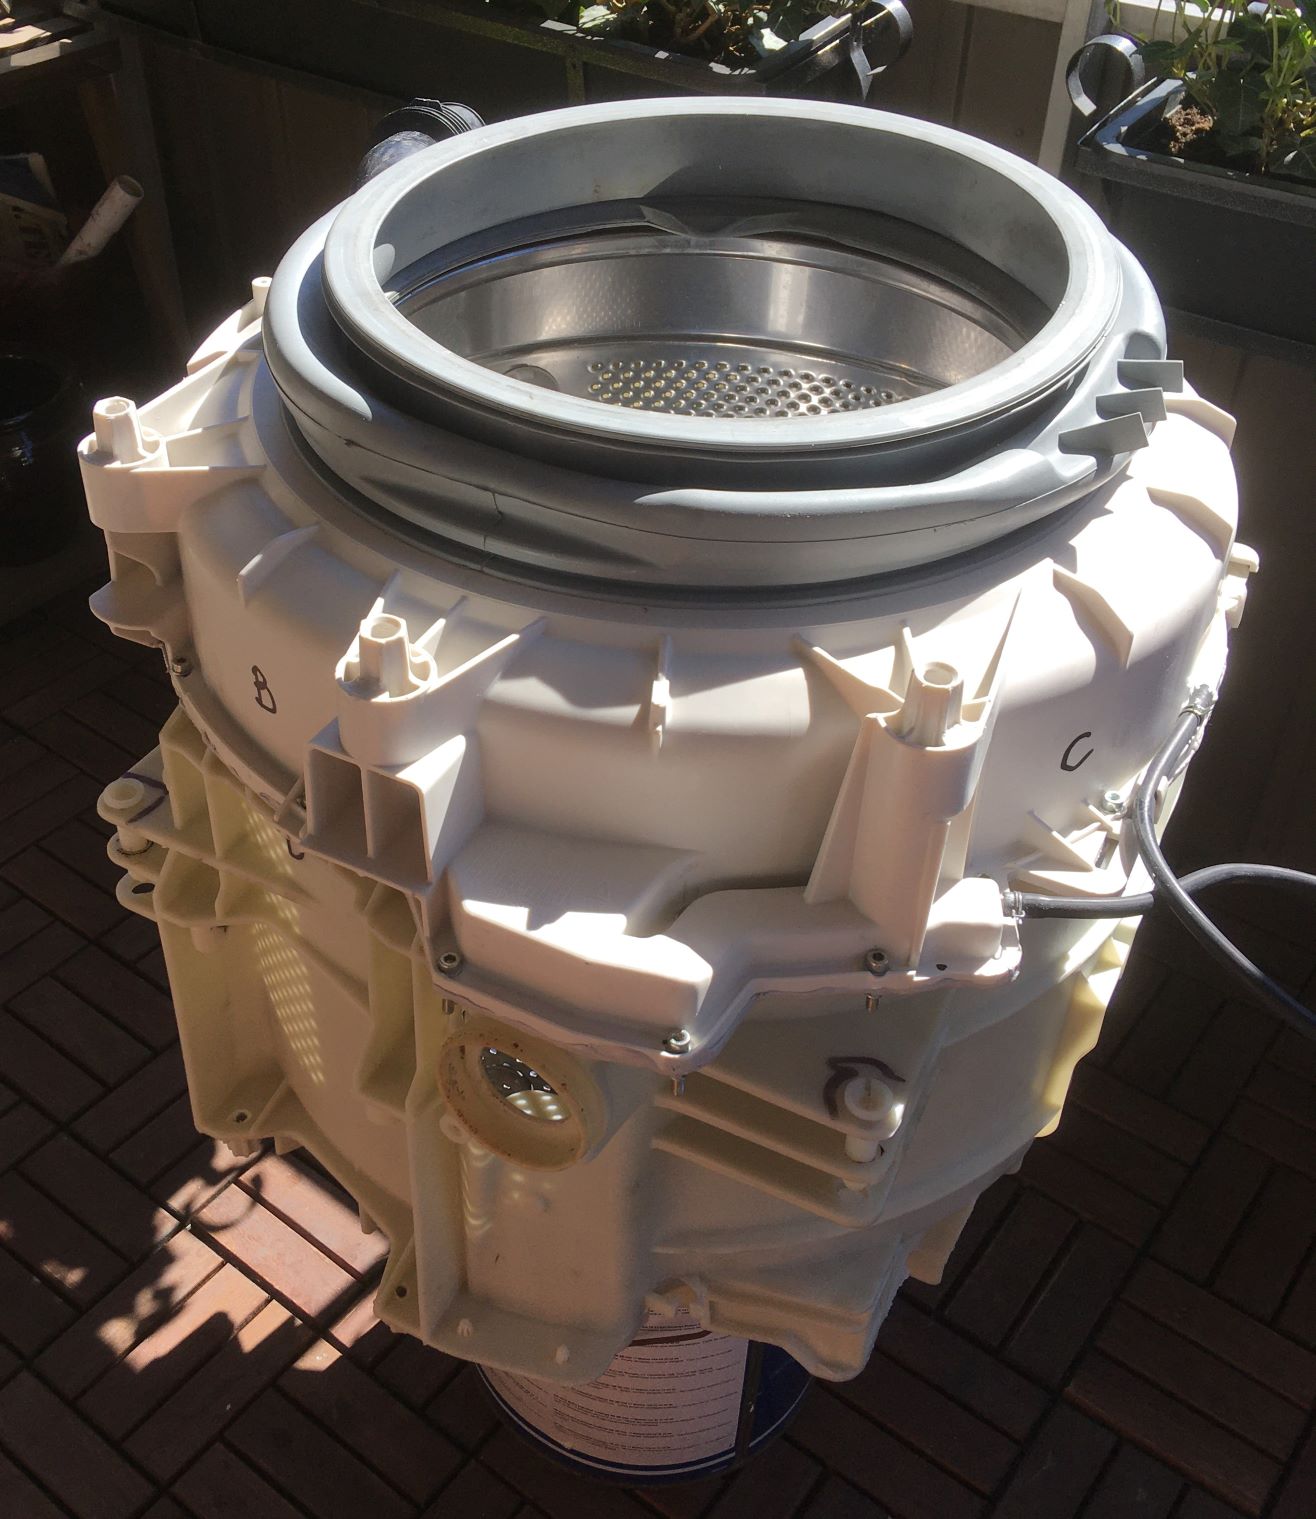
The whole affair went so smooth and quick I forgot to take any pics of the oil seal being fitted, sealed and greased,
then suddenly the previously meticulously cleaned drum merely jumped in. -No sweat.
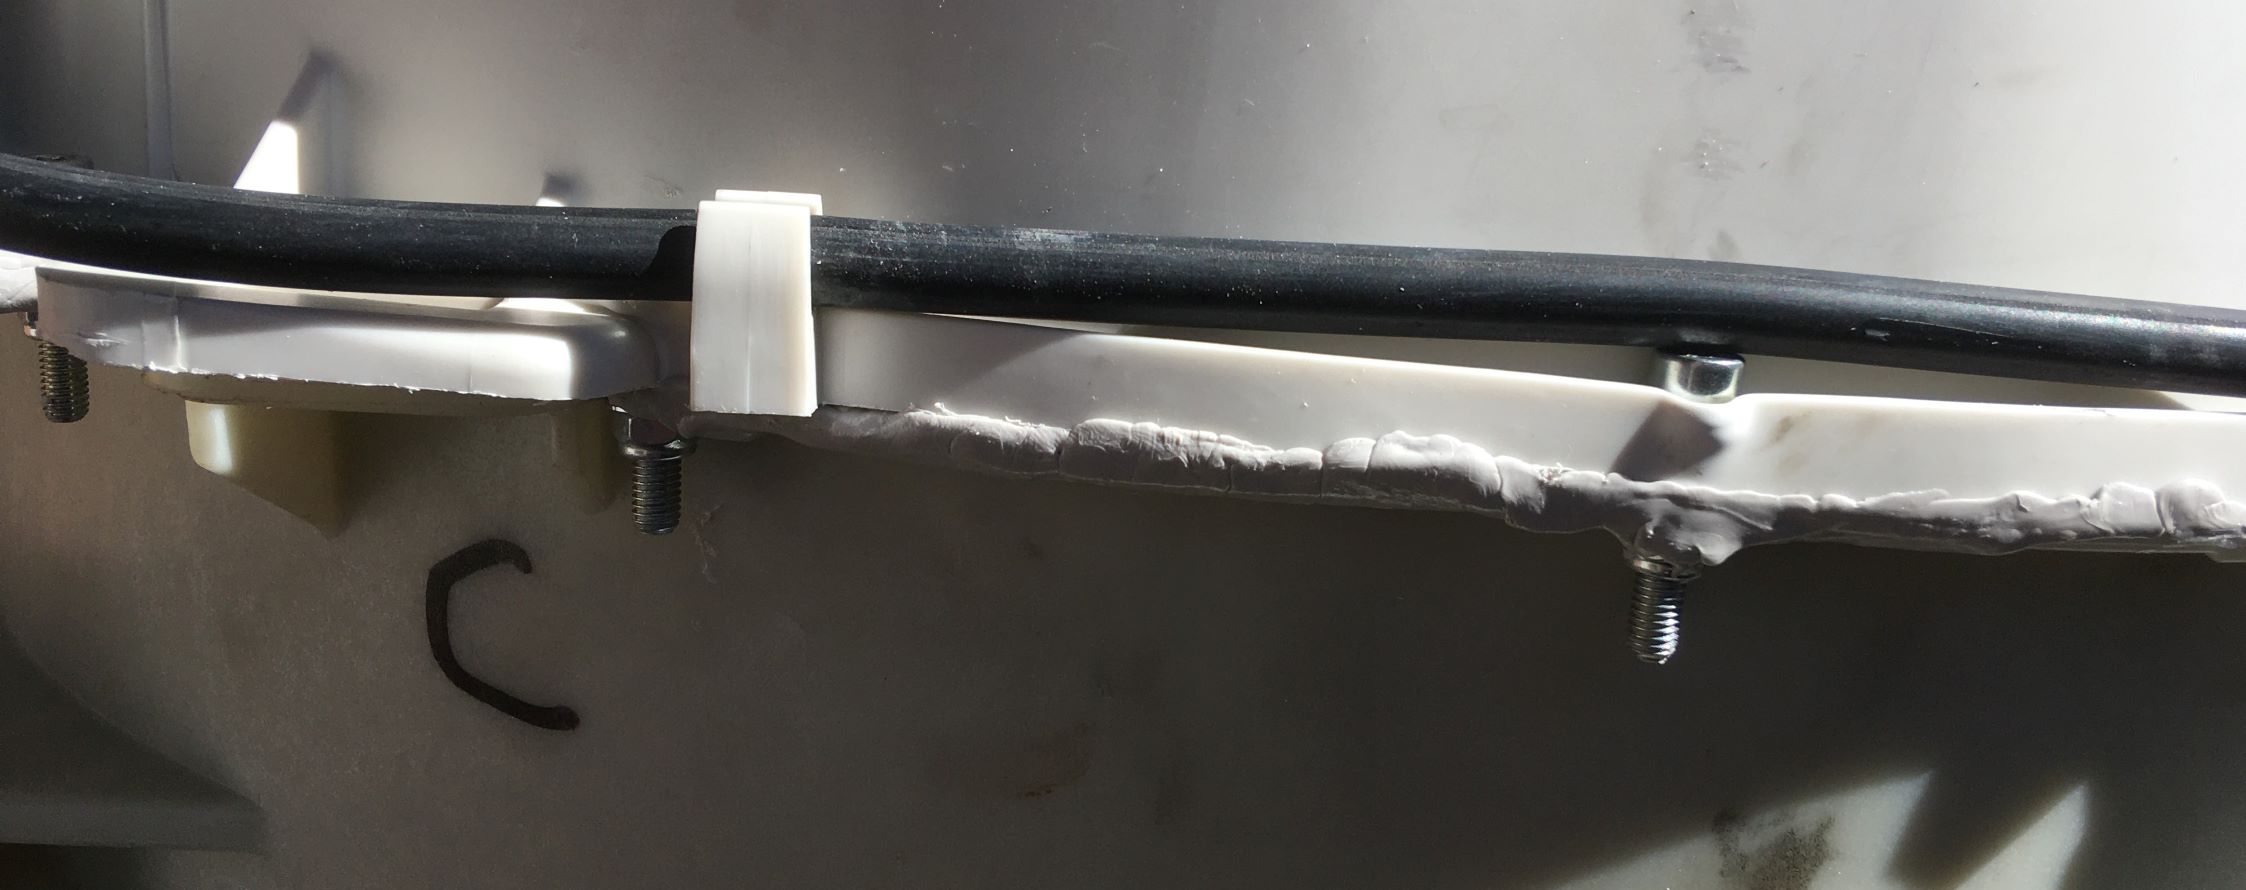
Hardest was catching up with the flow: gathering the bolts, washers, nuts, tools and a 2 year old leftover tube of RTV:
Having drilled app 20 holes around the tub perimeter, fitting the washers and M5 locknuts was the biggest challenge,
desperately trying not to get the grey silicone (nicely matching our kitchen tiles) on my hands, tools or clothes.
Lemme say that part of today's operations went "So-So".
Left sunbathing on our balcony in the afternoon sun - three hours after startup today -
With a pretty big WAF (Wife Acceptance Factor), and an amazed teen-age (usually dad-sceptical) daughter.
It really doesn't take much more to keep this Swedish Cheapskate happy,
and "being at it" thru some years now, I coincidentally seem to have acquired a certain portion of luck?
Tomorrow, when the tub is semi-cured, refitting the motor, belt, concrete weights and drop the thing into the chassis,
hook-up of springs, dampers, wires, hoses and bellows - refitting all stays, electronics, panels etc,
giving ithe RTV a coupla days of extra curing before the final test:
-Will it be water-tight? -Will it even run? "The mystery deepens as the plot thickens."
Last edited by DIYSwede; May 30, 2020 at 08:50 AM.
Toolmaker51 (May 30, 2020)
It seems to be going well so far I'm betting on that Norse blood to pull this off but there is always Mjǫllnir
Never try to tell me it can't be done
When I have to paint I use KBS products
There are currently 1 users browsing this thread. (0 members and 1 guests)
 Posting Permissions


 Reply With Quote


Bookmarks