
 LinkBack URL
 About LinkBacks
 axehead. I copied a picture from the British Museum's webpage, enlarged it to the dimensions indicated in it's description, and printed that as a template for my pattern. The original axe had a D-handle eye, w "Pin It")
I recently started learning to cast metals that have higher melting points than lead and pewter. Here is a pictorial history of the process of casting an aluminum bronze axe head. The head is a modeled on an historic 10th century Viking (Norwegian) axehead. I copied a picture from the British Museum's webpage, enlarged it to the dimensions indicated in it's description, and printed that as a template for my pattern. The original axe had a D-handle eye, while mine has a 3 degree slope tomahawk eye. The original was iron with an inserted steel bit. Mine preserves the shape of that junction between iron and steel, but is just a design element instead of the location of an actual joint. The aluminum bronze alloy is 88% Cu, 1.5% Ni, and 10.5% Al. It peens nice and hard, and I have hacked a 2" square piece of maple with the blade without deformation or need to resharpen -- the edge picture below is after that usage.
Some things I learned:
The axe is too heavy, by about 10 ounces. The axe body is overall too thick -- it's 1/4" thick across the flat of the blade -- should be about 1/8"; it's 5/16" thick around the eye -- should be about 3/16"; it's 3/8" thick across the faux bit weld -- should be about 1/4". I was a little bit limited by my pattern material (wood), and afraid that if I carved it too thin, especially across the flat, that it would deform or split from stresses in the wood.
The fine facing sand worked well at picking up detail. I got much better surface detail and smoothness than with regular greensand. I was even able to pick up the detail of some cellophane tape that I used to cover some peg holes in the pattern.
My sand was too wet, the steam created upon pouring molten aluminum bronze into the mold generated gas jets that pitted the bottom of the casting.
I did a good job with the riser and gating system -- no shrinkage or voids in the poured axe head. Tobho Mott gave me valuable advice on this aspect of the molding process.
I need to make my pattern more accurate, and finish it better -- imperfection in the pattern will only be duplicated in the final casting.
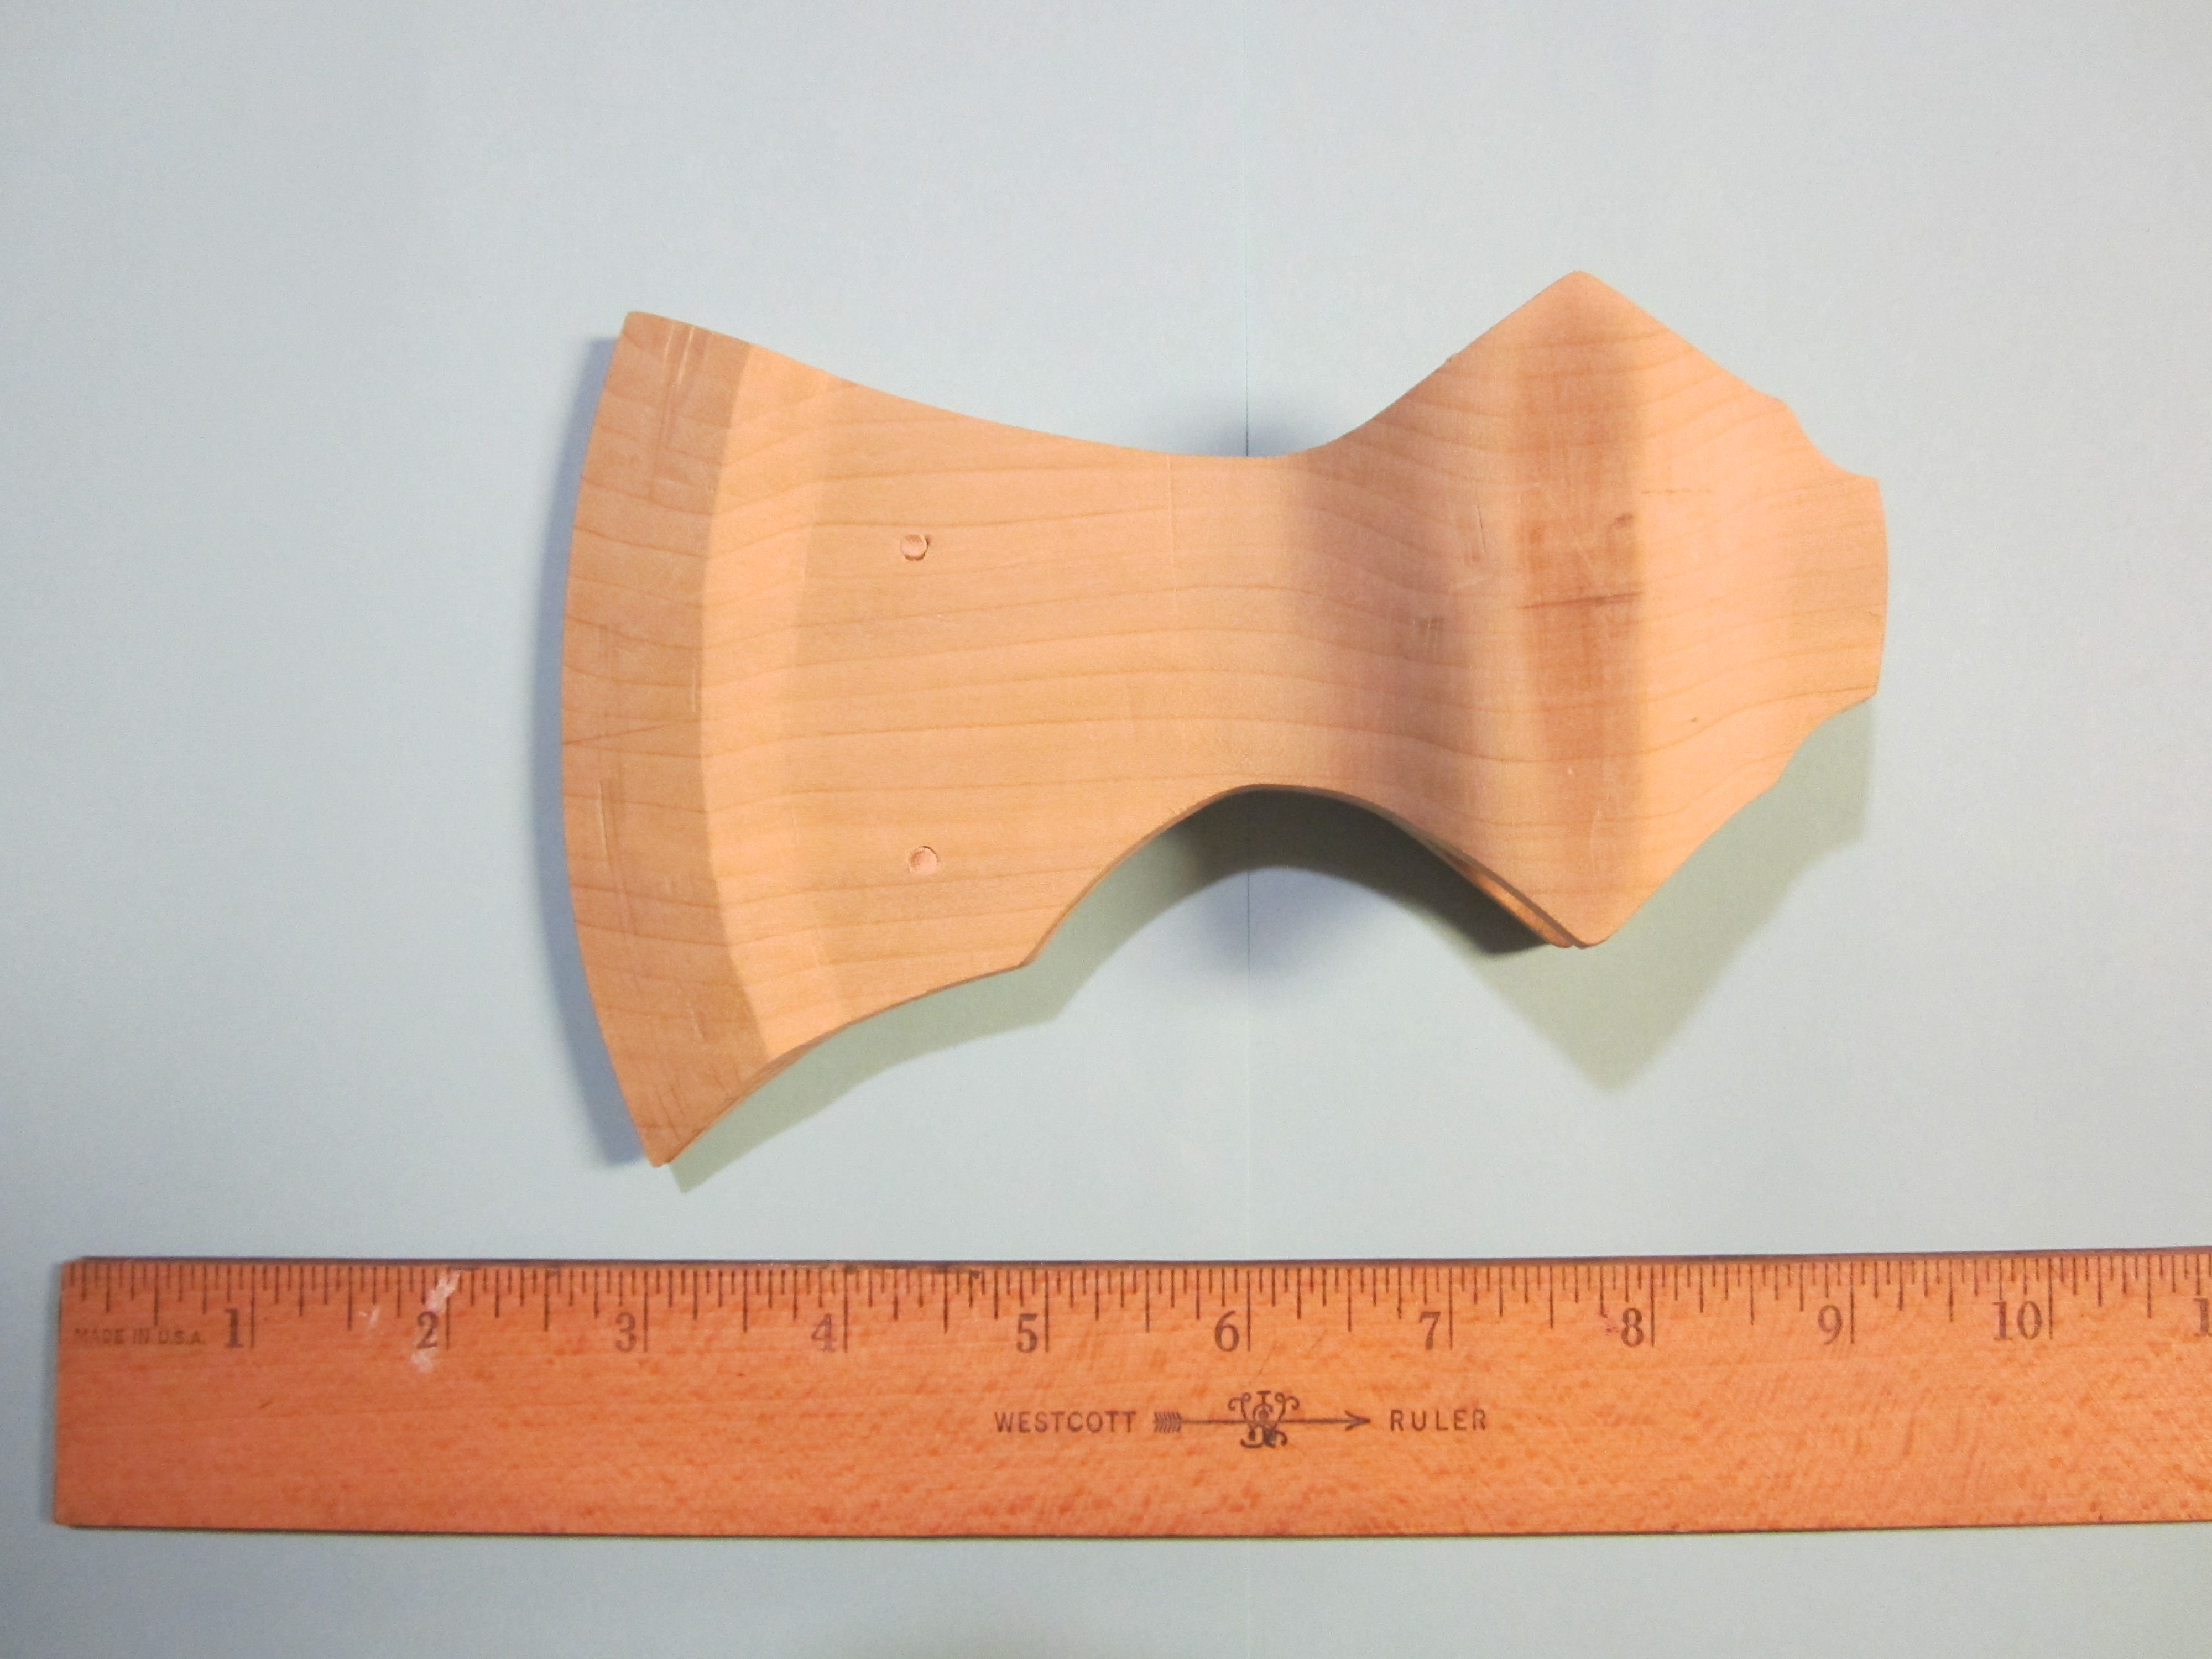
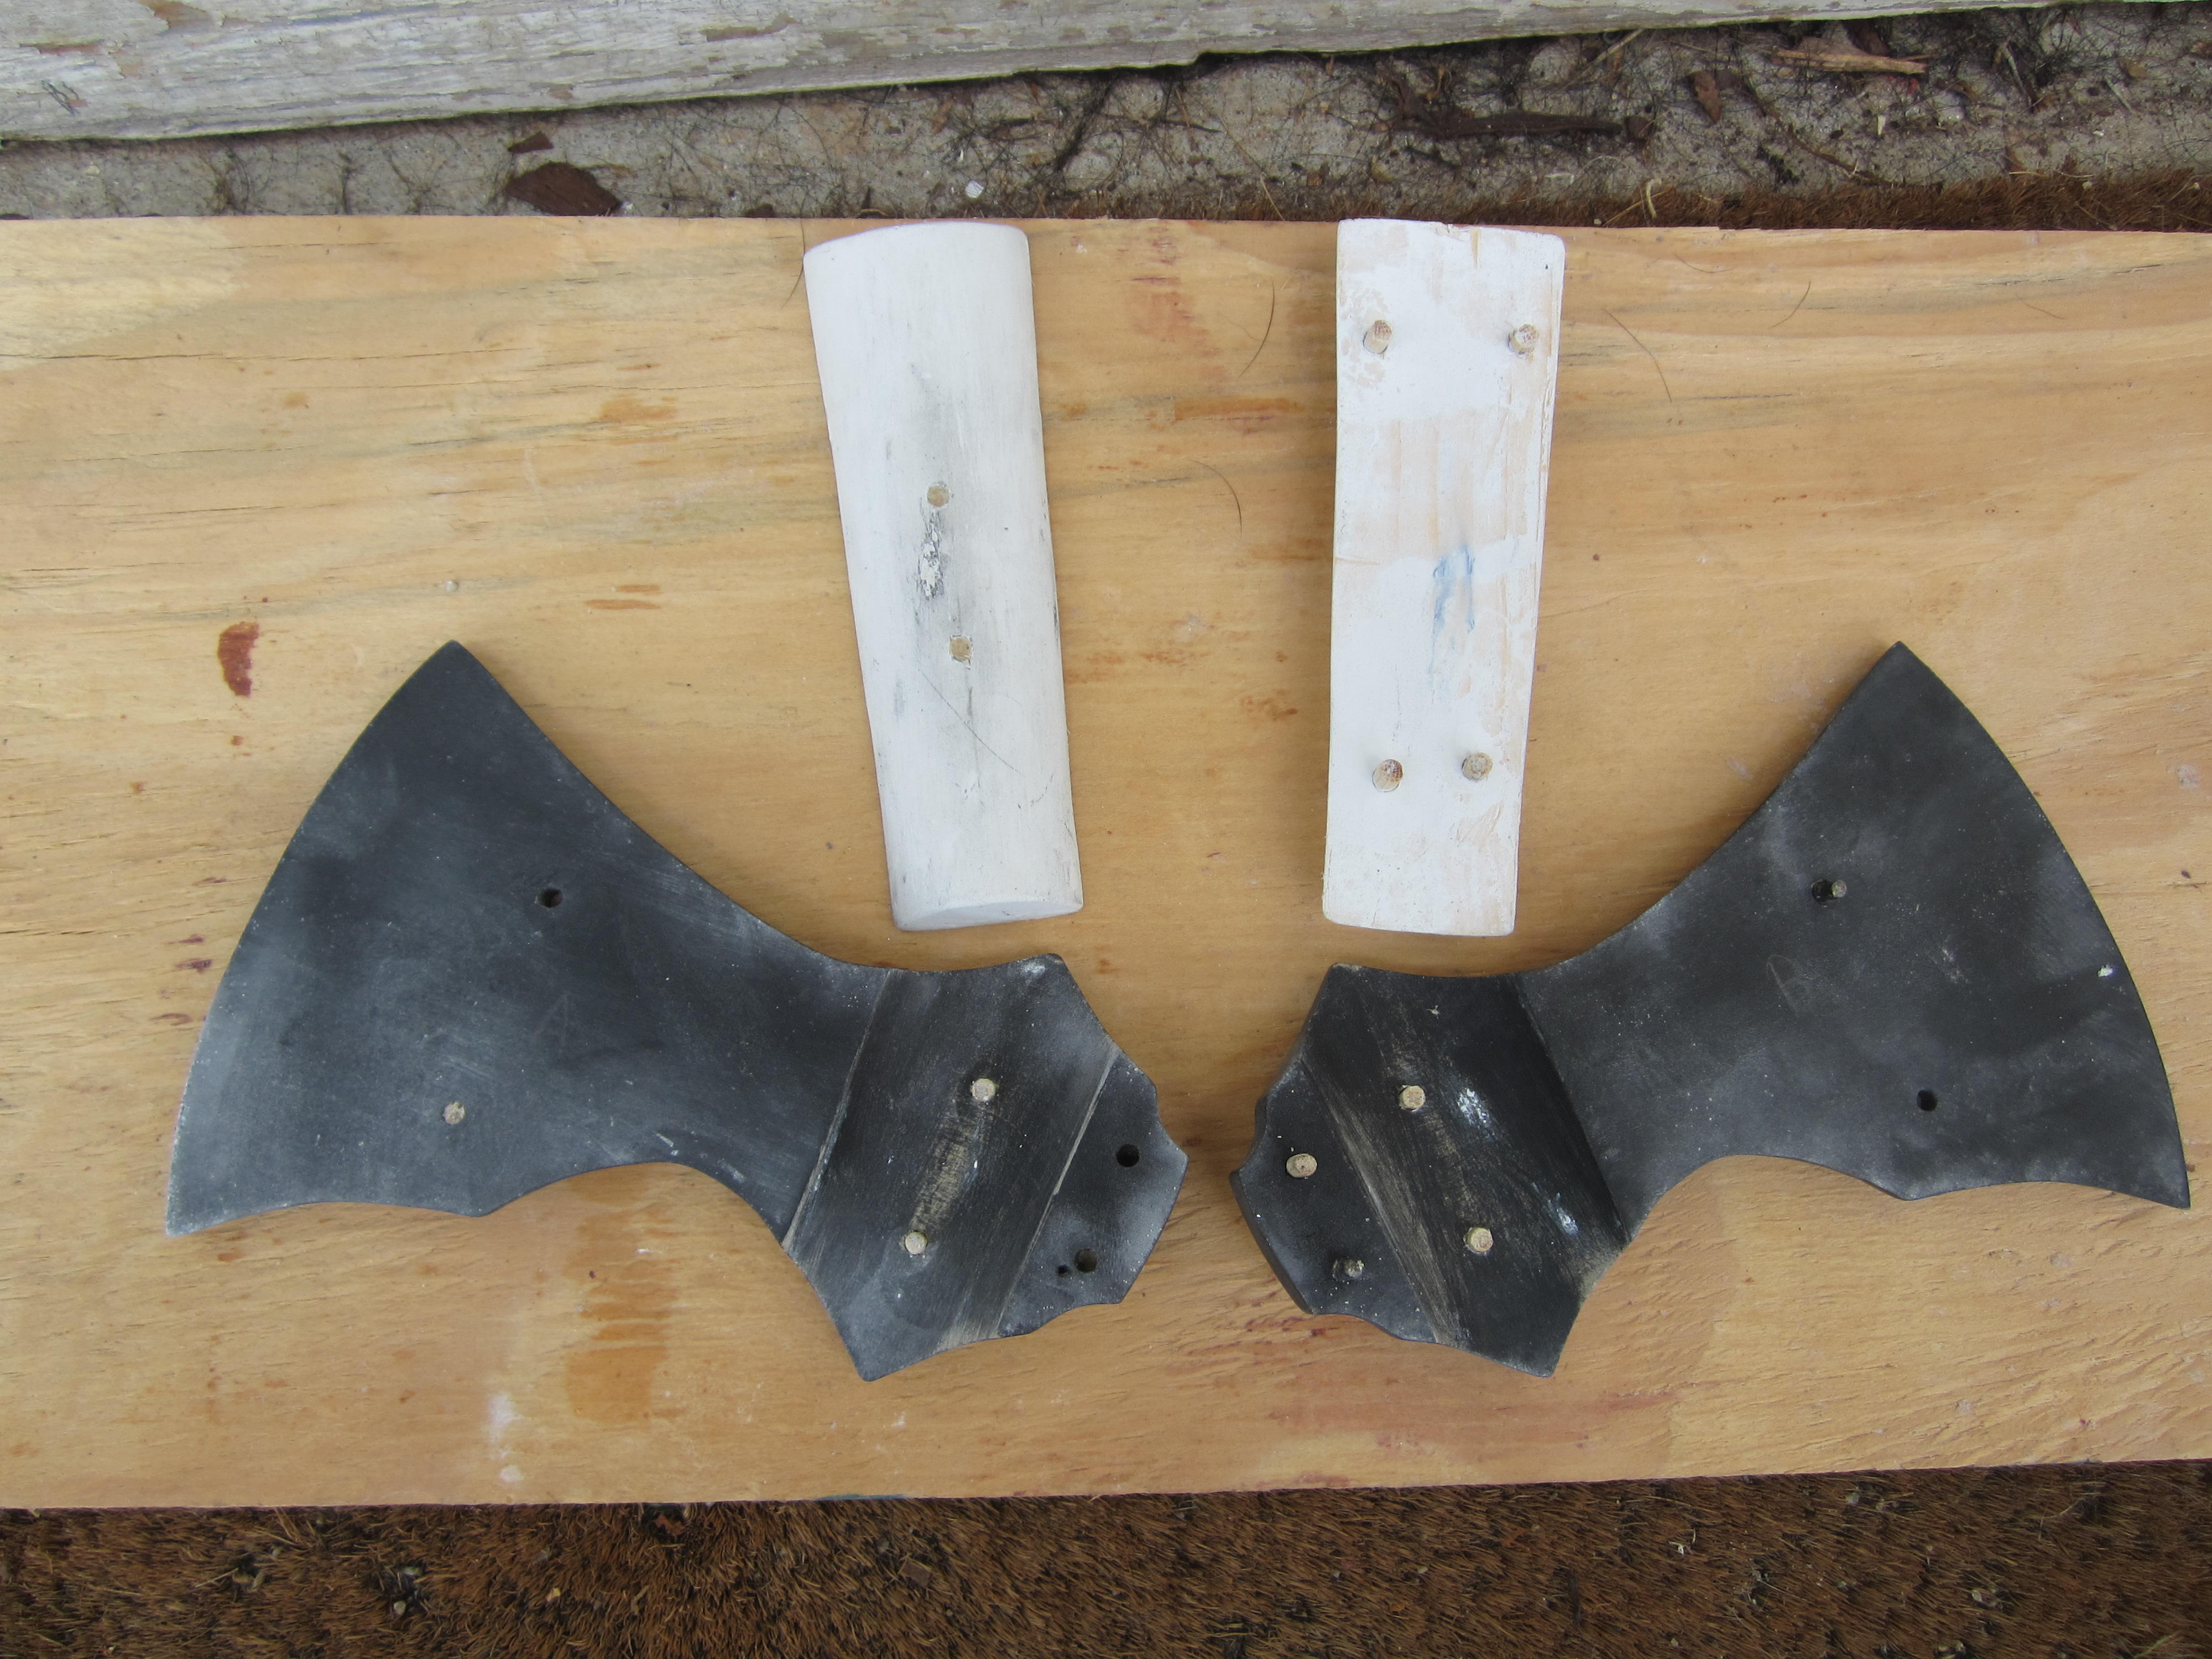
Pattern side view. Blade is about 4 1/4". Axe head is about 6 1/2" long. The wood used was a poplar 1x6 from the big box hardware store. This started out 1 1/2" thick, but most of it was chiseled and filed away.
Back view of axe head pattern showing poll.
Side view of pattern.
Bottom view of pattern.
Top view of pattern. After removing so much wood, the remaining wood de-stressed some along the blade, resulting in the gap that you see, but only on the edges, not in the center. It was worse, but I put clamps on it and got it to move as much as I could back to a flat position.
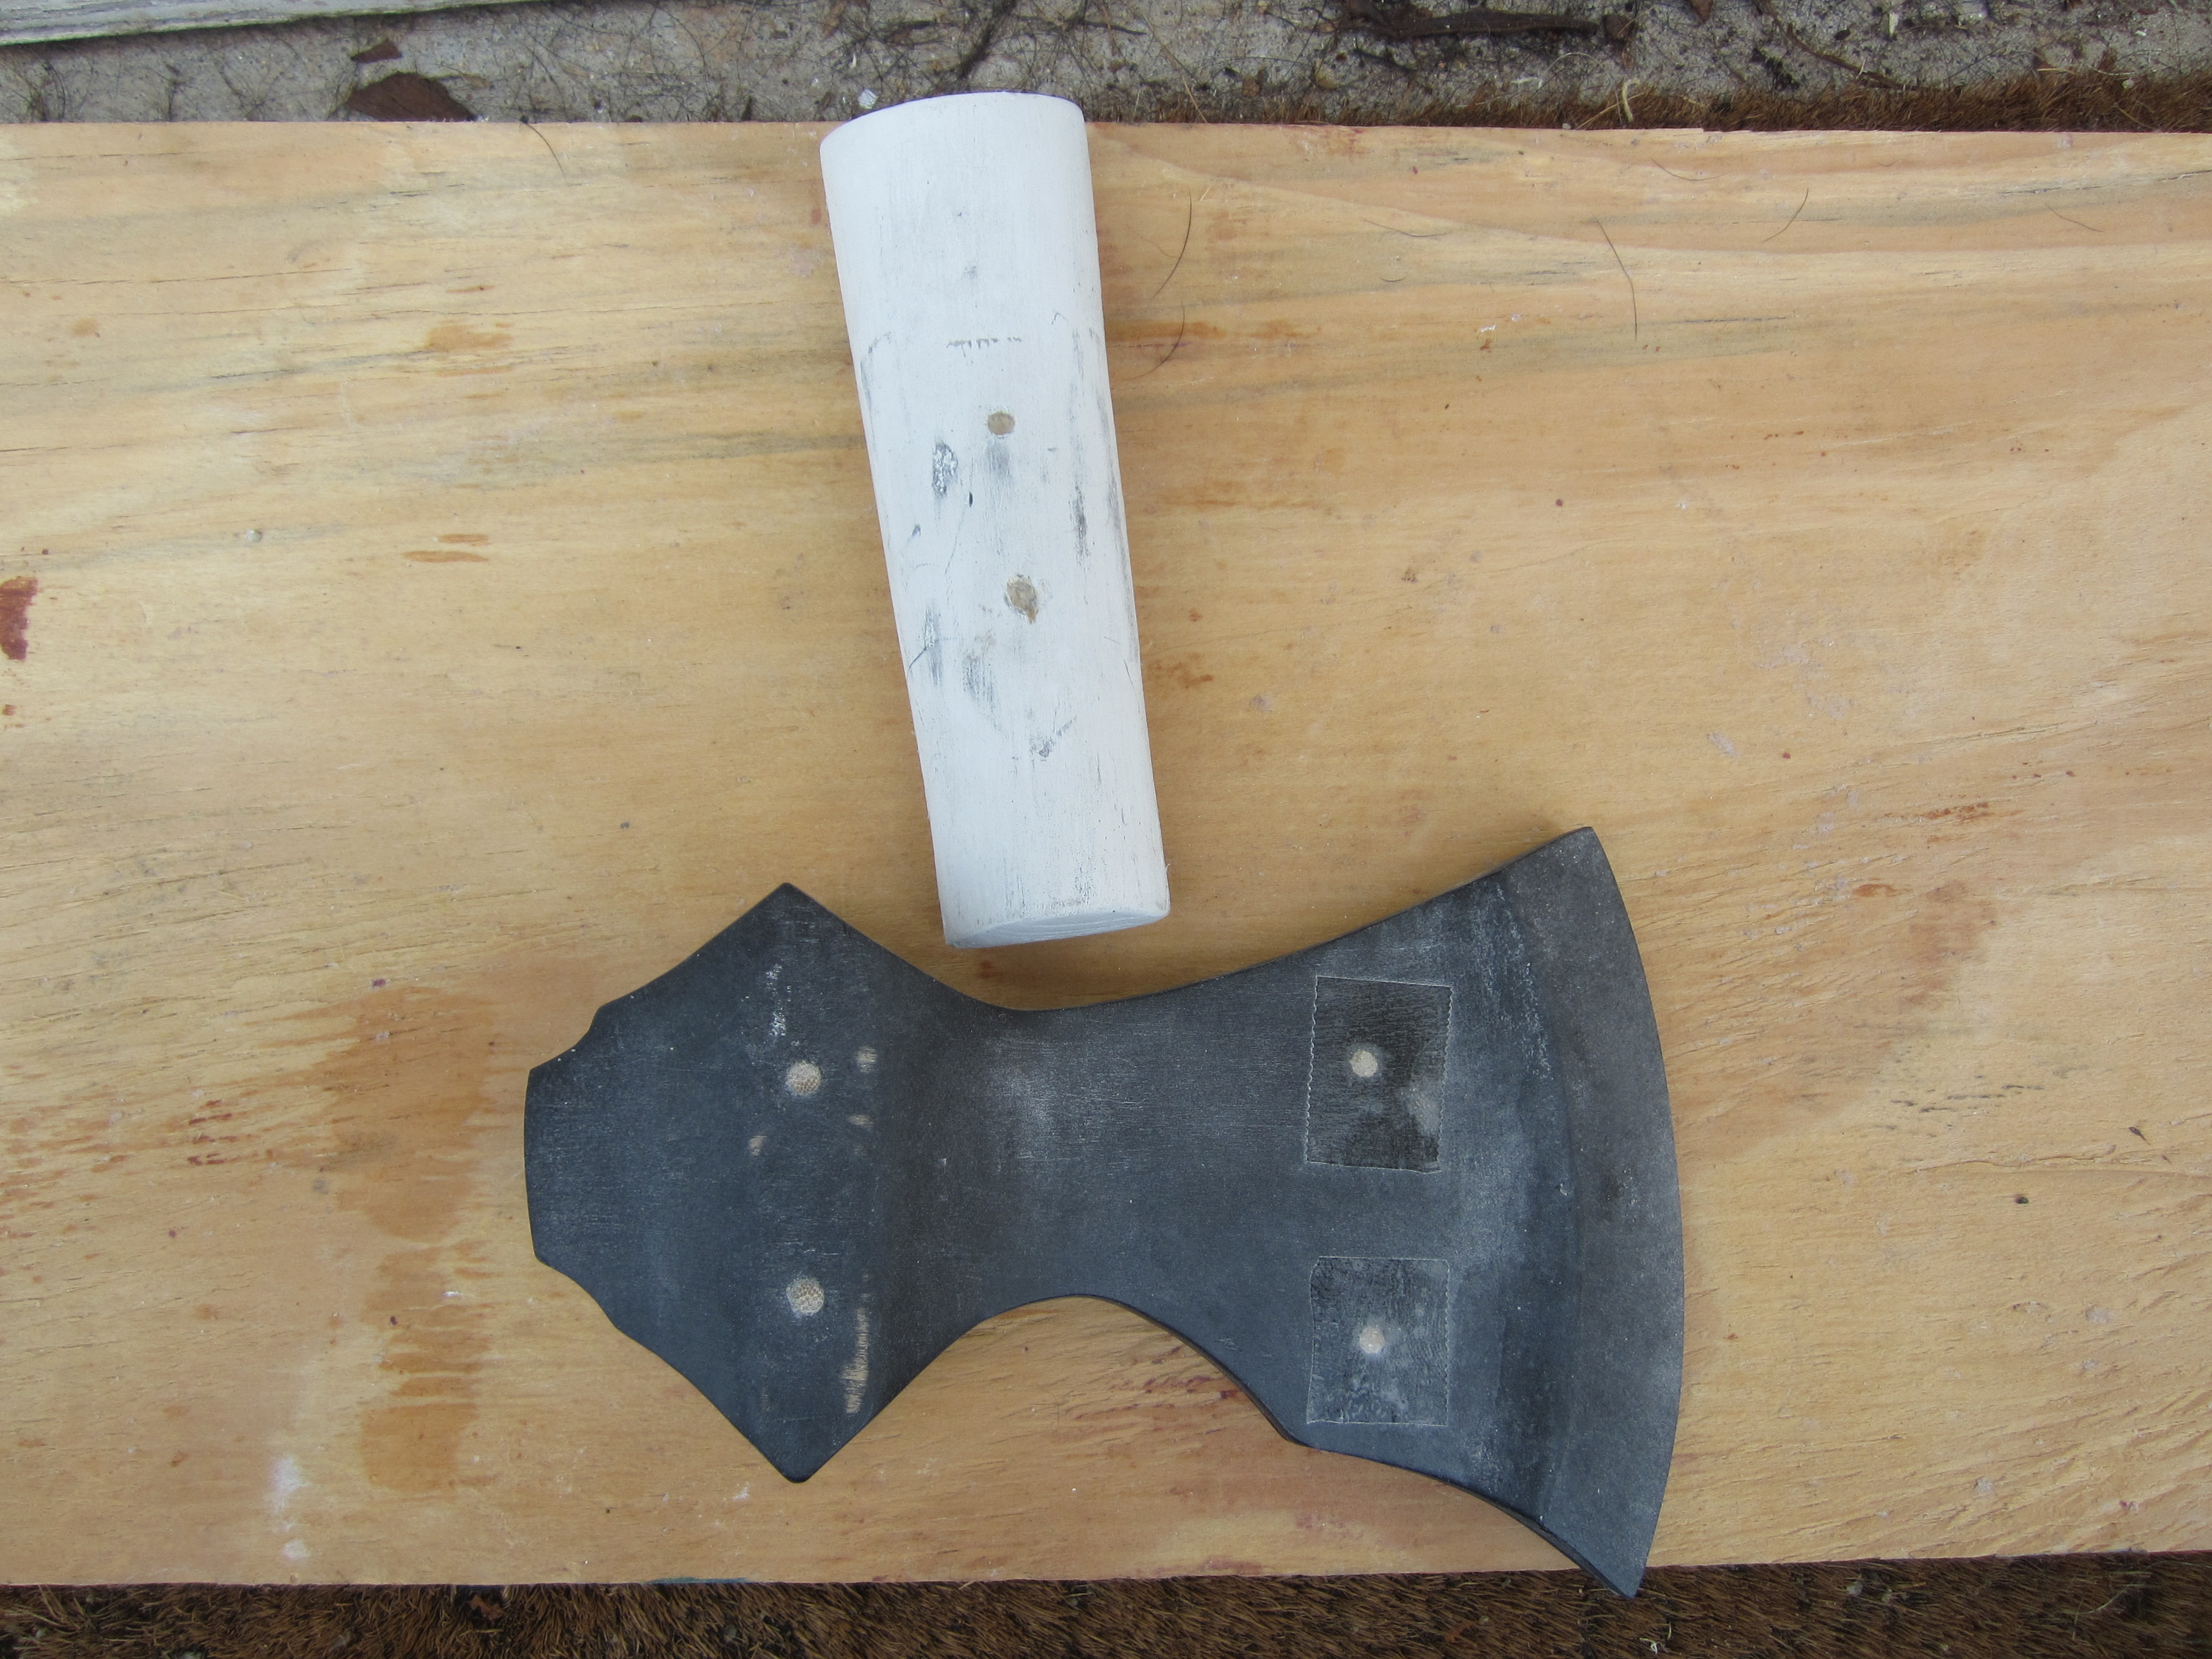
Painted axe head and handle dummy. The handle dummy was used to cast the core by making a mold out of plaster of Paris, and then filling that with sand mixed with stove gasket cement, which I learned from watching Tobho Mott's YouTube video on how to make cores -- The core worked very well.
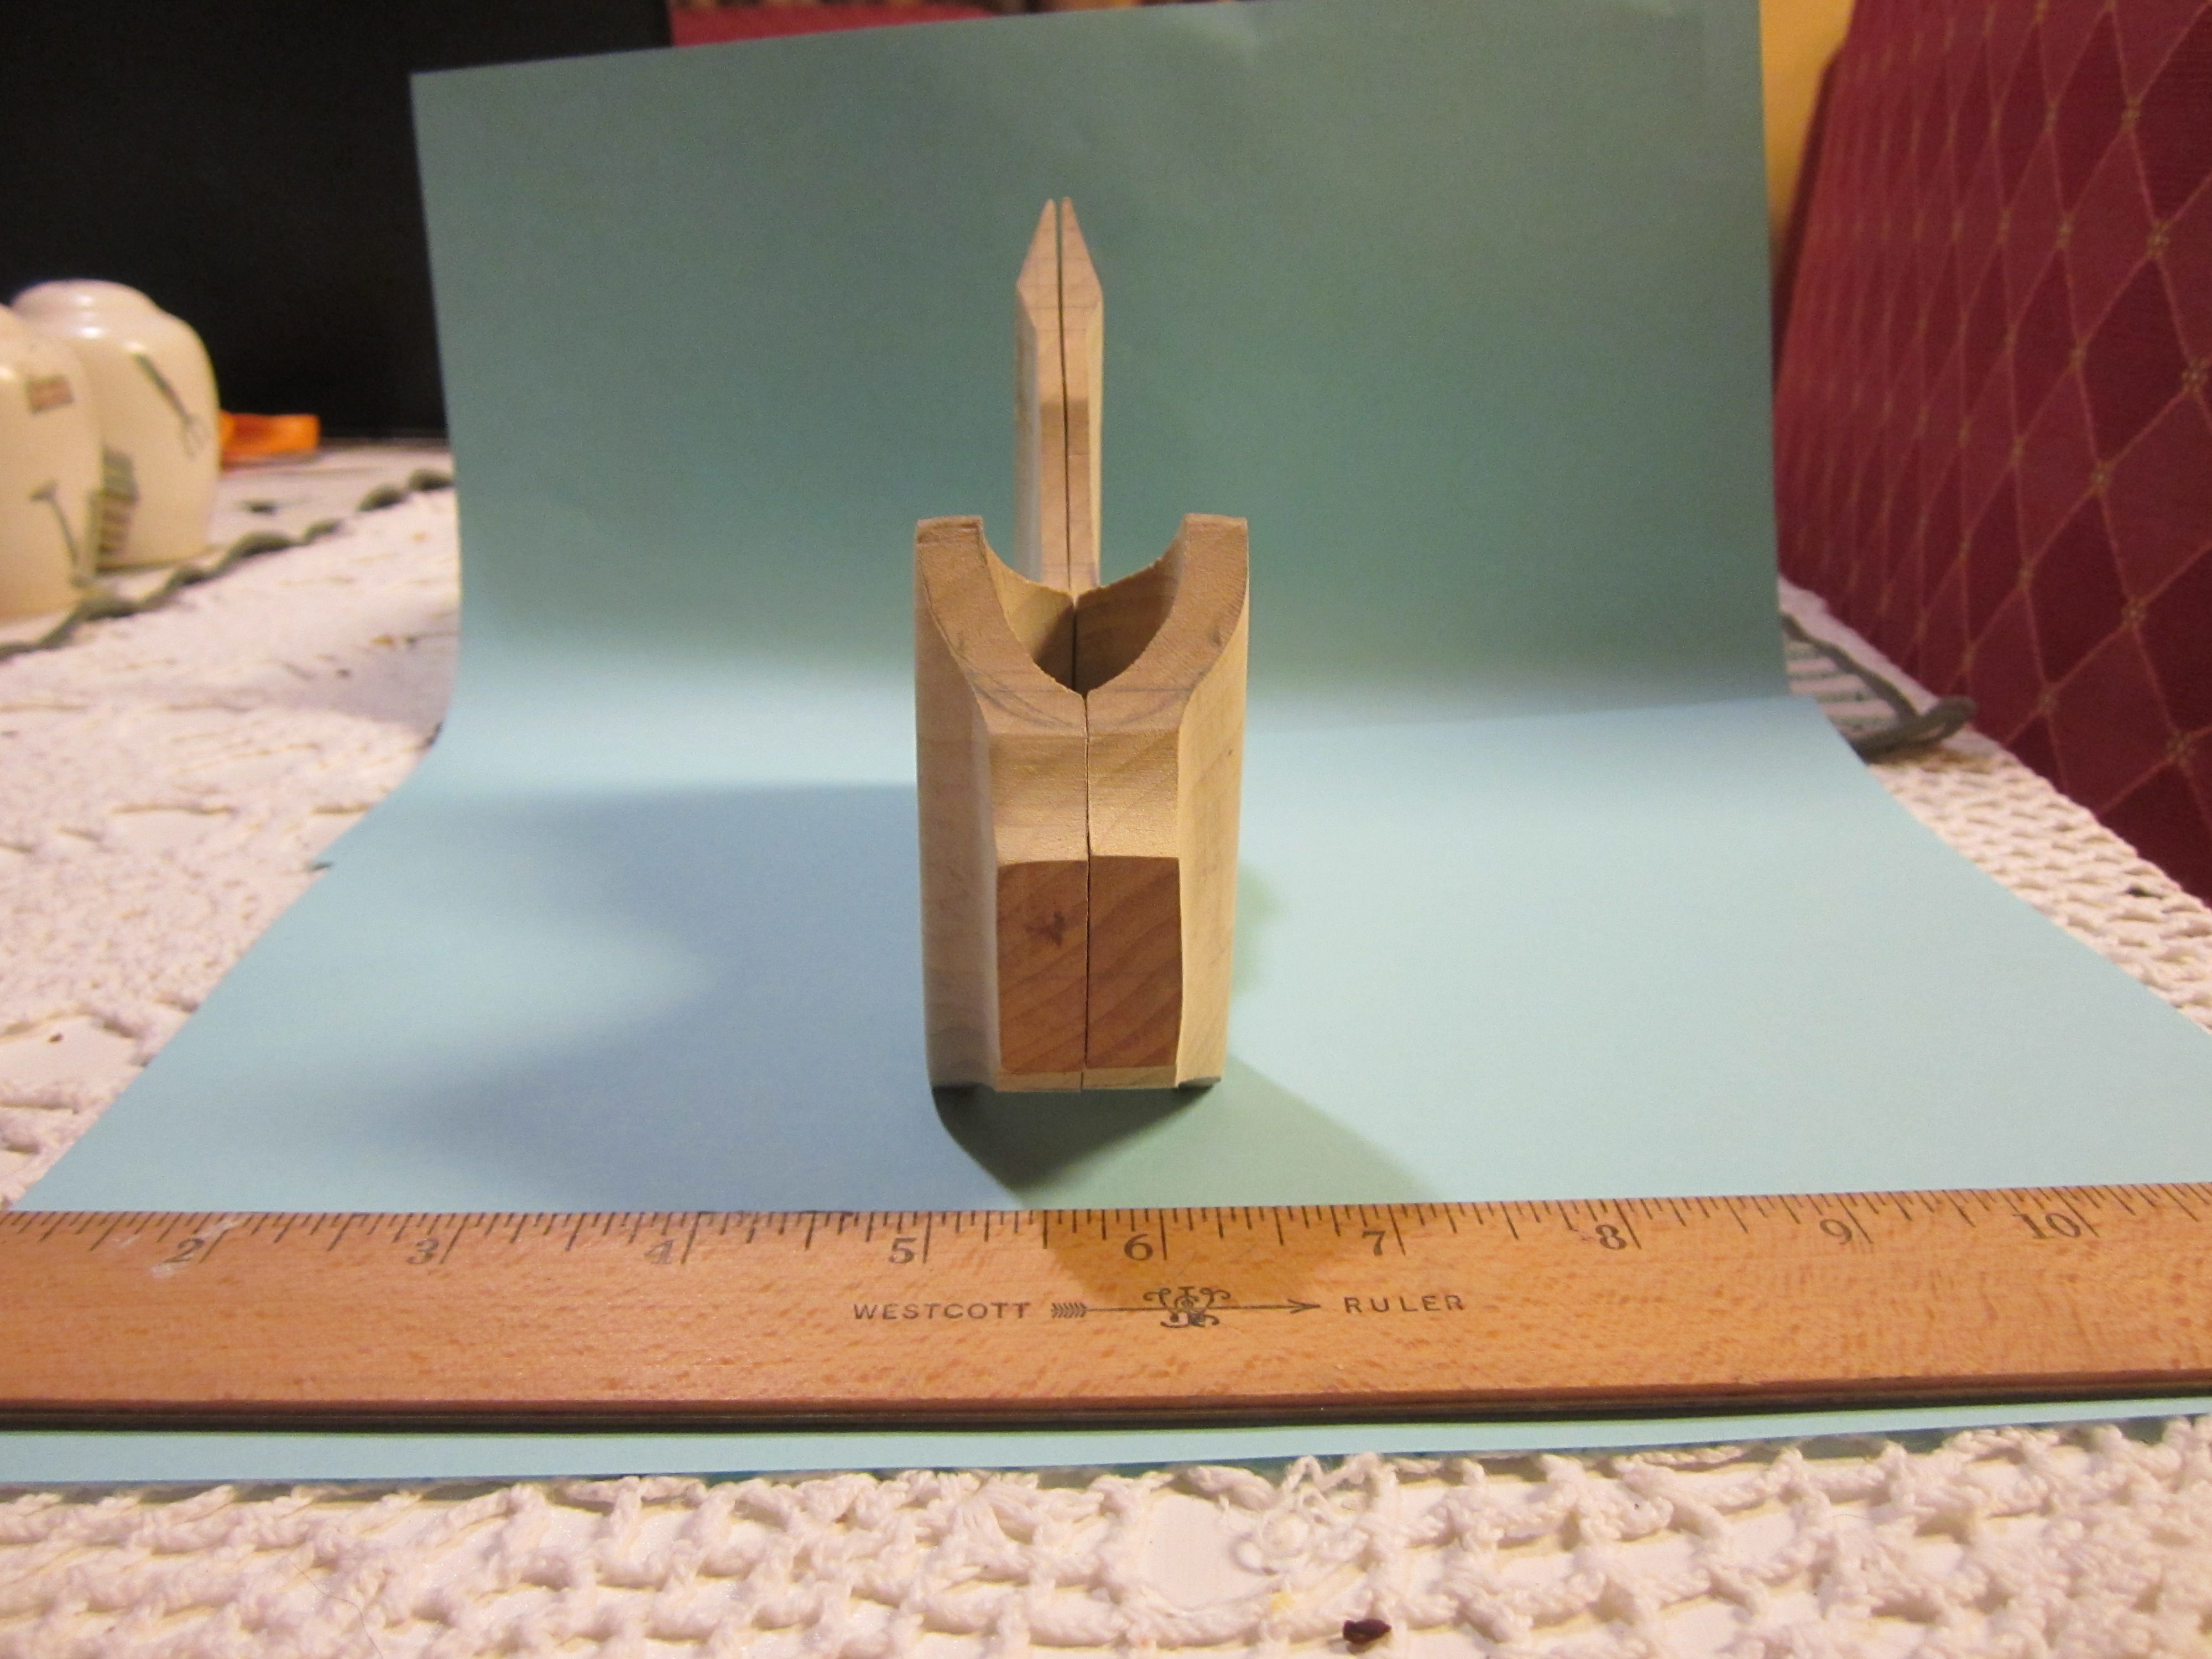
Inside of the axe pattern with dummy handle pattern. The handle pattern on the left is face up to show the holes that index on the pegs in the axe head eye. The handle pattern on the right is showing the inside surface to show how the handle pattern is fitted together with pegs inside.
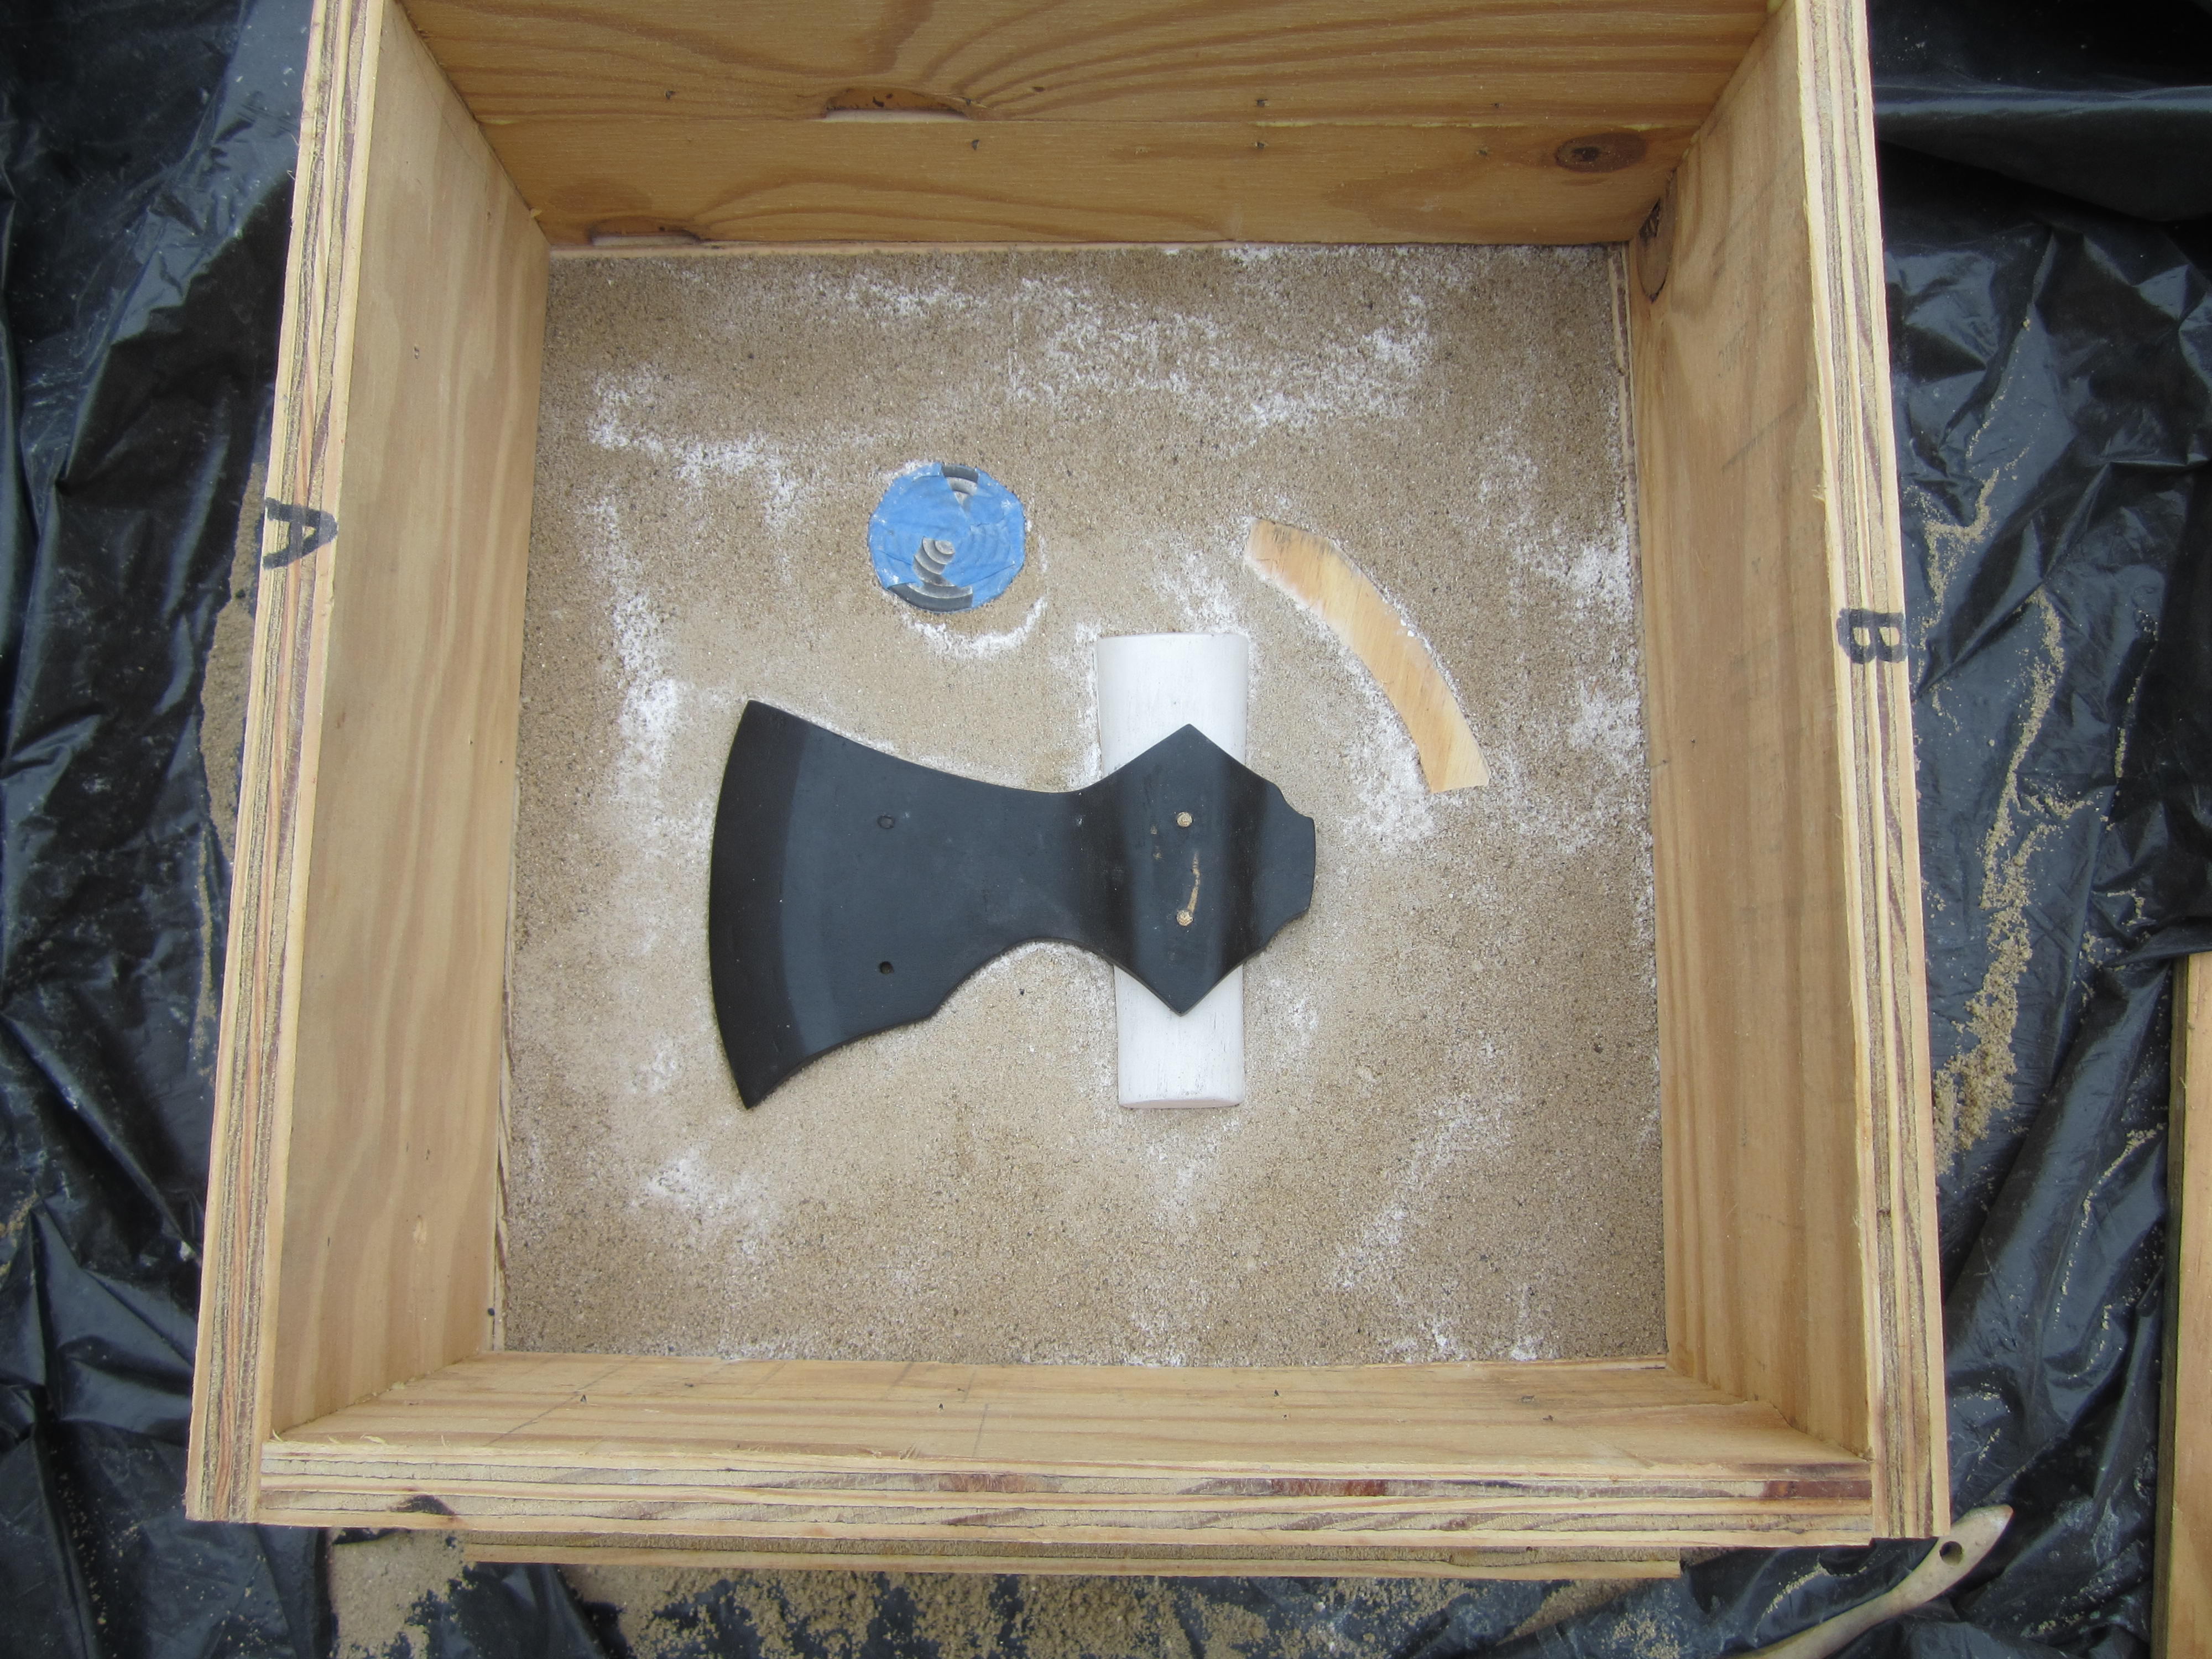
Drag rammed up. The pegs have been removed from the handle pattern that will fit down on this part, as the handle patterns index on the axe head, and don't need to be held together once they are fitted to the axe head. The axe head still has the pegs in it (the other half does, not this one), and it will index onto this part of the pattern, thus everything will be aligned for ramming up the mold. (file too big for this board -- link is here: https://i.imgur.com/L2PPnmu.jpg )
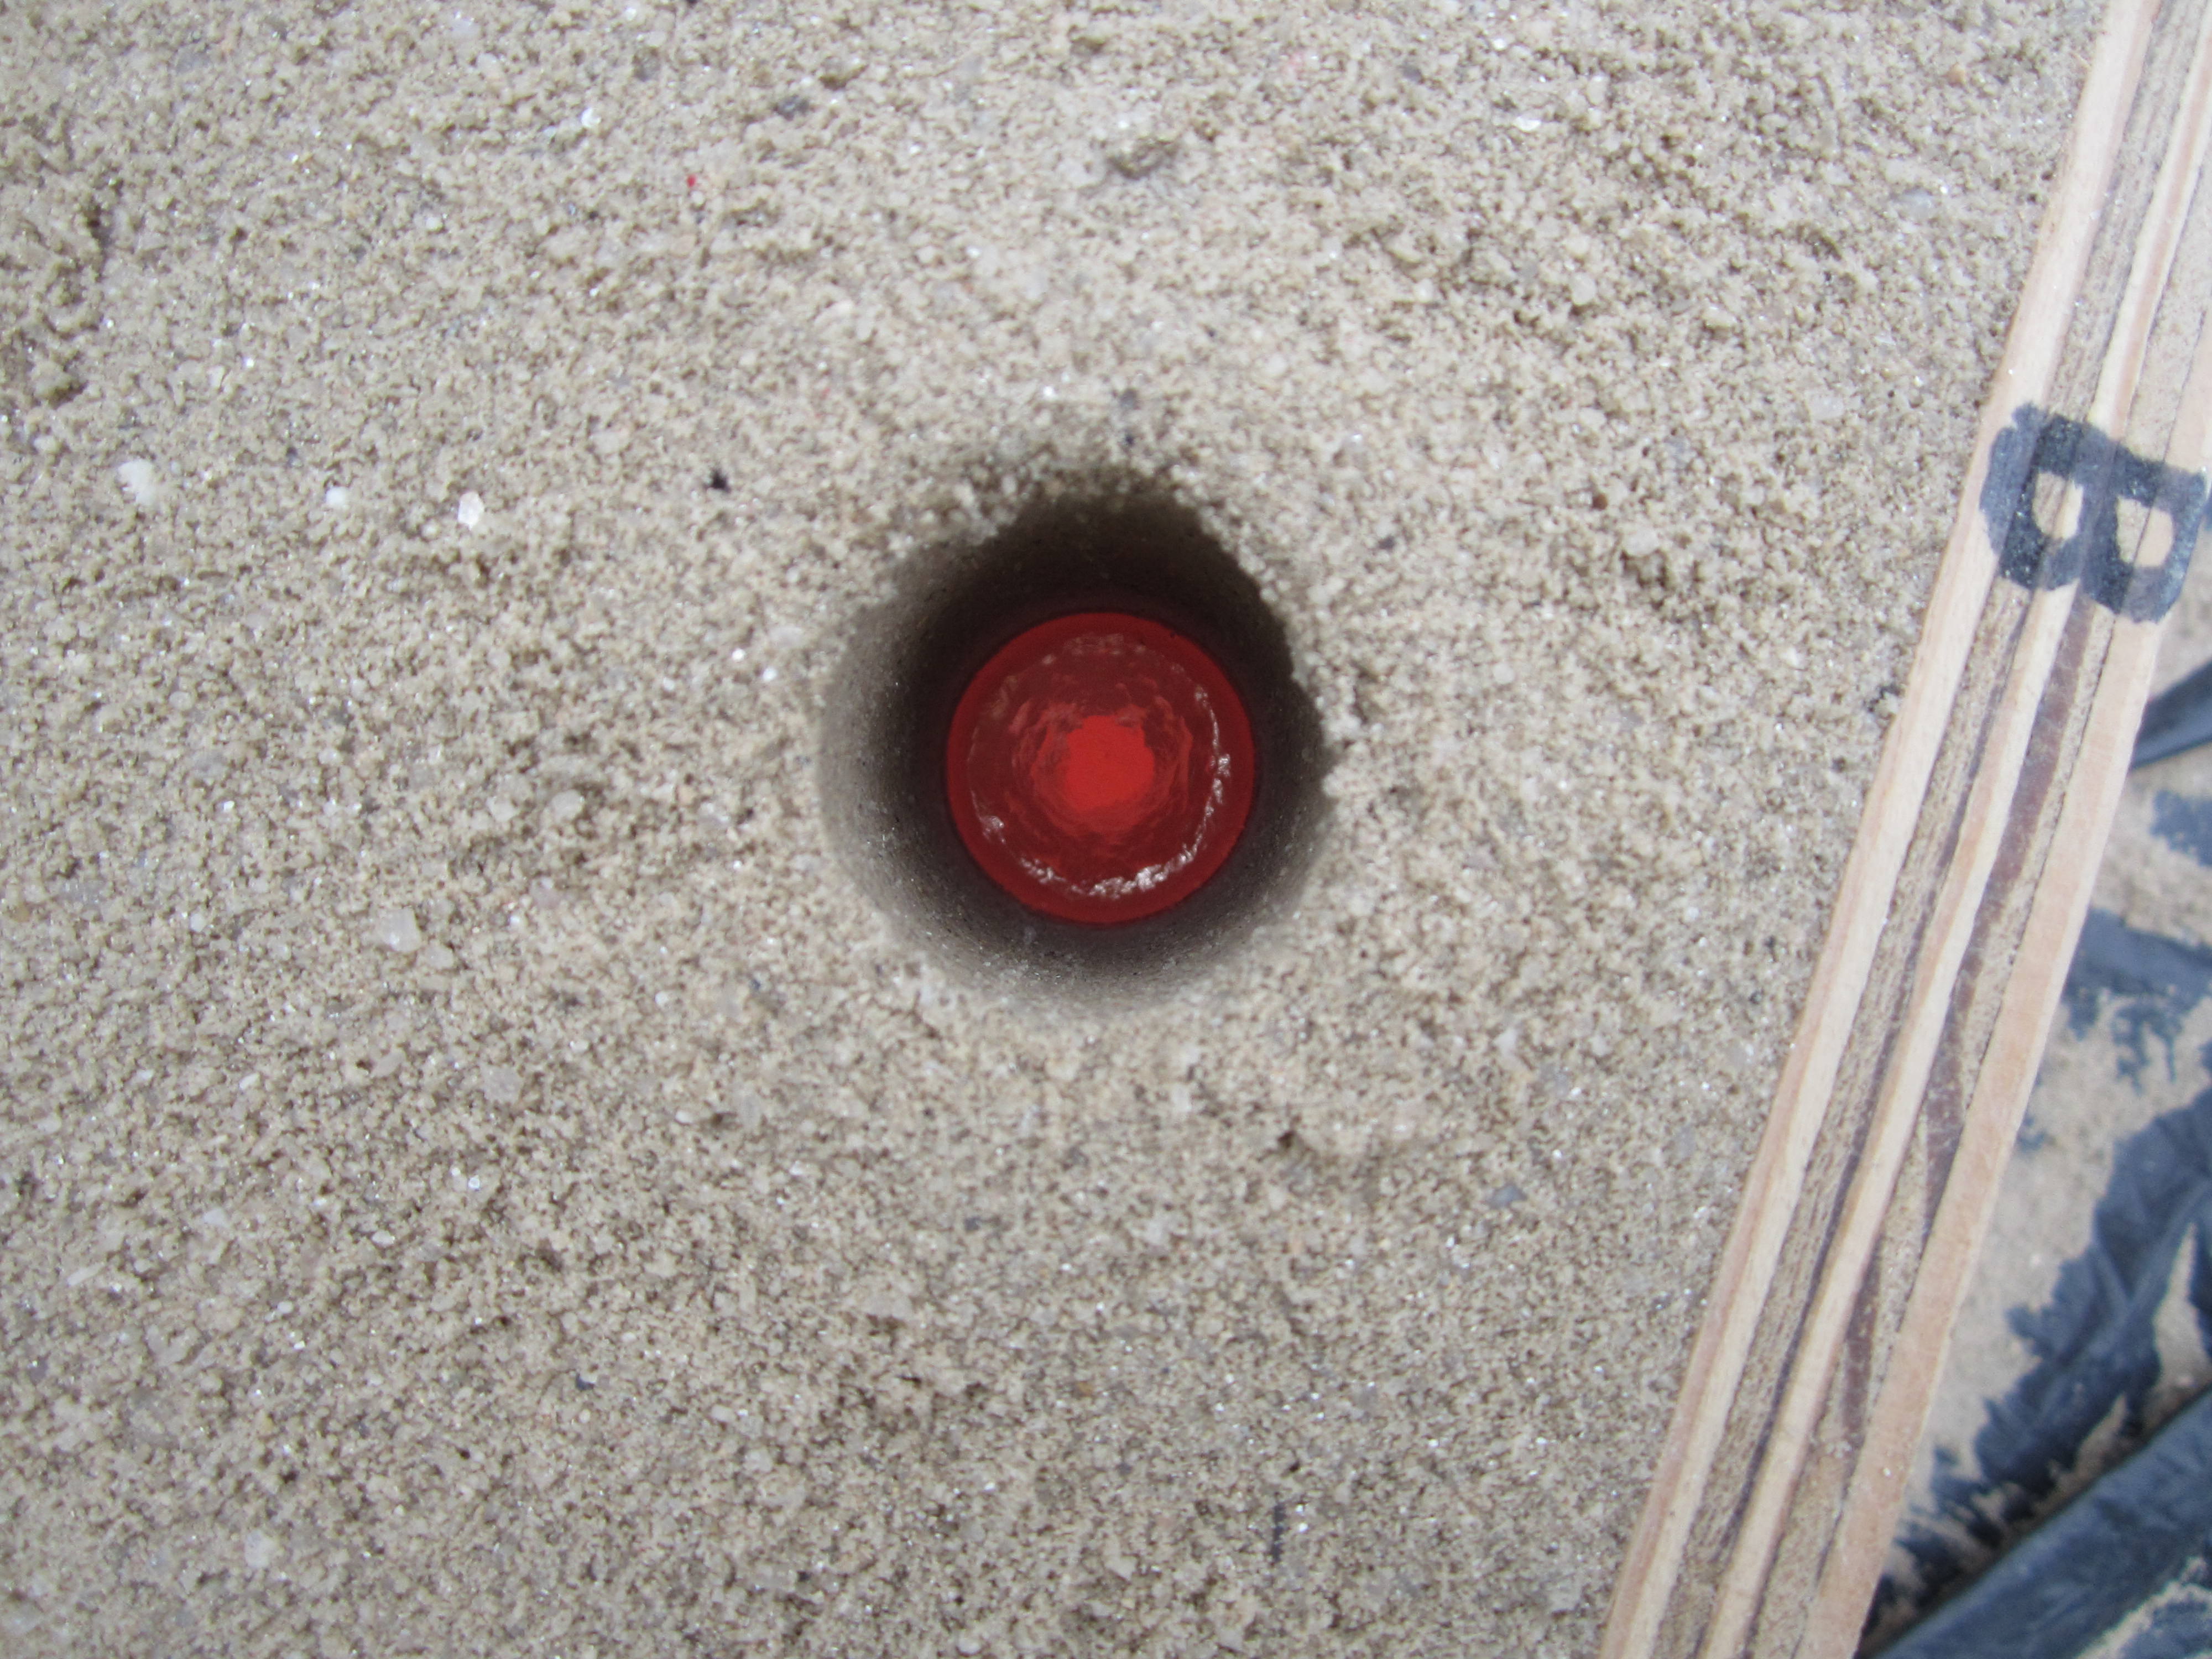
Top half of pattern in place, ready to ram the flask. The other parts are the sprue bottom (blue) and a bit of a runner (wood) that will be completed free hand.
Rammed and ready to pour. (again, file too large -- link here: https://i.imgur.com/tV95eMZ.jpg )
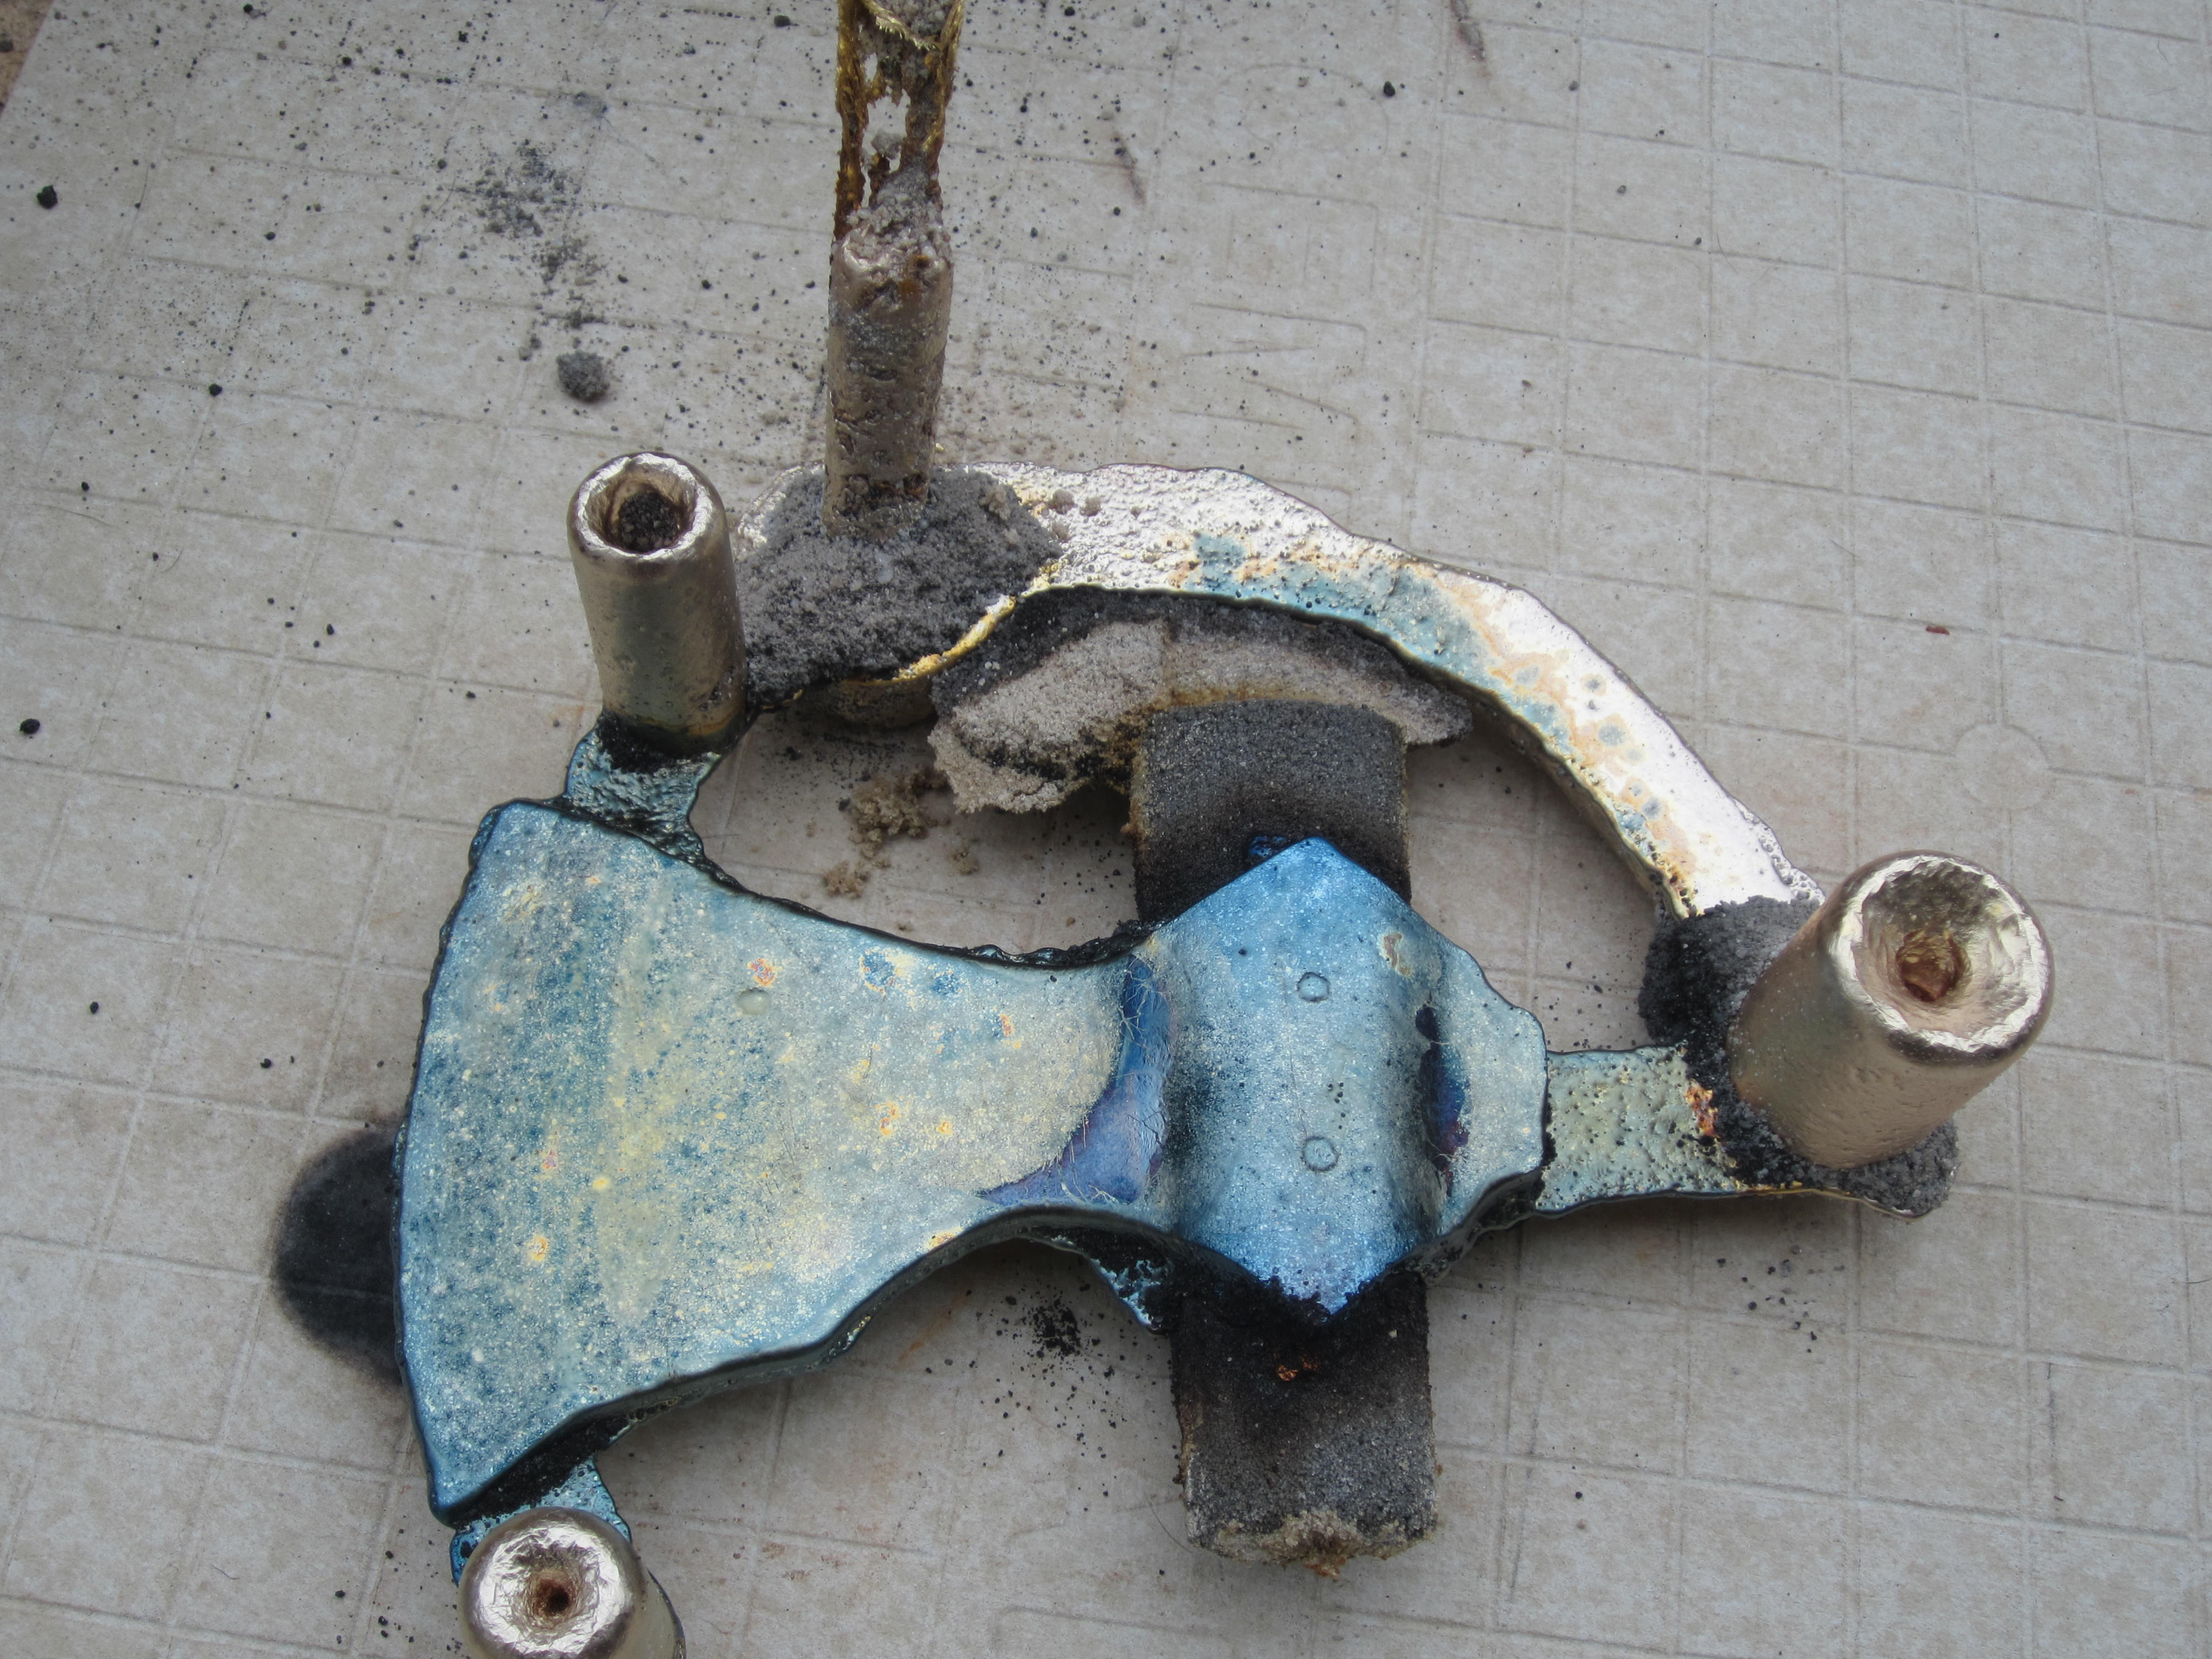
That stuff is HOT! You can see that it is already cooling and sucking metal down into the part from the riser (this is the riser by the back of the axe.)
You can see the sand and furnace cement (sodium silicate based) core in the pattern. I forgot to take a shot of it in the empty mold.
I made the core in two parts, like the wooden pattern, in a plaster mold. Then I put it in a 5 gallon bucket with some vinegar and baking soda ( CO2 to harden the sodium silicate) and sealed it up for a couple of hours. It seemed hard after that, but I also baked the core halves (in the plaster molds) at 400F for 1 hour and 550F for 1 hour. It was hard to get them out of the mold, and one half broke, but I managed to glue it back together with wood glue. I glued the two core halves together with regular wood glue, then baked it at 200F for a couple of hours to dry everything out.
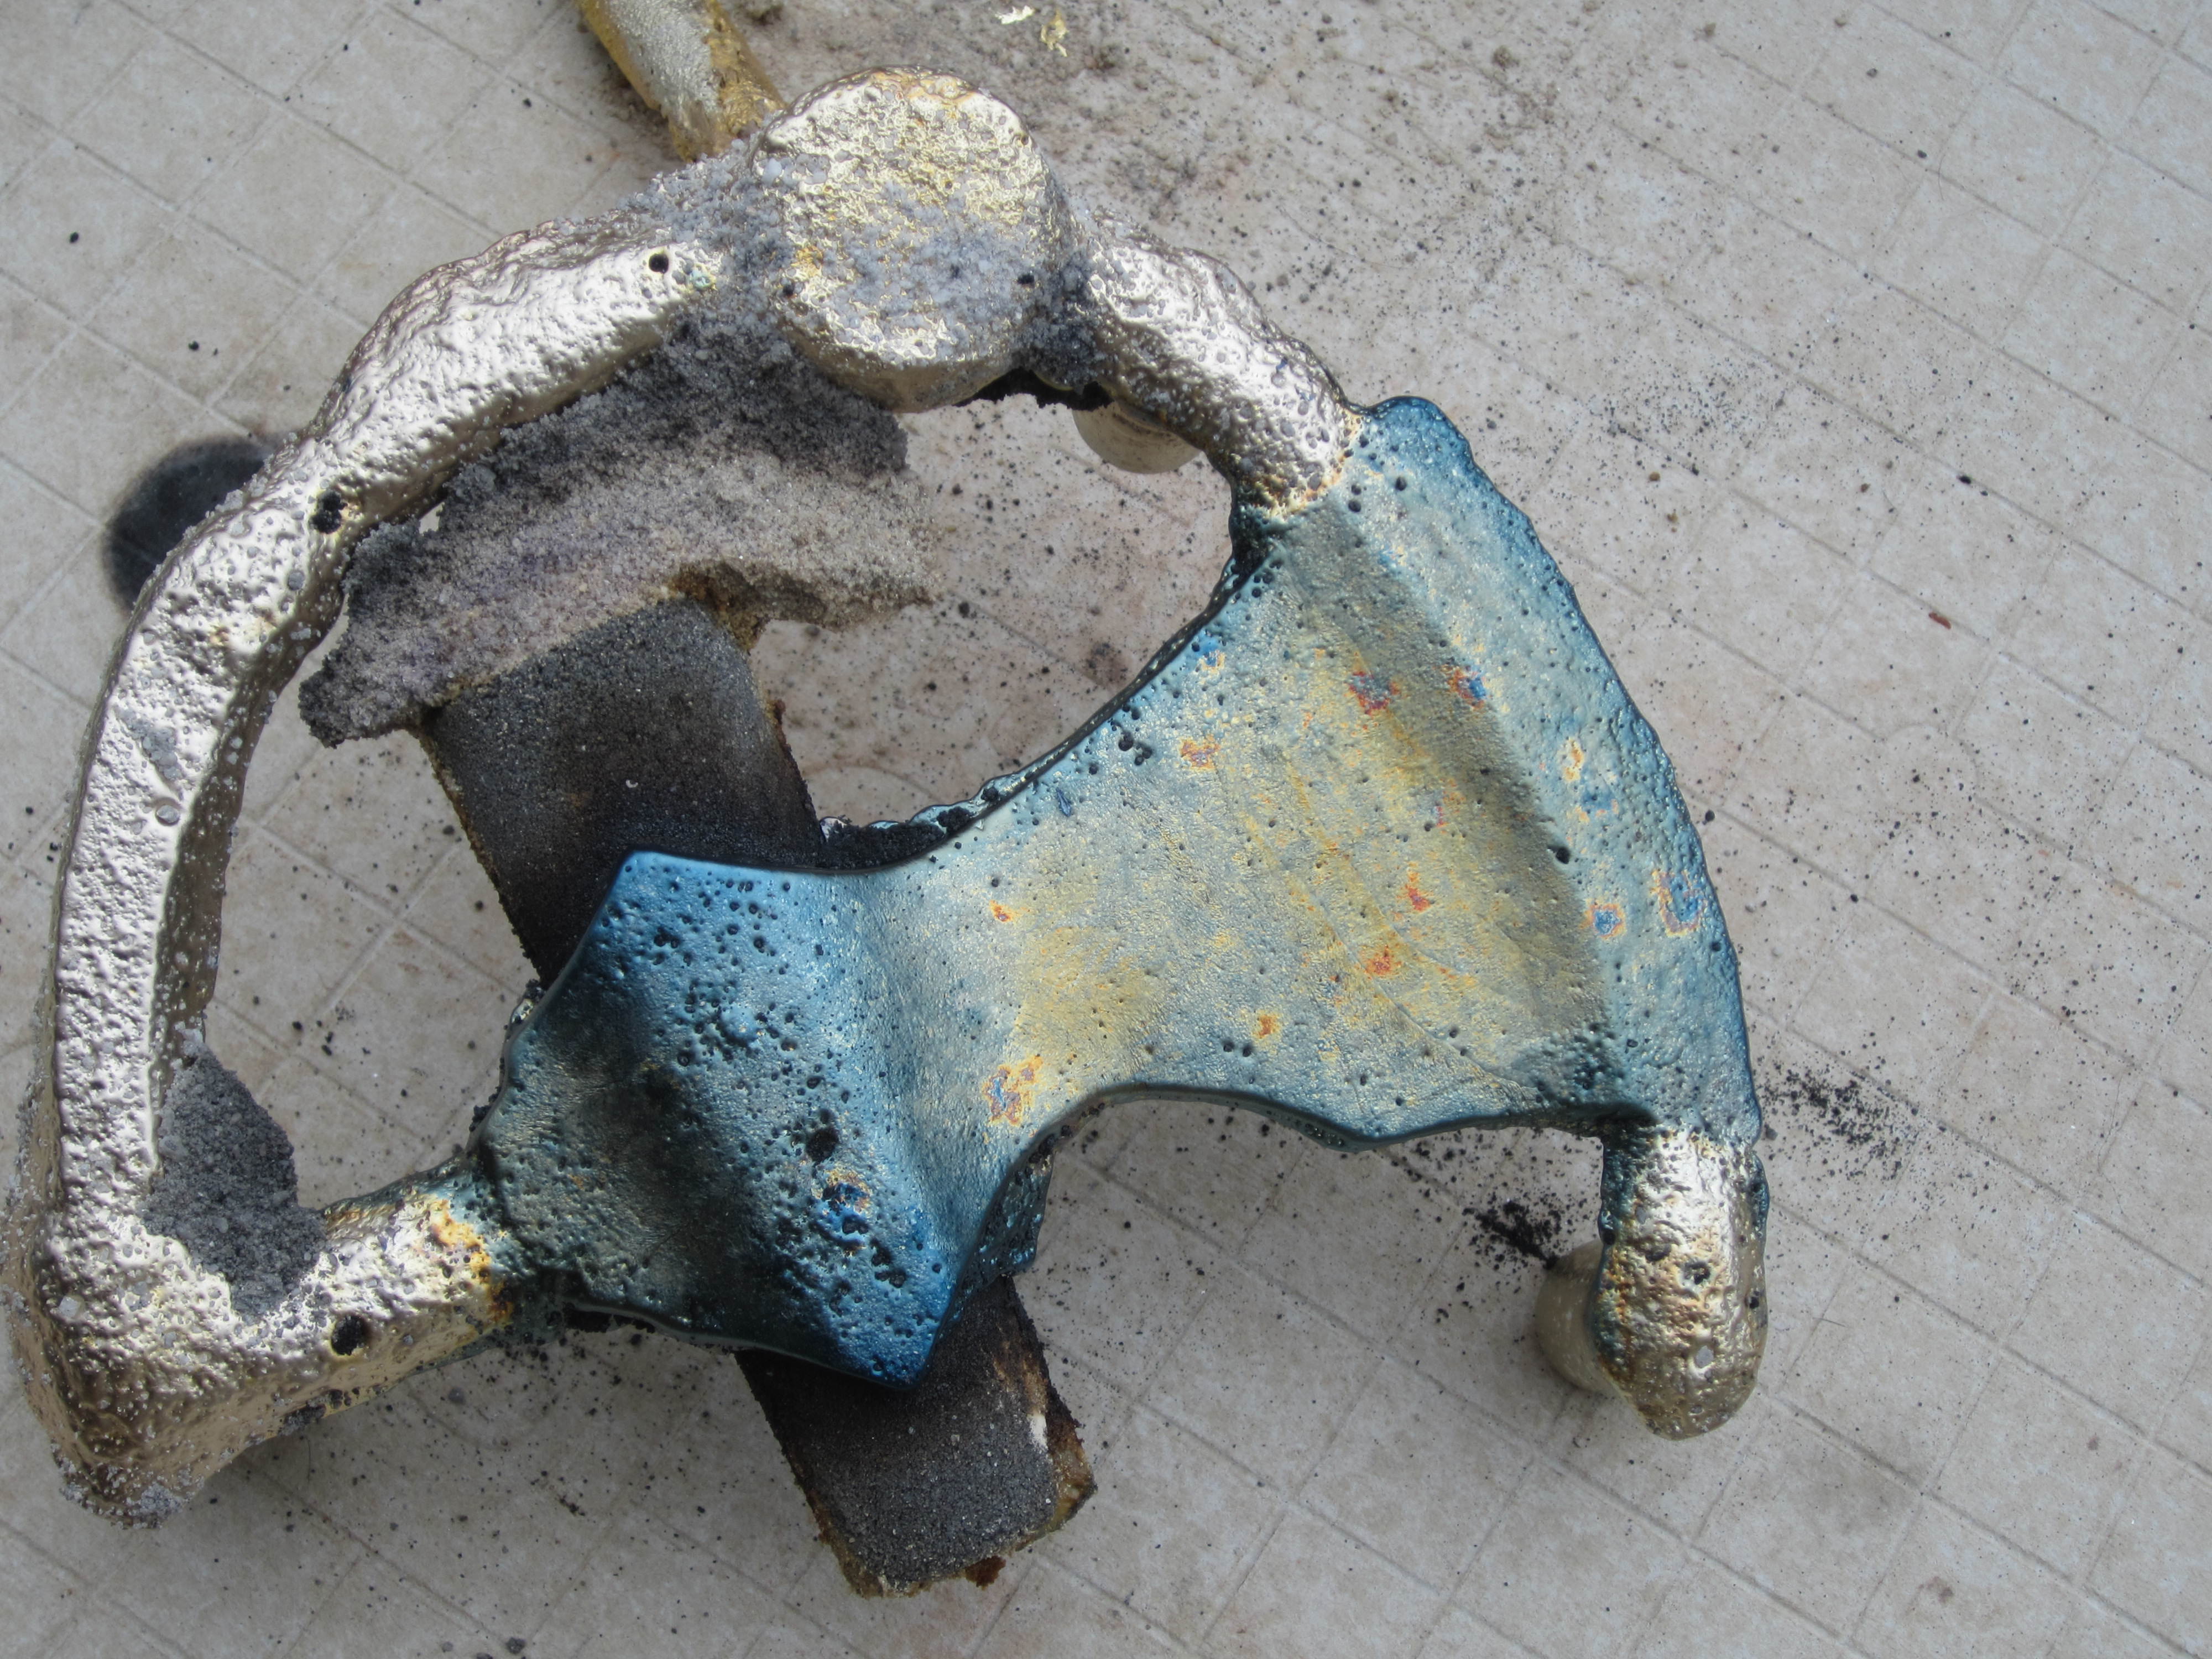
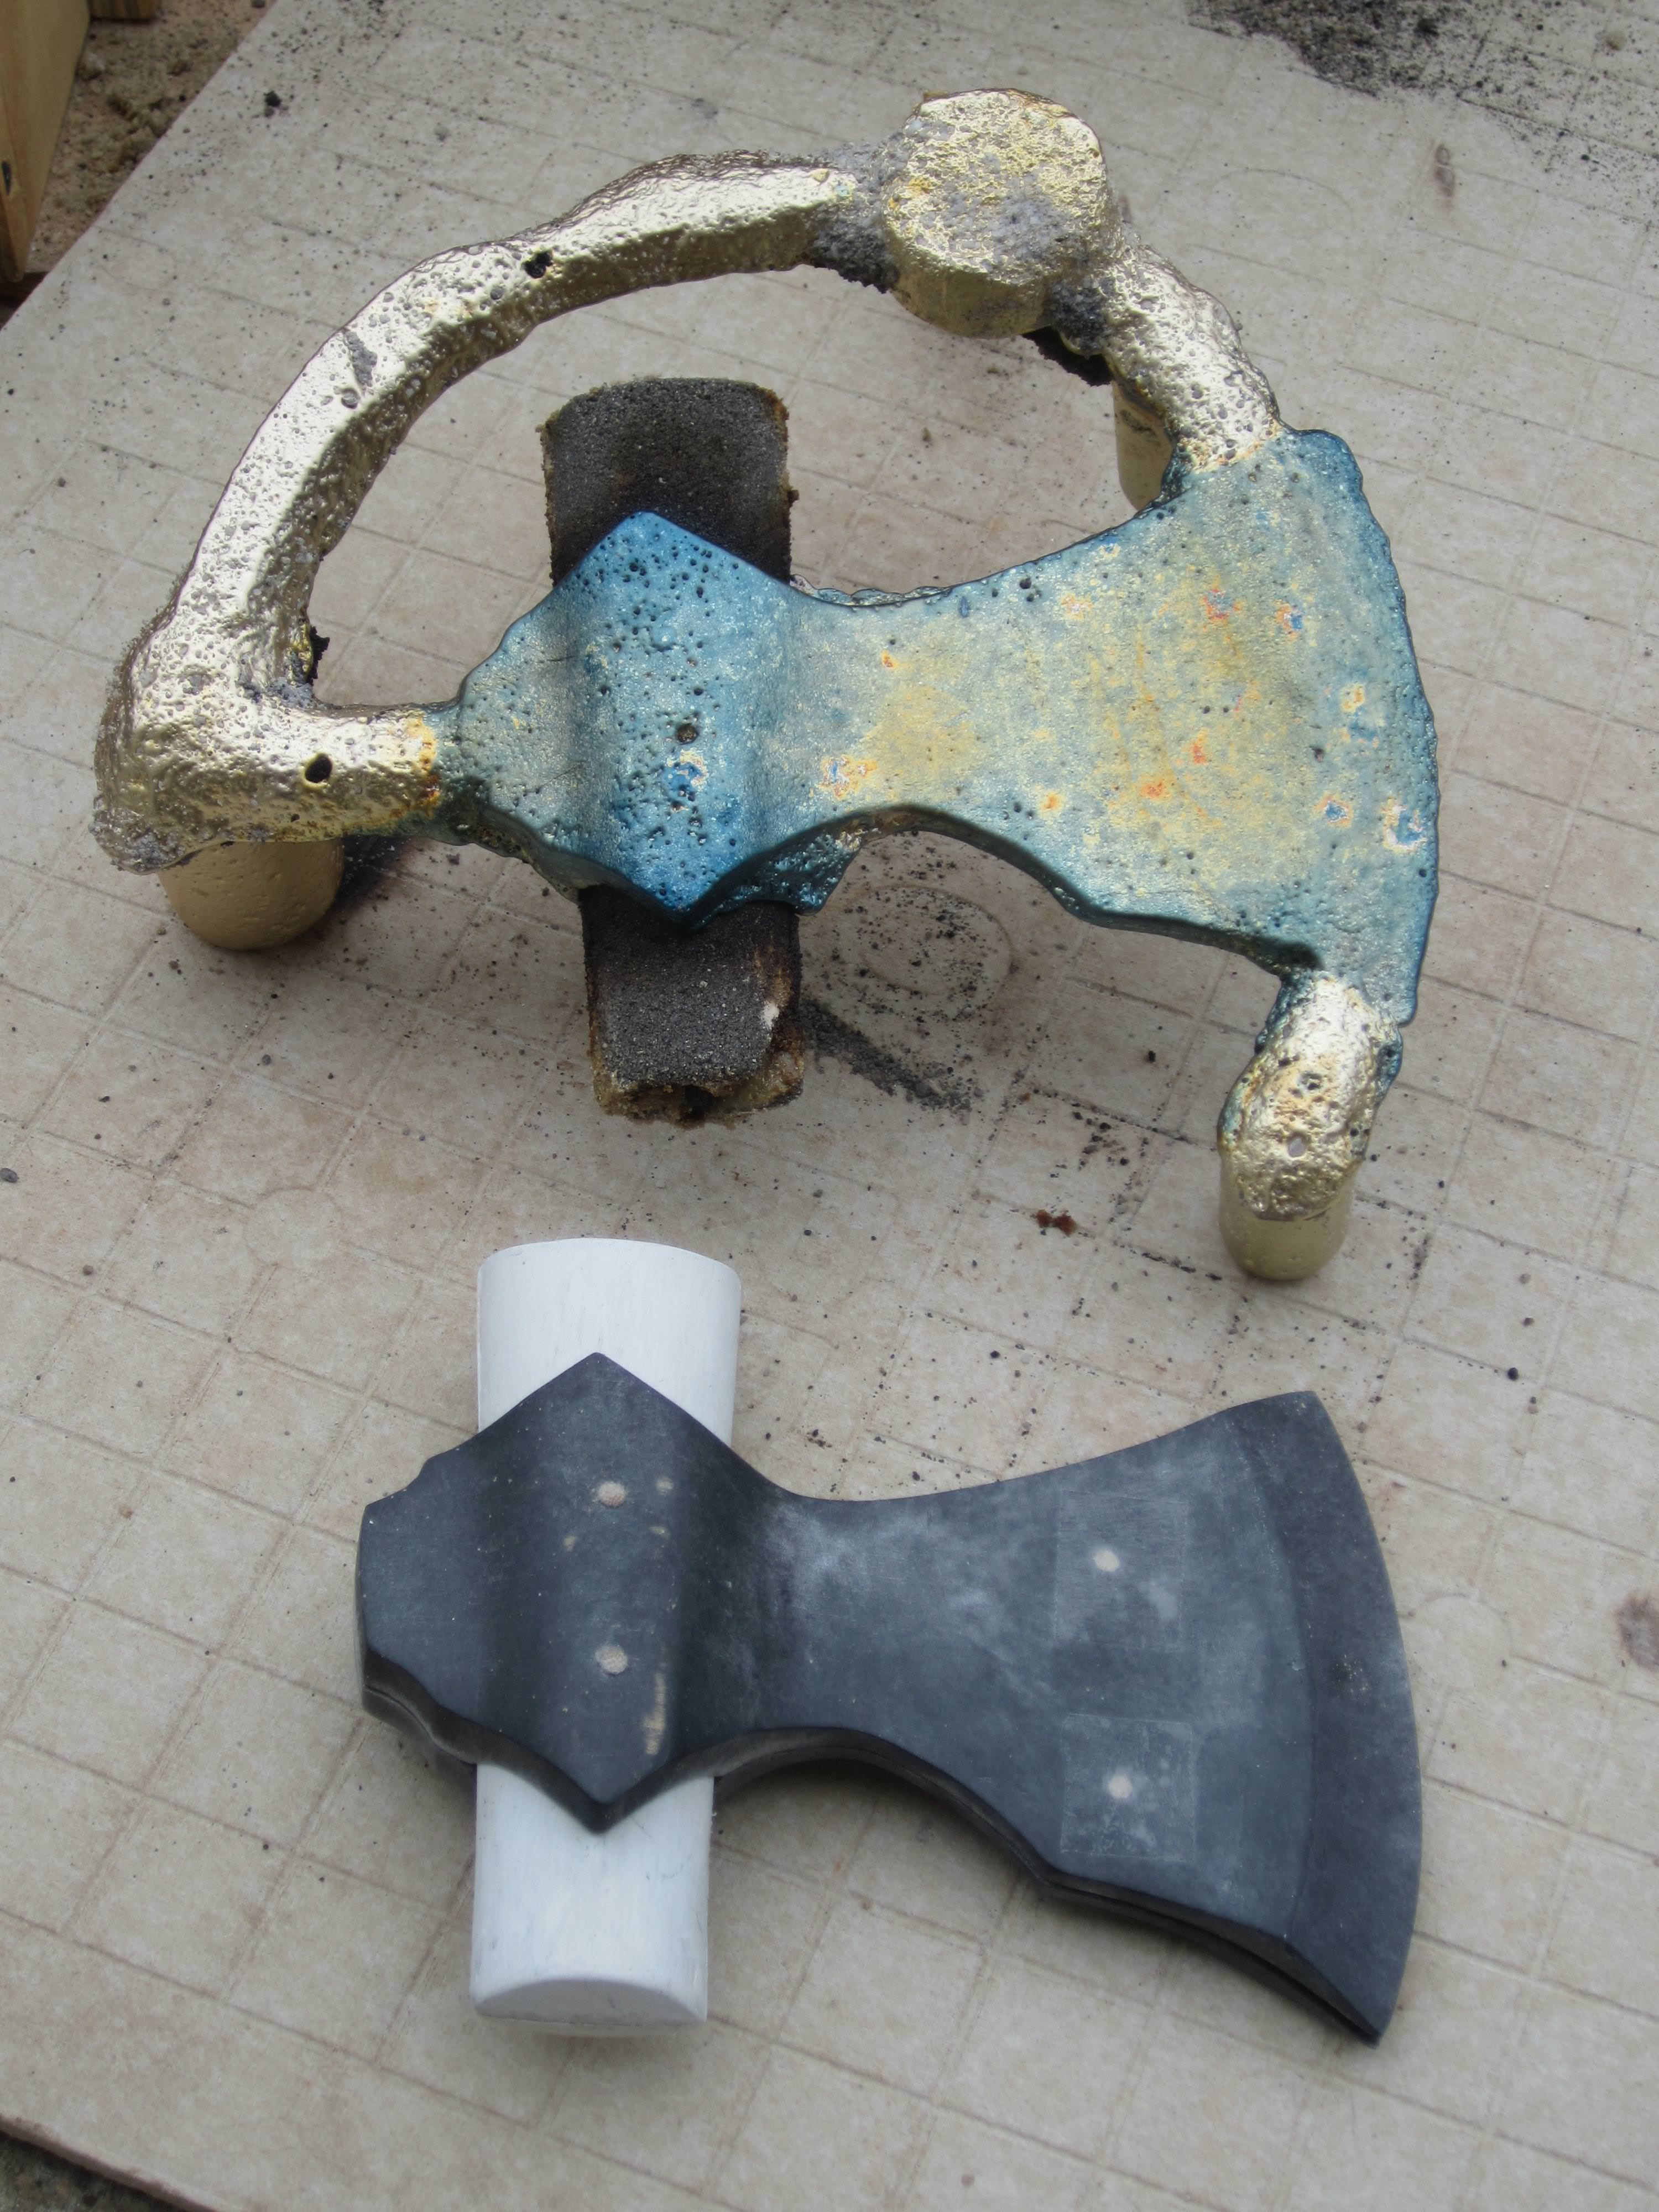
Upper side of the pour. Very good detail on the casting, and pretty smooth finish. It even picked up the two dowels that I left slightly proud on the pattern (I meant to do that -- no, really!) You can see, though, that I barely made enough metal to pour the mold. I would like to have had the risers about 2" higher. This is about 2.5 kg of metal.
The bottom has the dreaded gas pits. The sand is probably too wet. There are only a few really ugly ones, and they don't go more than about 2 mm deep. The core held its shape very well. It was hard to break apart, especially getting it out from the inside of the axe.
Comparison -- bottom side of casting. If you look closely, you can see that the casting picked up the detail of the cellophane tape that was covering the peg holes on the pattern.
Now to cut it free and get it cleaned up!
(There are a few unincluded images and a bit more information in the Imgur album here: https://imgur.com/a/RdMpU5k )
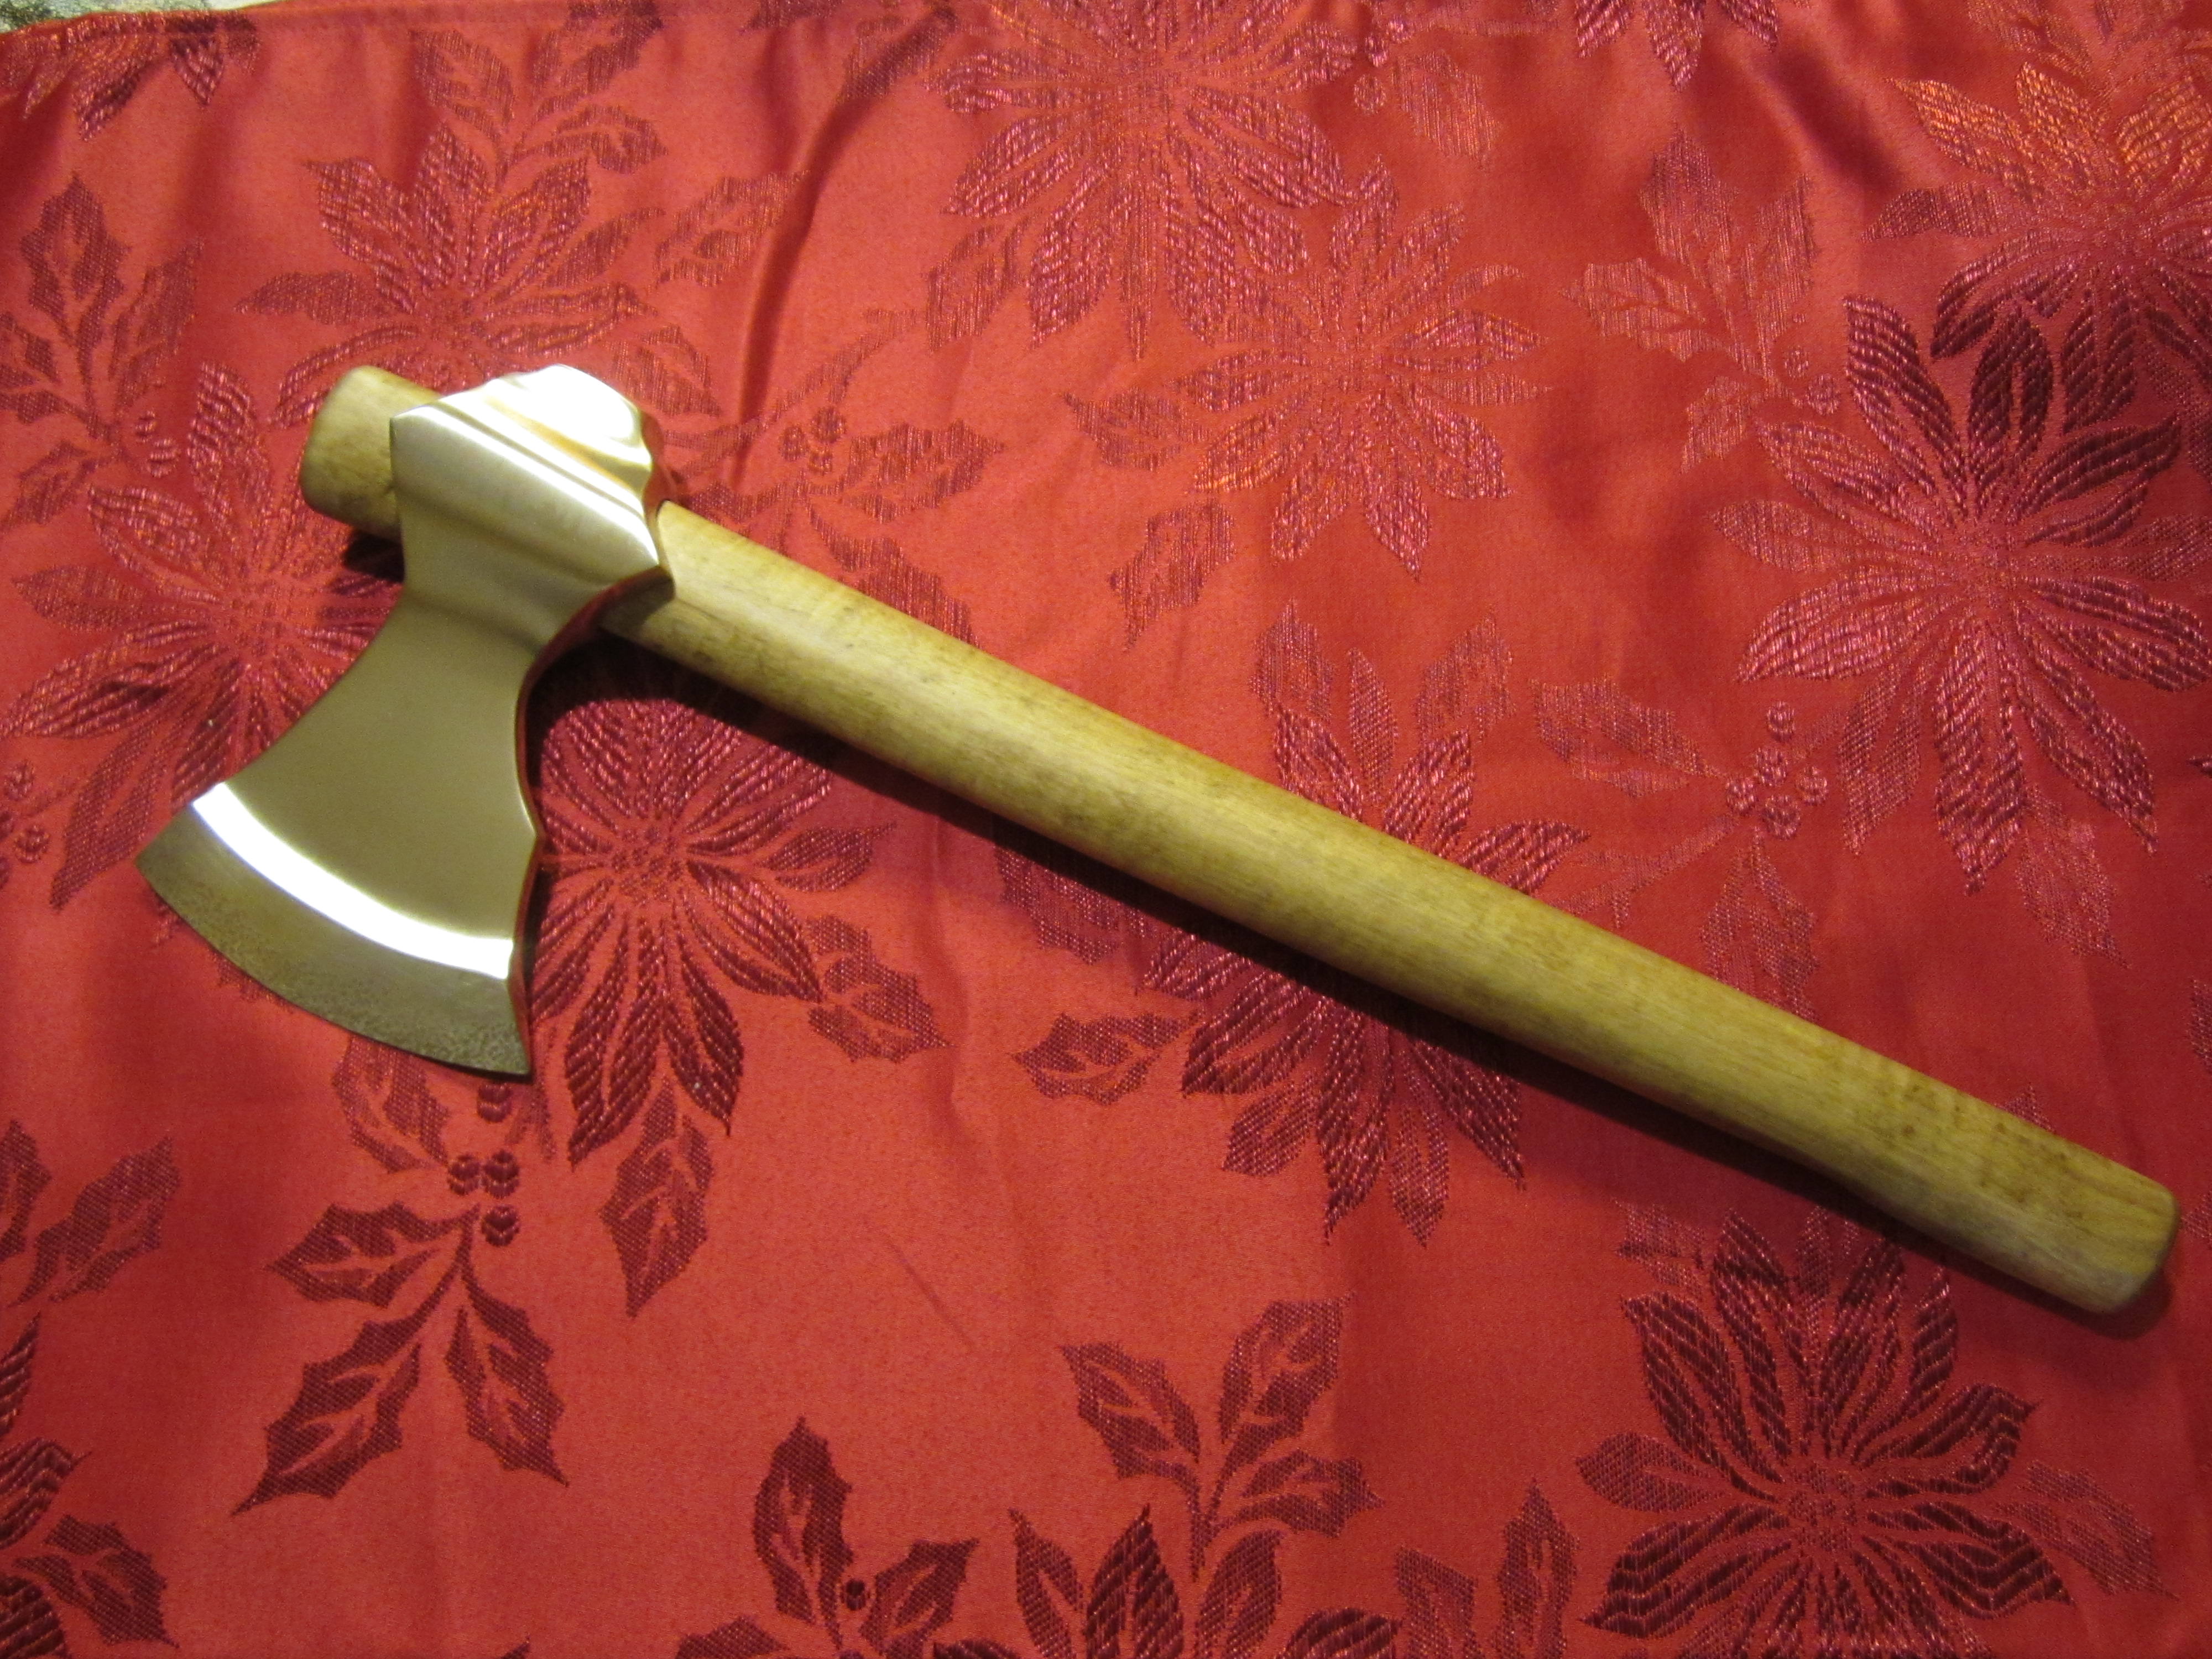
Finished aluminum bronze hand axe. Handle is maple (with a little bit of curl in spots.) Axe handle is 17" long. Axe head is 6 1/4" from blade to poll, and edge is 4 1/4" long. Maple handle was split from a log and hand carved to size. Axe head weighs 1 pound 12.4 ounces -- 804 grams.
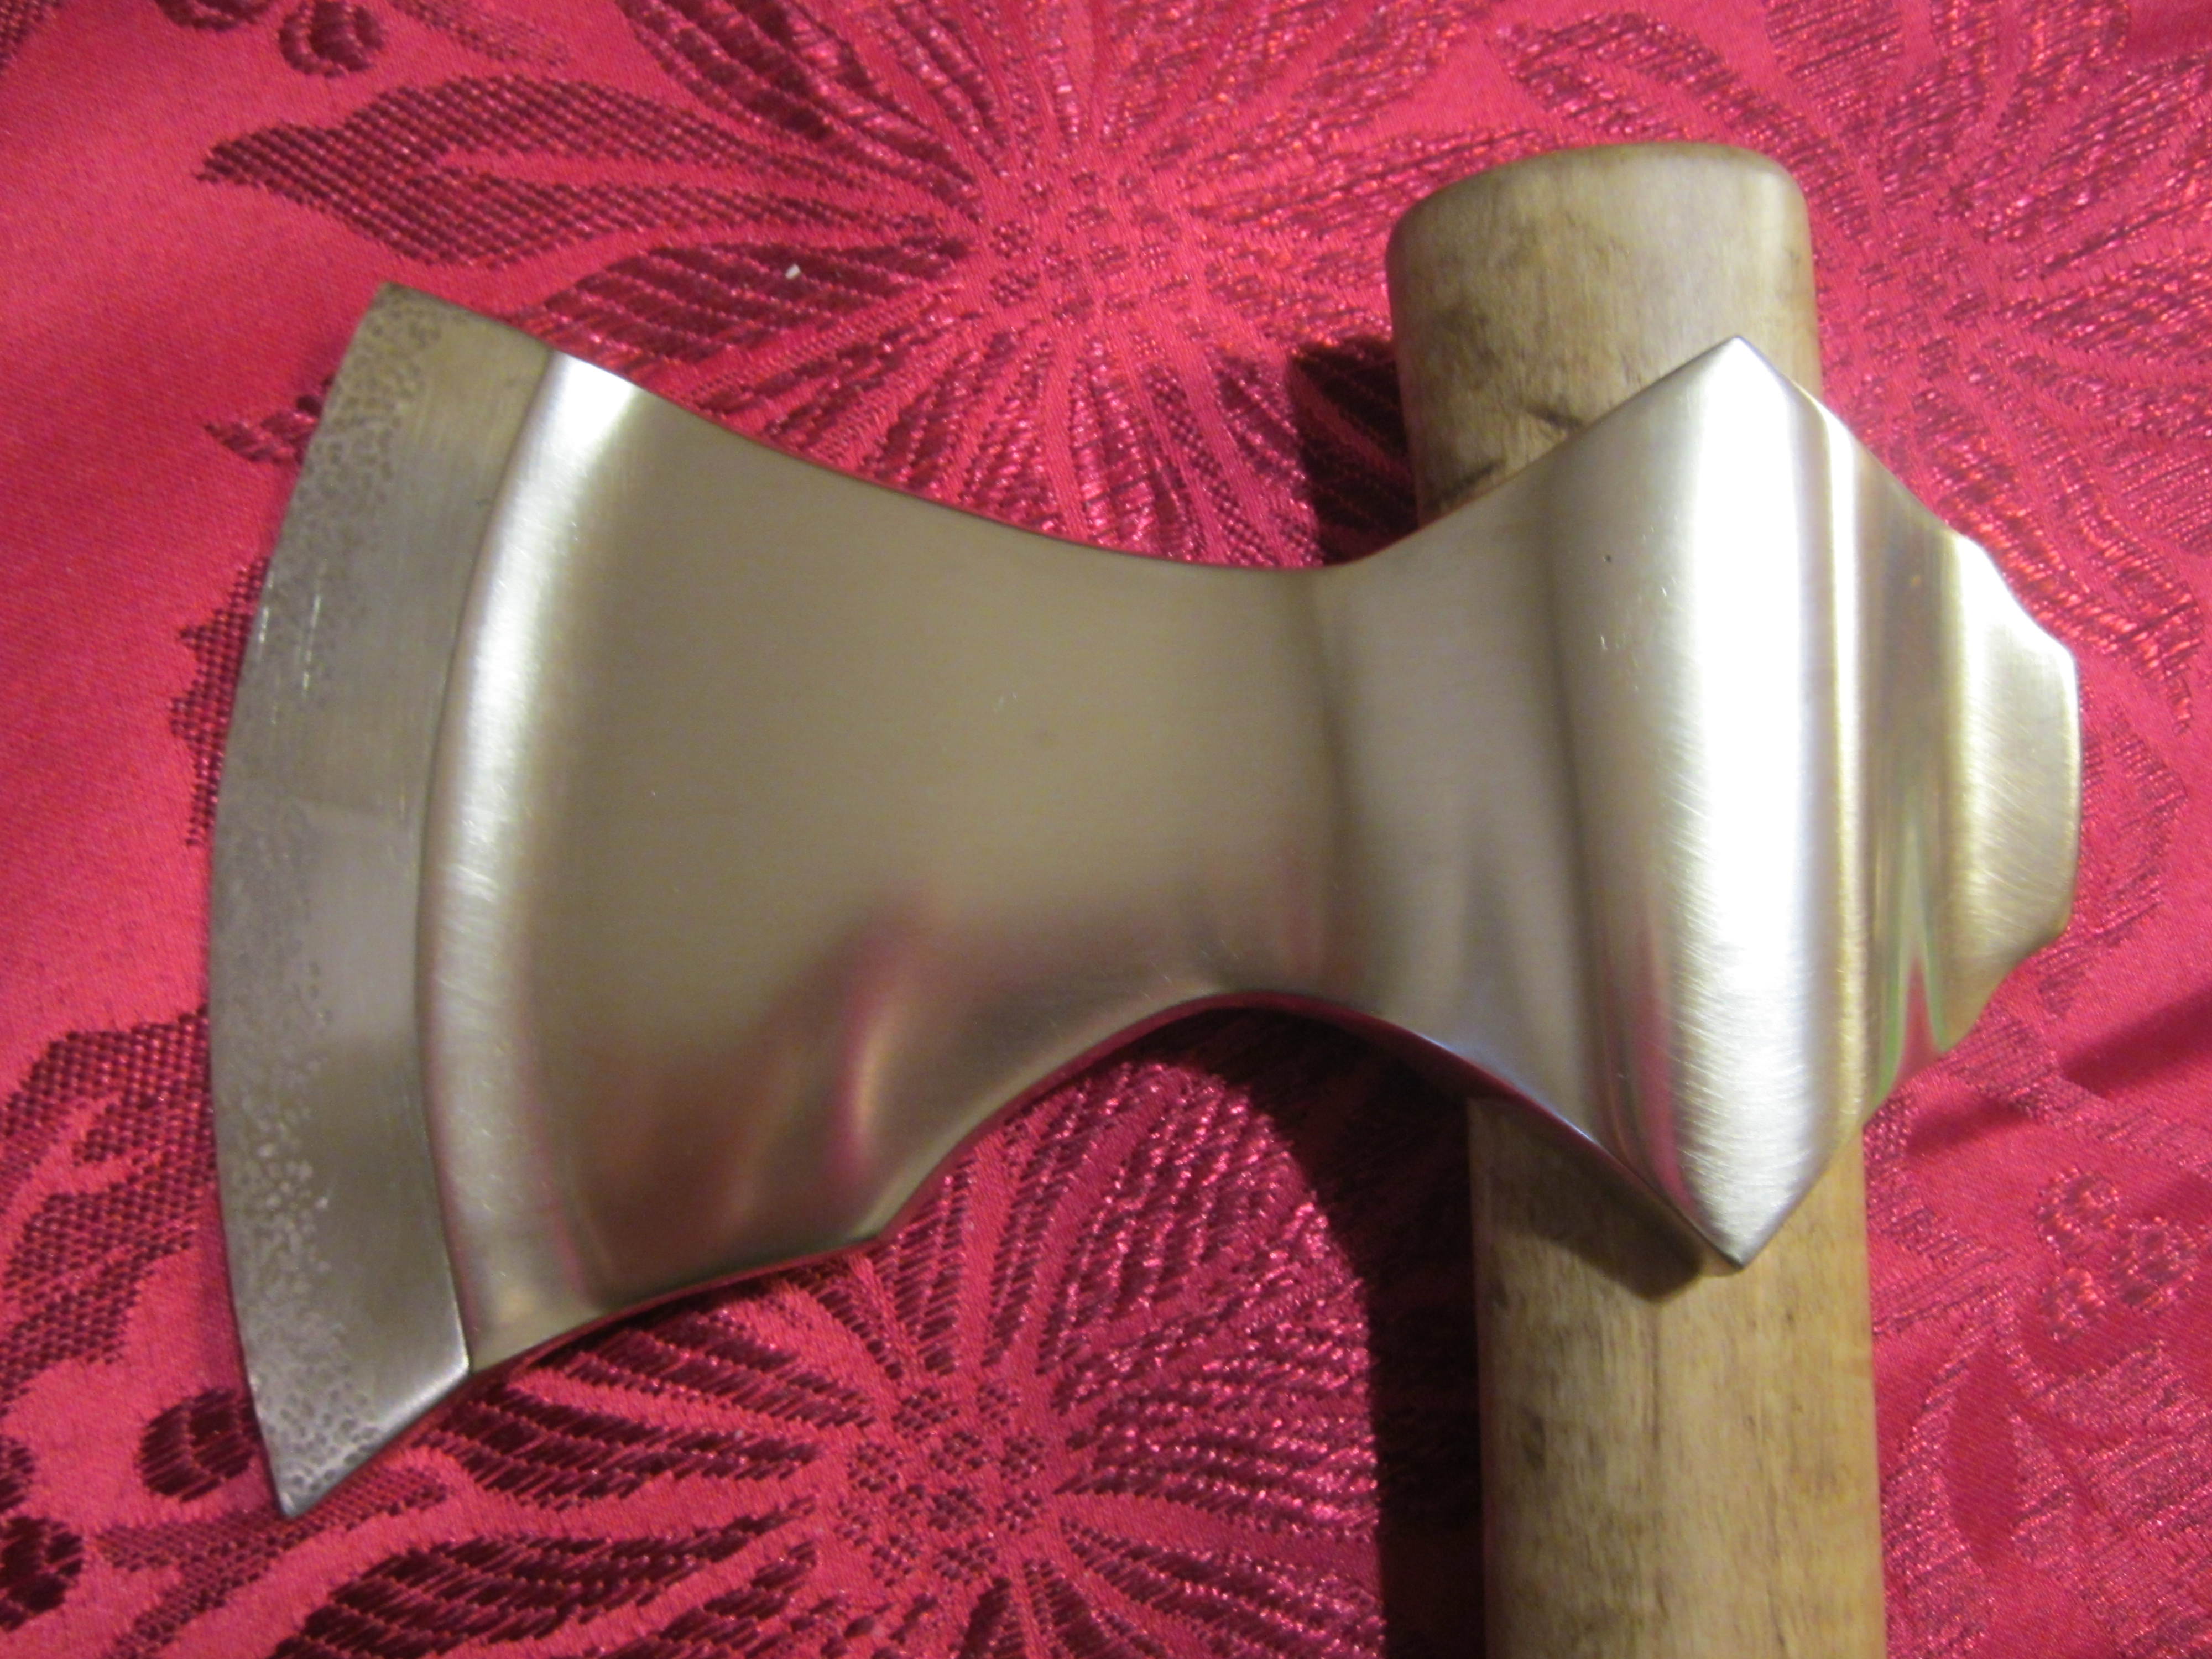
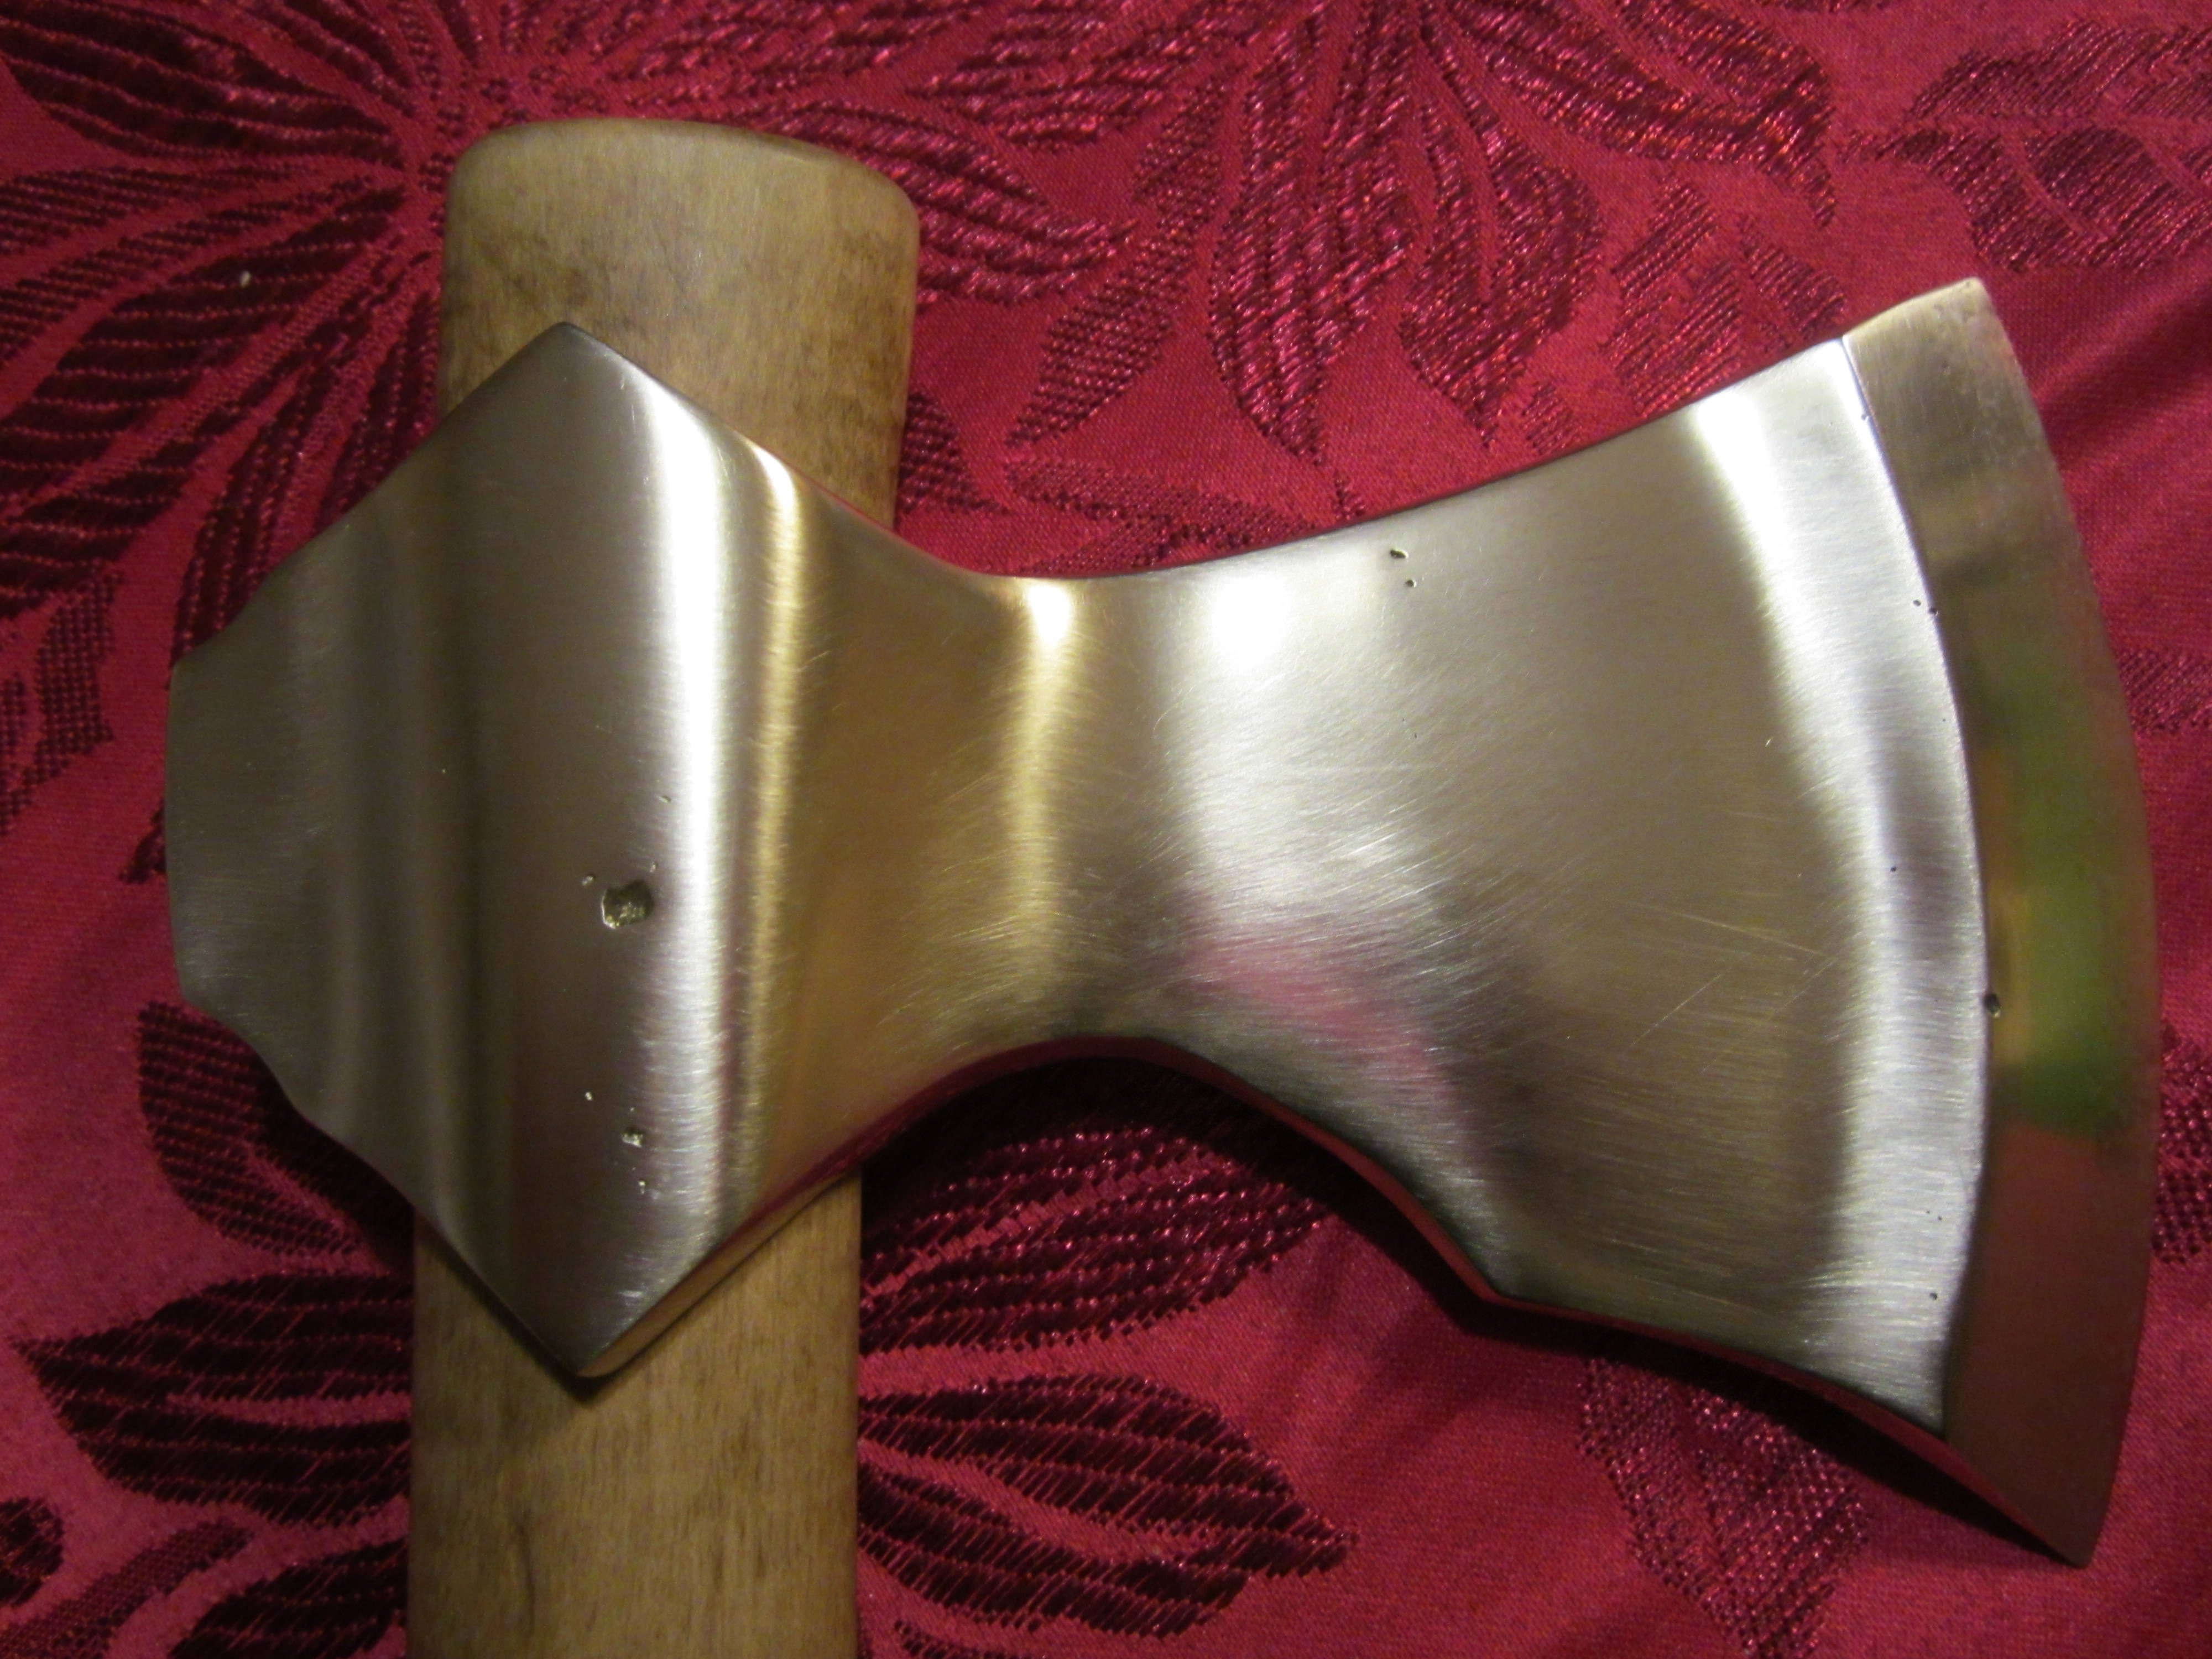
Left side of axe head. This side was the top (cope) side of the casting, and the rough casting had very little pitting on it. You can see that the edge of the blade has been peened. The surface has been sanded to an 800 grit.
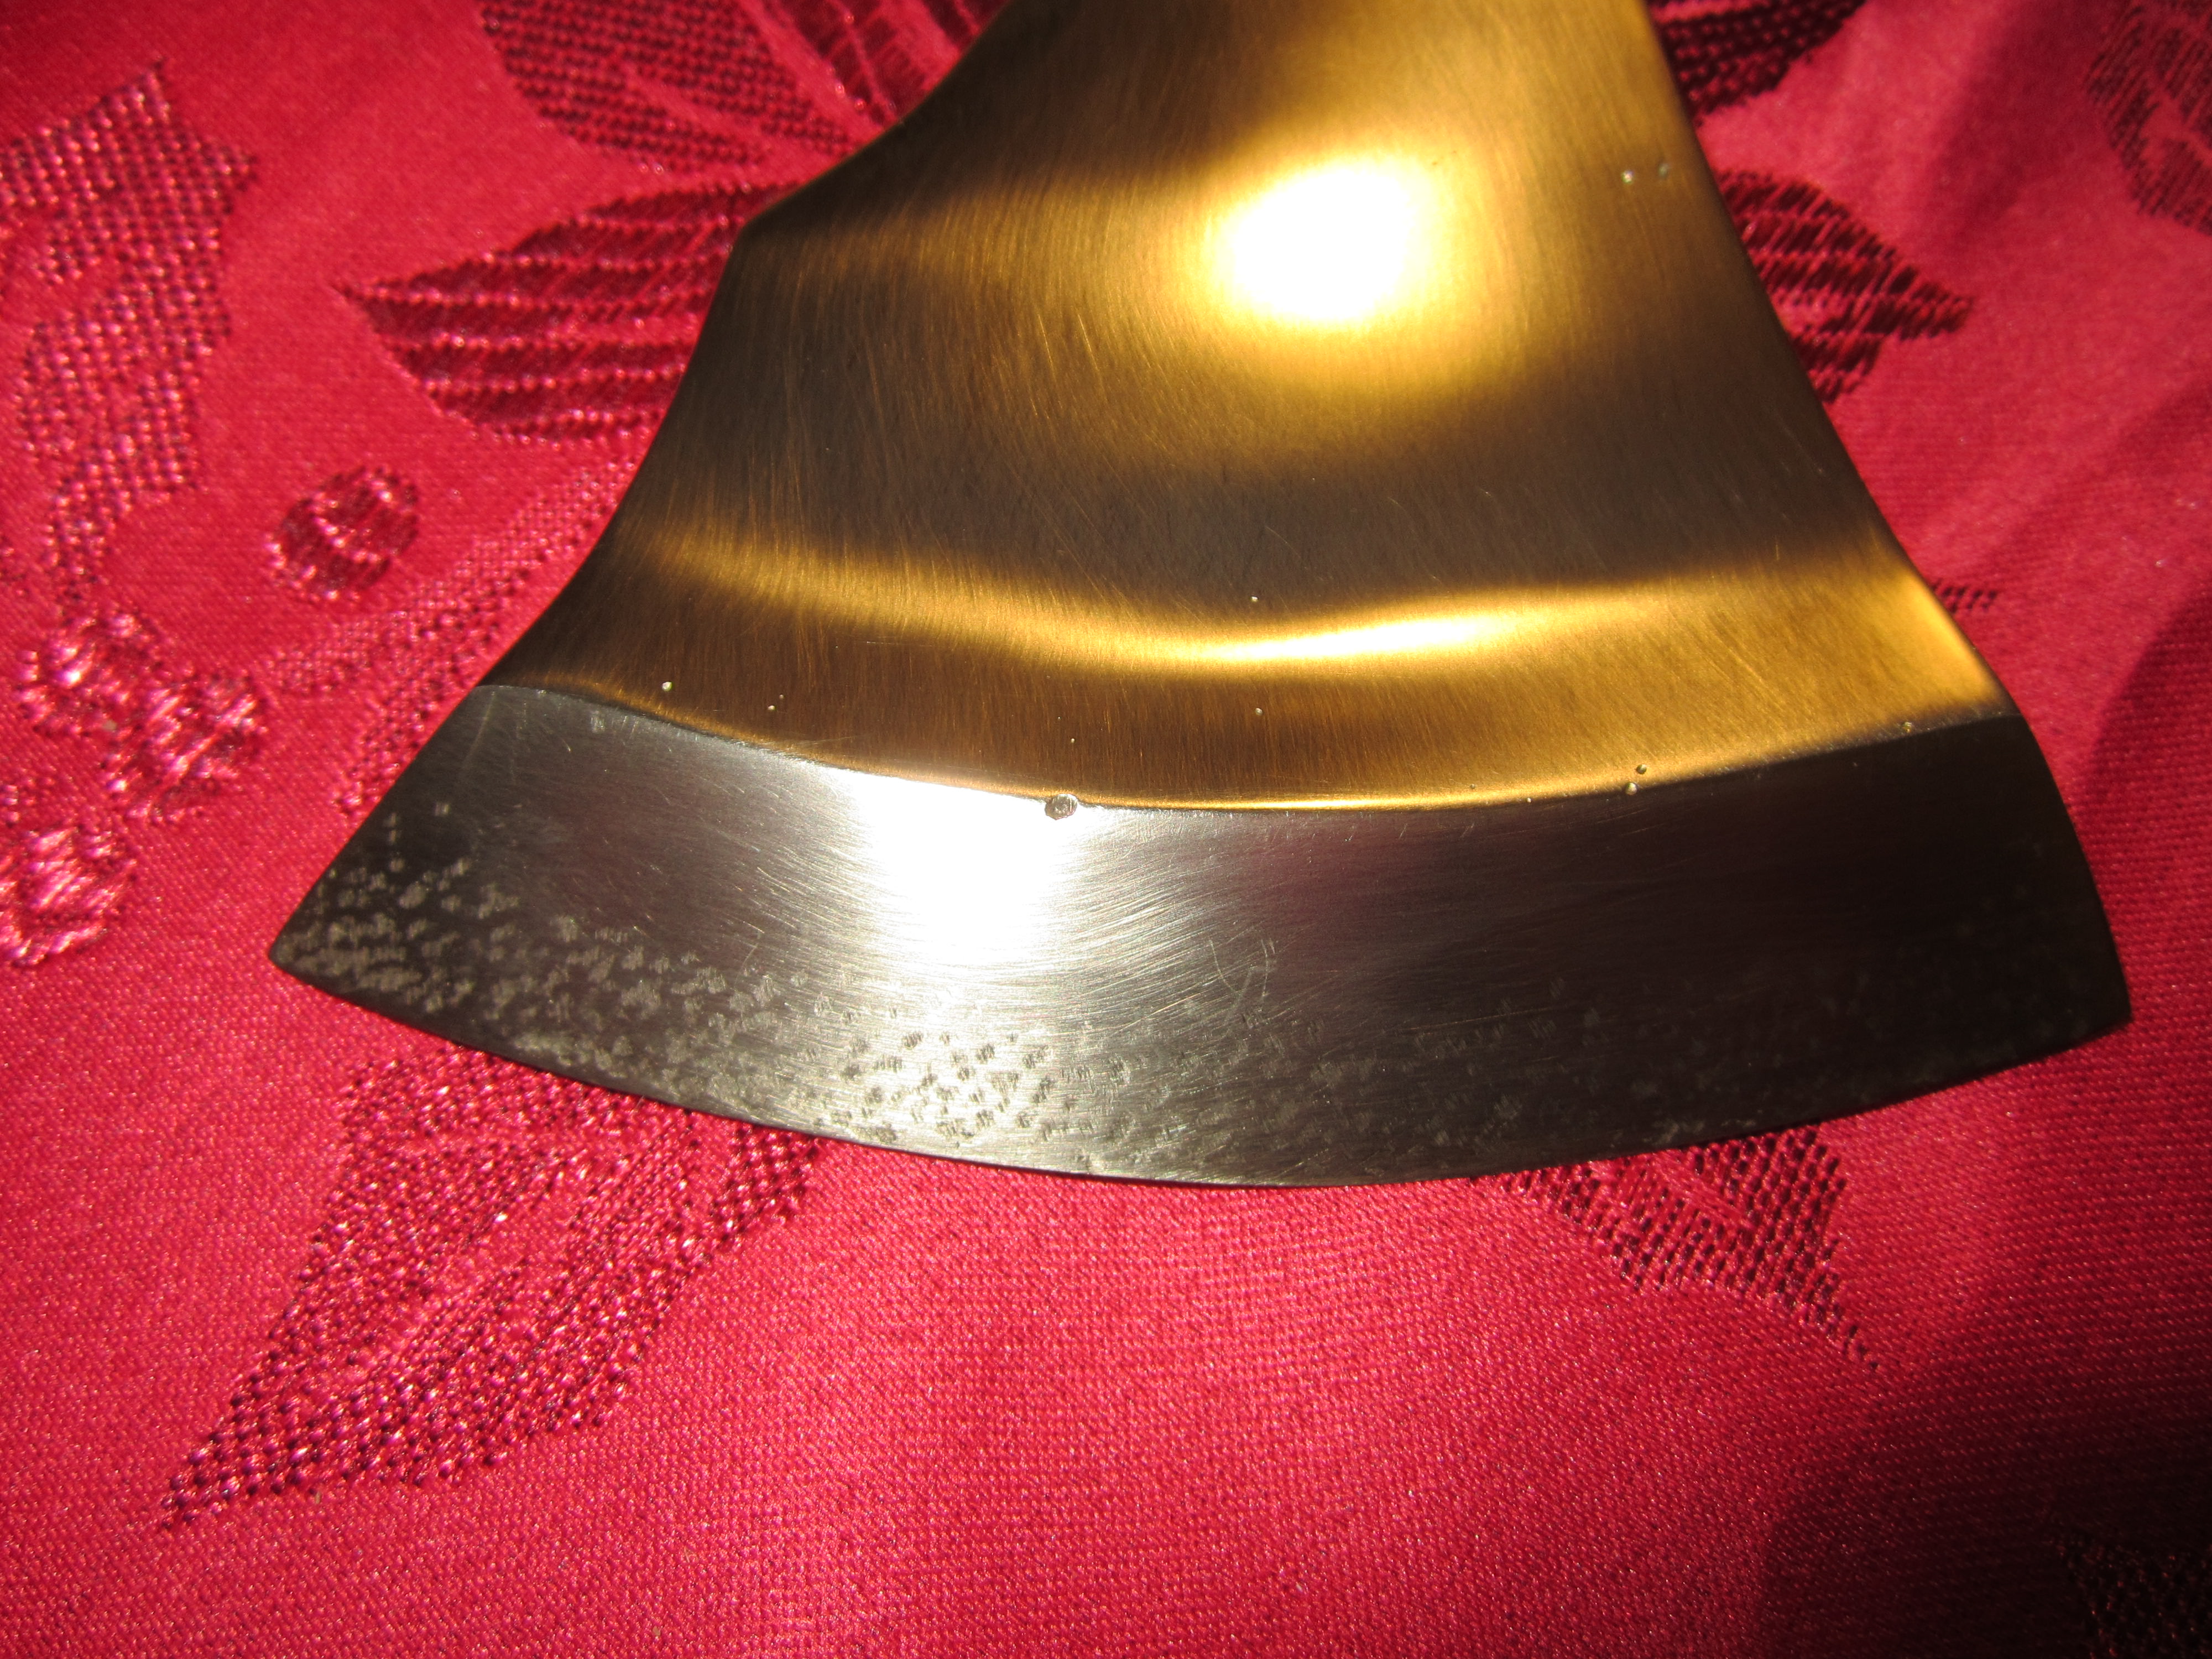
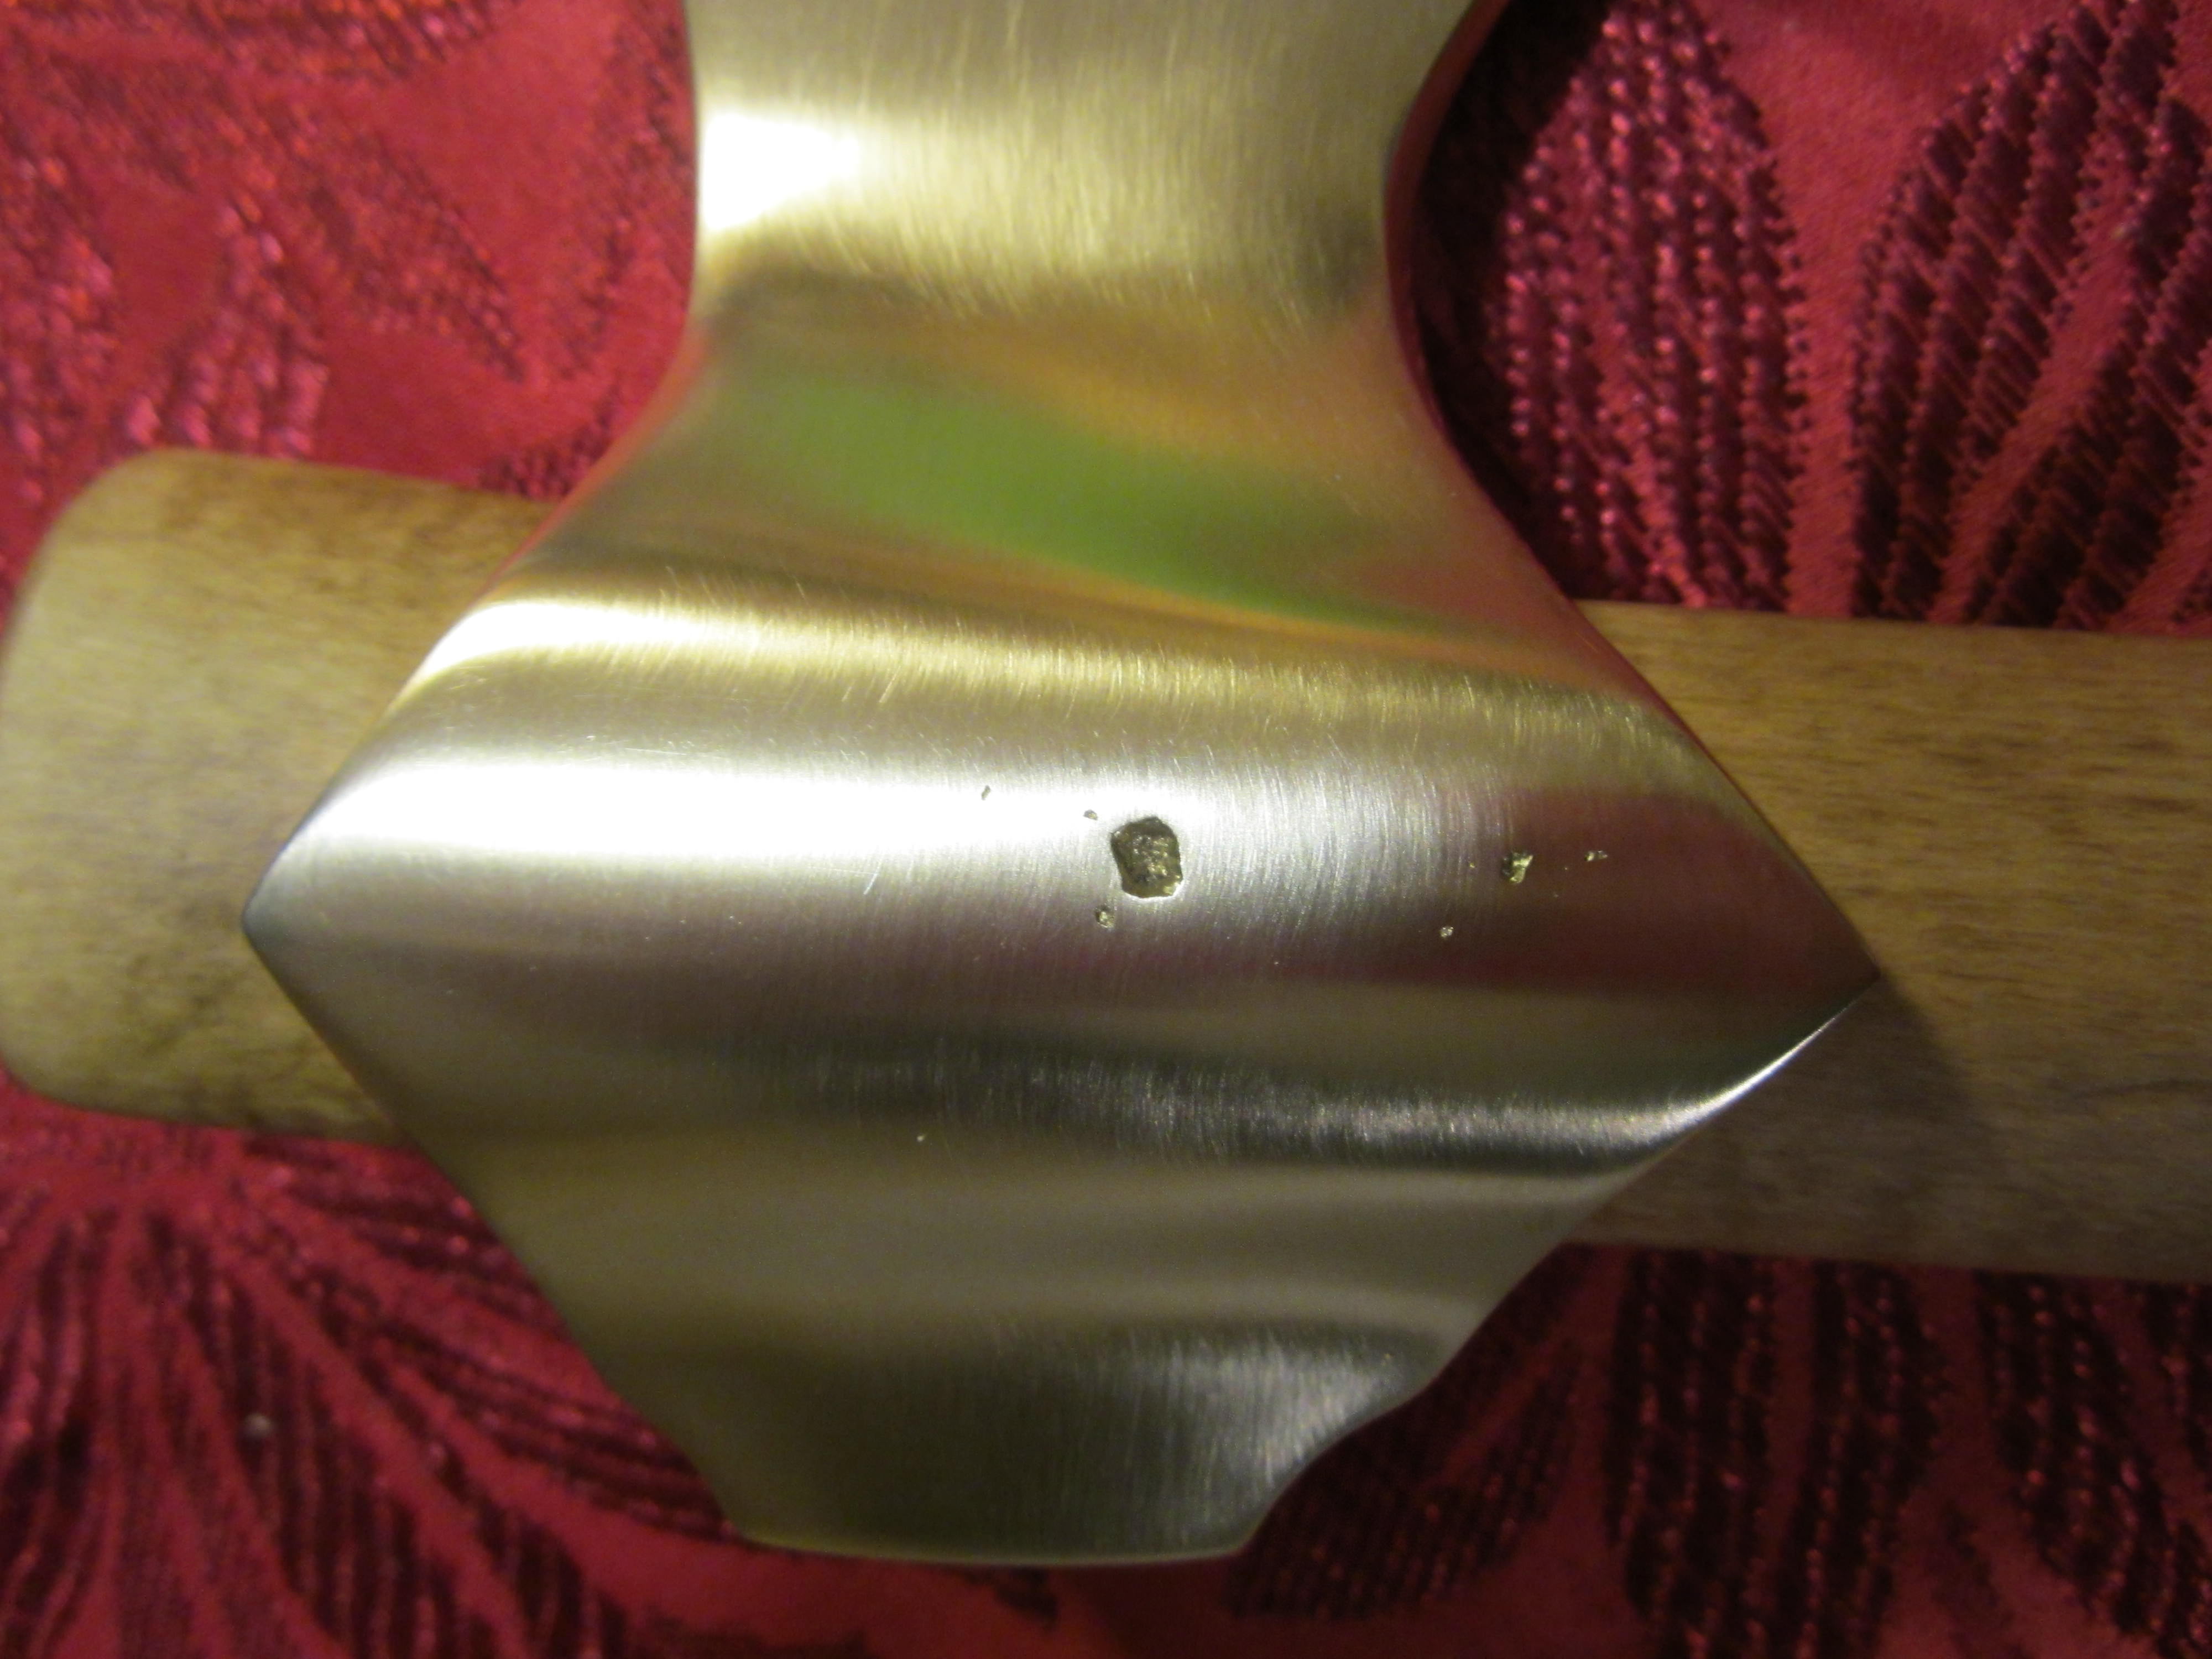
Right side of axe head. This side was the bottom (drag) side of the casting. It was fairly heavily pitted, but I was able to grind out most of the pits, although a few remain, including one large one that measures 1/8" -- 3mm -- in diameter and about 2mm deep.
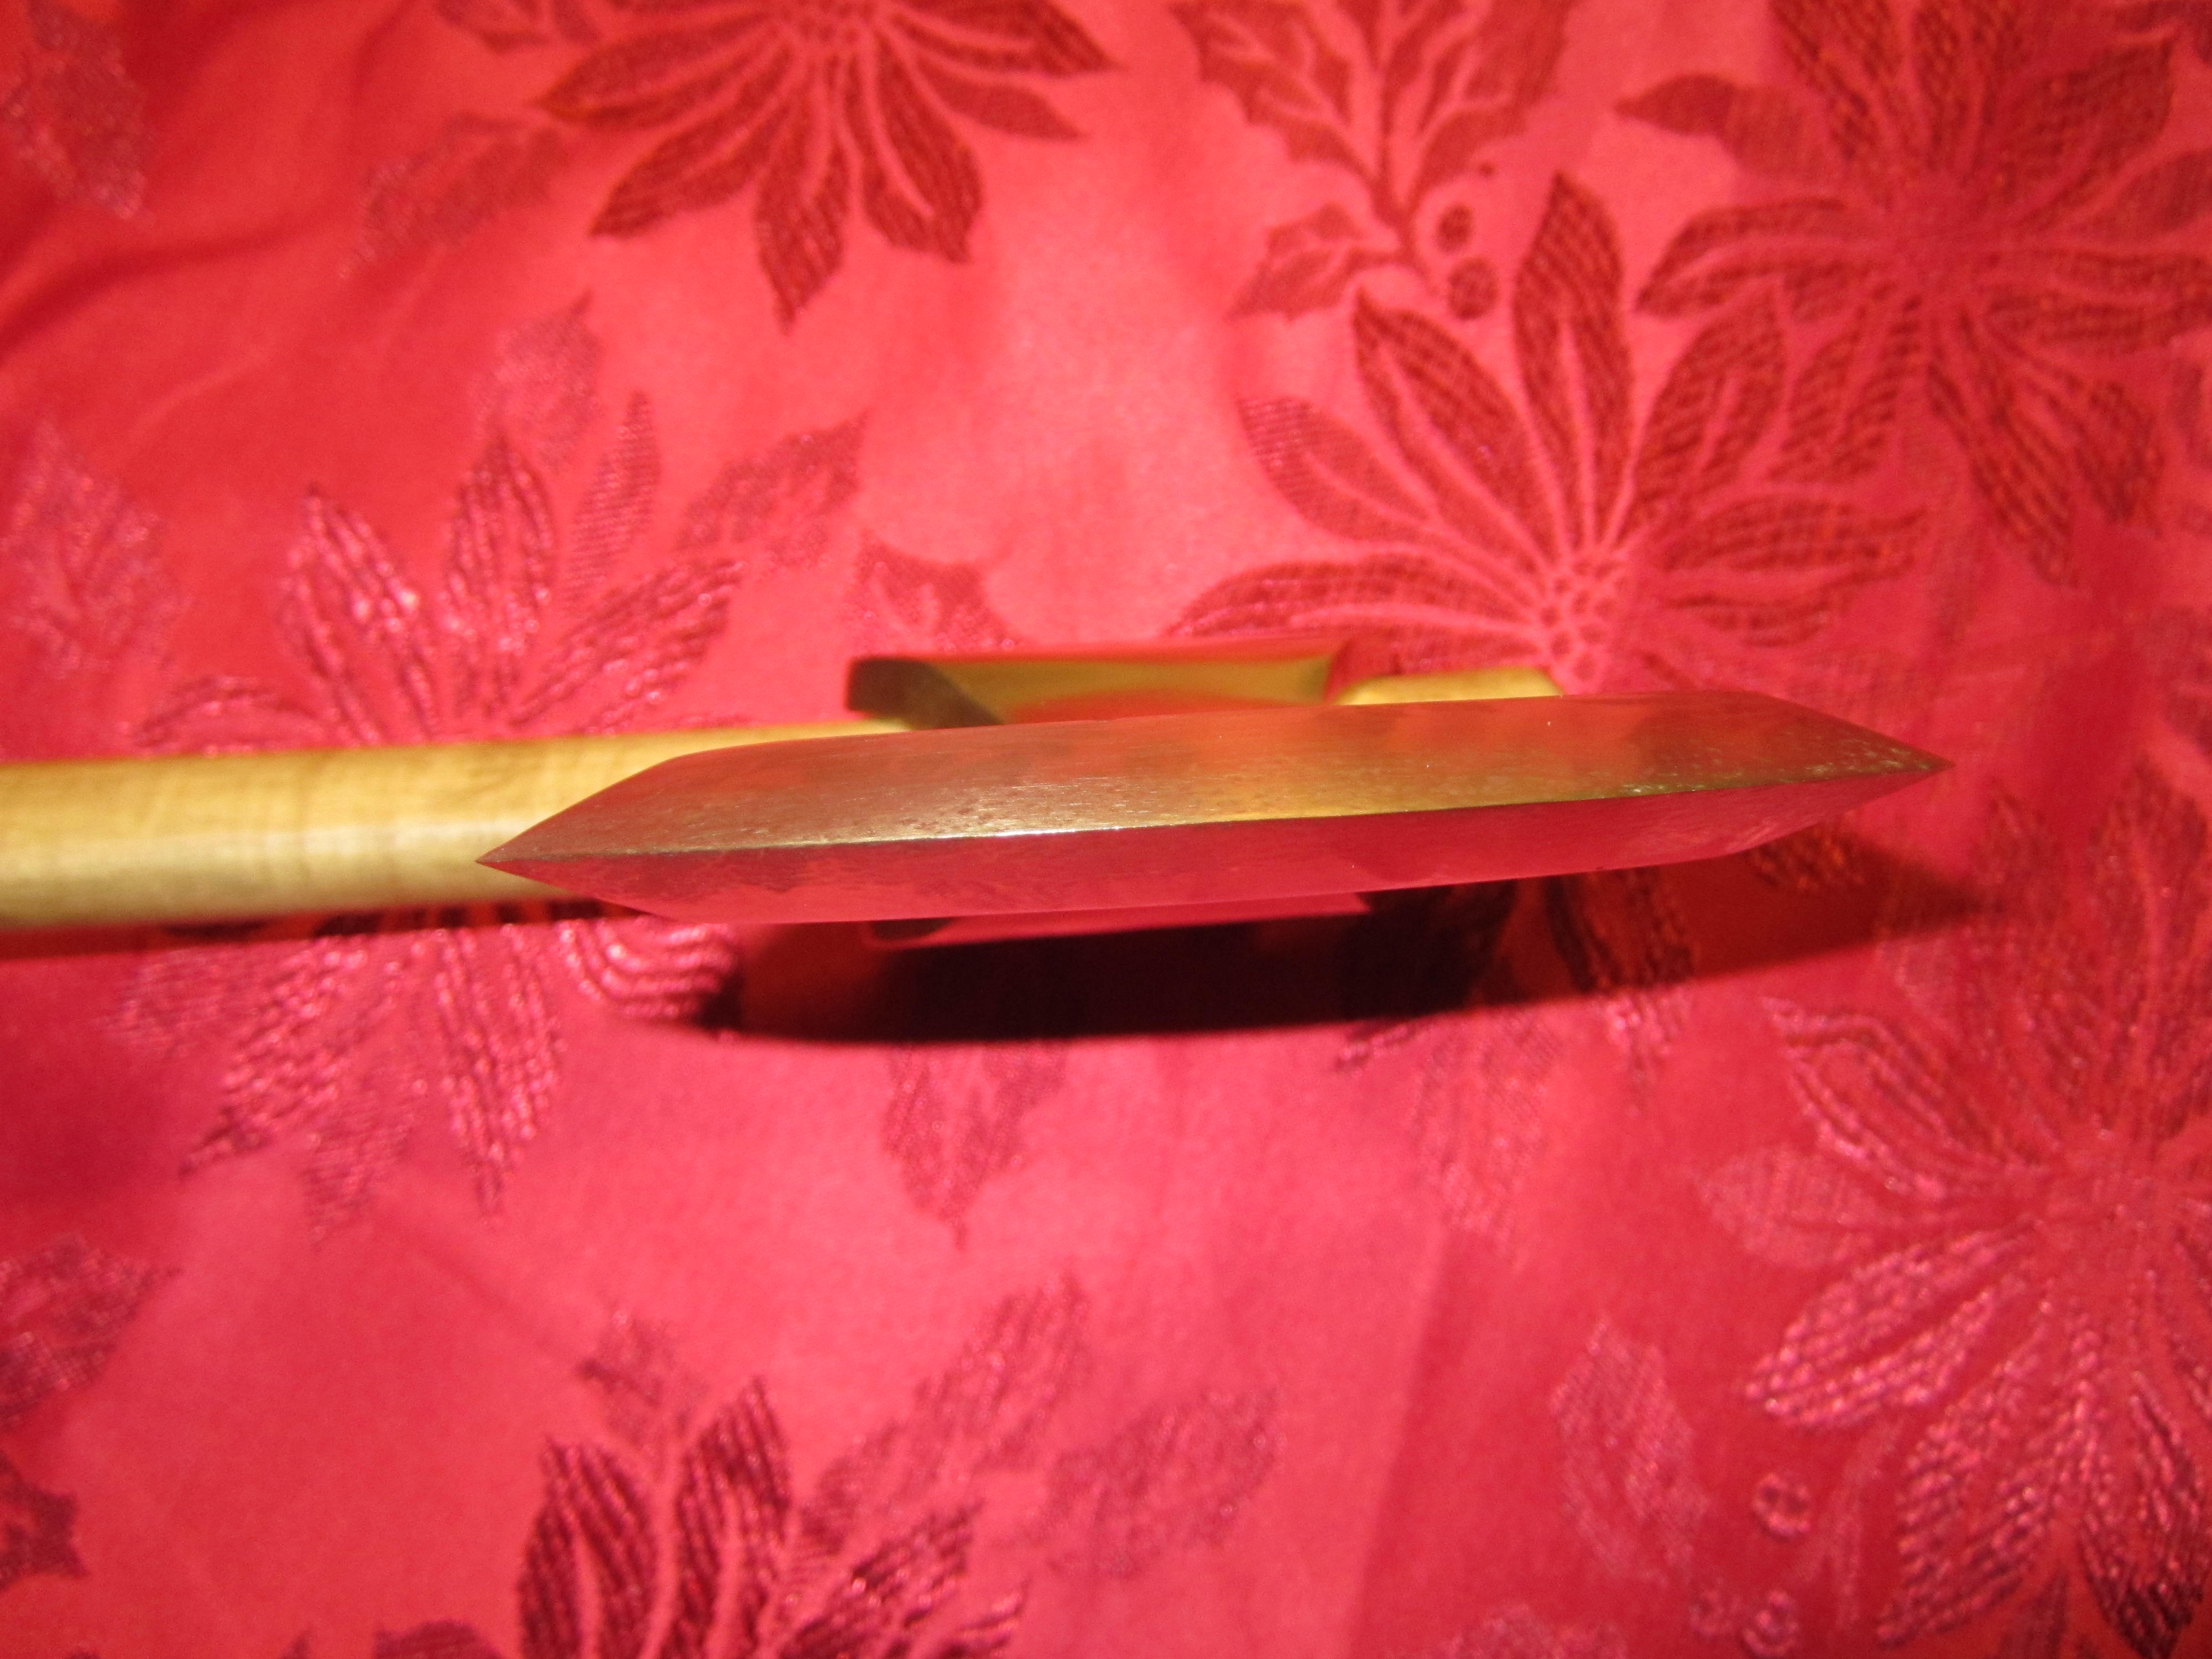
Edge of axe. The edge is sharp enough to chop with, but it won't slice paper easily. I haven't actually sharpened it properly, but have just filed it to an edge and sanded it before peening. I chopped a 2" square piece of maple with this edge and it did not dull any. You can see a little bit of the curl in the maple handle.
Close-up of the peened edge. I might peen this side some more. The other side is peened a little bit more than this. The peening work hardens the aluminum bronze so that it will hold an edge without deforming.
This is the large pit on what was the bottom (drag) side of the axe. Again, it's about 3mm in diameter and 2mm deep.
Left hand view of the axe.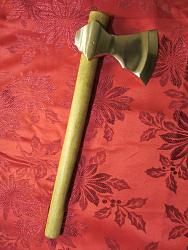


 Reply With Quote

Bookmarks