Free 186 More Best Homemade Tools eBook:  
Get 2,000+ tool plans, full site access, and more.

User Tag List

Page 1 of 2 1 2 LastLast
Results 1 to 10 of 12

Thread: Ball and radius turning attachment

  1. #1
    Supporting Member Dimitris Polychronis's Avatar
    Join Date
    Nov 2018
    Location
    Athens-Greece
    Posts
    142
    Thanks
    150
    Thanked 285 Times in 54 Posts

    Dimitris Polychronis's Tools

    Ball and radius turning attachment

    Hi again,

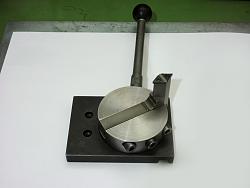
    The ball and radius turning attachment is the very first tool I’ve made for my lathe; in reality the design¹ and the making of this tool is shared 50-50 with an old friend from a machining forum here in Greece.
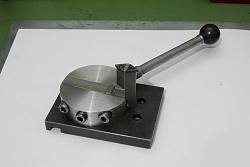
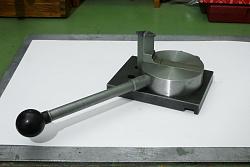
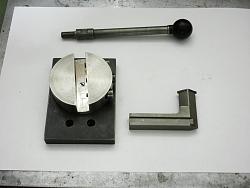
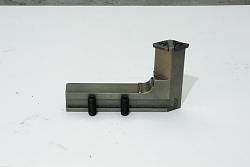
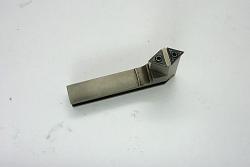
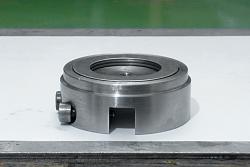
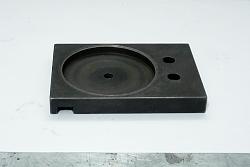
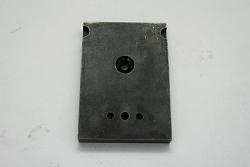
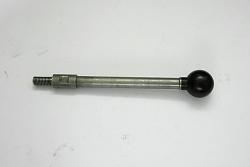
    Ball and radius turning attachment-p1140363-large-.jpg Ball and radius turning attachment-p1140364-large-.jpg Ball and radius turning attachment-p1140366-large-.jpg Ball and radius turning attachment-p1140368-large-.jpg

    In one of the first web searches I found Steve Bedair's ball turning toolpost: Steve Bedair / Ball Turning Toolpost
    nice design but not exactly what I wanted for my lathe.
    I continued my search and that time was when I found for the first time toolsandmods. One of the projects there was a ball turning tool: http://www.toolsandmods.com/docs/ral...rning_tool.pdf the tool is designed to fit on 7 x 12” mini lathes, similar to the Sieg C3.
    Looking at the drawings I found that the cross slide of a 7 x 12” mini lathe had the same design with my lathe but with smaller dimensions; it was what I needed, the only difference was that it couldn't turn radius on parts and that was what I added in the original design¹. From that it was easy to make the necessary changes on the measurements.

    Now as I have mention in another post I don’t know how to make drawings, so my forum friend (who had a milling machine) helped me by making the drawing for the tool based on my measurements and the idea for the radius turning feature. He drew up the tool on Sketchup so that we have it as basic reference.
    I did the needed lathe work, filing and finishing, he did all the milling operations. After we finished with the tool we agreed to post it on Sketchup’s 3D warehouse so to be free for download from anyone that would been interested.

    Here is the link: https://3dwarehouse.sketchup.com/mod...ing-attachment note that you can see or change the dimensions after you download it. The dimensions of the tool are for the Optimum D180x300 lathe or similar in center height lathes².

    I have to mention that the size of this tool is overkilled, meaning that it doesn't need to have so wide base plate, a round body of this size as well as a lengthy arm like my tool has; let me explain a bit more.
    The tool it can make a sphere up to 59 mm in diameter (it’s not wise though, to exceed the safe limit of the 50mm). So having a main body of 64.50mm in diameter and an arm with 70mm in length, the only that can give is trouble; because you will need to keep bigger distance from the chuck when you will need to make small spheres since the base of the arm will protrudes much more from the main body and could possibly hit on the chuck. Plus that you will have an overhanging part, with more flex and vibrations (depending on the diameter of the material in use) as it will want to climb on the cutting tip especially on potential deeper cuts.

    To sum up, if you have a lathe similar with mine and you interested to make this tool, I suggest you to make the main body somewhere around 55mm in diameter, a base plate with an appropriate size so to accommodate the diameter of the body and as for the arm must not exceed 60mm in length.
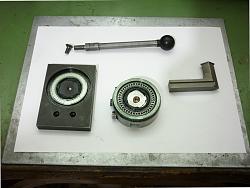
    Ball and radius turning attachment-p1140369-large-.jpg Ball and radius turning attachment-p1140370-large-.jpg

    Now, one of our mistakes was that we didn’t think to draw and make a second slot³ on the base of the arm so to make it more secure when I wanted to reverse it for turning radiuses.
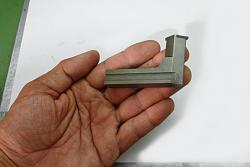
    Ball and radius turning attachment-p1140375-large-.jpg Ball and radius turning attachment-p1140376-large-.jpg

    As I said before the dimensions of the tool are for my lathe - Optimum D180x300 – having a center height² of 90mm; I have heard though for slight differences on the center height (+/- 1mm) in the exact model of my lathe from other hobbyist.
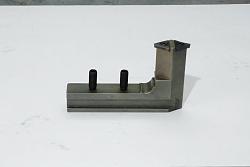
    So, in order for you to set the cutting tip precisely at the center height of your lathe I suggest you to do this: drill and tap two holes on the base of the arm for a 5 or 6mm set screws (it is important that the height of the set screws to not exceed the height of the arm’s base).
    Ball and radius turning attachment-p1140377-large-.jpg Ball and radius turning attachment-p1140378-large-.jpg

    Something that it’s also important, is that if you use set screws for height adjustment and you planning as well to make the side slots³ on the arm’s base, you must not forget to leave enough clearance for the up and down movement so the locking screws on the main body will not interfere while adjusting the height.
    Another advantage of using set screws for the height adjustment, is that you can set the cutting tip so as to have a positive, normal or negative rake (depending on the material you will turn, the size of the sphere or the arc you going to make and the depth of cut).

    I use TCMT 110204 carbide inserts for my tool, but it’s up to you what insert you want to use since that you can change the dimensions after you download the drawing.

    Ball and radius turning attachment-p1140379-large-.jpg
    The arm is the only, heat treated part (case hardened)

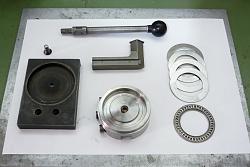
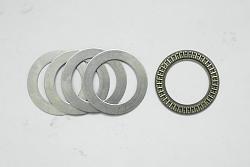
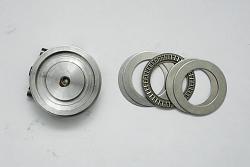
    The bore at the bottom of the main body was initially designed for using a 51107 thrust bearing but without the supplied washers, but I changed it because I realized that the hardened balls could wear out the base and the body with use. So, I used an SKF needle roller thrust bearing with 2 washers for each side (total thickness 6.0mm) so to reach the right height as the main body will set in the base plate as well as to have some clearance for preloading, that means that I had to decrease the depth of the bore by taking a cut at the face of the shoulder, so the depth of the bore became 5.93mm (I hope that this makes sense).
    Ball and radius turning attachment-p1140386-large-.jpg Ball and radius turning attachment-p1140387-large-.jpg Ball and radius turning attachment-p1140388-large-.jpg

    One last feature we’ve added to the design of this tool is the tiny shoulder on the base plate for keeping the movement of the body free and the bearing clean from metal chips or any other debris from turning.

    Ball and radius turning attachment-p1140389-large-.jpg

    The two hemispherical pockets you see on the upper corners on the bottom of the base plate, is for setting the base without to interfere with the oilers of the cross slide, something that you will not need to do if you make the base smaller in size.

    Ball and radius turning attachment-p1140391-large-.jpg

    As for the plastic ball on the handle...that was the first thing I've made with this tool.

    Ball and radius turning attachment-p1140392-large-.jpg

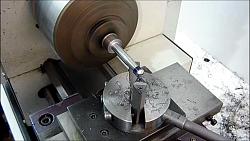
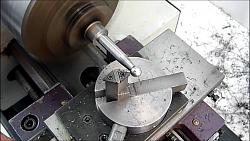
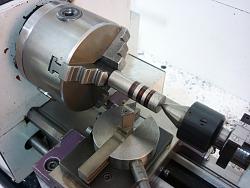
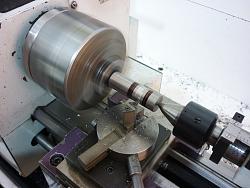
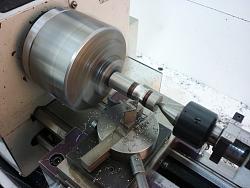
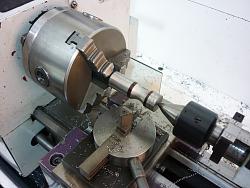
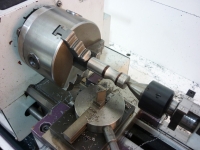
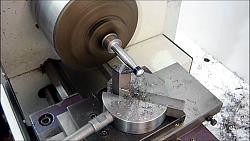
    Here are some pictures with the tool as it used
    Ball and radius turning attachment-p1130710-large-.jpg Ball and radius turning attachment-p1130711-large-.jpg Ball and radius turning attachment-p1130712-large-.jpg Ball and radius turning attachment-p1130728-large-.jpg Ball and radius turning attachment-p1130729-large-.jpg Ball and radius turning attachment-p1130732-large-.jpg Ball and radius turning attachment-p1130734-large-.jpg

    Unfortunately I don't have a video on building the tool, but I do have one while I’m using it to make a tool similar to a Snarling iron. I hope that you will find it interesting.


    All the best
    Dimitris

    186 More Best Homemade Tools eBook

  2. The Following 12 Users Say Thank You to Dimitris Polychronis For This Useful Post:

    12L14 (Jul 31, 2019), Altair (Jun 2, 2019), biggist (Today), DIYSwede (Jun 6, 2019), high-side (Jun 5, 2019), jdurand (Jun 3, 2019), Jon (Jun 3, 2019), markcawston (Jun 3, 2019), Metallurg33 (Oct 25, 2020), Ralphxyz (Jul 22, 2021), thehomeengineer (Oct 31, 2019), Toolmaker51 (Jun 3, 2019)

  3. #2
    Content Editor
    Supporting Member
    Altair's Avatar
    Join Date
    Aug 2013
    Posts
    11,894
    Thanks
    1,361
    Thanked 29,705 Times in 9,871 Posts


    Thanks Dimitris Polychronis! We've added your Ball and Radius Turning Attachment to our Lathe Accessories category,
    as well as to your builder page: Dimitris Polychronis's Homemade Tools. Your receipt:


    2000 Tool Plans

  4. The Following User Says Thank You to Altair For This Useful Post:

    Dimitris Polychronis (Jun 2, 2019)

  5. #3
    Supporting Member Frank S's Avatar
    Join Date
    Aug 2015
    Location
    Peacock TX
    Posts
    11,210
    Thanks
    1,982
    Thanked 8,785 Times in 4,206 Posts

    Frank S's Tools
    great how to description of the process and the reasons you made your tool as you did. For me pictures and words are a 1000 times better than videos of the builds. videos of the finished tool in use tells everything else that may have been missed.
    Never try to tell me it can't be done
    When I have to paint I use KBS products

  6. The Following 2 Users Say Thank You to Frank S For This Useful Post:

    Dimitris Polychronis (Jun 3, 2019), Toolmaker51 (Jun 3, 2019)

  7. #4
    Supporting Member Dimitris Polychronis's Avatar
    Join Date
    Nov 2018
    Location
    Athens-Greece
    Posts
    142
    Thanks
    150
    Thanked 285 Times in 54 Posts

    Dimitris Polychronis's Tools
    Quote Originally Posted by Frank S View Post
    great how to description of the process and the reasons you made your tool as you did. For me pictures and words are a 1000 times better than videos of the builds. videos of the finished tool in use tells everything else that may have been missed.
    Thank you very much, Frank! I really appreciate your comment!!

    I agree with you; there is though an exception and this is, if a video has the right editing, the necessary explanations upon machining operations, shows any mistakes and has all the side information to help the viewer to understand what he or she sees, then this video could be almost equal with pictures and words. I say almost, because the relation of time with the video creates a boundary, pictures and words haven't any boundaries.

    All the best
    Dimitris

  8. #5
    Supporting Member bruce.desertrat's Avatar
    Join Date
    Nov 2017
    Posts
    787
    Thanks
    559
    Thanked 668 Times in 357 Posts

    bruce.desertrat's Tools
    Nice design, going into my ideas folder.

    ON the 7x12 mailing list recently there was considerable discussion of a different style of tool for this task:

    https://groups.io/g/7x12MiniLathe/topic/31659090#105688

    And a DIY version: https://groups.io/g/7x12MiniLathe/me...0,2,0,31692913 (there are also links to other home-made version in the first discussion)


    ANd I'm with Frank S, definitely. I greatly admire the care and detail you put into your build descriptions.
    Last edited by bruce.desertrat; Jun 3, 2019 at 05:58 PM.

  9. The Following 2 Users Say Thank You to bruce.desertrat For This Useful Post:

    Dimitris Polychronis (Jun 4, 2019), thehomeengineer (Oct 31, 2019)

  10. #6
    Supporting Member Toolmaker51's Avatar
    Join Date
    Feb 2016
    Location
    Midwest USA
    Posts
    5,331
    Thanks
    7,042
    Thanked 2,980 Times in 1,893 Posts

    Toolmaker51's Tools
    So far, my vote also leans toward still graphics over video. The paragraphs dealing with bearings and the semi-labyrinth seal are rarely discussed.
    I'd be tempted adding a small pitch adjustment screw, for easy incremental changes.
    Sincerely,
    Toolmaker51
    ...we'll learn more by wandering than searching...

  11. The Following User Says Thank You to Toolmaker51 For This Useful Post:

    Dimitris Polychronis (Jun 4, 2019)

  12. #7
    Supporting Member Dimitris Polychronis's Avatar
    Join Date
    Nov 2018
    Location
    Athens-Greece
    Posts
    142
    Thanks
    150
    Thanked 285 Times in 54 Posts

    Dimitris Polychronis's Tools
    Thank you Bruce! Glad to know that you find it interesting!

    Yes I know Turnado, I have seen the video of how it works, it’s great. This tool can do many things besides spheres and arcs, Gary from eccentricengineering did a great job on this tool; in fact I have two of his tools, the diamond tool holder and the FoR inverted parting tool holder.

    As for the homemade versions of the Turnado, are very interesting too; it’s worth the effort to make something like this because it’s more easy to use and gives to the user the flexibility for creating many intricate shapes instead of the two basic shapes that my tool does.
    I think that the only advantage of tool like mine versus the Turnado is that if the moving arm has dovetails and a small leadscrew as well as a measuring scale on the body, then it could create very accurate spheres and arcs (just a thought).

    Thanks once again for your comment Bruce!

    All the best
    Dimitris

  13. #8
    Supporting Member Dimitris Polychronis's Avatar
    Join Date
    Nov 2018
    Location
    Athens-Greece
    Posts
    142
    Thanks
    150
    Thanked 285 Times in 54 Posts

    Dimitris Polychronis's Tools
    Thanks for your comment Toolmaker 51, I appreciate it!

    Although I slightly disagree with you, referring to pictures vs video, I understand and respect your opinion!
    As I wrote to Bruce, if the moving arm has dovetails, a leadscrew and a measuring scale on the body, then it would be easy on using and very accurate.

    As for the bearings and the semi-labyrinth seal you said; I'm not a qualified technician and my knowledge cannot cover this subject. The only that I can say, is that the tool disassembled and cleaned first time after making it (for the needs of this post) and I didn't found metal chips inside the bearing, so the thought we've had - my friend and I - for adding the tiny shoulder on the base worked perfect.

    Regards from Greece
    Dimitris

  14. #9
    Supporting Member Toolmaker51's Avatar
    Join Date
    Feb 2016
    Location
    Midwest USA
    Posts
    5,331
    Thanks
    7,042
    Thanked 2,980 Times in 1,893 Posts

    Toolmaker51's Tools
    Quote Originally Posted by Dimitris Polychronis View Post
    Thanks for your comment Toolmaker 51, I appreciate it!

    Although I slightly disagree with you, referring to pictures vs video, I understand and respect your opinion!
    As I wrote to Bruce, if the moving arm has dovetails, a leadscrew and a measuring scale on the body, then it would be easy on using and very accurate.

    As for the bearings and the semi-labyrinth seal you said; I'm not a qualified technician and my knowledge cannot cover this subject. The only that I can say, is that the tool disassembled and cleaned first time after making it (for the needs of this post) and I didn't found metal chips inside the bearing, so the thought we've had - my friend and I - for adding the tiny shoulder on the base worked perfect.

    Regards from Greece
    Dimitris
    Often times, I'm not very clear in my statements. . .
    Your discussion of bearings and the semi-labyrinth seal is ideal; those considerations rarely appear in similar posts.
    You and your friend's design abilities are good after all; qualified enough to seal chips out of the works! We all know of commercial items that can't get that right!

    Going to rummage through my horde of used serviceable bearings for a set; I've put off a radius attachment WAY too long.
    Sincerely,
    Toolmaker51
    ...we'll learn more by wandering than searching...

  15. The Following User Says Thank You to Toolmaker51 For This Useful Post:

    Dimitris Polychronis (Jun 5, 2019)

  16. #10
    Supporting Member Dimitris Polychronis's Avatar
    Join Date
    Nov 2018
    Location
    Athens-Greece
    Posts
    142
    Thanks
    150
    Thanked 285 Times in 54 Posts

    Dimitris Polychronis's Tools
    Thanks again Toolmaker51,

    Glad to hear that; anyway, I don't consider myself an expert in what I do, but I keep trying to get better.

    I would really like to see your ball-radius attachment, I'm sure it's gonna be perfect!

    All the best
    Dimitris

Thread Information

Users Browsing this Thread

There are currently 1 users browsing this thread. (0 members and 1 guests)

Tags for this Thread

Bookmarks

Posting Permissions

  • You may not post new threads
  • You may not post replies
  • You may not post attachments
  • You may not edit your posts
  •