
 LinkBack URL
 About LinkBacks


Dehumidifier to Leaf vac/shredder/blower
The title may be misleading but there really is a dehumidifier involved.
Trees in the yard are maturing. They produce way more leaves than can be
effectively mulched into the grass. Shredded leaves mixed with grass clippings
break down quickly and make good garden mulch. (we do not use herbicides
and pesticides on our lawn) I am getting too old to rake leaves. The grand kids
are not old enough.
I have looked at leaf vacs that tow behind the mower, suck leaves from
the discharge chute and blow them into a bin. I dont need another piece of
equipment with an engine to maintain and take of space. Also, there is the
cost, $1500-$2500 depending on the brand.
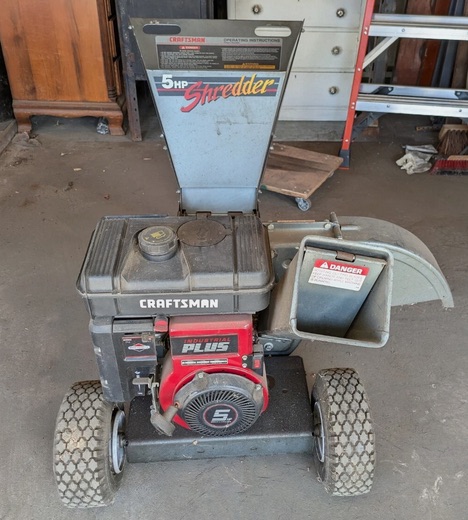
I have 40+ year old Craftsman 5hp chipper shredder. It has had lots of use,
but still runs good.
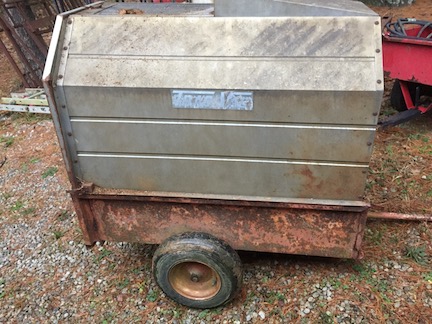
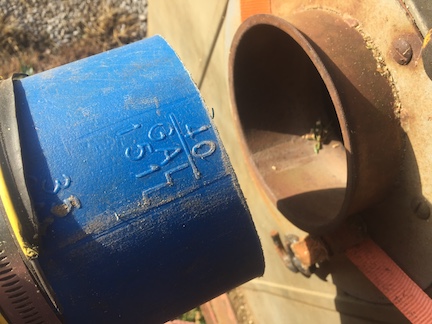
I have the collection bin from an old TracVac I picked up along the road a
while ago. It just happens to fit the old Sears yard chart, also from someones trash.
Since I already have the major components, I may as well make a leaf vac.
The leaves are piling up and rain is headed this way. Since I do not have
time to build the whole thing right now, the first step is just getting the leaves
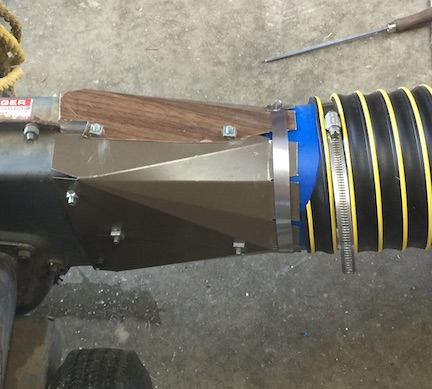
from the shredder into the cart. That requires a rectangle to round transition
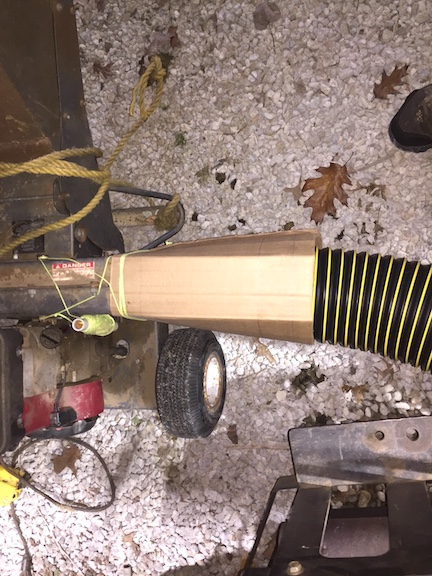
to adapt a hose to the shredder outlet. Made a quick cardboard mock up to start.
I have made transitions for HVAC a long time ago but needed a refresher for
layout. I found one on YouTube, search for "Basic square to round triangulation "
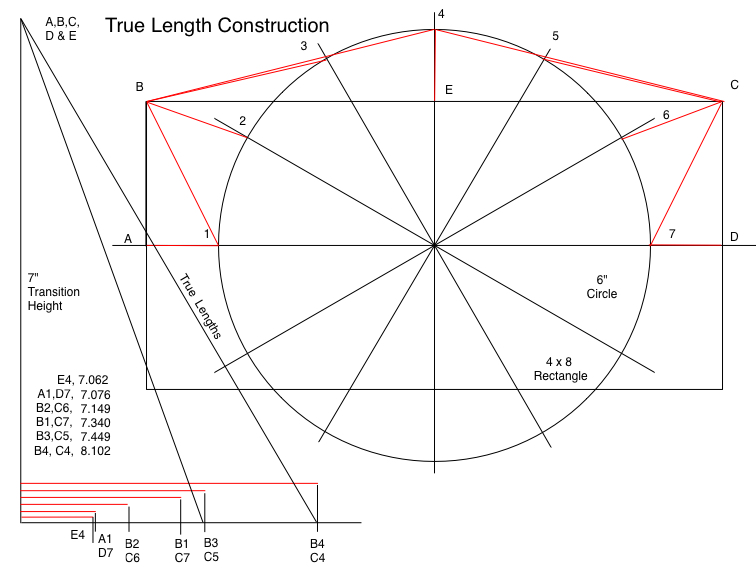
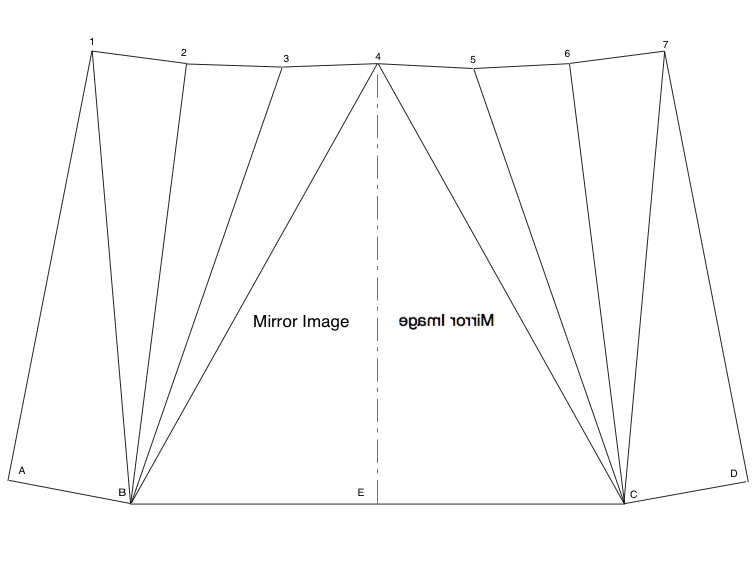
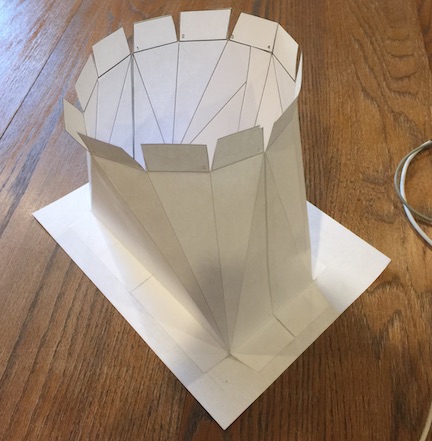
The chipper discharge is 4 x 8. Typical leaf vac hose is about 6 ID. The transition
stretch-out, or pattern, was made with a simple CAD program.
One half of the stretch out
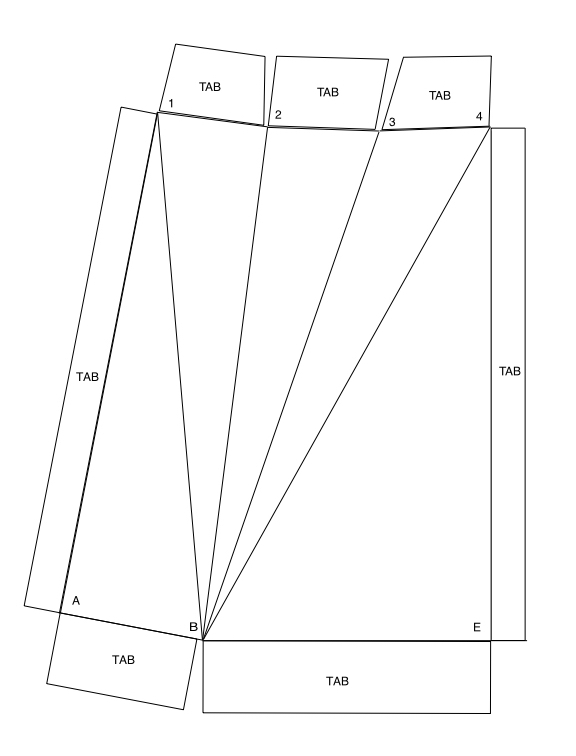
Adding tabs to a 1/4 pattern for making connections.
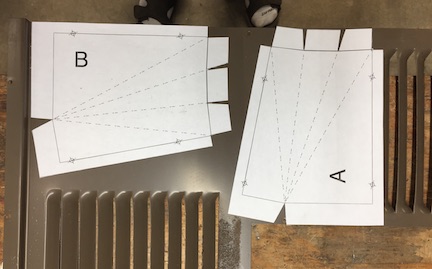
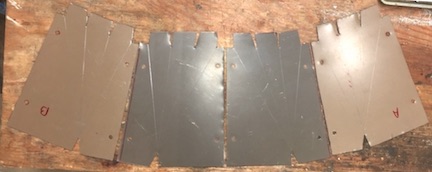
Patterns A and B
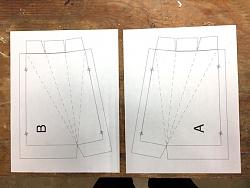
The 2-As and 2-Bs held together with tape looks right
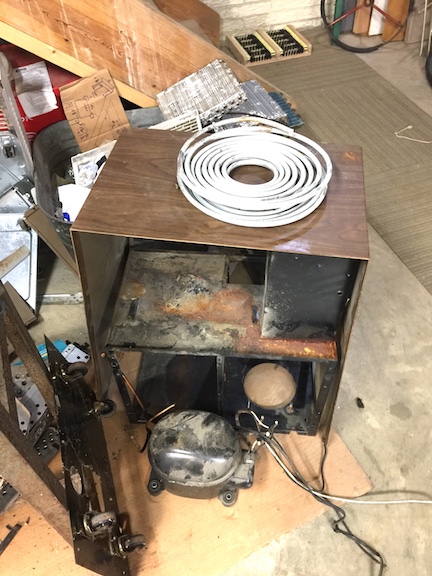
This is where the dehumidified became involved. Looking through my stock of r
eclaimed appliance sheet metal, found enough of appropriate thickness for this project.
The patterns make it easy to select suitable pieces from the pile I have.
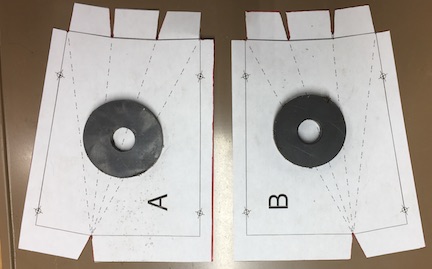
Magnets hold the patterns in place and a prick punch to mark line ends. Then
connected the marks with a scribe.
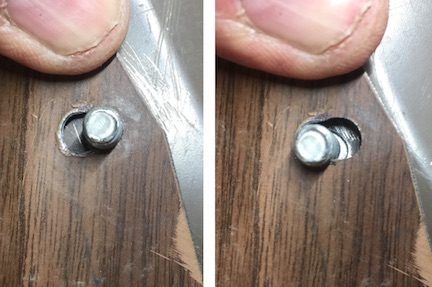
Holes were made while still flat and checked to be sure the fit properly. Rather than
make the transition one piece, it is 4 sections which bolt together. This makes the
required pieces smaller, and with slotted bolt holes, adjustable.
(Like Crustys sig line, If you cant make it precise, make it adjustable)
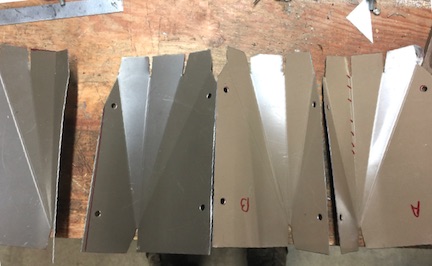
Then off to the brake. The round end has 12 segments which would make each
bend 30˚. BUT the 4 points that are centered over the sides each require 2 bends,
for a total of 16 bends 22.5˚ each.
With the pieces bolted together some tune-up with a hammer and anvil brought it into shape.
Plastic strips cut from the side of a 55 gallon drum form couplers. A heat gun softens
the material and large hose clamps to hold it in place as it cools.
The photo is distorted, the coupler slides into the bin inlet
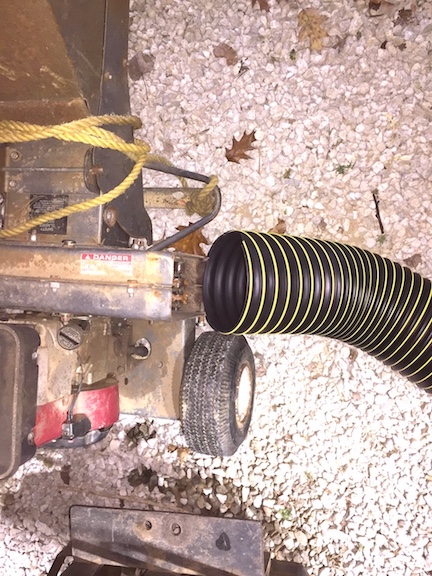
The transition is attached to the chipper using two existing threaded holes and making
two additional holes for nuts and bolts. I planned to slip the hose over the transition,
but the tabs were too short for a secure fit. The hose kept slipping off.
Good thing it was adjustable
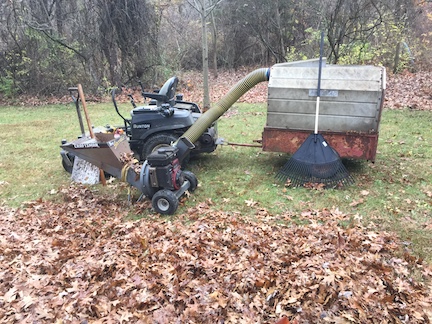
For this year I blew into a windrows with the mower, then shovel them into the hopper.
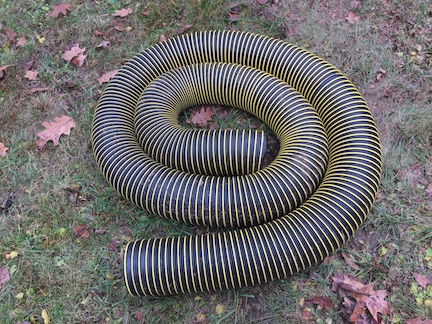
It its working pretty good. The 6 hose I got was 25 feet long. Wet leaves from the
recent rain, and the LONG horizontal section laying on the ground lead to some clogs.
With a long section removed, it works much better. This piece will be used as a
vacuum hose to clear leaves from flower beds, etc.
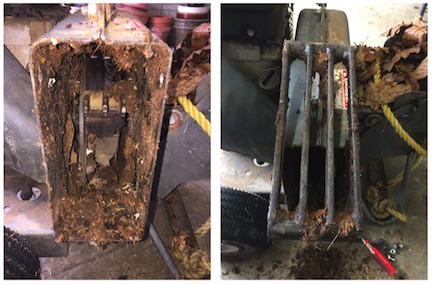
It does not like soggy leaves. There is a grate in the discharge that keep branches
in the chipper into they are small enough to escape. Wet leaves are sticky and block
the grate if they are fed too fast. With dry leaves the grate can be left in place
which grinds the leaves much smaller. Shown here with the grate removed.
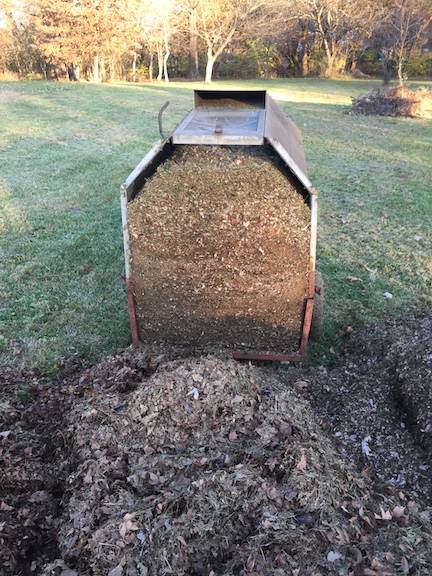
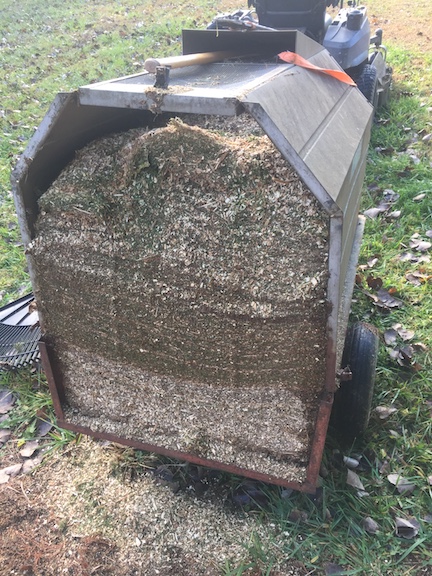
The bin holds almost a cubic yard of leaves,
Or chipped tree branches.This is a load of pine chips.
When time allows, I want to mount the blower on a new cart with a better dump mechanism.
Then make an adapter from the mower discharge, into the vac, then into the cart.


 Reply With Quote

Bookmarks