
 LinkBack URL
 About LinkBacks


Many times I need to mount my DTI on the tail stock. The
magnetic base easily grips the flat top. However the set-up is
awkward, time consuming and has too much flex. Fine
position adjustment is difficult at best and trying to set something
with in 0.001’’ is near impossible.
I really wanted to mount it on the quill with the axis on the center line.
I initially threw one together from some steel shorts. It worked but it
was ugly, clunky and required adjustments to work properly. This
version provided insight to a better design.
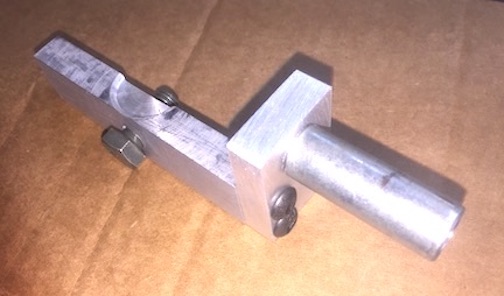
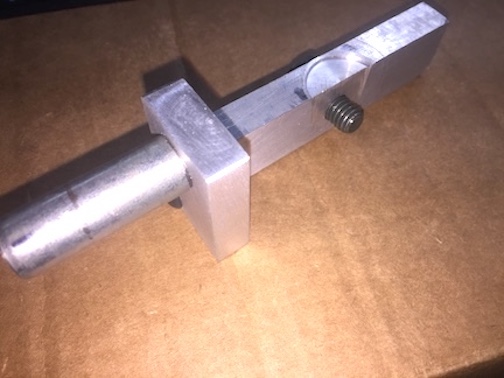
The new adapter is 3 simple parts. It attaches quickly to the DTI with
one bolt and is held in the drill chuck. Fine adjustment is quick and
easy using the quill hand wheel.
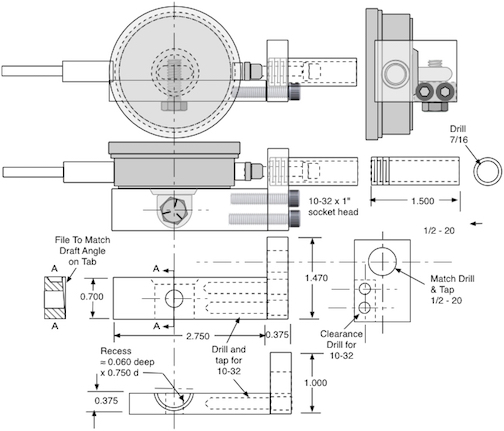
This is the Adapter drawing for my Harbor Freight DTI
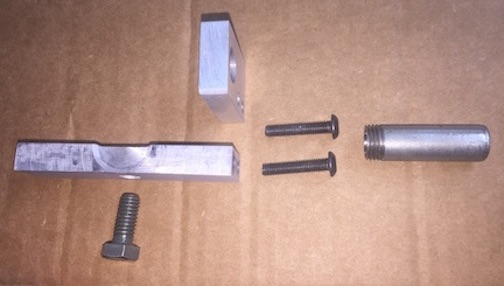
The parts
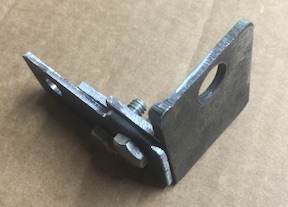
The long bar fits snug against the bottom of the indicator. It
attaches with a single 5/16 bolt. A recess is cut into the top to
fit snug against the bottom of the dial case. The hole in the
indicator lug was correct size to tap for 5/16-18 thread. The
indicator lug has a draft angle from the manufacturing process.
The bar was tapered with a file to match the draft on the gauge
lug so the bar will be square with the indicator case.
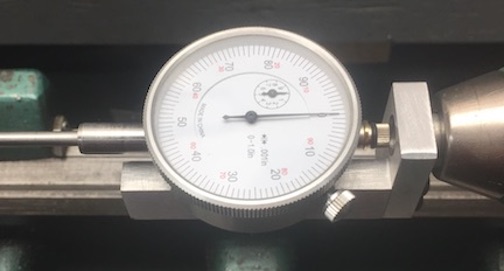
The second bar is attached at 90˚ to the first with machine
screws. With this secured In place, and bolted to the case, the
hole for mounting was marked using the plunger of the indicator.
This was done putting tape on the bar. Then pressing the plunger
against that tape. A gentle tap on the plunger with a block of wood
made a good mark in the tape. Then the bar removed, center
punched, drilled and tapped for 1/2-20 thread.
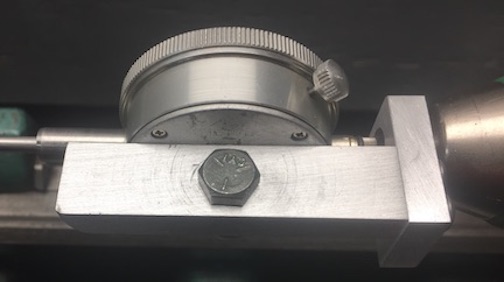
The 3rd piece is a 1/2” x 1 1/2 piece of shank from a bolt. One end
Is threaded 1/2-20. Then drilled through 7/16 to allow the indicator
plunger to pass inside which allows the adapter to be more compact.
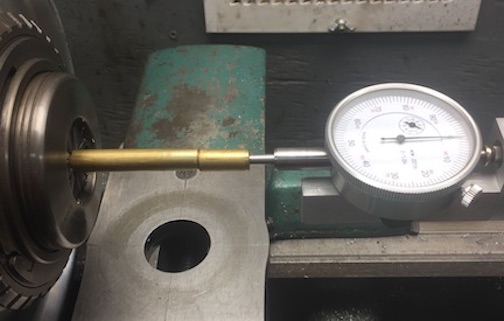
The adapter quickly attaches to the tail stock drill chuck.
The bottom bar fits snug against the base of the dial which
eliminates the need to adjust anything. One bolt holds it.
The indicator spindle is aligned with the headstock spindle.
This allows easy measurement of items too large for my
available tools.
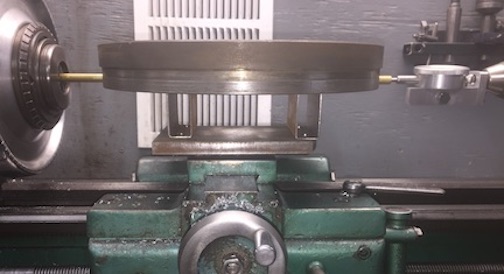
The adapter in use - > Flywheel and ring gear installation measurement


 Reply With Quote

Bookmarks