
 LinkBack URL
 About LinkBacks


This is an update to a previous post about holding odd
shapes in a lathe chuck. (Flat, Square, Angular parts on the Lathe)
Still lacking a milling machine, my lathe is my mill.
It works fine for some small parts. I needed to cut a flat on
the side of several small, internally threaded, cylinder shaped parts.
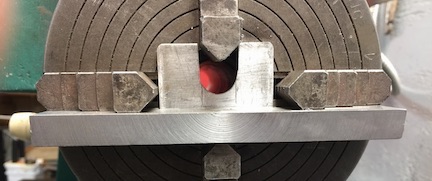
The center hole in the chuck has always been an issue trying
to accurately position small parts like this.
I made an adapter to cover that hole and provide a flat
platform for parts to bear against when chucking them.
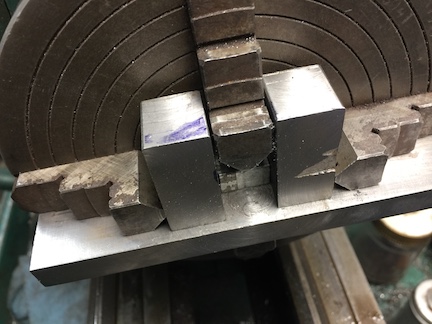
The adapter is held in position with jaw #3 pressing a bar
LIGHTLY against jaws #2 & 4. This allows 2 & 4 to move
freely and 1 to press against 3. Jaw #3 is never adjusted
when clamping as that would tend to bend the bar.
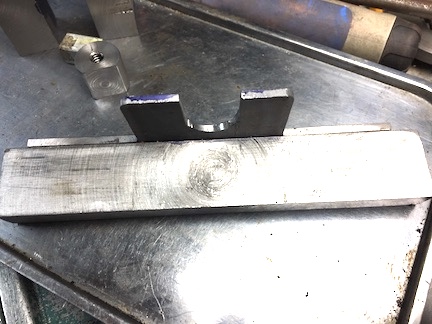
The adapter is just a flat piece of bar stock with a thin gauge
plate screwed to the edge. The plate blocks the center hole.
A slot in the plate allows jaw #1 to slide into plate.
Small plates were added to the ends of the bar to provide
a wider bearing surface to assure the adapter is parallel to
the chuck face. A small notch under the bar positions the
adapter over jaw #3. After attaching the plates, make a skim
cut on the front side of the bar so it is parallel with the chuck face.
This adapter allows set-ups to be planned on the bench,
finding appropriate blocks to securely hold the part. I have
collected a box of assorted blocks of various sizes over the
years. Then move those pieces to the chuck.
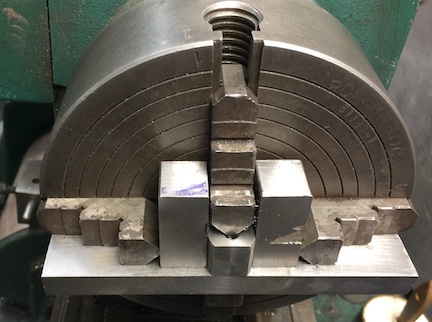
Bar and back spacer in position.
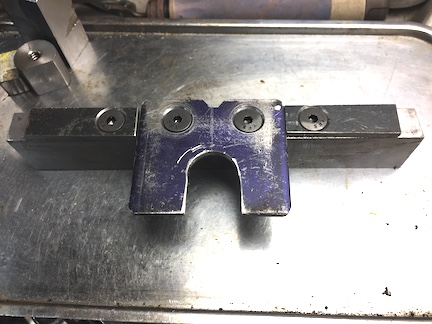
Side blocks in position.
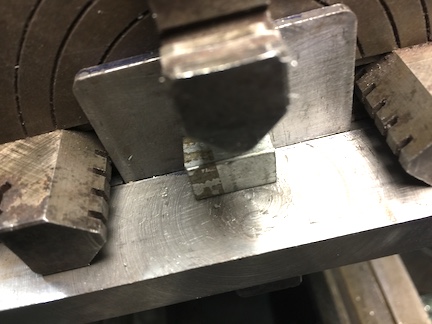
Part turned and ready to swap out with the next one.
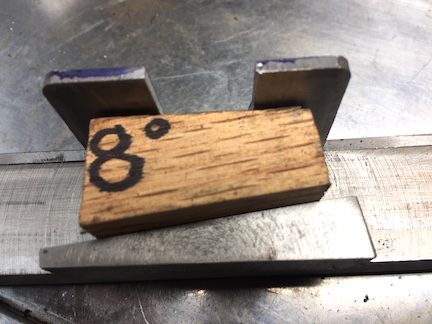
Recently I need to make some steel wedges. One simple
way to accurately hold a small part at the desired angle
is to cut a block with the miter saw to hold the first part.
If additional parts are needed with same taper, the first
part can replace the wood block.


 Reply With Quote

Bookmarks