Free 186 More Best Homemade Tools eBook:  
New: 300+ fresh build posts/day from 275 forums → BuildThreads.com

User Tag List

Results 1 to 7 of 7

Thread: Rotary broaching tool.

Threaded View

  1. #1
    Supporting Member thehomeengineer's Avatar
    Join Date
    Nov 2017
    Location
    Berkshire UK
    Posts
    762
    Thanks
    764
    Thanked 2,388 Times in 483 Posts

    thehomeengineer's Tools

    Rotary broaching tool.

    Hi All
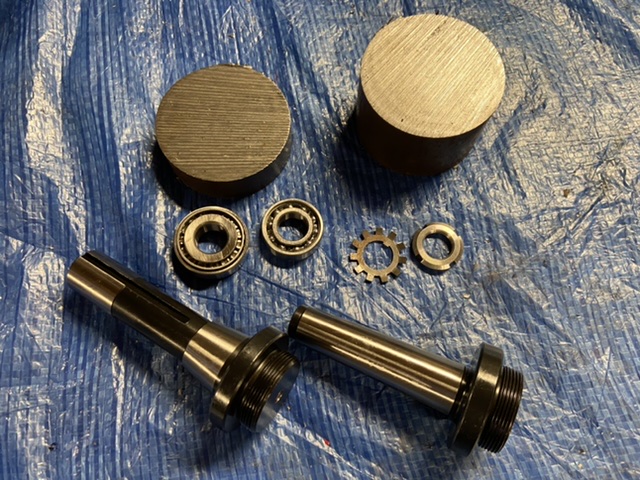
    i don’t normally make a tool if I haven’t got a job for it but I am fascinated by rotary broaching. Anyway cutting a long story short I have made one and am very pleased with the results so thought I would share with you the build. I bought the bearings, tab washer, locking nut and two arbours (R8 and a 3MT).
    Before I get on to the build I will try and explain how rotary broaching works and what it is used for.
    Rotary broaching is a form cutting process and both internally and externally forms can be produced using this technique. (I am interested in internal forms) Examples of forms are squares, hexagons and splines which can all be produced.
    The broaching tool body has the internal shaft supported on bearings angled at 1 degree angle which obviously allows the tool to run off centre (a bit like a drill that hasn’t been correctly placed in a chuck and then runs out). As the cutting tool is in a housing supported on bearings the tool, when it comes in to contact with the work piece stops rotating with the spindle but moves in a oscillating motion and this action allows the corner of the tool to cut the form of the cutter in a pre-drilled hole.
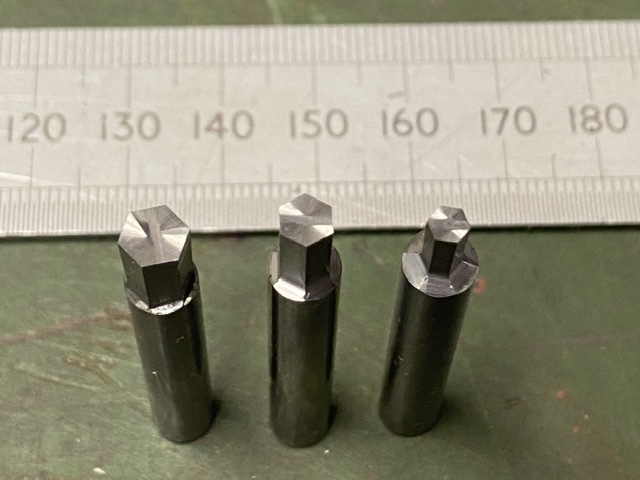
    A tool needs to be made with the desired shape and size to be cut. When grinding the cutting tool flanked clearance is needed at approximately 2 degrees for clearance and the bottom of the tool relieved to give a sharp cutting edge.
    One drawback is the cutting tool needs to be positioned at a known distance from the centre of the broaching body centre line to allow the cutter to produce the correct size.
    I hope the photos will clarify my explanation on how the tool works.


    Click image for larger version. 

Name:	3695D7D6-770C-4973-9B1D-D5901FEFC6E4.jpeg 
Views:	448 
Size:	171.0 KB 
ID:	34123
    Material and purchased items
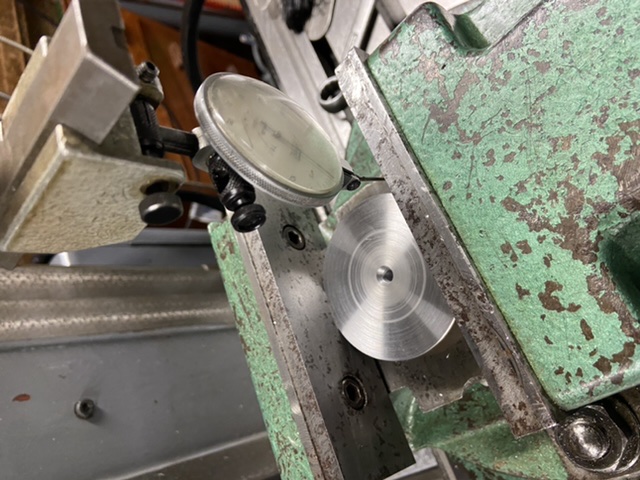
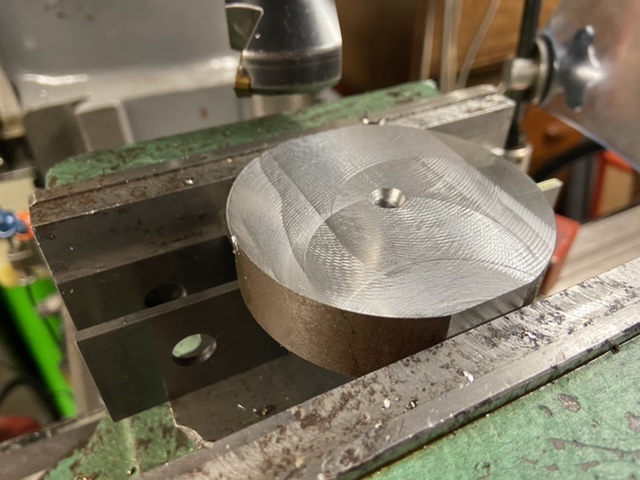
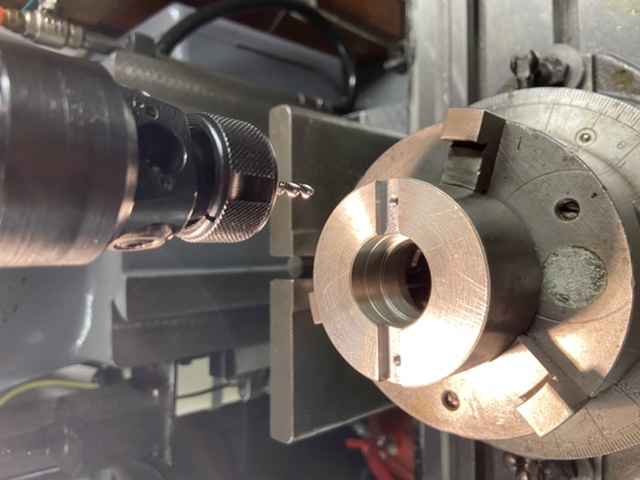
    Click image for larger version. 

Name:	89CE3A10-9A85-4975-AA1F-C9F60804C3B9.jpeg 
Views:	350 
Size:	123.8 KB 
ID:	34124
    centring work piece

    Click image for larger version. 

Name:	6D7852A7-2E0A-454B-A2FF-DBF8C2645C19.jpeg 
Views:	379 
Size:	73.5 KB 
ID:	34125
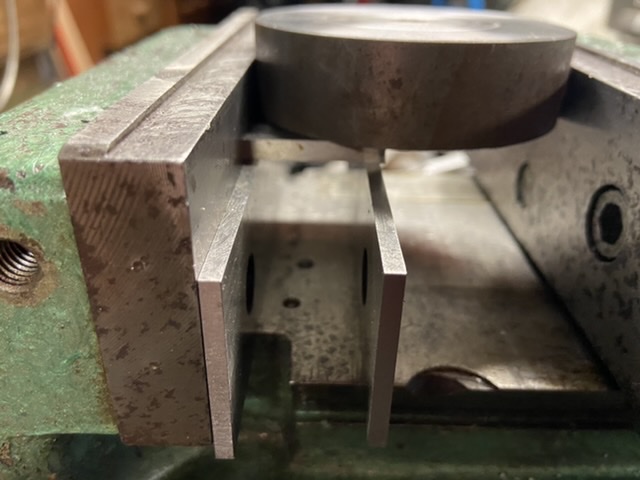
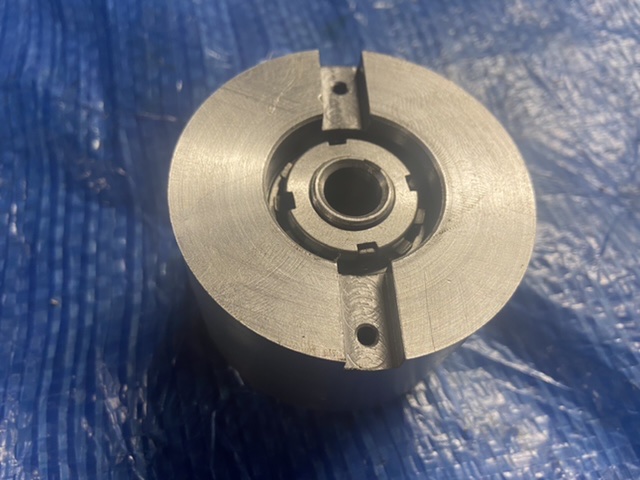
    Main body set at 1 degree

    Click image for larger version. 

Name:	4E93BAE9-4001-4C60-83F8-C8CF3AFF9CA7.jpeg 
Views:	342 
Size:	98.2 KB 
ID:	34126


    Click image for larger version. 

Name:	663B05C1-03FD-483D-BC74-7798646F7C3C.jpeg 
Views:	349 
Size:	88.0 KB 
ID:	34130
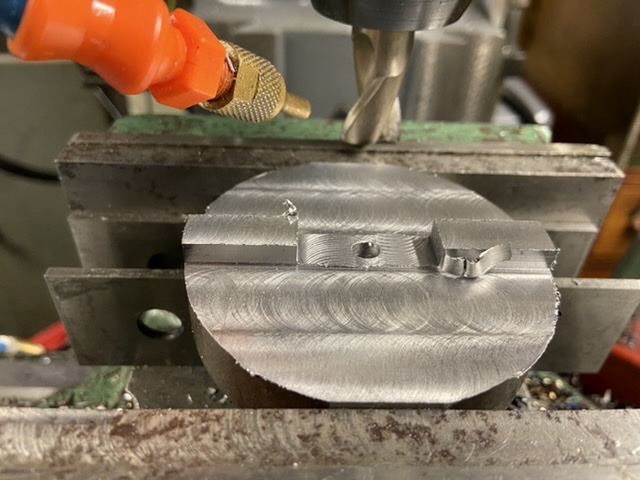
    machining location tongue
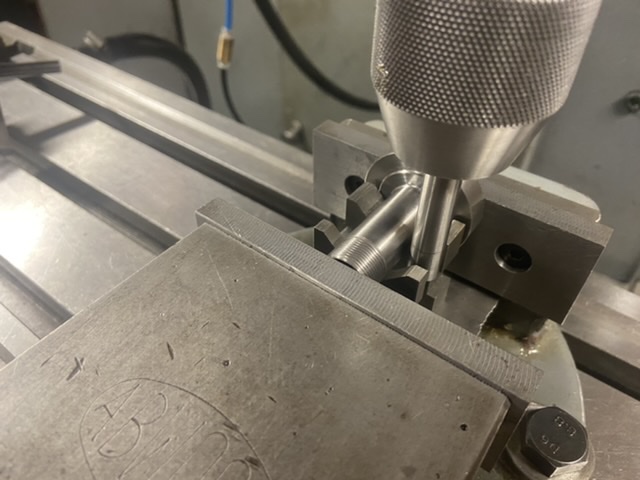
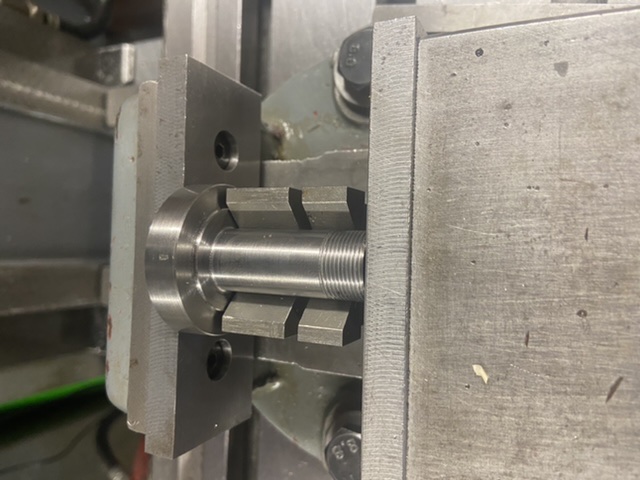
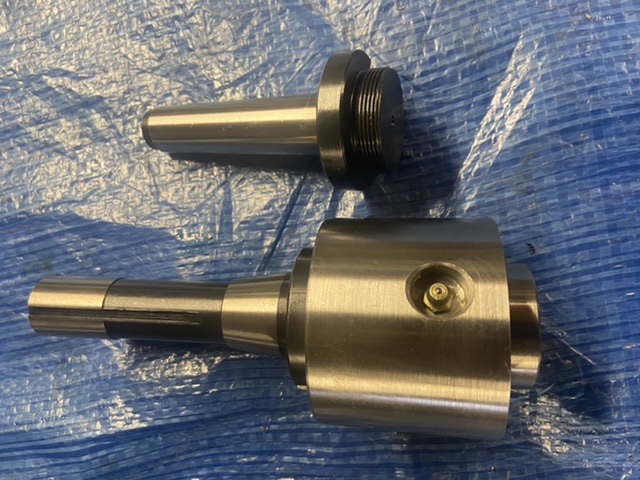


    Click image for larger version. 

Name:	53FE4138-22FE-4FBF-B8CF-0EF3D299BA47.jpeg 
Views:	343 
Size:	84.8 KB 
ID:	34128

    Click image for larger version. 

Name:	824D5982-A54E-4101-AB62-974025B0B324.jpeg 
Views:	349 
Size:	80.9 KB 
ID:	34133
    Tool shaft

    Click image for larger version. 

Name:	8EB2FE46-80F0-4F86-A66E-F5AEDA32847C.jpeg 
Views:	362 
Size:	91.5 KB 
ID:	34132


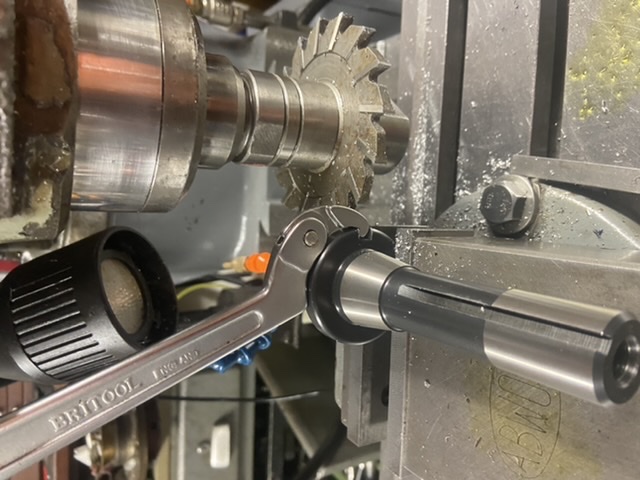
    Truing the outer body in the lathe so this runs concentric to the main spindle. The internal bearings and tool shaft maintain the 1degree angle to allow too to oscillate.

    Click image for larger version. 

Name:	6201E852-3013-41E4-A437-10EF70EB031A.jpeg 
Views:	360 
Size:	100.0 KB 
ID:	34143
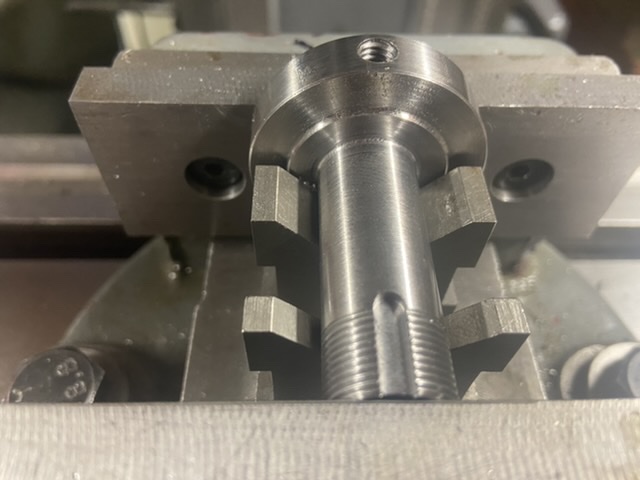
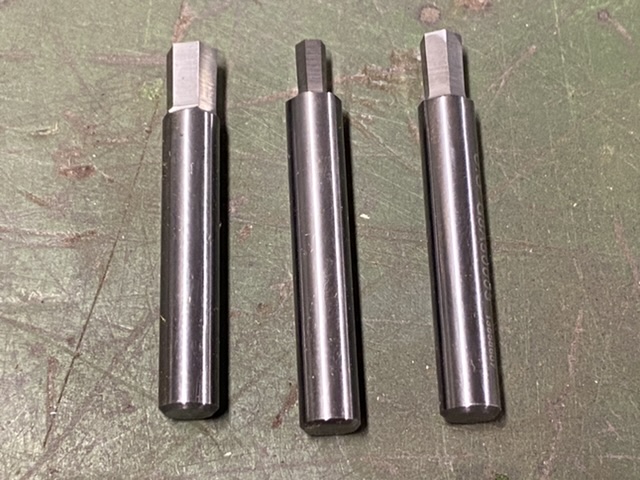
    machining shanks for c-spanner


    Shaft screw cut for purchased bearing locking nut.

    Click image for larger version. 

Name:	509B4156-D66B-46CE-8A8B-94D6725D2FA1.jpeg 
Views:	337 
Size:	66.0 KB 
ID:	34144
    Internal shaft thread and machined to accept locking tab washer.
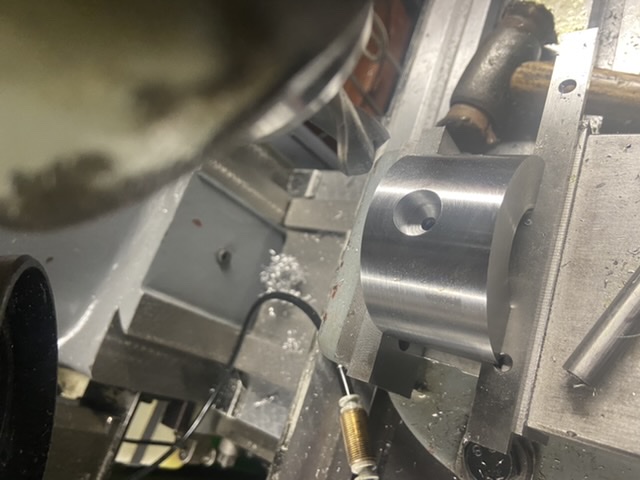
    The thin bee-blocks make it easy to clock to find the centre. Link to vee-blocks Story of the little discarded beat up Vee block


    Click image for larger version. 

Name:	8FD0A5D7-1144-4DA8-AE52-63B9CA01E740.jpeg 
Views:	334 
Size:	77.3 KB 
ID:	34129
    grease hole for bearings sunken in to body to avoid nipple protruding outer body.

    Click image for larger version. 

Name:	AFB87850-3B75-4616-B866-997EF356DCF3.jpeg 
Views:	380 
Size:	157.4 KB 
ID:	34135
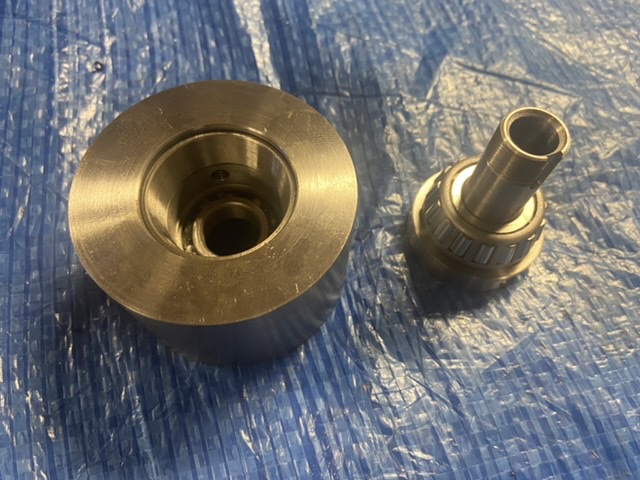
    completed parts ready for assembly

    Click image for larger version. 

Name:	48202D76-7759-4FD8-B2D1-AB8A98A3DB68.jpeg 
Views:	328 
Size:	115.0 KB 
ID:	34136

    Click image for larger version. 

Name:	B51F8D58-2BCC-45D6-A862-0DFBED783D9B.jpeg 
Views:	337 
Size:	89.3 KB 
ID:	34137

    Click image for larger version. 

Name:	65D38EFD-B2A3-4F99-9C7E-79A307646586.jpeg 
Views:	360 
Size:	129.2 KB 
ID:	34138
    Completed body

    Click image for larger version. 

Name:	F668E11B-AAC2-4EA2-9010-D03EAEC66ECD.jpeg 
Views:	328 
Size:	76.4 KB 
ID:	34139
    Cutting tools from old slot drills

    Click image for larger version. 

Name:	4E41AC53-2838-4CFF-BA28-B2B9A33F5139.jpeg 
Views:	329 
Size:	125.1 KB 
ID:	34140

    Click image for larger version. 

Name:	83AFBED6-B2F9-4188-B797-3295C42D1ABF.jpeg 
Views:	337 
Size:	153.5 KB 
ID:	34141
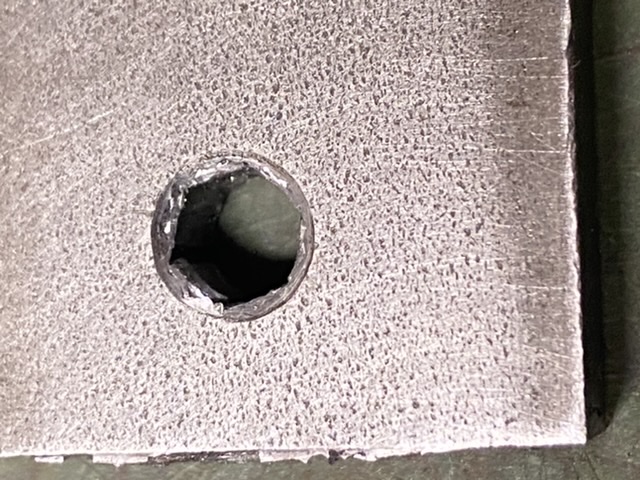
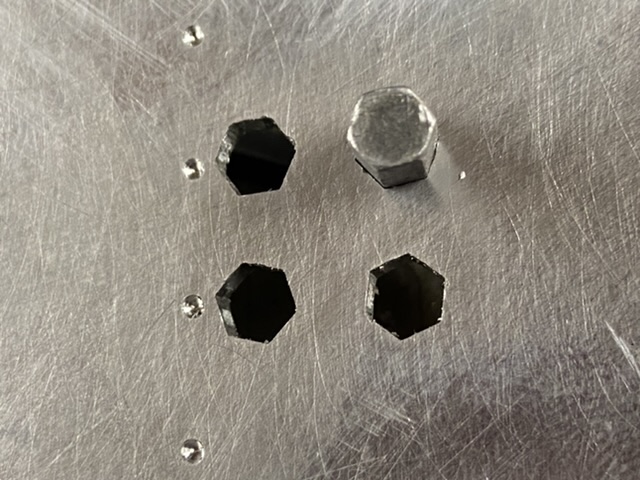
    3/16” hexagon in steel

    Click image for larger version. 

Name:	A735C879-5B6E-44C5-A06F-7CAE66A46409.jpeg 
Views:	317 
Size:	123.4 KB 
ID:	34142
    Aluminium

    Thank you for viewing
    The Home Engineer
    Attached Thumbnails Attached Thumbnails Click image for larger version. 

Name:	94A50FA7-842F-4A84-8B64-FE9A80F0A204.jpeg 
Views:	306 
Size:	107.6 KB 
ID:	34127   Click image for larger version. 

Name:	FAE38497-8130-4422-9FE3-4A7C0347AEA3.jpeg 
Views:	283 
Size:	56.1 KB 
ID:	34131   Click image for larger version. 

Name:	67E38EC5-5C8E-4703-B3B0-3A2366643D7F.jpeg 
Views:	260 
Size:	102.8 KB 
ID:	34134  
    Last edited by thehomeengineer; Mar 29, 2020 at 02:09 AM. Reason: Add more photos

  2. The Following 16 Users Say Thank You to thehomeengineer For This Useful Post:

    BrianW (Mar 30, 2020), emu roo (Feb 21, 2026), Hopefuldave (Mar 28, 2020), HUMARIA (Apr 5, 2020), Jeff Michel (Mar 31, 2020), Jon (Apr 2, 2020), mr herb (Mar 31, 2020), mrsuwds (Apr 23, 2020), mwmkravchenko (Mar 30, 2020), NortonDommi (Apr 3, 2020), Philip Davies (Mar 28, 2020), Rikk (Mar 31, 2020), Sleykin (Mar 30, 2020), threesixesinarow (Apr 4, 2020), Toolmaker51 (Jul 31, 2022), Tule (Mar 31, 2020)

Thread Information

Users Browsing this Thread

There are currently 2 users browsing this thread. (0 members and 2 guests)

Bookmarks

Posting Permissions

  • You may not post new threads
  • You may not post replies
  • You may not post attachments
  • You may not edit your posts
  •