Free 186 More Best Homemade Tools eBook:  
Get 2,000+ tool plans, full site access, and more.

User Tag List

Page 4 of 4 FirstFirst 1 2 3 4
Results 31 to 39 of 39

Thread: Silver soldering small components

  1. #31
    Supporting Member Murph1090's Avatar
    Join Date
    May 2016
    Posts
    42
    Thanks
    17
    Thanked 17 Times in 11 Posts

    Murph1090's Tools
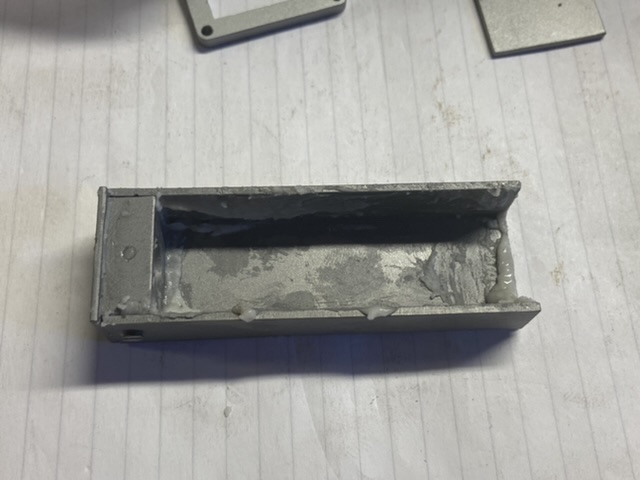
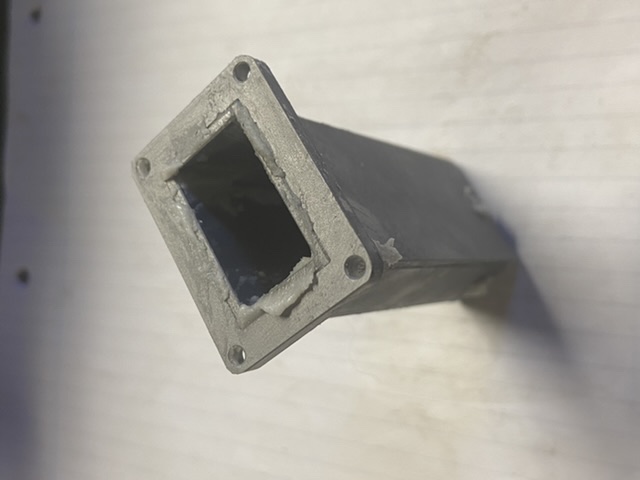
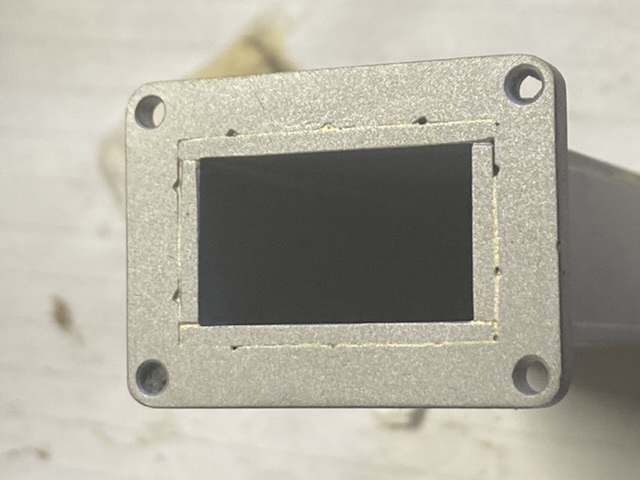
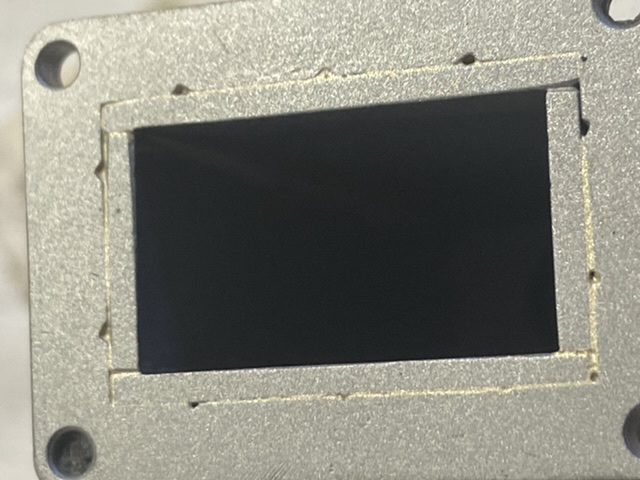
    The upside to alcohol is you can brush it on and have a layer of dry flux between the parts, where it can't burn off from the torch heat.

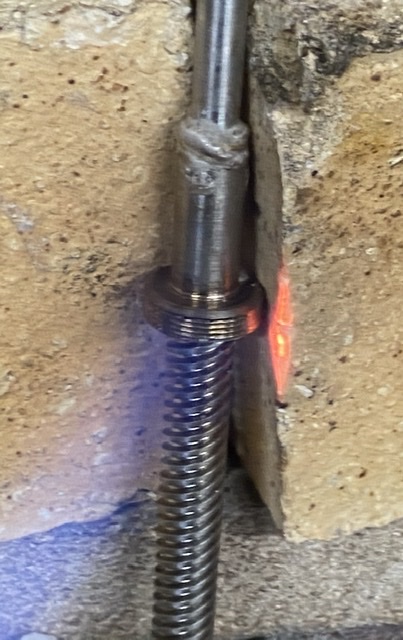
    When I do parts, I use air-acetylene torch, that way you can't overheat your part, and I use a large tip, and lower pressure, so the flame doesn't blow small parts or the solder out of position. If I keep my distance with the torch, it all heats up evenly and joins near seamlessly.

    Murph

    186 More Best Homemade Tools eBook

  2. #32
    Supporting Member Toolmaker51's Avatar
    Join Date
    Feb 2016
    Location
    Midwest USA
    Posts
    5,330
    Thanks
    7,041
    Thanked 2,977 Times in 1,892 Posts

    Toolmaker51's Tools
    Quote Originally Posted by Karl_H View Post
    Thanks!
    That is a lesson I am just learning - take a few extra minutes to make a jig.
    I have a couple chunks of metal with all sorts of holes in them - I don't recall what most of the are for now, but they were in just the right place when I needed them.
    I probably look at every part as candidate for a jig or fixture. At the same time, quantity [and then repeated use] is what justifies how sophisticated a jig/ fixture is called for.
    If the plan then calls for tooling, one additional feature is worthwhile; the means to remount and locate via a reference feature [a pin, a step, a hole...etc]

    2000 Tool Plans
    Sincerely,
    Toolmaker51
    ...we'll learn more by wandering than searching...

  3. The Following 2 Users Say Thank You to Toolmaker51 For This Useful Post:

    Karl_H (May 19, 2020), thehomeengineer (May 15, 2020)

  4. #33
    Supporting Member thehomeengineer's Avatar
    Join Date
    Nov 2017
    Location
    Berkshire UK
    Posts
    704
    Thanks
    720
    Thanked 2,062 Times in 406 Posts

    thehomeengineer's Tools

    Fabricated shaft and box housing

    The clutch linkage is nearly complete and I thought I would share how I fabricated the shaft and made the the box housing with different soldering techniques I use.

    The box is relatively straight forward as it is screwed together and a mounting flange at the bottom. However screwing matting faces together is not great for silver soldering as there is no gap for the solder to capillary into. To over come this I file notches and grooves where I want the solder to flow. This doesn’t give satisfactory joints for pressure fittings but is great for fabricated components. The notches and grooves allow the solder to penetrate the joint as can be seen in the photos below.
    Silver soldering small components-78ccdb98-24a0-4dbb-8540-f3ed8e9e39a6.jpeg Components to be silver solder together.

    Silver soldering small components-b8e9551c-1036-427a-a467-b8523f2daa0b.jpeg Filed notches can be seen on the inner part of the flange.

    Silver soldering small components-ee5732f9-f82f-45fe-8f52-516bf840540c.jpeg Flat plates that are to be screwed to top bearing block.

    Silver soldering small components-09b4ebf2-b1d8-4421-a592-b2bc7ea83a6d.jpeg All shot blasted ready for assembly and fluxing.

    Silver soldering small components-0237c5de-1a7c-4f96-afcd-81c87066e400.jpeg Top bearing housing fluxed ready to accept plates.

    Silver soldering small components-3bda9708-7aed-413a-98a1-800916dd4a1b.jpeg The seems are also fluxed on the inside.

    Silver soldering small components-df0cb915-4335-442b-9975-814efa10bd35.jpeg Base flange is a tight push fit over plates.

    Silver soldering small components-a83aa85a-72b5-43b1-89ae-9bee86888ed9.jpeg Silver soldering small components-a639b337-1bbf-4845-b7f5-1117f2397c30.jpeg The photo shows that the solder has penetrated the base flange joint.

    Silver soldering small components-3a9c2f03-7ba7-4abd-b460-edfdd49a34b2.jpeg Silver soldering small components-7a0ae89e-2d6b-4cf9-8159-5febb089658b.jpeg The heads of the screws are filed off.

    Silver soldering small components-f0b1a124-a3c2-4fad-bc5e-de01272b7fe4.jpegCompleted box housing for clutch linkage.

    The shaft is made from a commercially available stainless steel 8mm diameter 4 start thread and a brass flanged nut to suit.
    As this requires a flanged section this is rough turned over size and silver soldered in place. The shaft and the flange section can then be placed in a collet and turned true to each other and to size. The shaft is 3/16”diameter and the flanged section drilled 0.004” (0.1mm) bigger to create the gap for the capillary action.

    Silver soldering small components-985b1721-74b7-48c7-9ed5-90209dc20979.jpeg Shaft and flange

    Silver soldering small components-8e15e47f-7a5a-43fc-8972-85364ad9e0fd.jpeg Again to stop the solder flowing we’re it is not needed the paint pen is used.

    Silver soldering small components-41ac4faa-ef41-46fd-b2b8-4a2c2c27d50c.jpegSilver soldering small components-99e58128-f039-46ec-874e-60dfb0bb9843.jpeg A silver soldering ring is bent up and placed on the joint and fluxed.

    Silver soldering small components-fdf55ef9-a2a5-4e6d-aa93-f87abeb83a2a.jpeg Heat is applied to the largest section and the heat draws the solder into the joint.

    Silver soldering small components-e71bfb5c-e0b2-46fa-8e3a-70898f1ce511.jpeg Completed shaft awaiting top bearing and locknuts.

    Thank you again for viewing and hope this will help those starting out silver soldering.

    The Home Engineer
    Attached Thumbnails Attached Thumbnails Silver soldering small components-19f4d6e8-f297-458d-b46d-7d2bd99c3f41.jpeg  

  5. The Following 14 Users Say Thank You to thehomeengineer For This Useful Post:

    57_210 (Jun 1, 2020), Andyt (May 21, 2020), baja (May 21, 2020), Corm (May 21, 2020), high-side (May 20, 2020), Inner (May 20, 2020), Jon (May 20, 2020), KustomsbyKent (May 20, 2020), mwmkravchenko (May 19, 2020), Philip Davies (May 22, 2020), Rikk (May 20, 2020), rlm98253 (May 20, 2020), Sleykin (Mar 7, 2024), Toolmaker51 (May 19, 2020)

  6. #34
    Supporting Member thehomeengineer's Avatar
    Join Date
    Nov 2017
    Location
    Berkshire UK
    Posts
    704
    Thanks
    720
    Thanked 2,062 Times in 406 Posts

    thehomeengineer's Tools

    Fabricated dog bone linkage

    Nearly on the final stretch of the clutch linkage. The last of the fabricated parts are the two dog bone links which again are a silver soldered fabrication. The most important thing is that the links have both the same hole centres (pitch). To achieve this a scrap piece of material is drilled and tapped at the correct pitch and the ends of the dog bone linkage are held in position with countersunk screws and the tie bar fitted into drilled through holes. The fabrication is completed by soldering the joints.

    Silver soldering small components-1d682b31-6d3f-482e-ad77-1317fd43c56c.jpeg One dog bone link machined ready for soldering.

    Silver soldering small components-9f82d5b3-cd8a-4e3c-ad3a-d7703cd3a632.jpeg Soldering jig

    Silver soldering small components-ba51c417-4eb4-479e-9e0a-55bafa67d085.jpeg Screws painted to prevent solder contact.

    Silver soldering small components-b879490d-5b41-46c9-9d7e-5e0ddb4b807e.jpeg Soldering completed.

    Silver soldering small components-2ab0a17c-c735-4046-8de9-6d8c94873a31.jpeg Removed from jig.

    Silver soldering small components-2ab1de34-e188-42c5-a446-bebb63da247e.jpeg Cleaned up using shot blasting and the holes need to be reamed.

    Silver soldering small components-a12c6706-3f1a-4566-a123-3d870f332e98.jpeg Completed assembly awaiting operating handle. (Not sure if you make single crank or wheel type).

    Thank you for viewing
    The Home Engineer

  7. The Following 6 Users Say Thank You to thehomeengineer For This Useful Post:

    Jon (May 22, 2020), mwmkravchenko (May 21, 2020), Okapi (May 22, 2020), Philip Davies (May 22, 2020), Sleykin (Mar 7, 2024), Tonyg (May 24, 2020)

  8. #35
    Supporting Member Okapi's Avatar
    Join Date
    Mar 2013
    Location
    Switzerland
    Posts
    222
    Thanks
    346
    Thanked 132 Times in 76 Posts

    Okapi's Tools
    It's very interesting to see how you make them by pair, soldering in an oven like those used by dentist can be a good alternative for a cleaner finish with less work after soldering, have you never tested the protection coating for a cleaner heated surface with less oxydising ?

  9. #36
    Supporting Member thehomeengineer's Avatar
    Join Date
    Nov 2017
    Location
    Berkshire UK
    Posts
    704
    Thanks
    720
    Thanked 2,062 Times in 406 Posts

    thehomeengineer's Tools
    Hi okapi
    thank you for your comment. Correct me if I’m wrong but I think you are talking about a vacuum furnace which prevents oxidation and the need for flux. This is very specialised piece of equipment and has it drawbacks like brass can’t be used as the zinc is removed during the process. Also size of furnace and cost. The acid bath and the shot blasting cabinet I use are adequate and cost effective for the jobs I do. Please correct me if I have miss understood.

  10. #37
    Supporting Member Okapi's Avatar
    Join Date
    Mar 2013
    Location
    Switzerland
    Posts
    222
    Thanks
    346
    Thanked 132 Times in 76 Posts

    Okapi's Tools
    No, I'm simply speaking of the very cheap furnace used in the past for the dentistry mechanical use which are no more usable with new norms about sterilization etc.
    They can go to 1'200° C and are generally less than 200 €, they can be use with inert gas generally by a very simple hole in the back but for me using borax is less expensive, I have two of them, one used for oil or water hardening and the other for carbon hardening with powder which make a lot of smoke and leave some residues in the furnace.
    Using the hole for the gas introduction they are regulated by a captor and an electronic command unit.

  11. #38
    Supporting Member thehomeengineer's Avatar
    Join Date
    Nov 2017
    Location
    Berkshire UK
    Posts
    704
    Thanks
    720
    Thanked 2,062 Times in 406 Posts

    thehomeengineer's Tools
    I have never considered this but am always interested in other ways of achieving results. At 200€ a bottle of inert gas and another piece of kit to store in an already crammed workshop I don’t think I can justify the outlay. Have you had success using this method?

  12. #39
    Supporting Member Okapi's Avatar
    Join Date
    Mar 2013
    Location
    Switzerland
    Posts
    222
    Thanks
    346
    Thanked 132 Times in 76 Posts

    Okapi's Tools
    I'm using this technique since I was an apprentice, we use that for small pieces or for pieces which doesn't be cleaned, but near never with inert gas, just with borax or in special ignifugated bags for medical components, What is expensive with inert gas is the bottle but you can find small bottles very cheap made for small soldering units in the discount stores normally, here it's a current thing, for me I use a bottle I've bought at one time and it cost me about 40$ for a full new one and it's for two years approximately.


    186 More Best Homemade Tools eBook

Thread Information

Users Browsing this Thread

There are currently 1 users browsing this thread. (0 members and 1 guests)

Bookmarks

Posting Permissions

  • You may not post new threads
  • You may not post replies
  • You may not post attachments
  • You may not edit your posts
  •