Free 186 More Best Homemade Tools eBook:  
Get 2,000+ tool plans, full site access, and more.

User Tag List

Page 1 of 2 1 2 LastLast
Results 1 to 10 of 15

Thread: Travel Tool Chest & Workbench with Integrated Vice

  1. #1
    Supporting Member Dr.Al's Avatar
    Join Date
    Jul 2018
    Posts
    34
    Thanks
    7
    Thanked 137 Times in 18 Posts

    Dr.Al's Tools

    Travel Tool Chest & Workbench with Integrated Vice

    Travel Tool Chest & Workbench with Integrated Vice-with_front_on_800.jpg

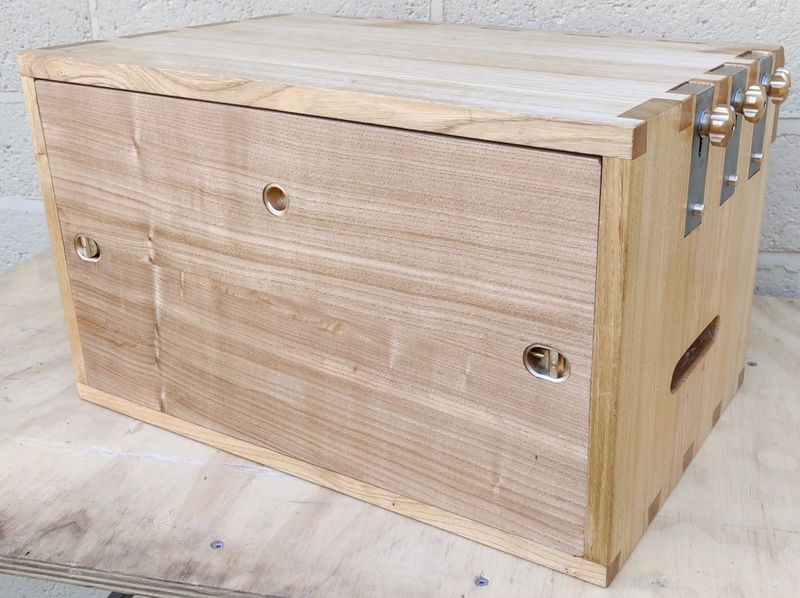
    This is a combined tool chest and workbench. It is made out of Sweet Chestnut and American Black Walnut (along with a lot of brass and stainless steel). All of the woodwork was done with hand tools (except for a few instances of resawing with a bandsaw). All the metalwork was done with power tools (because hand tool metalworking is just silly!).

    I did this project mainly as a means of practising hand tool woodwork. However, it's also intended as a means to take my hobby on holiday. My other half has M.E. and often needs time to rest. I'd go spare if I just sat around reading a book while she rested, so being able to take a basic (ish) woodworking kit with me keeps me amused and sane!

    Travel Tool Chest & Workbench with Integrated Vice-just_opened_800.jpg

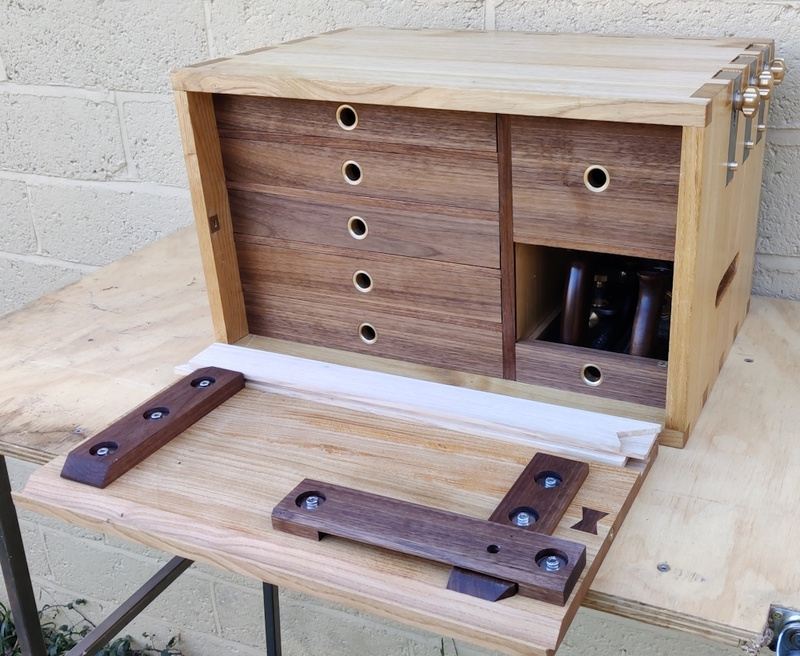
    This is what it looks like with the front opened. The drawers hold the various tools I would need for making simple wooden boxes and suchlike. The front of the box doubles as a shooting board for shooting square edges or mitres.

    Travel Tool Chest & Workbench with Integrated Vice-rear_view_showing_vice_800.jpg

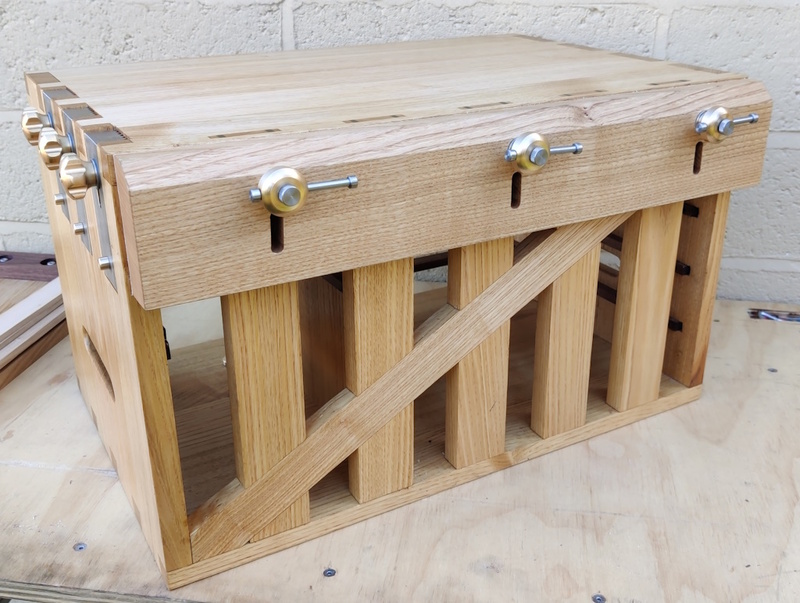
    This photo shows the back of the chest and the vice (which has a leather jaw). The uprights give a firm surface to clamp against while (hopefully) allowing for wood movement by having narrow slats rather than a solid back. The diagonal piece is there to stop racking when planing on the top surface of the chest.

    Travel Tool Chest & Workbench with Integrated Vice-planing_with_does_foot_800.jpg

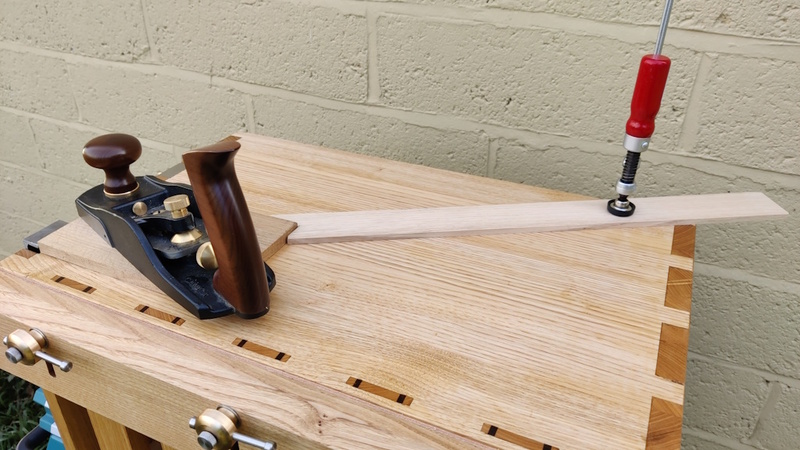
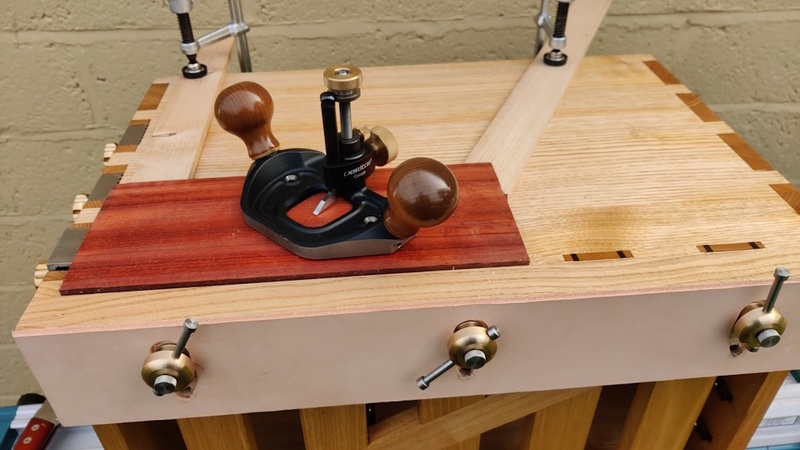
    This photo shows the planing stops in use for planing the top surface of a board.

    Travel Tool Chest & Workbench with Integrated Vice-sawing_vertically_800.jpg

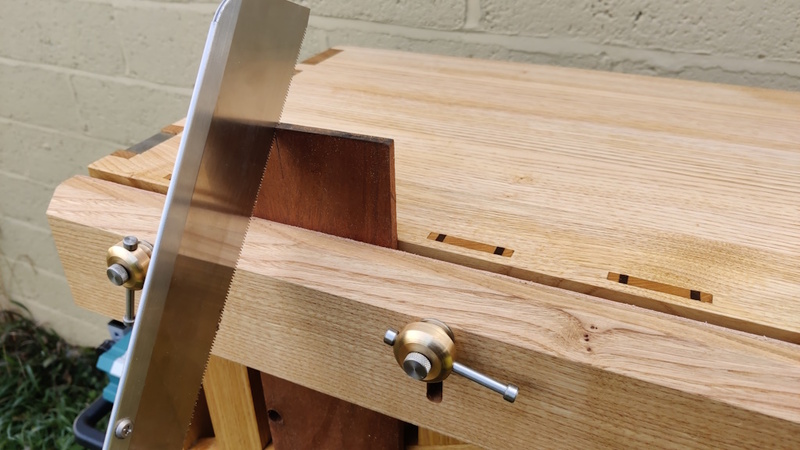
    The vice holds boards rigidly for sawing (or planing on the edges or ends).

    Travel Tool Chest & Workbench with Integrated Vice-wide_board_800.jpg

    Wide boards can be held by removing the middle vice screw.

    Travel Tool Chest & Workbench with Integrated Vice-access_to_whole_top_surface_800.jpg

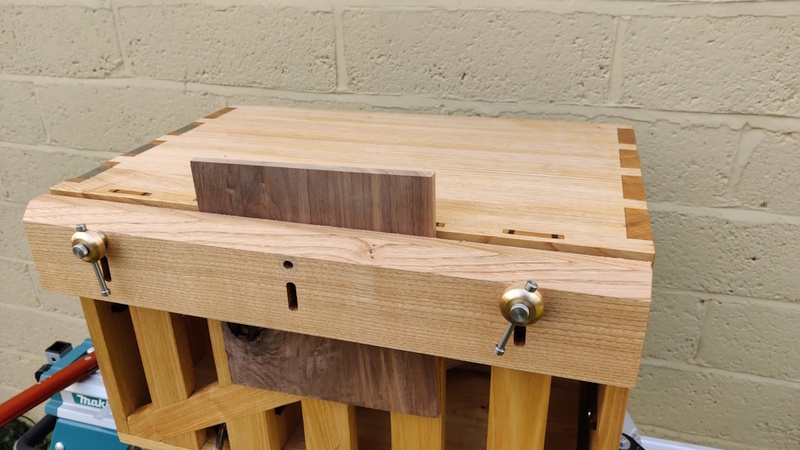
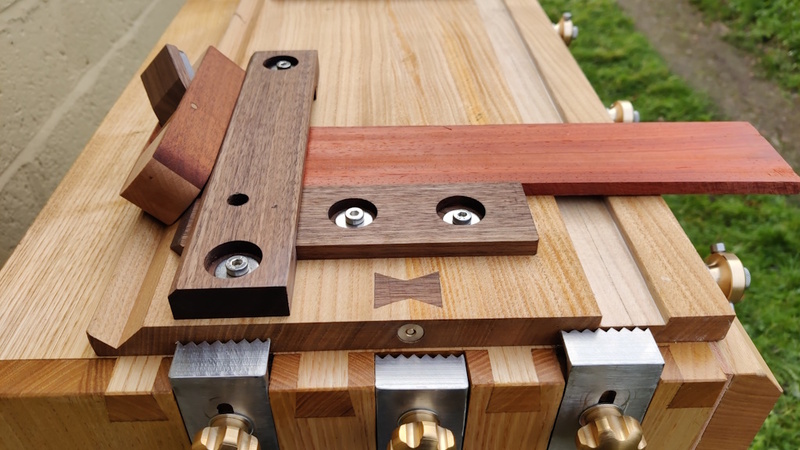
    The vice can also be flipped round so the leather jaw is facing outwards and the vice screws go into slotted holes. It can then be raised, providing a stop, so boards can be fully constrained while giving access to the complete top surface.

    Travel Tool Chest & Workbench with Integrated Vice-clamping_to_back_800.jpg

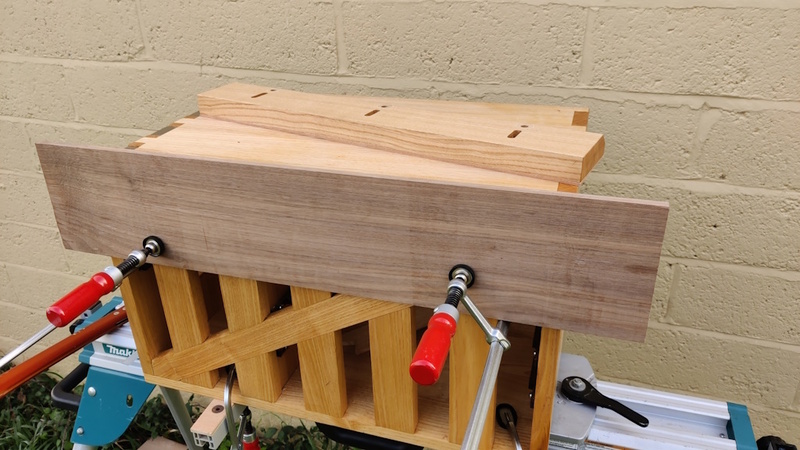
    The vice jaw can also be completely removed and big boards clamped to the back (they can also be clamped to the top, obviously).

    Travel Tool Chest & Workbench with Integrated Vice-shooting_end_800.jpg

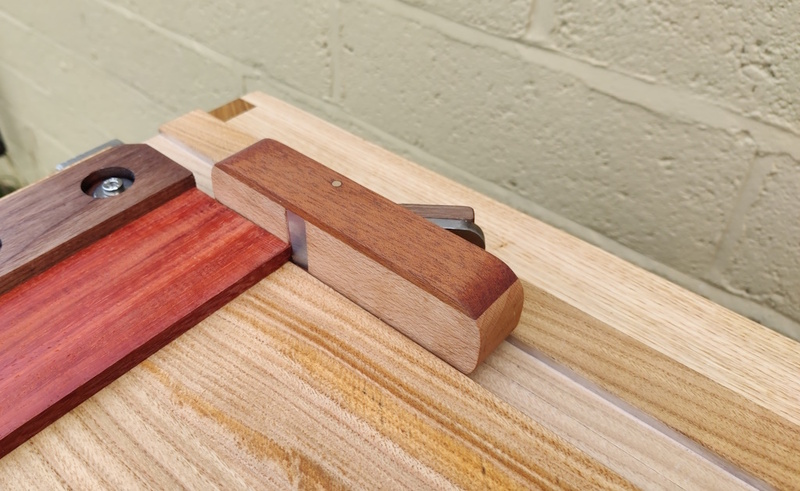
    This photo shows the shooting board in use for shooting an end square (with home-made block plane).

    Travel Tool Chest & Workbench with Integrated Vice-shooting_mitre_2_800.jpg

    The shooting board gets turned round for shooting mitres.

    There are lots more photos of the chest on my website if anyone's interested: https://www.cgtk.co.uk/woodwork/hand...raveltoolchest


    I mentioned that this was an opportunity to practice hand-tool woodworking skills. I've learnt a huge amount over the year it took me to make this (in my spare time). This was:

    • The first project in which I've made panels from rough sawn wood by hand. In the past I've made panels, but they've involved a table saw (which I'm very happy to have now sold!) and/or thicknesser (which I've still got, but it's nice to be able to work without it, especially given the amount of snipe from my cheap-ish thicknesser). I've planed wood to size by hand in the past, but only relatively small pieces (for boxes) and this is the first time I've had to make lots of pieces of wood square edged and the same size.
    • The first project where I've cut dovetails without any sort of saw guide. I've cut quite a lot of dovetails with 3D printed saw guides and I've cut a few (not very successful) dovetails without the guides on bits of scrap wood for practice, but this is the first finished project that includes guide-less dovetails. Also the first time I've cut dovetails on such thick wood: all previous ones have been on box-scale projects, so 10-ish mm thick rather than 20 mm thick.
    • The first project in which I've cut housing joints (for the middle upright support and the drawer runners) - known as dadoes in America I believe.
    • The first project with wedged through mortice-and-tenon joints (for the rear uprights). I used blind mortice-and-tenons on my side table, but the tenons were cut with a table saw and the fact that the mortices are blind makes them a lot easier! I'd done a few practice joints (with varying levels of success!) in offcuts, but never used them in a project.
    • The first project with half-lap dovetails (for the drawer fronts). I'd done exactly one practice piece before starting this project.
    • The first project with wooden drawers. Unless you count pocket-hole joined plywood boxes with ball-bearing slide runner things, I'd never made a wooden drawer before this project.
    • The first project with half-lap joints (on the anti-racking diagonal piece on the back).
    • The first project in which I've used protein-based glue (most joints with fish glue and some with TB hide glue).
    • The first project where I've had to come up with my own way of dealing with wood movement. On previous projects I've just used well-known techniques (buttons for table tops, grooves for box bases), whereas making what is essentially a five sided box where all sides needed to be rigid took a bit more thought. Hopefully what I've done will last.
    • The first time I've used a "Dutchman" / graving piece to repair a blemish. I used two different types of Dutchman: decorative butterfly ones in a contrasting wood and discrete grain matched ones.
    • The first large project I've finished without sandpaper. The faces were finished with a smoothing plane without any of the dust and tedium of sanding (and I think it looks a lot better for it!). A scotchbrite pad was used for rubbing between coats of finish ("Mike's Magic Mix": equal parts pure tung oil, satin varnish & white spirit) but that's a quick job compared with sanding large surfaces.
    • The first time I've tried photolithography (for etching the numbers that are inset into the top of each drawer front to help re-fit them in the right place as they're removed when the tool chest is in use).
    • The biggest and most complicated hand-tool project (and woodworking project in general) I've done. I did use a bandsaw for some bits of resawing, but all the other woodwork was by hand. Metalwork was all powered, but that doesn't bother me as I hate filing and don't even aspire to being a hand-tool metalworker. Woodwork power tools are noisy and dusty, but most metalwork power tools I use aren't (angle grinders being the obvious exception). Welding the planing stops without some sort of power source would have been quite a challenge!

    186 More Best Homemade Tools eBook
    Metalworking projects site: https://www.cgtk.co.uk/metalwork
    Woodworking projects site: https://www.cgtk.co.uk/woodwork

  2. The Following 18 Users Say Thank You to Dr.Al For This Useful Post:

    baja (Dec 8, 2023), bruce.desertrat (Dec 4, 2023), butlerandrew (Dec 4, 2023), Christophe Mineau (Dec 7, 2023), cohay1 (Dec 7, 2023), Corm (Dec 7, 2023), Inner (Dec 4, 2023), Jon (Dec 3, 2023), Metallurg33 (Dec 7, 2023), mklotz (Dec 3, 2023), mr mikey (Dec 5, 2023), mwmkravchenko (Dec 8, 2023), nova_robotics (Dec 7, 2023), old_toolmaker (Dec 7, 2023), Philip Davies (Dec 10, 2023), PJs (Dec 12, 2023), rlm98253 (Dec 4, 2023), whitebear (Dec 5, 2023)

  3. #2
    Supporting Member IntheGroove's Avatar
    Join Date
    May 2019
    Location
    Lake Tahoe
    Posts
    1,925
    Thanks
    182
    Thanked 858 Times in 522 Posts

    IntheGroove's Tools
    Impressive. Nice work...

    2000 Tool Plans

  4. The Following User Says Thank You to IntheGroove For This Useful Post:

    Dr.Al (Dec 3, 2023)

  5. #3
    Supporting Member Dr.Al's Avatar
    Join Date
    Jul 2018
    Posts
    34
    Thanks
    7
    Thanked 137 Times in 18 Posts

    Dr.Al's Tools
    Thank you for the kind words

  6. #4
    Content Editor
    Supporting Member
    DIYer's Avatar
    Join Date
    Aug 2013
    Posts
    3,056
    Thanks
    773
    Thanked 1,853 Times in 1,654 Posts


    Thanks Dr.Al! We've added your Tool Chest to our Toolboxes category,
    as well as to your builder page: Dr.Al's Homemade Tools. Your receipt:


  7. #5
    Supporting Member bruce.desertrat's Avatar
    Join Date
    Nov 2017
    Posts
    787
    Thanks
    559
    Thanked 668 Times in 357 Posts

    bruce.desertrat's Tools
    That is a gorgeous and well made toolchest/workbench.

  8. #6
    Supporting Member mr mikey's Avatar
    Join Date
    May 2022
    Location
    Michigan
    Posts
    274
    Thanks
    857
    Thanked 61 Times in 47 Posts

    mr mikey's Tools
    A+ in my book. Thank you.

  9. #7
    Supporting Member black echo's Avatar
    Join Date
    Feb 2020
    Posts
    17
    Thanks
    4
    Thanked 1 Time in 1 Post
    This is a lovely build. I have three questions.
    1. Since American black walnut is an import for you, and considering it is even here an expensive wood for a domestic product with widespread distribution, I am curious about your selection. In your neck of the woods, is it used as a less expensive alternative to English walnut, or does it command a premium price as an import?
    3. What is the approximate final weight?
    2. Do you sell the plans to this build?

  10. #8
    Supporting Member Dr.Al's Avatar
    Join Date
    Jul 2018
    Posts
    34
    Thanks
    7
    Thanked 137 Times in 18 Posts

    Dr.Al's Tools
    Quote Originally Posted by black echo View Post
    This is a lovely build. I have three questions.
    1. Since American black walnut is an import for you, and considering it is even here an expensive wood for a domestic product with widespread distribution, I am curious about your selection. In your neck of the woods, is it used as a less expensive alternative to English walnut, or does it command a premium price as an import?
    It is an expensive wood - probably about twice the price of oak (which itself is probably 50% more than Sweet Chestnut). However, it looks beautiful and is lovely to work with, so I do like using it where I can. I think American Black Walnut trees are more productive than English / European Walnut, so ABW can be cheaper and easier to get hold of than the native stuff.

    Quote Originally Posted by black echo View Post
    3. What is the approximate final weight?
    I haven't measured it, but I would guess that the chest itself weighs 10–15 kg and fully loaded with tools it weighs 25–30 kg. It's definitely not something you'd want to carry on a long walk, but I only really envisage moving it from house to car and from car to holiday let, neither of which would be a long walk. It was a conscious decision to accept the weight: I wanted to take a good selection of tools and I also wanted the chest to be robust enough to withstand hammer & chisel use on the top surface as well as planing.

    Quote Originally Posted by black echo View Post
    2. Do you sell the plans to this build?
    No, but if you're interested in the details, I wrote it up as I went along on (in exhaustive "warts an' all" detail) on a woodworking forum I frequent. It's interspersed with comments and (useful!) advice from other forum members, but everything I did to make the chest is documented. The thread is here: https://thewoodhaven2.co.uk/viewtopic.php?f=26&t=7477 - there are 22 pages of it though, so you'd need a reasonable amount of time on your hands to read it all!
    Metalworking projects site: https://www.cgtk.co.uk/metalwork
    Woodworking projects site: https://www.cgtk.co.uk/woodwork

  11. The Following User Says Thank You to Dr.Al For This Useful Post:

    bruce.desertrat (Dec 5, 2023)

  12. #9
    Supporting Member black echo's Avatar
    Join Date
    Feb 2020
    Posts
    17
    Thanks
    4
    Thanked 1 Time in 1 Post
    Very good information. Thank you. And I adore American black walnut.

  13. #10
    Supporting Member
    Join Date
    Oct 2023
    Posts
    4
    Thanks
    1
    Thanked 0 Times in 0 Posts
    I was impressed with your well thought out tool box system. Great for away from home small projects. Useful and a nice touch.

Thread Information

Users Browsing this Thread

There are currently 1 users browsing this thread. (0 members and 1 guests)

Bookmarks

Posting Permissions

  • You may not post new threads
  • You may not post replies
  • You may not post attachments
  • You may not edit your posts
  •