Free 186 More Best Homemade Tools eBook:  
Get tool plans

User Tag List

Page 1 of 7 1 2 3 4 5 6 7 LastLast
Results 1 to 10 of 69

Thread: 1/32 model train car mold procedure

  1. #1
    Supporting Member machiningfool's Avatar
    Join Date
    Jul 2015
    Location
    Seffner Florida
    Posts
    266
    Thanks
    0
    Thanked 272 Times in 146 Posts

    machiningfool's Tools

    1/32 model train car mold procedure

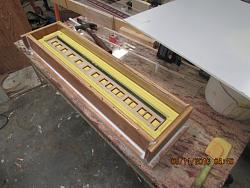
    I said procedure, as if this is the way to do it, well there are many ways to do it, but this is the way that I make a model train mold. This time, instead of machining or patterning a completely new car side, I liked the detail of an observation car that I bought and decided that it would be easier to just make a mold from it, saves quite a bit of time. I will, from time to time add pictures of my progress. This beginning picture is the gluing of the car side to a piece of 1/4 inch piece of plexiglass and claying up around the edges and windows. This is very important because, if you don't, the urethane, when pouring, will leak through the small openings and spoil the mold, cause bubbles, and a number of other problems. This will be a two piece mold, this is the first half. After making this half, I will prepare the inside of the car side and pour the other half, so that both sides come out smooth and easy to manage. Here is the first step, more to come. Bob.1/32 model train car mold procedure-img_0429.jpg1/32 model train car mold procedure-img_0430.jpg

    186 More Best Homemade Tools eBook
    Last edited by machiningfool; May 7, 2016 at 08:43 AM.

  2. The Following 2 Users Say Thank You to machiningfool For This Useful Post:

    Jon (May 7, 2016), Paul Jones (May 7, 2016)

  3. #2
    Supporting Member machiningfool's Avatar
    Join Date
    Jul 2015
    Location
    Seffner Florida
    Posts
    266
    Thanks
    0
    Thanked 272 Times in 146 Posts

    machiningfool's Tools

    Mold ready for pouring urethane.

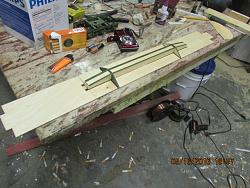
    I have blocked the pattern and placed 1/4 by 3/8 strips of plastic for alligning the second part of the mold. Now, all that is required is spraying parting compound and pouring with urethane. Bob.1/32 model train car mold procedure-img_0431.jpg1/32 model train car mold procedure-img_0432.jpg

    2,000+ Tool Plans

  4. The Following User Says Thank You to machiningfool For This Useful Post:

    Paul Jones (May 7, 2016)

  5. #3
    Supporting Member machiningfool's Avatar
    Join Date
    Jul 2015
    Location
    Seffner Florida
    Posts
    266
    Thanks
    0
    Thanked 272 Times in 146 Posts

    machiningfool's Tools

    First part of mold poured.

    Here is a picture of the first part of the mold poured with urethane. Next I will add some body to the thin side and then pour the second part of the mold. Bob.1/32 model train car mold procedure-img_0433.jpg1/32 model train car mold procedure-img_0434.jpg

  6. The Following User Says Thank You to machiningfool For This Useful Post:

    Paul Jones (May 10, 2016)

  7. #4
    Supporting Member machiningfool's Avatar
    Join Date
    Jul 2015
    Location
    Seffner Florida
    Posts
    266
    Thanks
    0
    Thanked 272 Times in 146 Posts

    machiningfool's Tools

    Adding thickness.

    1/32 model train car mold procedure-img_0435.jpg1/32 model train car mold procedure-img_0436.jpgThis is how I give the pattern some thickness, because the original pattern is metal and thin, too thin to reproduce a pattern for an epoxy part. This is partially done, will finish tomorrow and then possibly pour the second part of the mold. Bob.

  8. #5
    Supporting Member Paul Jones's Avatar
    Join Date
    May 2014
    Location
    Del Mar, California
    Posts
    1,231
    Thanks
    5,810
    Thanked 1,452 Times in 655 Posts

    Paul Jones's Tools
    Bob,
    I am following along to see how you do this. You will have a nice looking product based on the original car but there is more to make before the new cars will be rolling out of the shop. Will the original observation car sides clean-up and be return assembled in its original condition or permanently assigned to the pattern shop? Thanks for posting your progress.
    Paul

  9. #6
    Supporting Member machiningfool's Avatar
    Join Date
    Jul 2015
    Location
    Seffner Florida
    Posts
    266
    Thanks
    0
    Thanked 272 Times in 146 Posts

    machiningfool's Tools
    Yes, the parts are not damaged, urethane doesn't attack paint, or anything else. The only thing that happens to parts of the pattern, is when I apply super glue to the inside of the pattern, but, you won't be able to see that when it is reassembled, so I will still have a good looking obs. car. Bob. Do you make molds or patterns? I see you live in Yorba Linda, I used to live in Chino on Lime Pl.
    Last edited by machiningfool; May 11, 2016 at 04:02 AM.

  10. The Following User Says Thank You to machiningfool For This Useful Post:

    Paul Jones (May 11, 2016)

  11. #7
    Supporting Member machiningfool's Avatar
    Join Date
    Jul 2015
    Location
    Seffner Florida
    Posts
    266
    Thanks
    0
    Thanked 272 Times in 146 Posts

    machiningfool's Tools
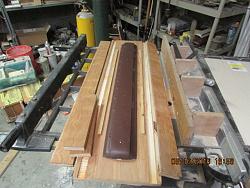
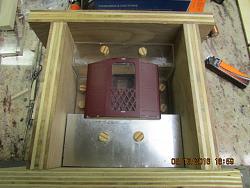
    Here is the pattern finished except for seal the wood and sprayed parting compound. Bob.1/32 model train car mold procedure-img_0437.jpg1/32 model train car mold procedure-img_0438.jpg

  12. #8
    Supporting Member machiningfool's Avatar
    Join Date
    Jul 2015
    Location
    Seffner Florida
    Posts
    266
    Thanks
    0
    Thanked 272 Times in 146 Posts

    machiningfool's Tools
    Here is a picture of the pattern ready to pour the second half of the mold. Bob.1/32 model train car mold procedure-img_0439.jpg

  13. #9
    Supporting Member Paul Jones's Avatar
    Join Date
    May 2014
    Location
    Del Mar, California
    Posts
    1,231
    Thanks
    5,810
    Thanked 1,452 Times in 655 Posts

    Paul Jones's Tools
    Bob,

    I do not make patterns but I am interested in the work you are doing for the larger scale model trains. I have had a life-long interest in trains and attribute a lot of my designing, woodworking, machining, and electronic skills to my early years doing scratch building HO model railroading.

    I have lived and owned several properties in Yorba Linda since 1978 and have seen tremendous growth and development in the area. I will send a PM.

    Paul

  14. #10
    Supporting Member machiningfool's Avatar
    Join Date
    Jul 2015
    Location
    Seffner Florida
    Posts
    266
    Thanks
    0
    Thanked 272 Times in 146 Posts

    machiningfool's Tools

    Pattern for six-wheel heavyweight truck

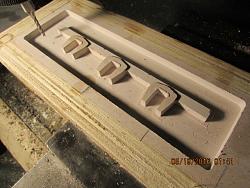
    I am waiting for supplies, so I started a pattern for a six-wheel truck for the car. The original is made of metal and looks good, but I am making this out of resin, hope to make it so it is sprung. I made this pattern on my cnc and machined it out of Bondo, cuts easily. I will make a urethane mold, when this pattern is finished. Bob.1/32 model train car mold procedure-img_0459.jpg1/32 model train car mold procedure-img_0453.jpg1/32 model train car mold procedure-img_0454.jpg1/32 model train car mold procedure-img_0455.jpg1/32 model train car mold procedure-img_0458.jpg

  15. The Following User Says Thank You to machiningfool For This Useful Post:

    Paul Jones (May 21, 2016)

Thread Information

Users Browsing this Thread

There are currently 1 users browsing this thread. (0 members and 1 guests)

Bookmarks

Posting Permissions

  • You may not post new threads
  • You may not post replies
  • You may not post attachments
  • You may not edit your posts
  •