Attachment 35939
.
Set up a couple of digital generators to my old analogue TIG welder this spring, in an attempt to optimize its wave forms of welding current, to help my self when I make some butt-welding to thinner aluminium sheets.
Printable View
Attachment 35939
.
Set up a couple of digital generators to my old analogue TIG welder this spring, in an attempt to optimize its wave forms of welding current, to help my self when I make some butt-welding to thinner aluminium sheets.
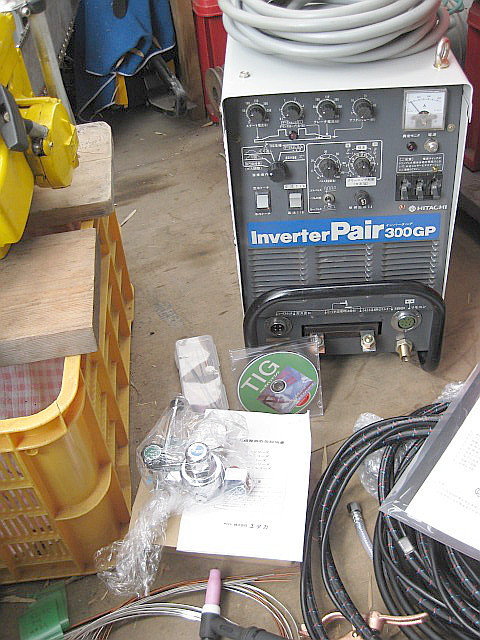
Here showing my old TIG welder;
Attachment 35940
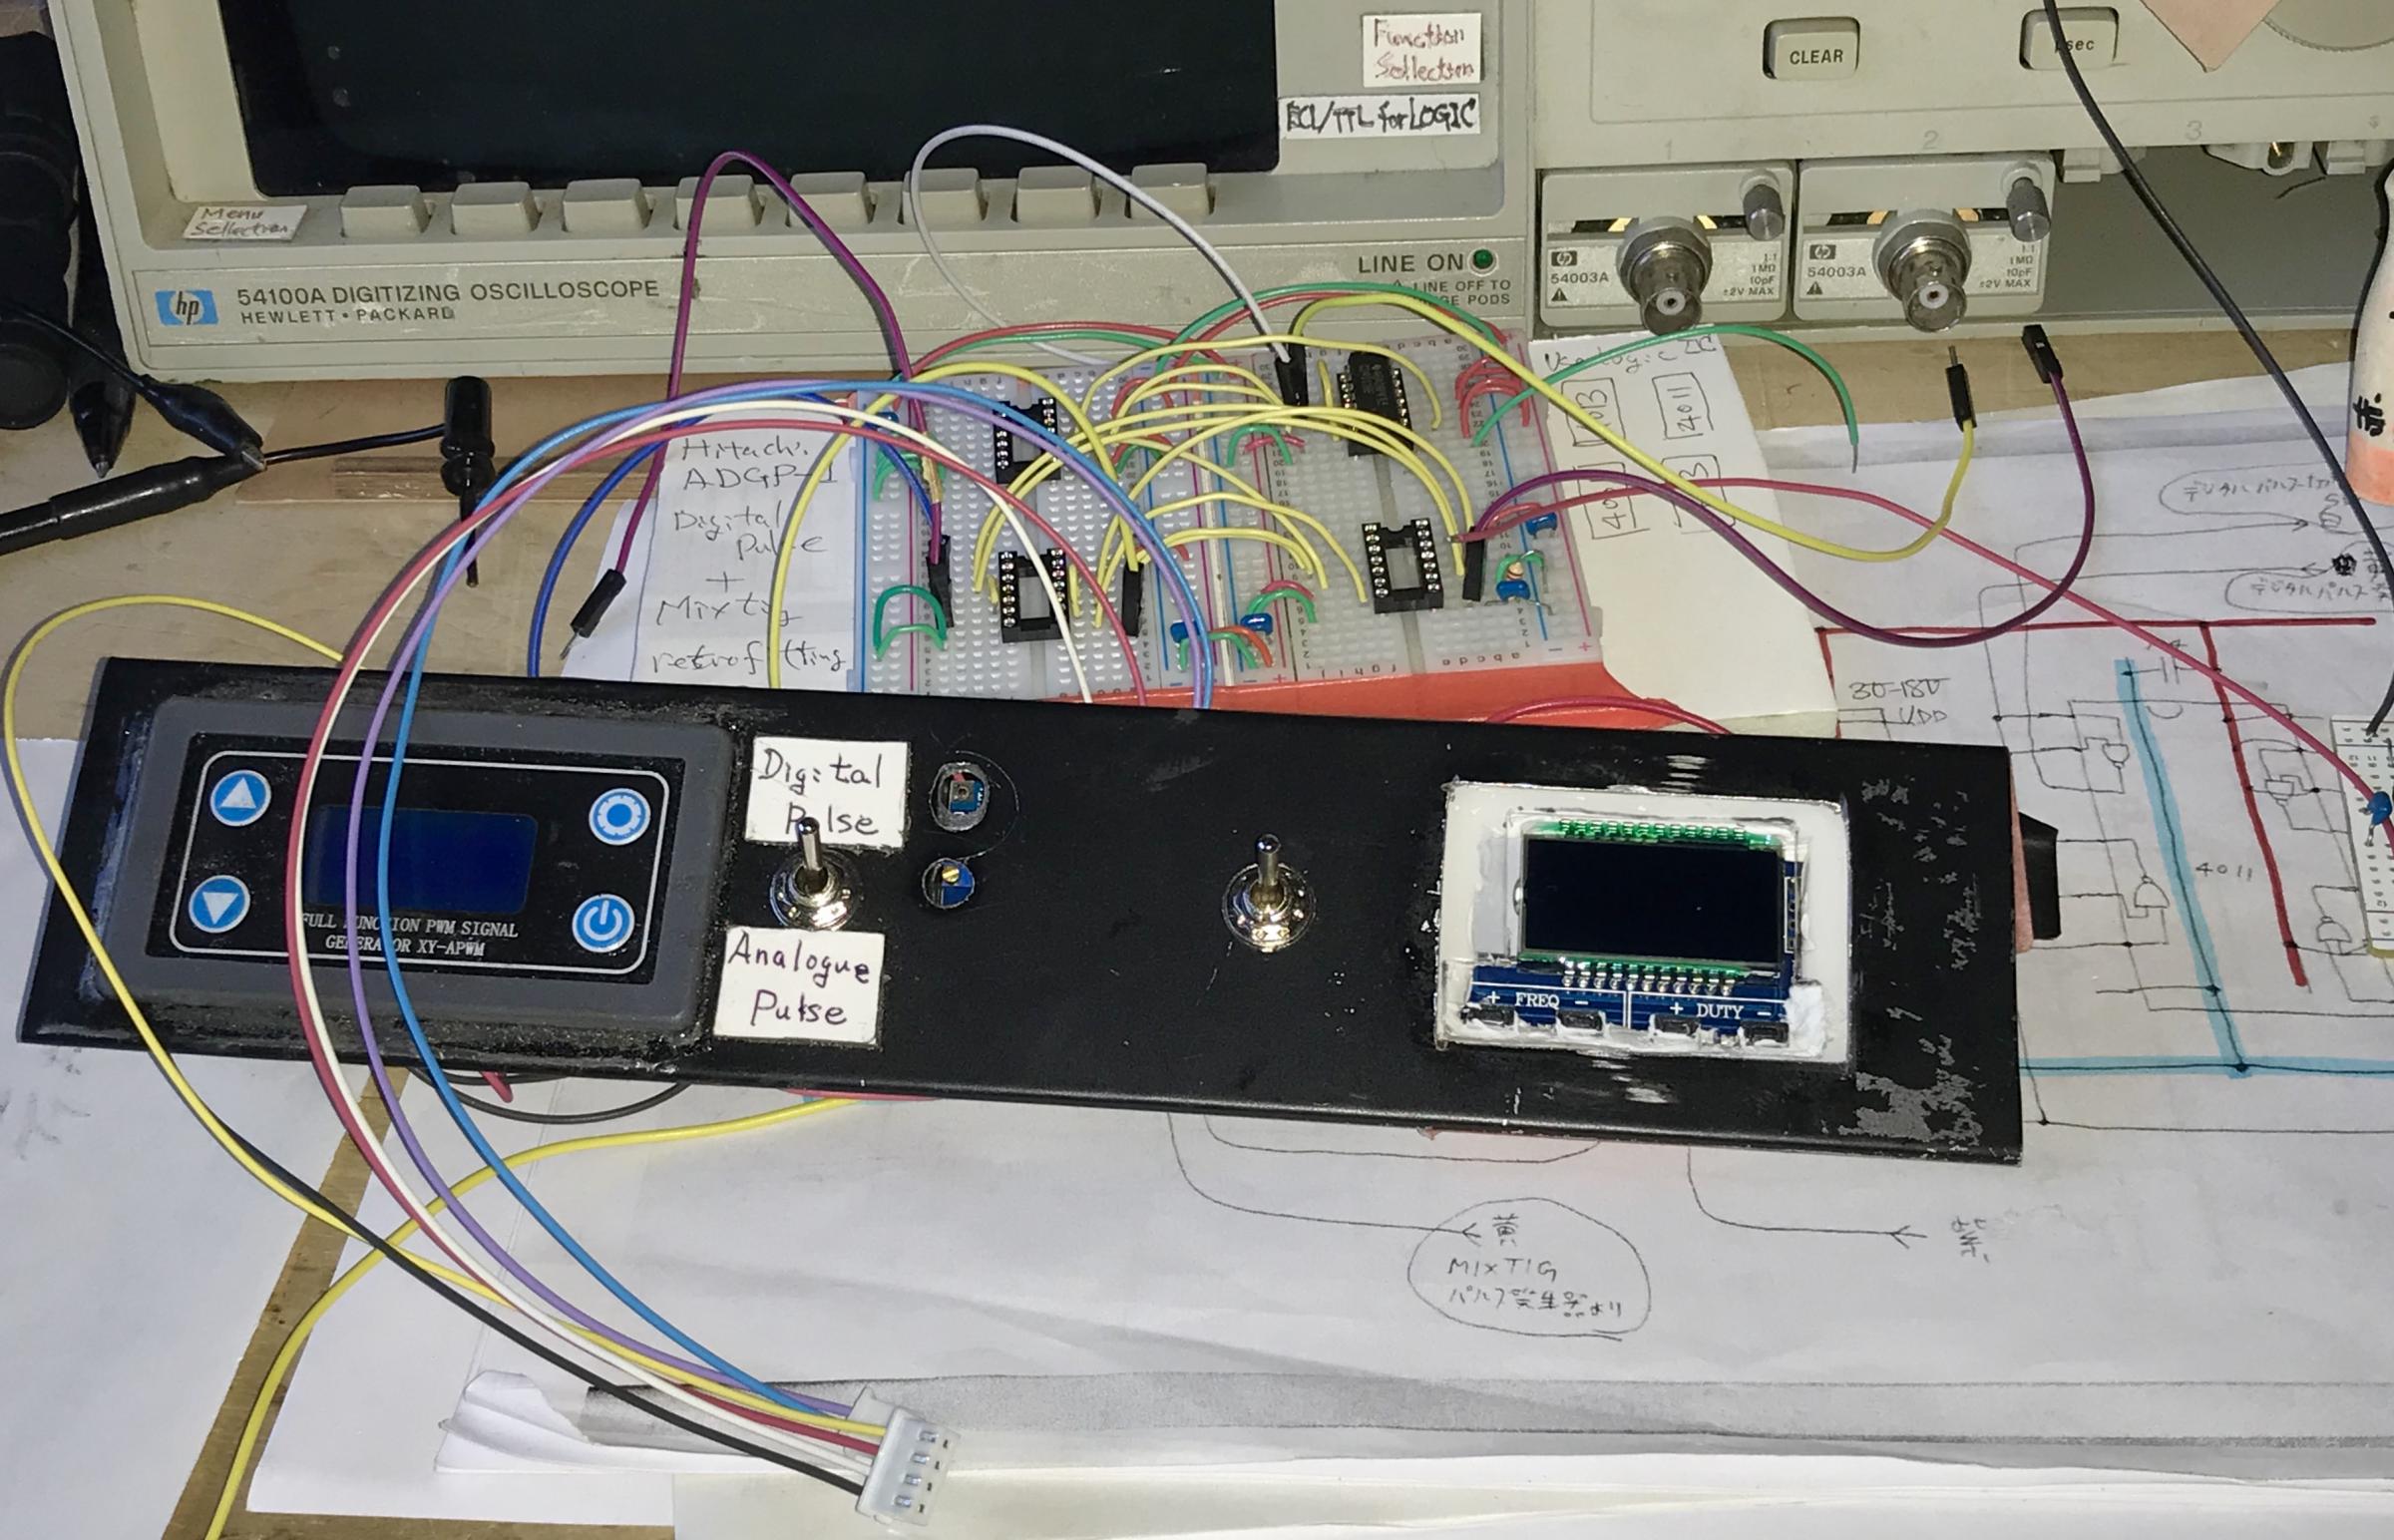
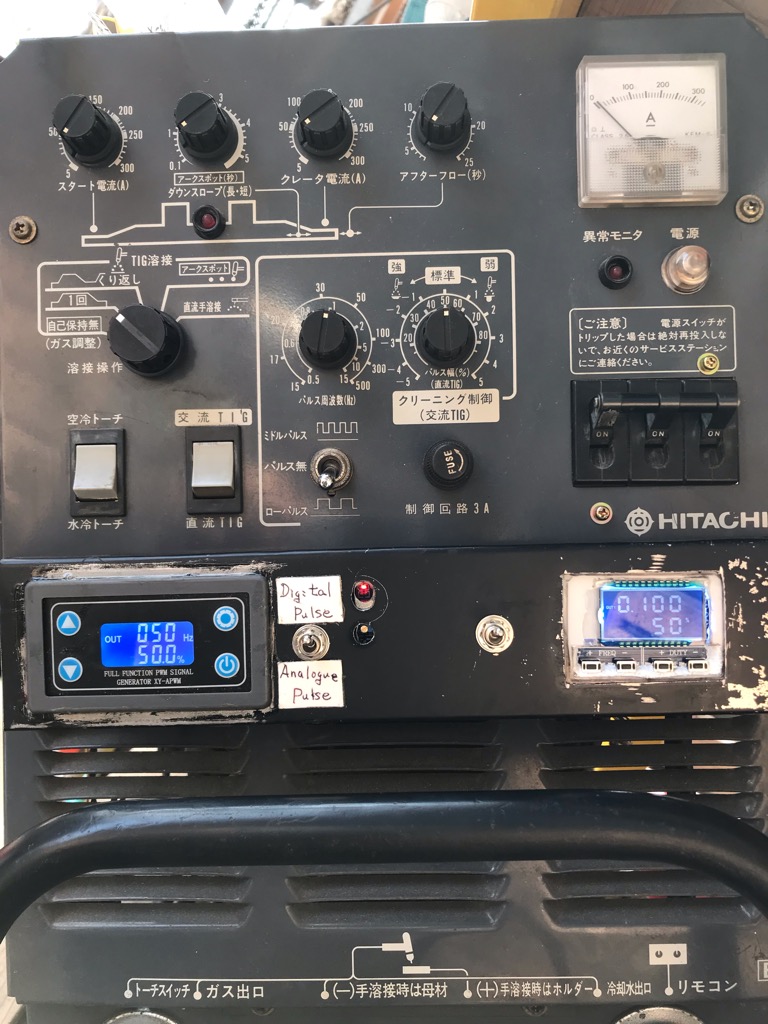
The digital unit above is set up on the front panel;
Attachment 35941
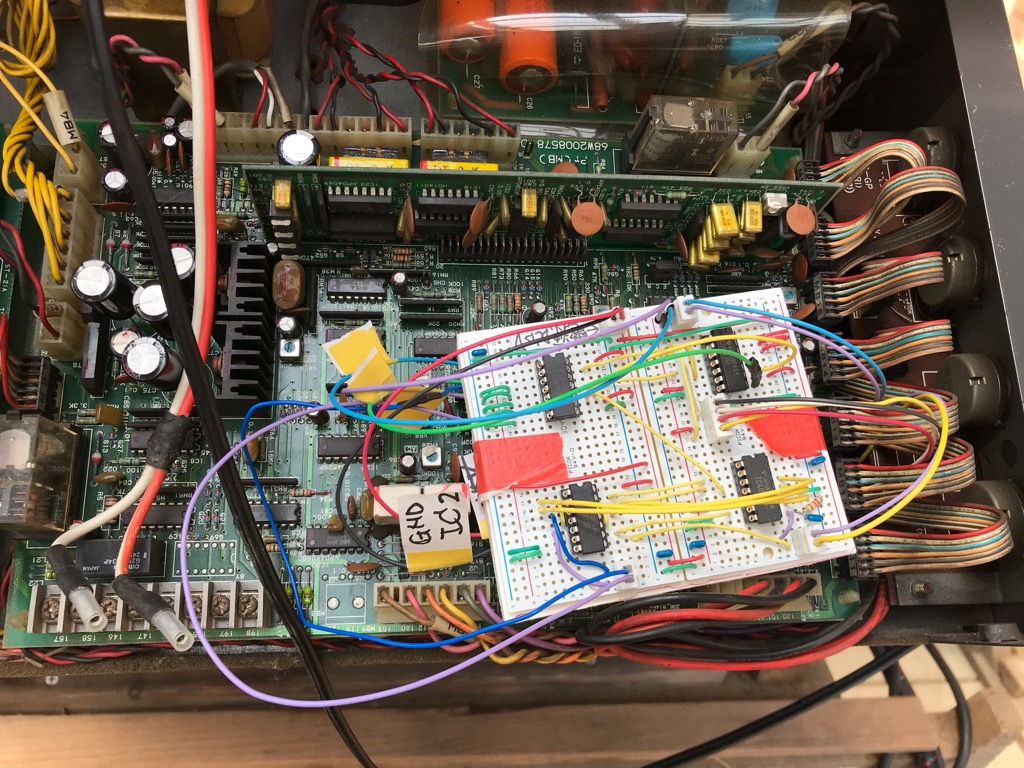
Several logic-chips are placed on a small additional board, and is placed on the main circuit board of the welder;
Attachment 35942
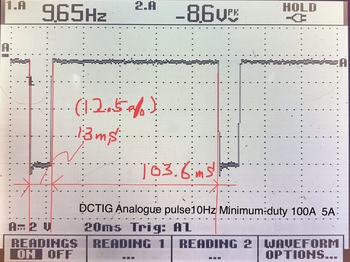
The default setting only provides the minimum duty ratio of welding pulse as 12.5%
.
Attachment 35943
.
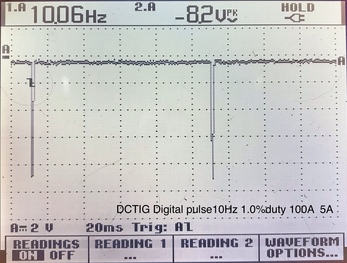
but I wanted smaller duty as small as down to 1.0% for each welding pulse frequency,
showing one sample I got after this retrofit;
.
Attachment 35944
This old welder has a pulse-range from nearly 0.5Hz up to 500Hz done by analogue frequency generator by default. This old set-up of analogue pulse is not replaced with the new, it can be used if I want.
One of the features I love is that this new set-up can provide higher pulse frequency from 500Hz up to 900Hz, which I found useful in welding thinner steel sheet.
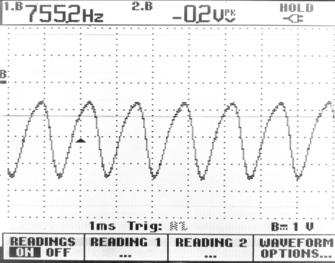
The arc sometimes wonders when the welding amperage is set low, like 30A for welding current and 5A for base current.
But I feel like this problem has nearly gone since I added this new digital generator by applying DC welding pulse frequency higher than 750Hz;
.
Attachment 35945
.
with this frequency the arc shows somewhat better stability to the aimed point.
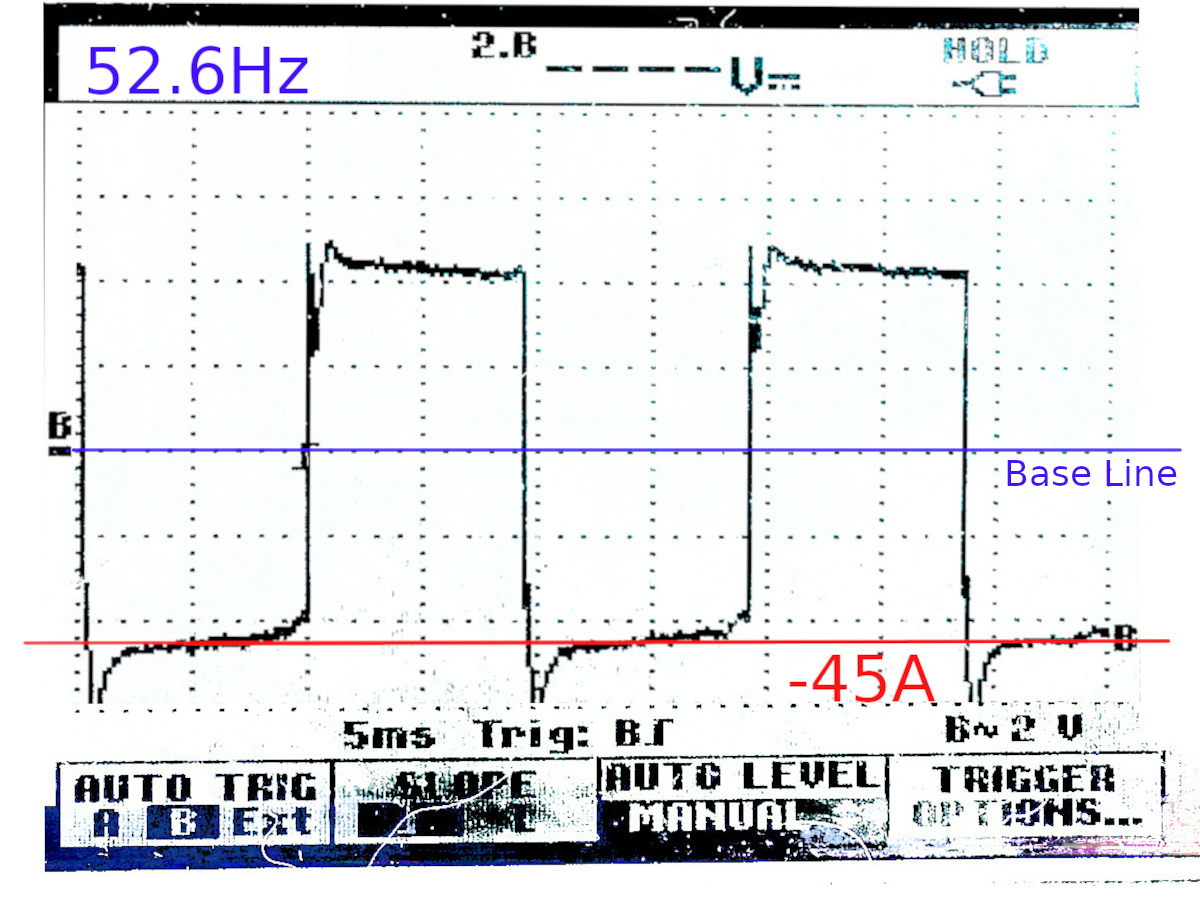
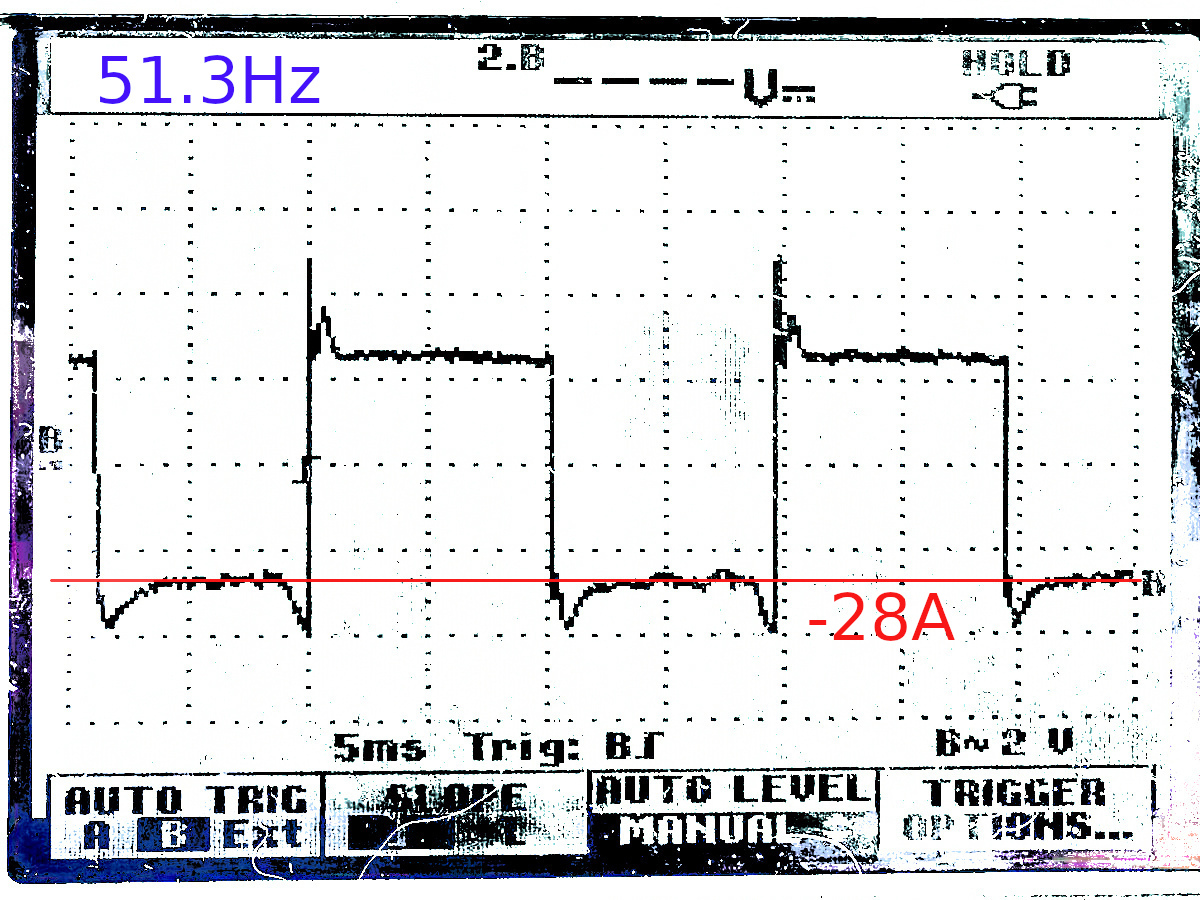
Below is a default wave form of Alternative Current welding, aluminium for example, showing the minus peak as 45A besides overshoot.
Output power is set to 50A for welding;
Attachment 35947
This shows the real welding power is a tad lower than the setting value.
Here is another wave form attained with the same setting but the output power was set to 30A;
Attachment 35948
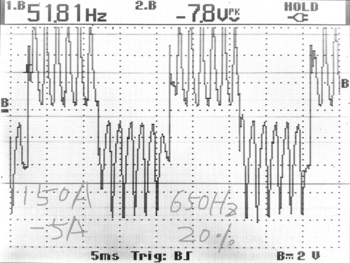
Now I'm going to replace the rectangular wave forms of the both sides (of plus and minus domains), with a couple of pulses of arbitrary frequencies given by this new addition;
Attachment 35949
Replaced the rectangular wave with 650Hz pulses, setting power 150A for welding.
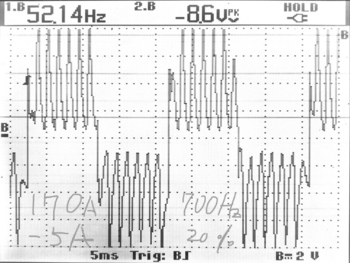
Attachment 35951
also with 700Hz pulses, setting power 170A.
<!-- BEGIN /var/www/html/homemadetools/protected/modules/zeus/views/tool/postUpdate.php -->
Thanks chy_farm! We've added your Digital Generators for a Welding Machine to our Metalworking category,
as well as to your builder page: chy_farm's Homemade Tools. Your receipt:
<div id="blocks"> <div class="block b1 pngfix"> <div class="bimg"> <div> <a href="https://www.homemadetools.net/homemade-digital-generators-for-a-welding-machine-2"> <img src="/uploads/234725/homemade-digital-generators-for-a-welding-machine.jpeg"/> </a> </div> </div> <div class="head pngfix"></div> <div class="left pngfix"></div> <div class="right pngfix"></div> <div class="blockover b1 pngfix"> <div class="title"> <a href="https://www.homemadetools.net/homemade-digital-generators-for-a-welding-machine-2">Digital Generators for a Welding Machine</a> <span> by <a href="https://www.homemadetools.net/builder/chy_farm">chy_farm</a></span> </div> <div class="tags">tags: <a href='https://www.homemadetools.net/tag/welder'>welder</a>, <a href='https://www.homemadetools.net/tag/electronics'>electronics</a> </div> </div> </div> </div>
<!-- END /var/www/html/homemadetools/protected/modules/zeus/views/tool/postUpdate.php -->
As far the schematic, I am thinking of asking a buddy who guides me to attain this job with a lot of information on welding machines if he gives me permission to open his schematic design of this unit.
A nice addition to your old welder. A You have indeed created a much easier to use welder for thinner materials. How does the overshoot work? I'm guessing that your initial arc will be a little bit easier to strike with your settings.