
 LinkBack URL
 About LinkBacks


We got to the point where "we need to make a hydraulic press someday" got to "we need one now". So, my wife and I started working out how we wanted to build one, maybe something like the one we had in California only less wobbly.
Well, she happened across a press kit on sale for a price that looked like "maybe we'll buy the kit" instead of calculating and ordering the steel profiles. Around here there's lots of basic hot rolled steel, anything else is special order or poke through the scrap yard at one steel place.
5 star rating, looked like our April 10 ton cylinder would fit fine, made here and not China. Ok, ordered.
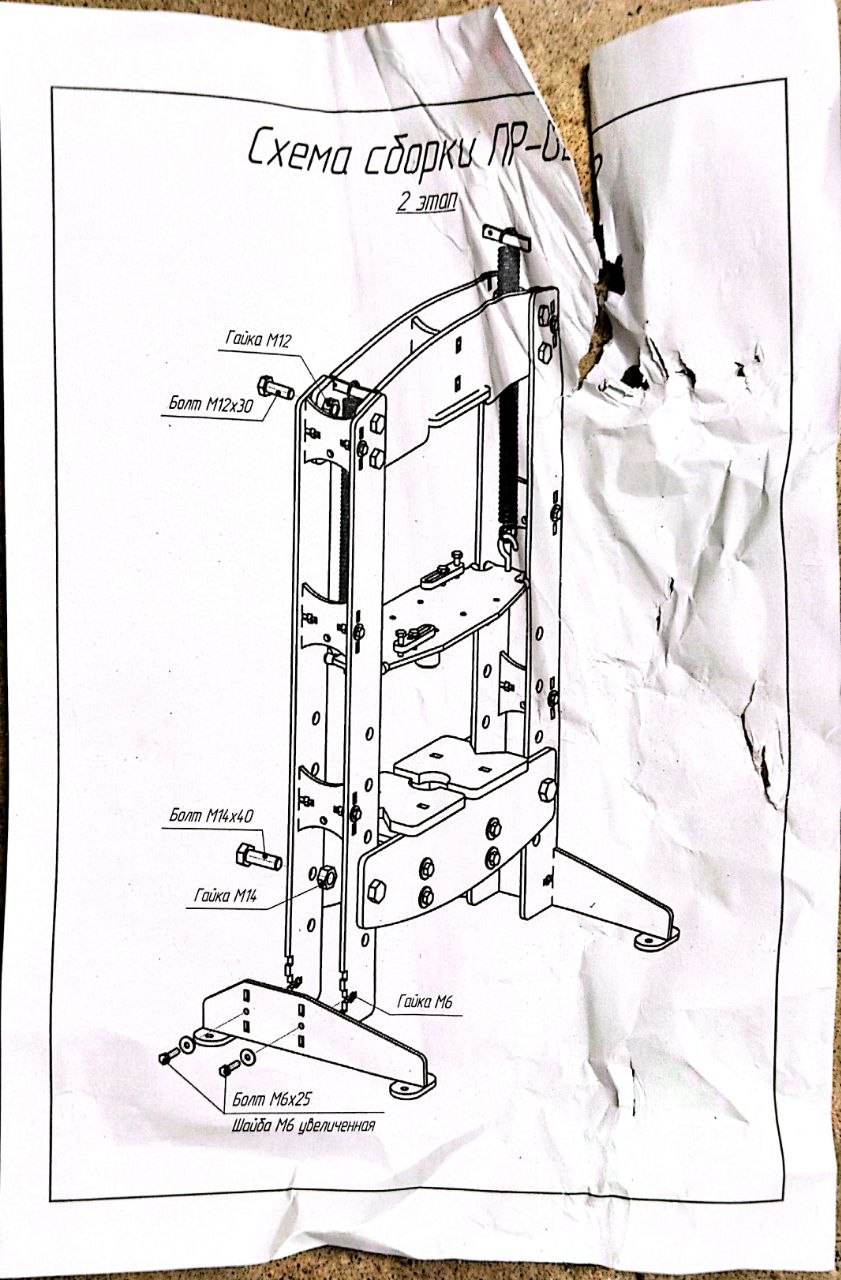
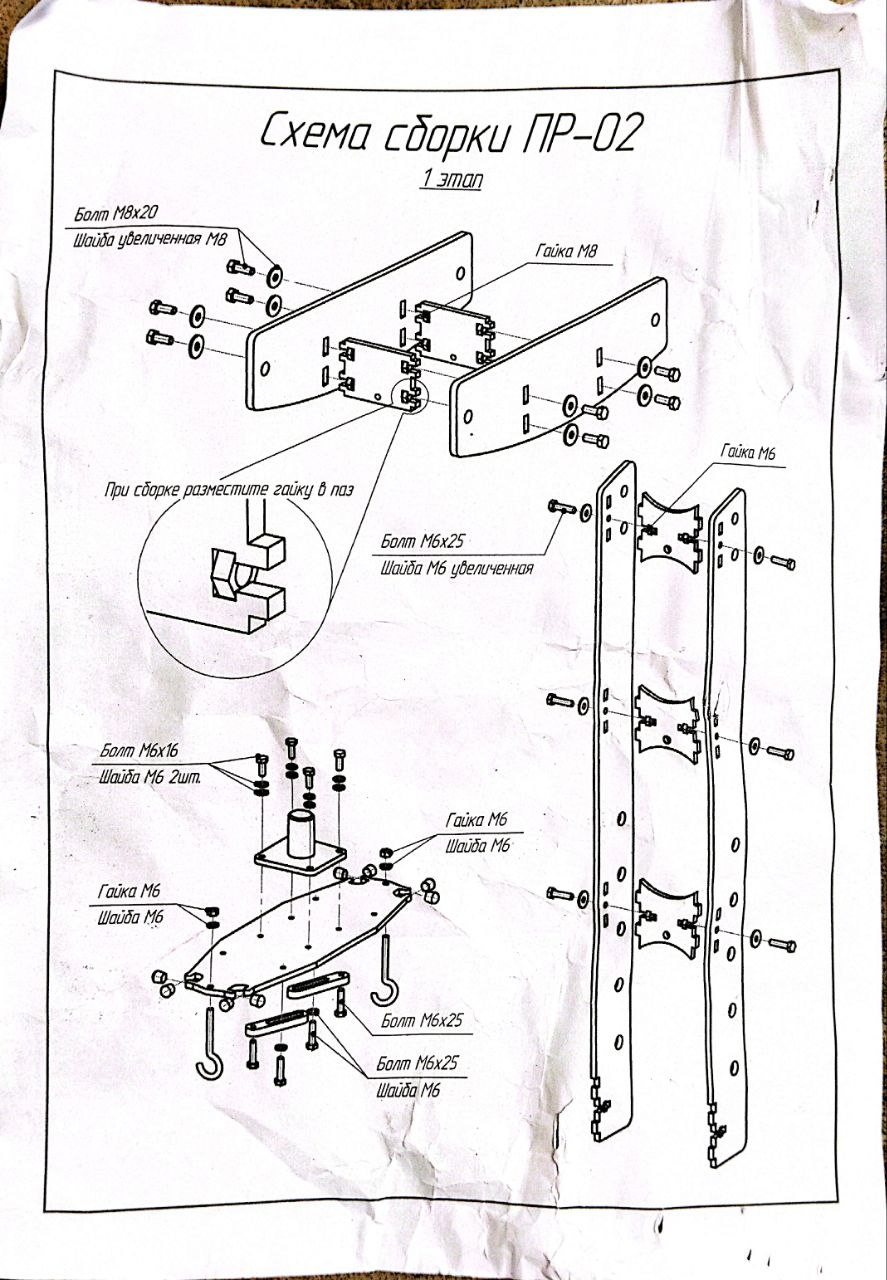
Interesting design, made like the laser cut plastic and thin wood used for various maker stuff. Only this is made of 6mm steel in the verticals and 8mm in the cross pieces. Grade 10.5 bolts.
Seems strange to make it this way, but we'll see
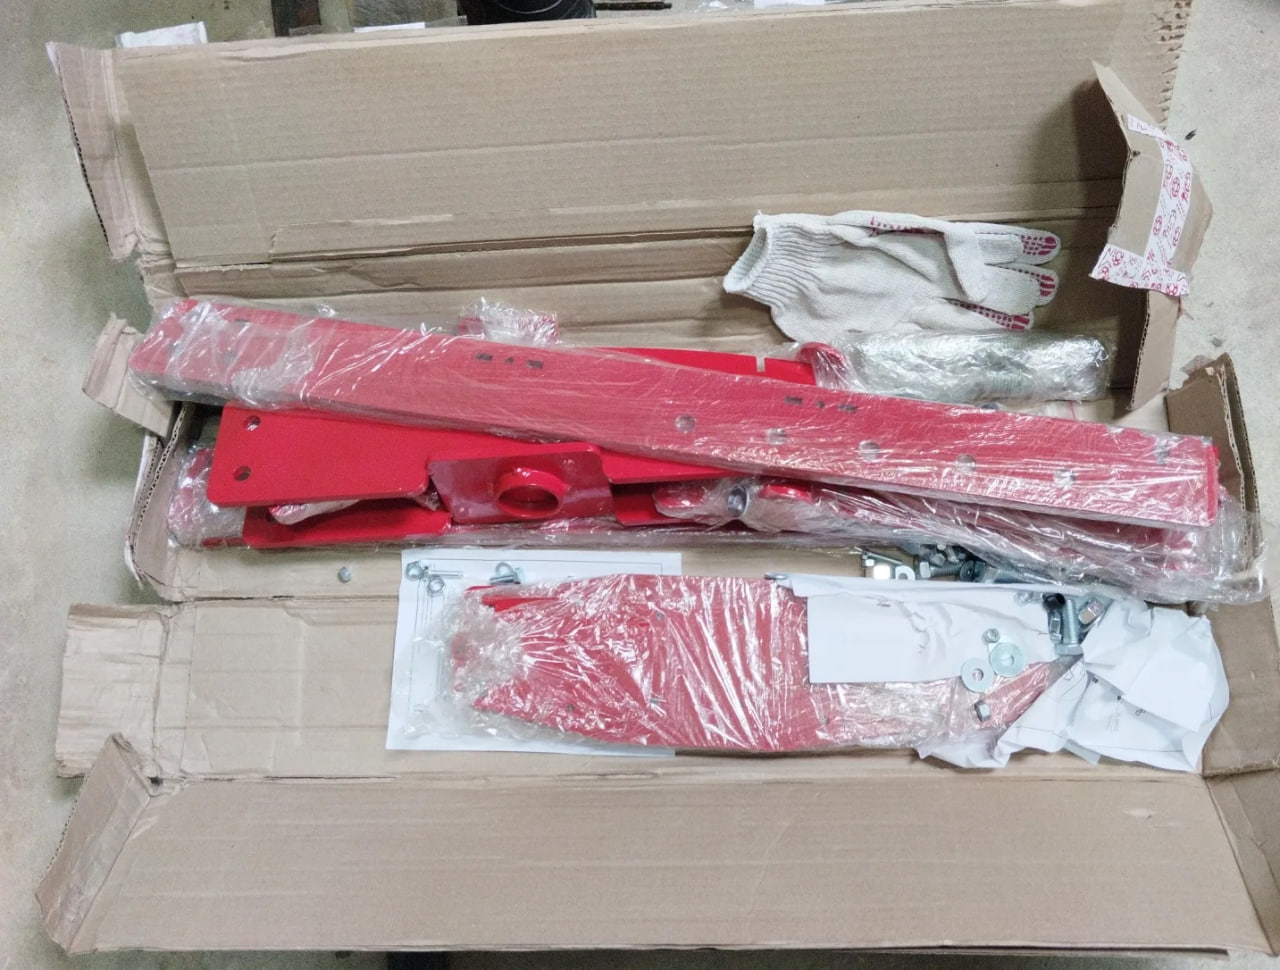
The box arrived a few days early, over 30kg. We took a hand truck to pick it up.
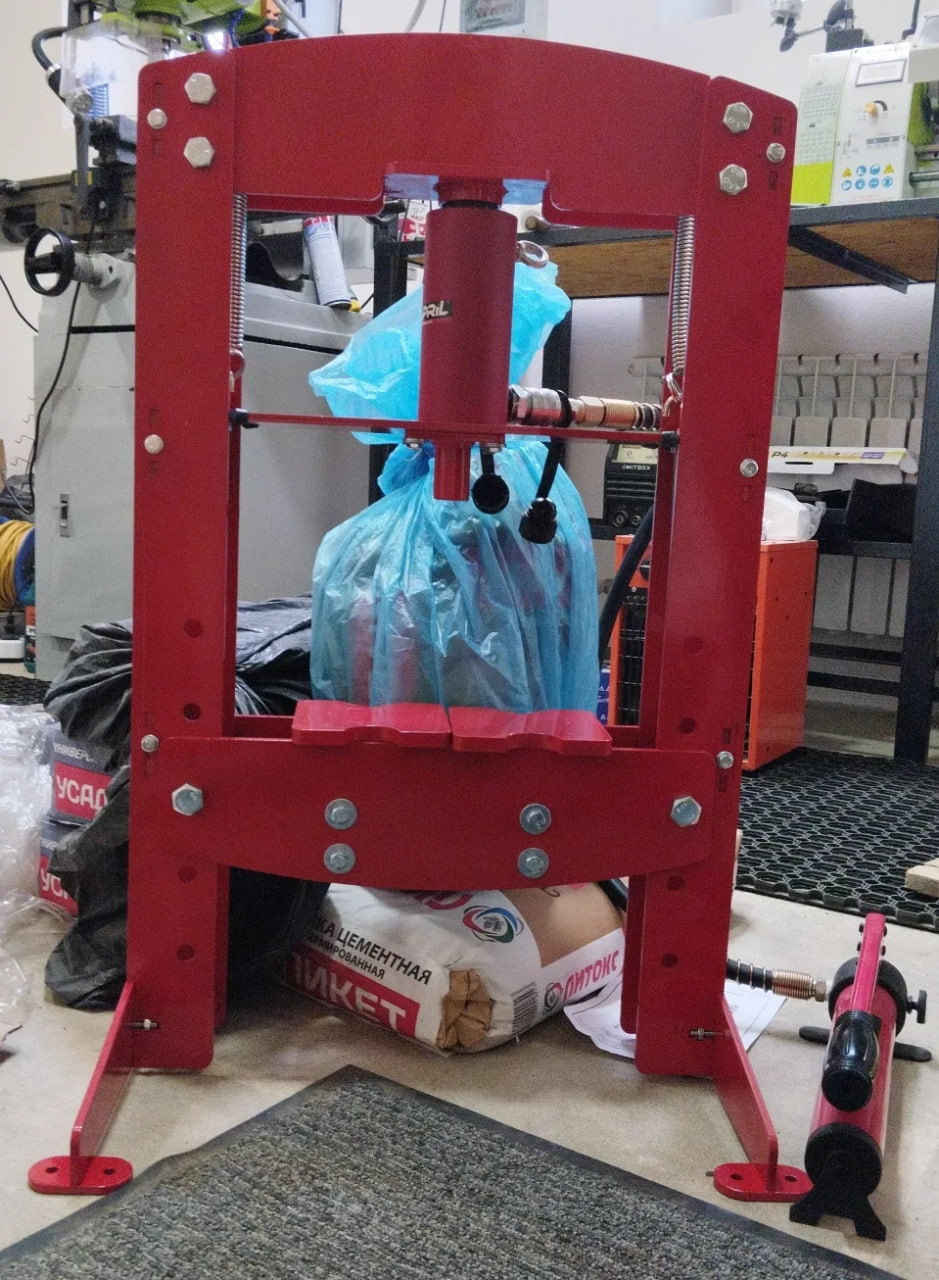
Looks nice, powder coat paint, very clean design.
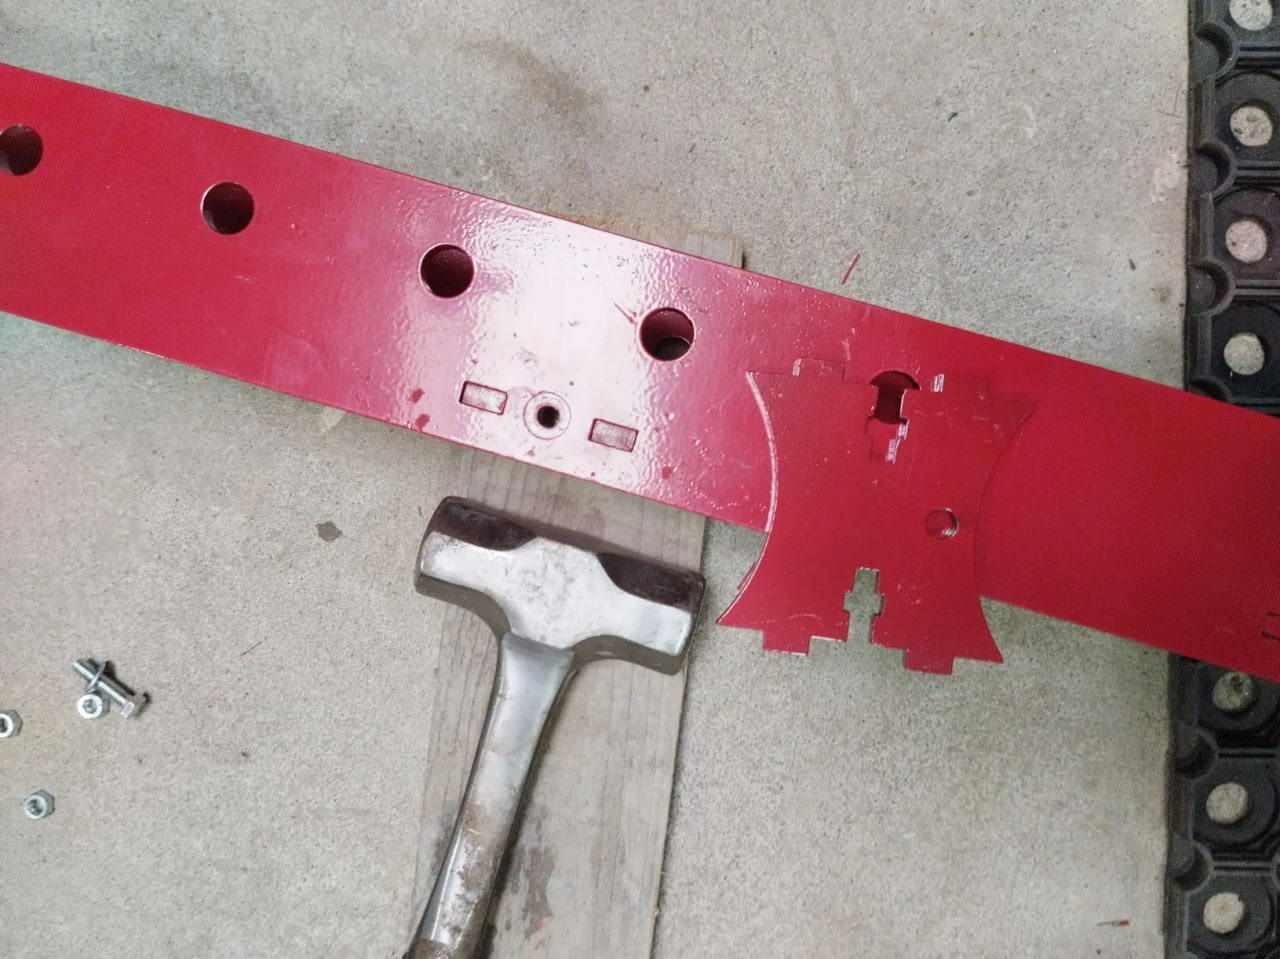
Small problem, the rectangular holes for the pins are too small (after the powder coat paint) so I employed a hand operated persuasive device.
The rest went together with no problem. Here it is assembled with the April cylinder in place.
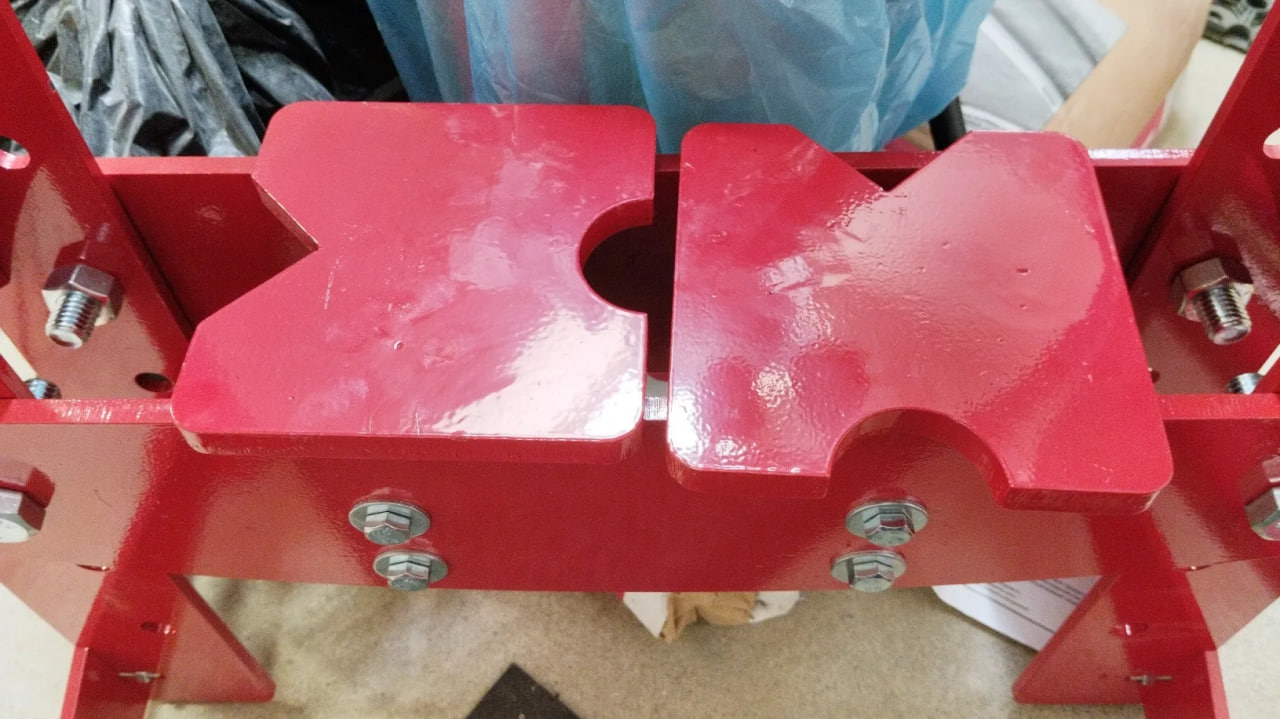
It came with the X plates, they only have two cutouts each but that's ok. The backs have a vertical plate welded on so you can bend/straighten things in them. The side legs of the press being two plates leaves a nice gap if you need to feed something in from the side.
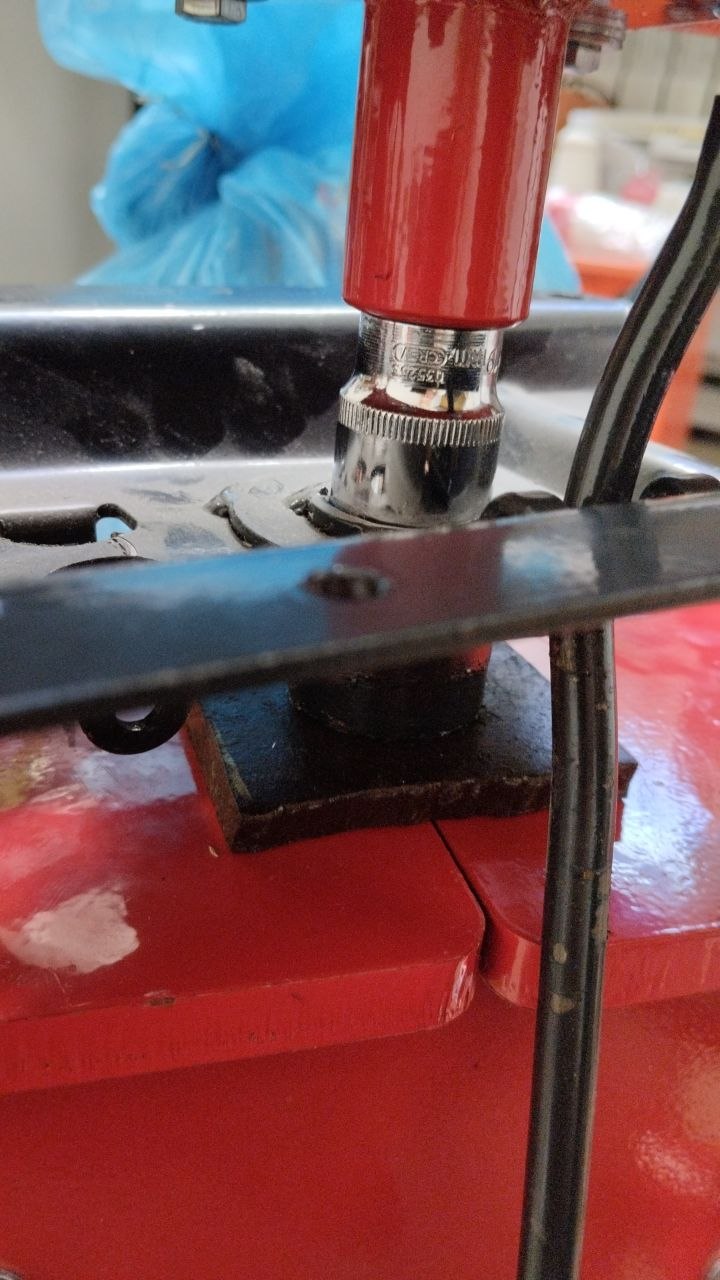
First use, fix my ^%%$#! office chairs, both of them wouldn't stay up for long. The gas springs on them are replaceable... if you have a press for each end. So, here's the first one being popped out using the official press spacer of a 12 point socket.
I haven't connected the gauge to my pump yet, I've been using the cylinder for construction work and didn't need it. But, it felt like a couple of tons of force based on past use.
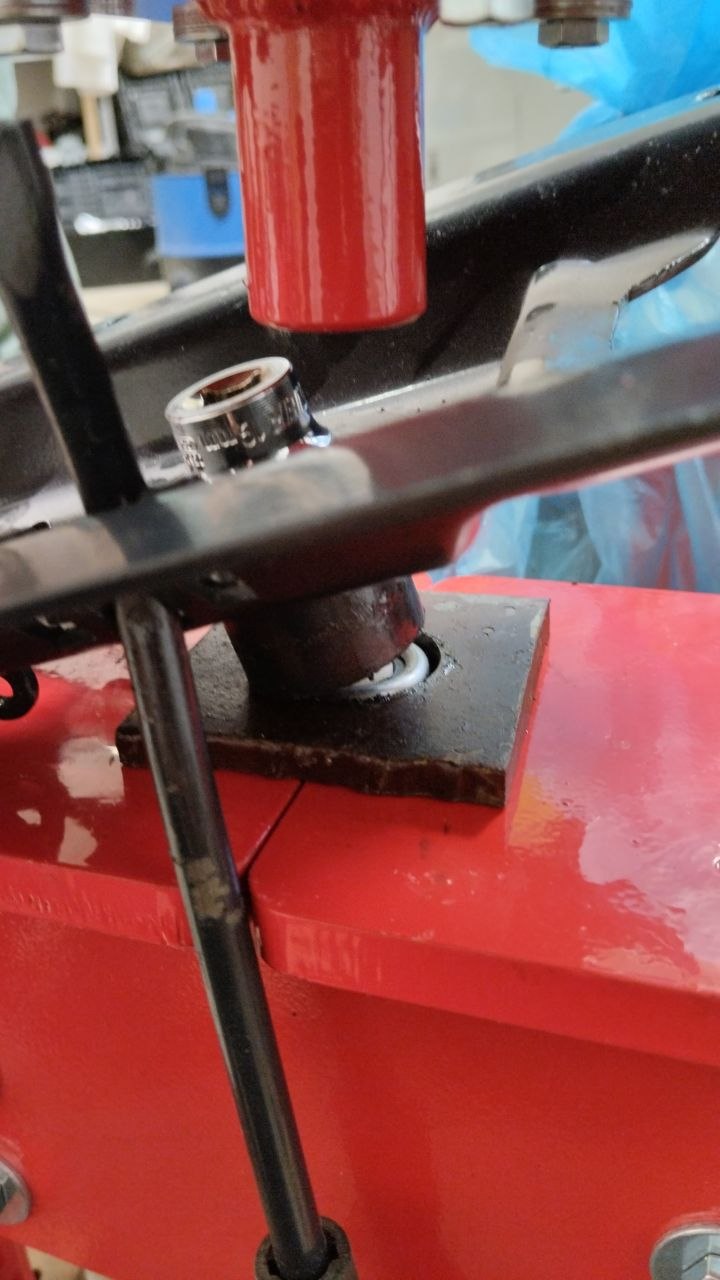
Since the X plates only have big notches in them, I found the adapter I'd made to press the spring back in my hammer drill worked perfectly. Never toss out scrap!
Looks good, overall pleased. The hole size is a beginner mistake, they forgot paint thickness. But this method of assembly makes a strong, wobble free press.
Anyone with access to a laser cutter might consider this funny looking but functional way of making things.


 Reply With Quote

Bookmarks