I wanted to bore several 26.5 mm holes in oak. They must be square to face and edge. I do not have ready access to a lathe anymore. The hole must be smooth. I do not, of course, have a 26.5 mm Forstner bit.
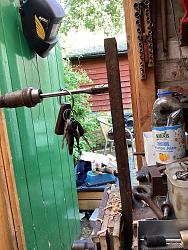
I do however have an adjustable wood boring auger:
I hope you appreciate that the wood is plumb in the vice, itís just my posture. You can tell by the door jamb, which is plumb, or it was.
Why are my keys on the auger? This is a tip I learned at college, thanks, Danny. If the keys go away or towards you as you drill, then youíre not square. The other planes you must judge by eye. Well, this is just a tip. The bore, as expected, is not at all satisfactory, far worse than an Forstner bit, although it might do if I just wanted to run a tube through it.
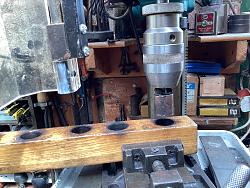
I have a 25mm Forstner bit to remove most of the waste. This was the first operation.
I also have a short piece of round bar, 25.35 at the largest diameter.
This I heated red hot, and taking it outside, pushed it though each of the holes, from each side. (2 heats).
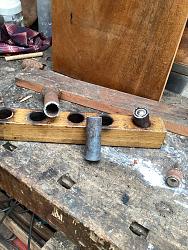
This is the result, the steel, now cold, in the centre.
The holes taper towards the middle. Now I need to remove the taper and any excess material.
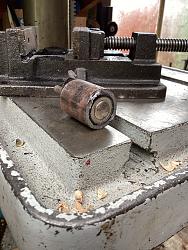
The tube on the left is just under 27 mm. On the right you see an ordinary sanding spindle, 20 mm dia. I have wrapped a bit of tape around the rubber sleeve, pushed it into the tube and tightened the nut on the arbor. Then I cut through the steel tube leaving a slight excess. This is the lap which I then abraded, with it in the drill chuck and the motor running.
I ran it until I was happy with the diameter, then passed it through the holes, with very little resistance.

I suppose if I had needed to drill, say 27.5 mm, I would have sawn down the tube, wedged it open, and used more tape on the arbor.
You may think that burning the holes out made it very time-consuming. It wasnít the only job, though, I was just using the opportunity presented by the unseasonable weather. Also, I wanted the oak hardened around the holes, as well as smooth. This is the way I learned to fabricate makeshift bearings.


 LinkBack URL
 About LinkBacks


 Reply With Quote


Bookmarks