
 LinkBack URL
 About LinkBacks


Click thumbnails for fullsize.
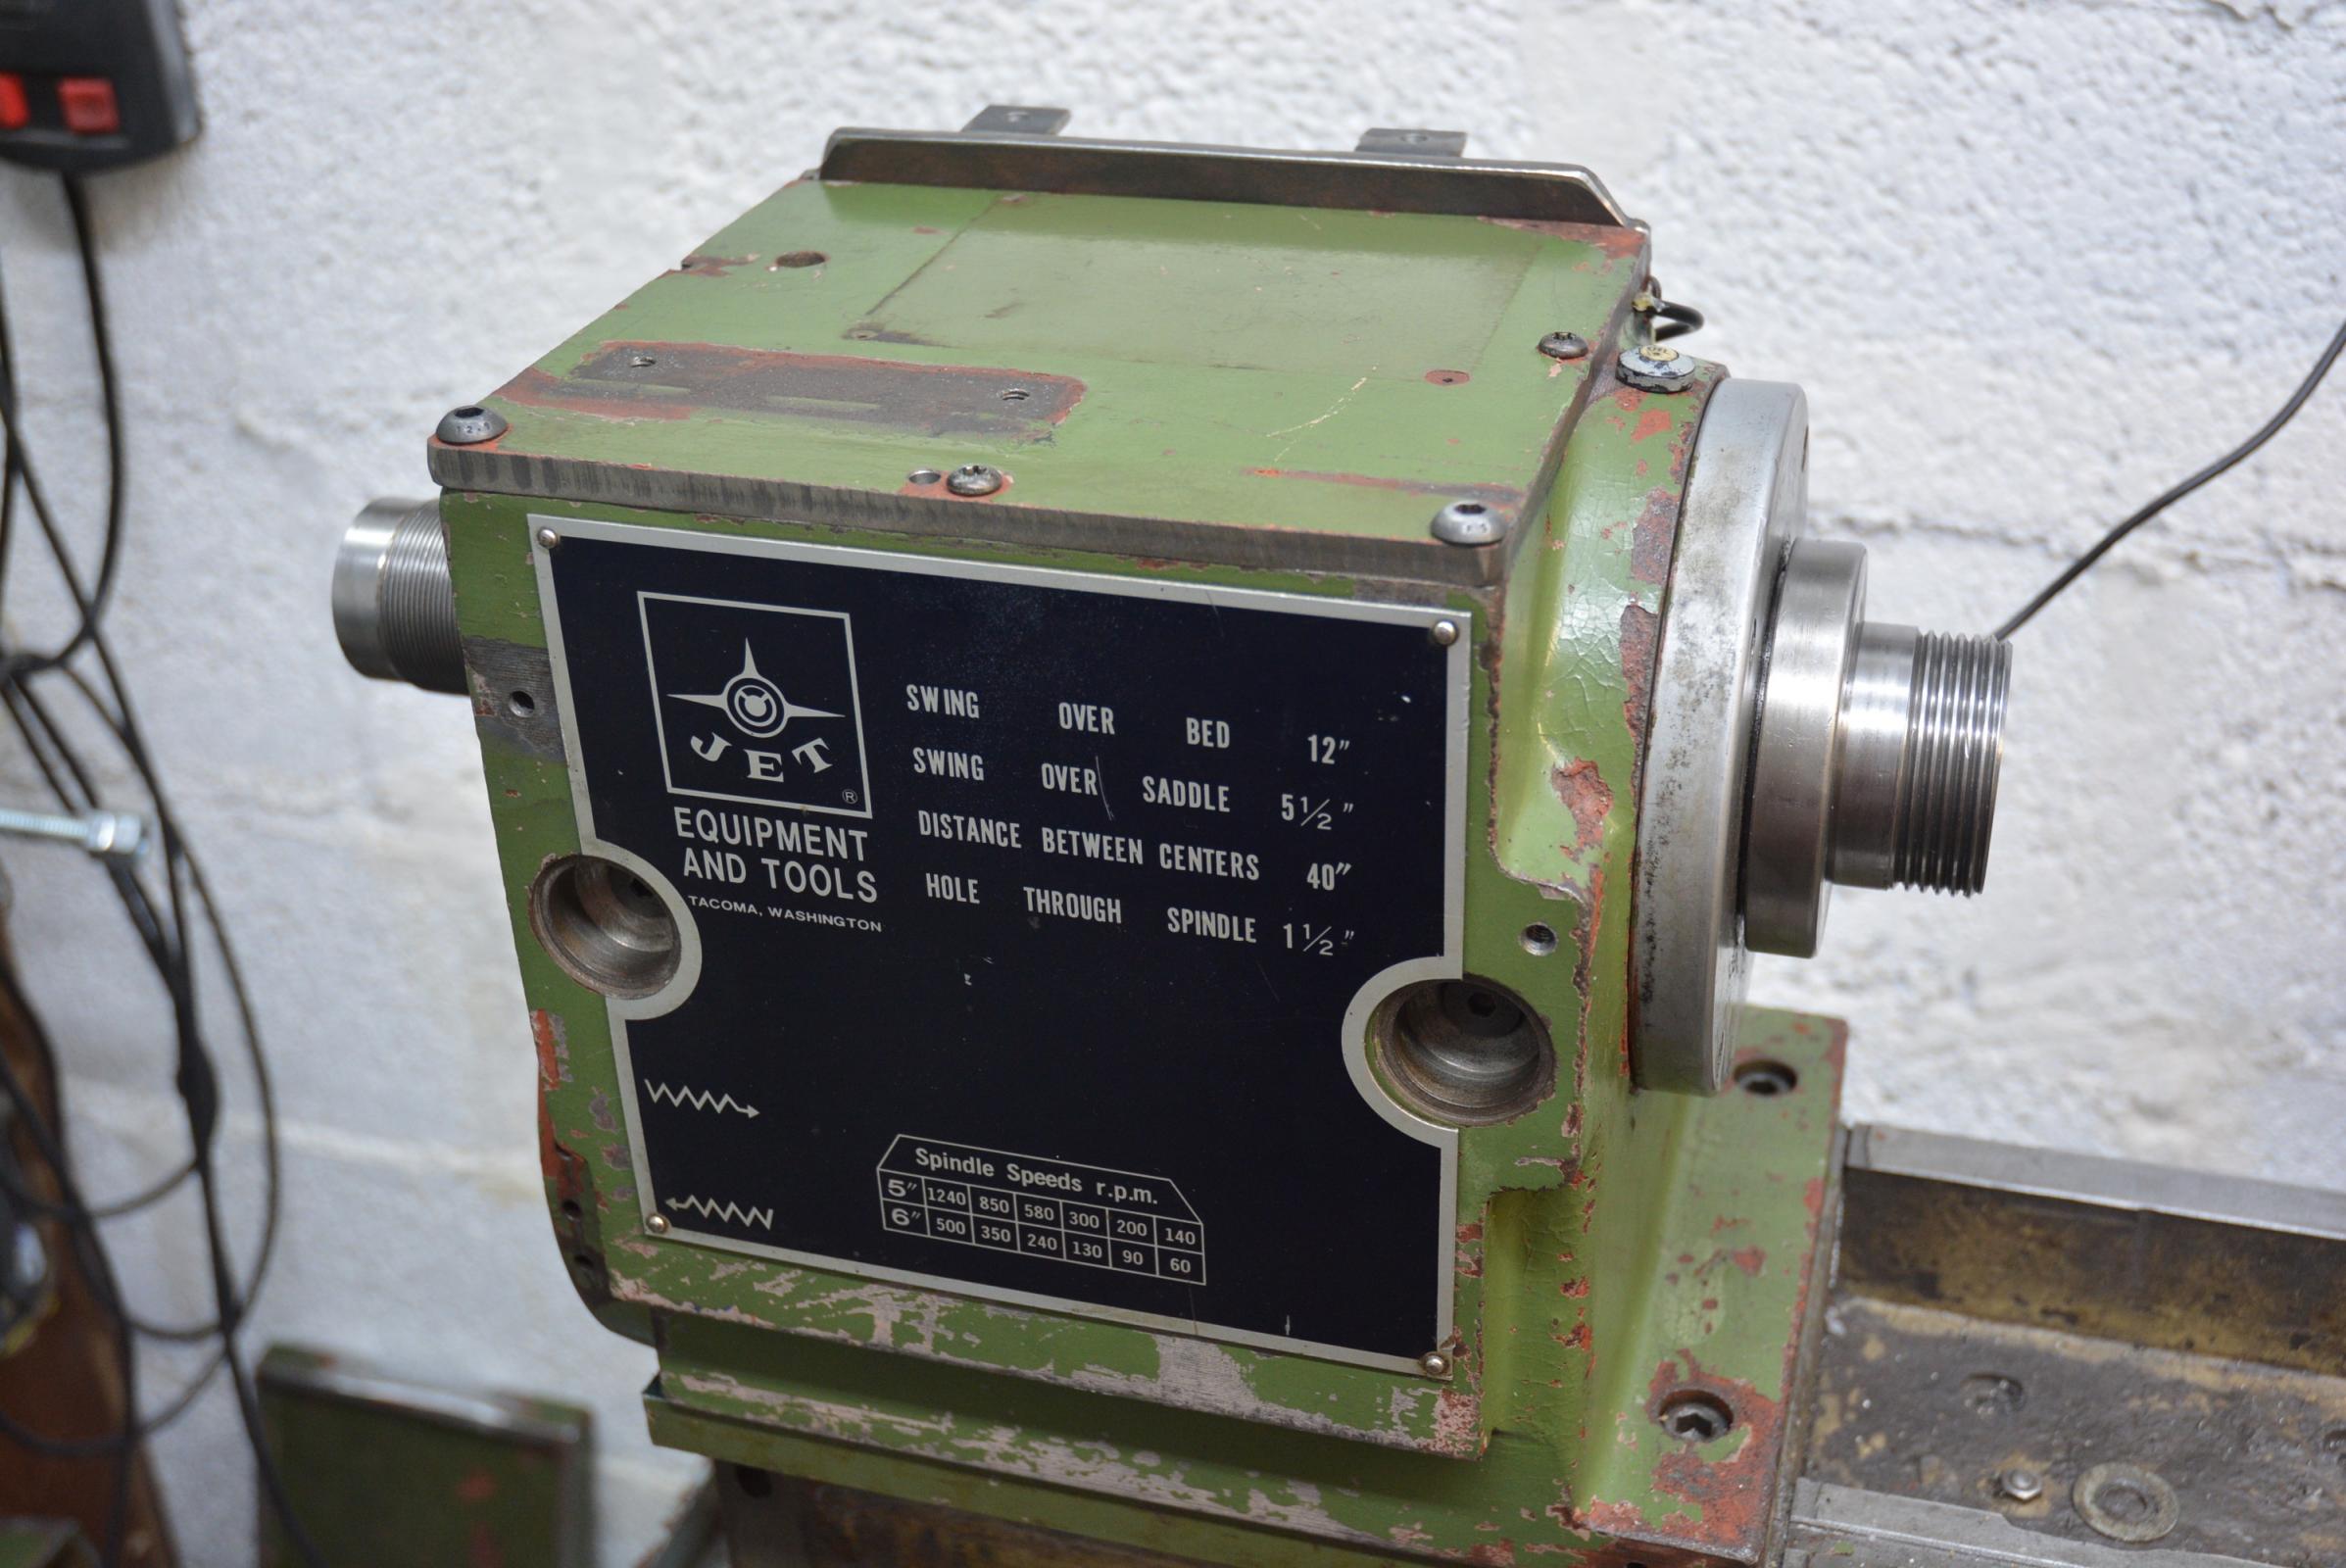
I bought my first lathe when I was about 16, it was a Myford Super 7. A great little lathe but I hated the screw-on chuck mounting and I have hated them since. After owning my current Jet lathe for over ten years I have finally got around to doing something about it.
My favourite chuck mounting is what is known as a long nose taper. The long taper provides the drive from spindle to chuck, it has a key which ensures that the chuck is always fitted with the same angular location and the chuck is held to the spindle by means of a large threaded sleeve which is also used to force the chuck off the spindle. The length of the taper means that the chuck back plate has to be quite long, I had four chucks and a face plate to fit and that would have required making a whole lot of swarf.
My second choice would be what is known as a "D" Camlock fitting. These have a short taper and a very quick system of holding the chuck onto it using a chuck style key. However, there would have been a lot of work to make the adaption to fit the existing screw on spindle. I was sure that there would be commercial conversion kits available but I drew a blank.
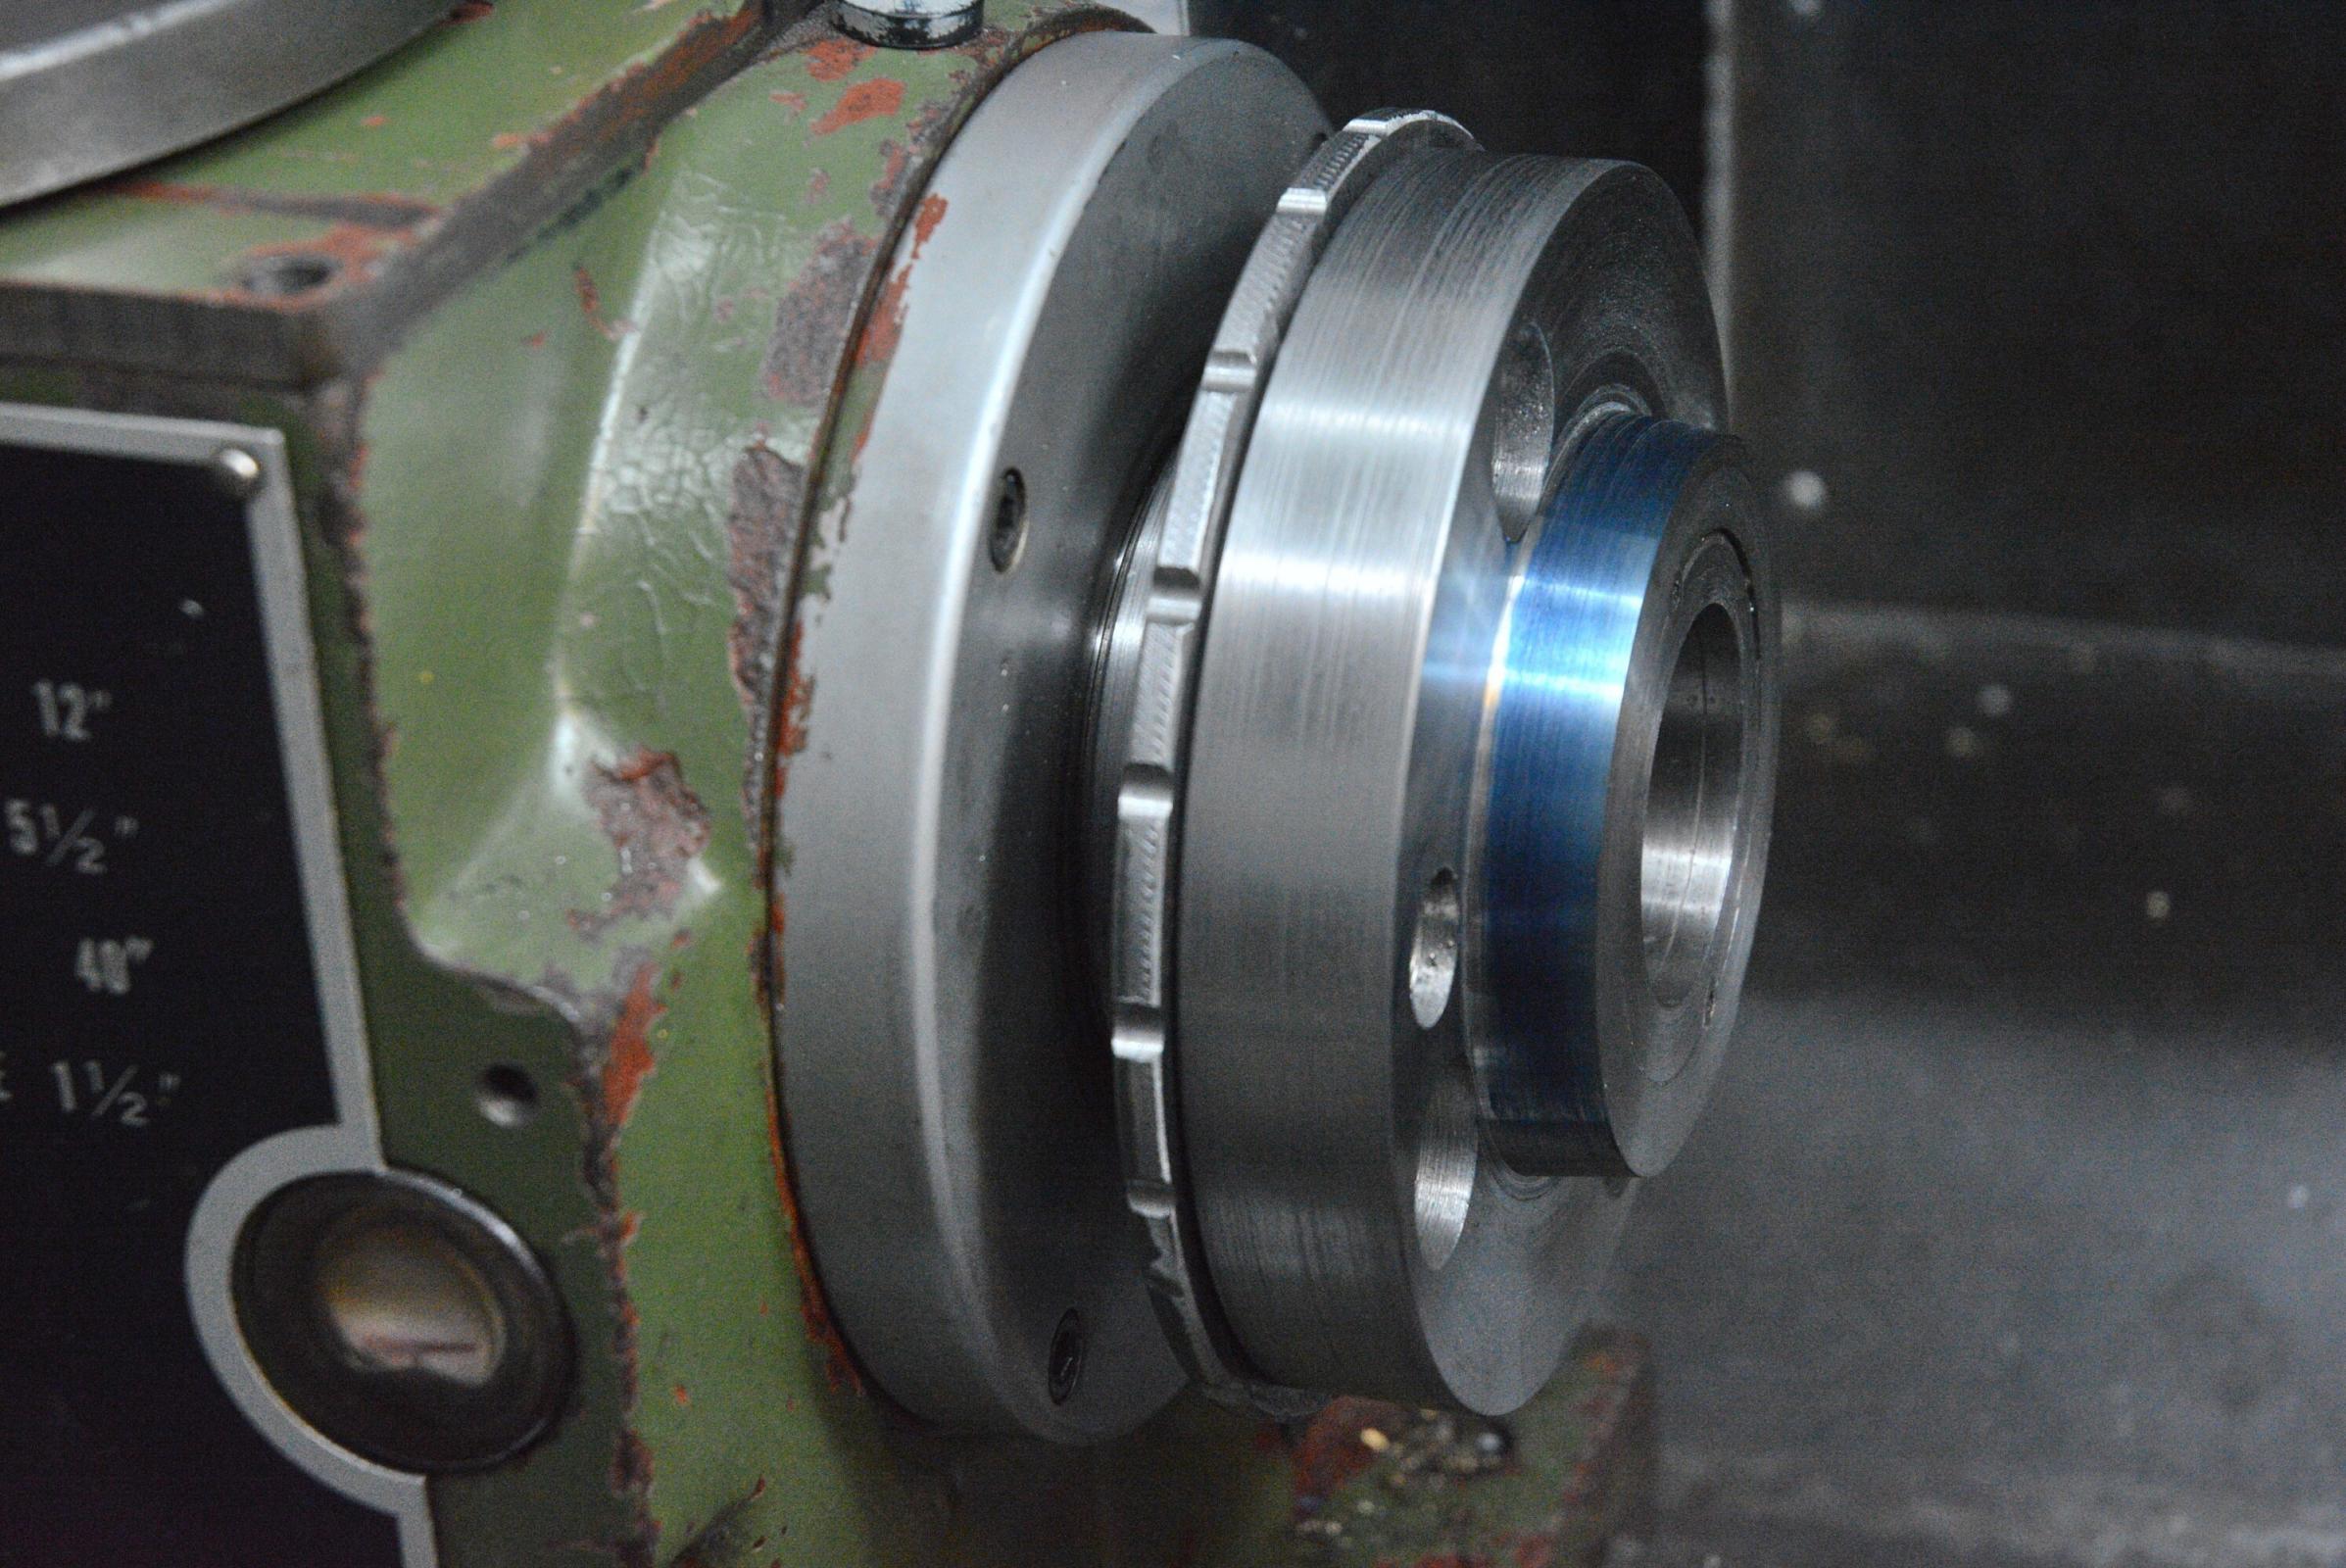
Some years ago I had a very old and worn lathe which had a "bayonet" chuck fitting. This was the best part of the lathe. When I scrapped it I kept a chuck backplate and a face plate. The standard for this type of mounting has mounting dimensions very similar to the "D" type and the mounting and removal is fairly quick and easy. My existing chuck back plates only needed a bit of boring out and drilling and tapping for four studs. I already had a suitable back plate for one chuck so I only had three to do. The following video shows how I did it. It was very easy and I am over the moon with the result. I find myself changing chucks more often, instead of using a 3 jaw with a shim I now simply switch to a 4 jaw when more appropriate.
There is an excellent listing of chuck mounting methods with dimensions at https://www.smalltools.com/lathe-spi...ication-chart/
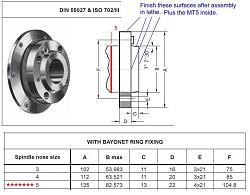
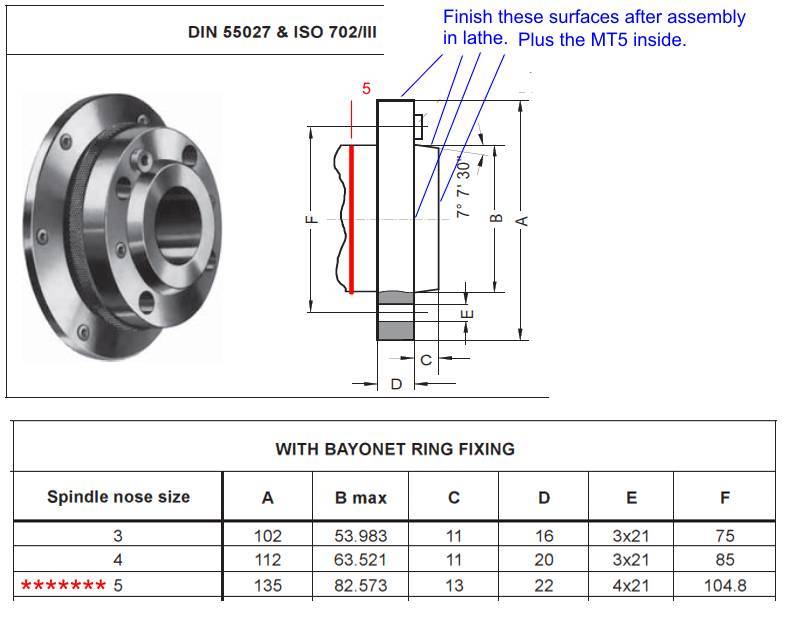
Here is a section showing details of different sizes of bayonet mounting.


 Reply With Quote

Bookmarks