Free 186 More Best Homemade Tools eBook:  
Get 2,000+ tool plans, full site access, and more.

User Tag List

Results 1 to 10 of 10

Thread: side kit for my 5x9 trailer

  1. #1
    Supporting Member Frank S's Avatar
    Join Date
    Aug 2015
    Location
    Peacock TX
    Posts
    11,179
    Thanks
    1,974
    Thanked 8,766 Times in 4,195 Posts

    Frank S's Tools

    side kit for my 5x9 trailer

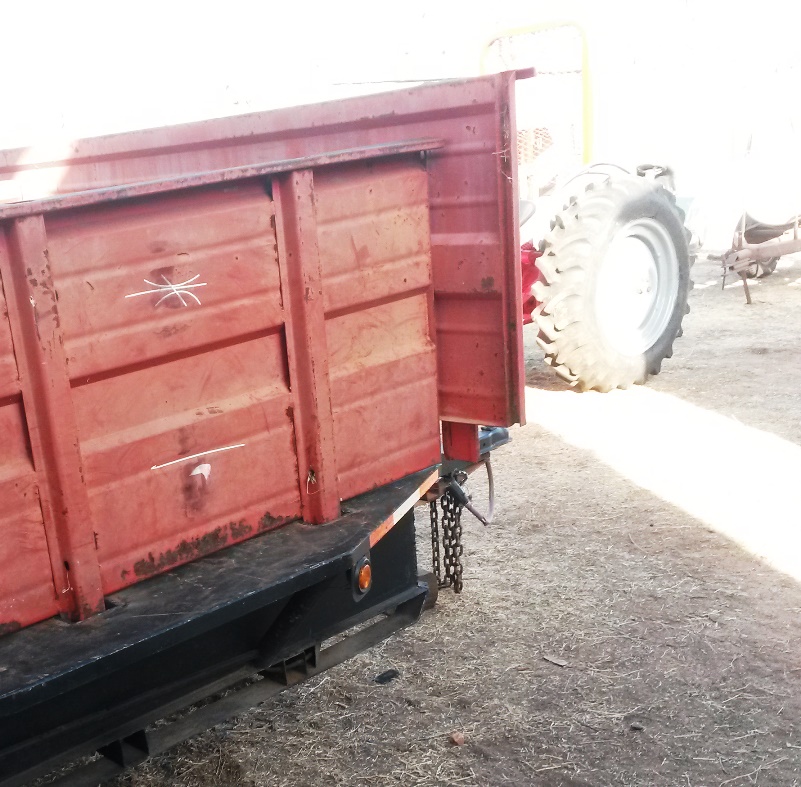
    With Spring coming up it is time to get some mulch I need about 20 cubic yards but the cheapest hauler I could find to bring that much wanted $50.00 per cubic yard delivered with a 10 year minimum,mostly because to the distance traveled. I can buy mulch for $4.00 per cubic yard.if I haul it myself but it will cost me about $25.00 in fuel per trip. So if I could do this in say 4 trips it would be $80.00 for the mulch and $100.00 for the fuel, or slightly less than what 4 yards would cost.Except for that minimum charge. The problem was in my small trailer I would only be able to get maybe 2 yards on at a time, fine for heavy gravel but fluffy mulch not so good.My solution was I need a side kit for my small trailer.
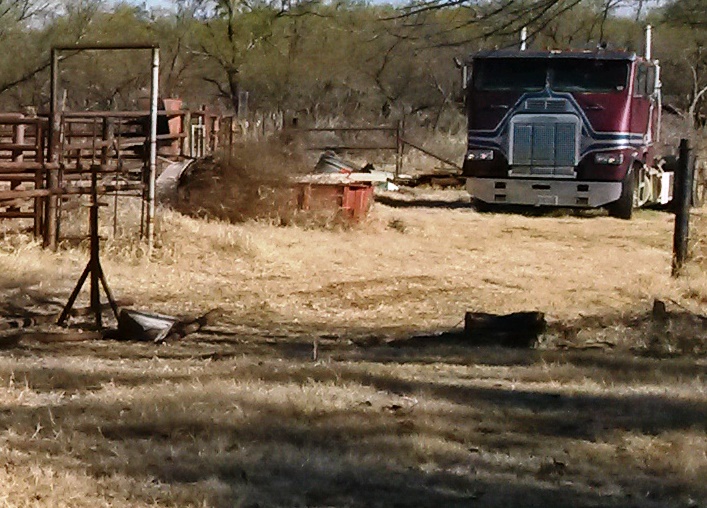
    On our property there was a kit half buried next to my coral fence if by some chance it wasn't too rusted down it might just work
    You can barely see it behind the tumble weeds next to the coral in front of my 85 Freightliner.
    side kit for my 5x9 trailer-side-kit.jpg
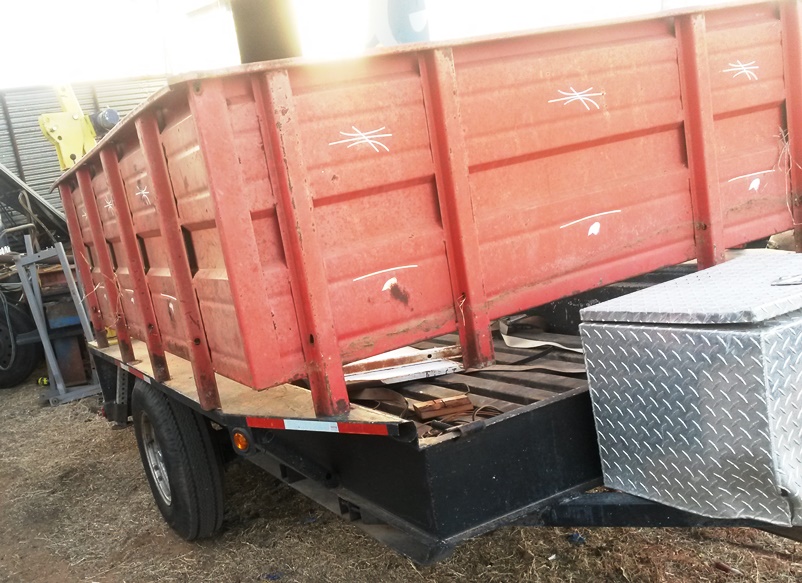
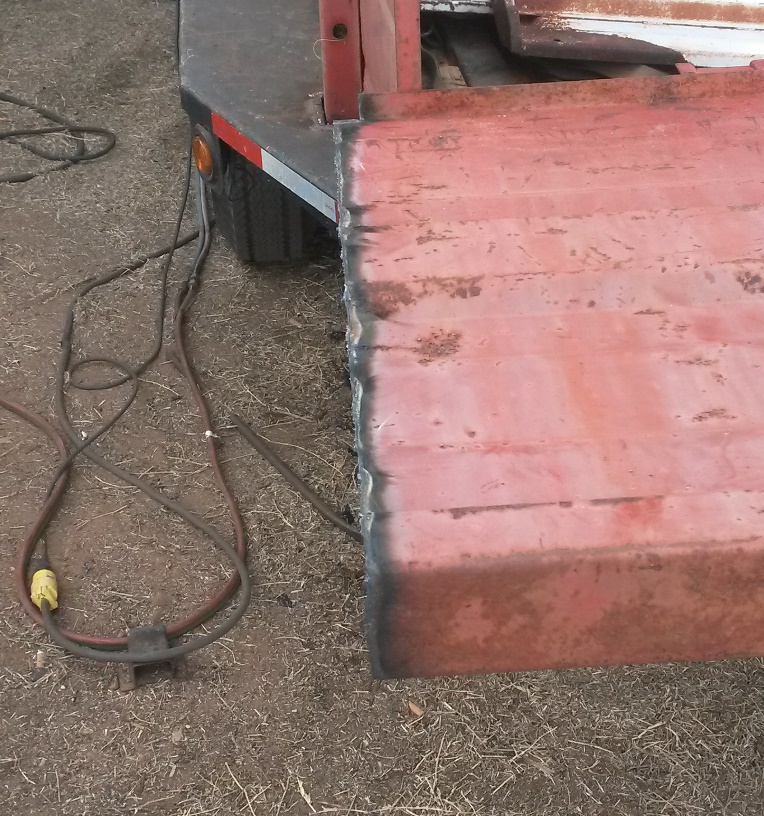
    After digging it out I set it up on my trailer I could have used it this way by making pockets out on the edges of my fenders but it was too short and I didn't like the looks
    side kit for my 5x9 trailer-20180212_172804.jpgd.jpg
    side kit for my 5x9 trailer-20180212_172813.jpgd.jpg
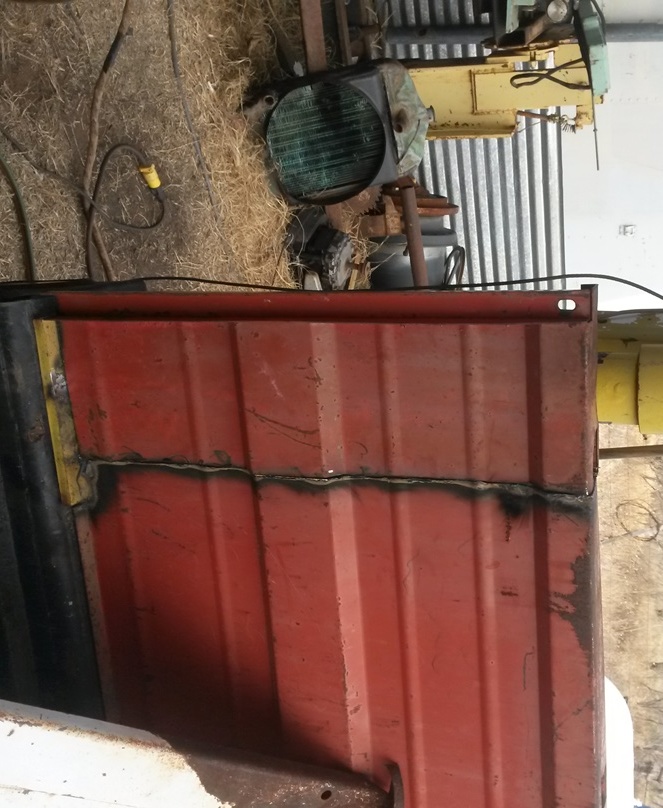
    So I made my pockets closer to the inner edge of my fenders
    side kit for my 5x9 trailer-20180213_131906.jpgd.jpg
    side kit for my 5x9 trailer-20180213_131902.jpgd.jpg
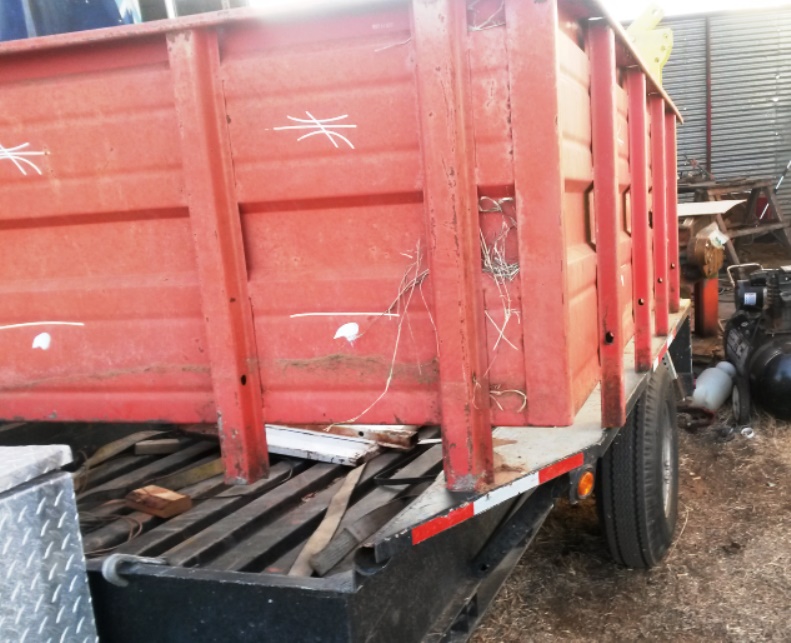
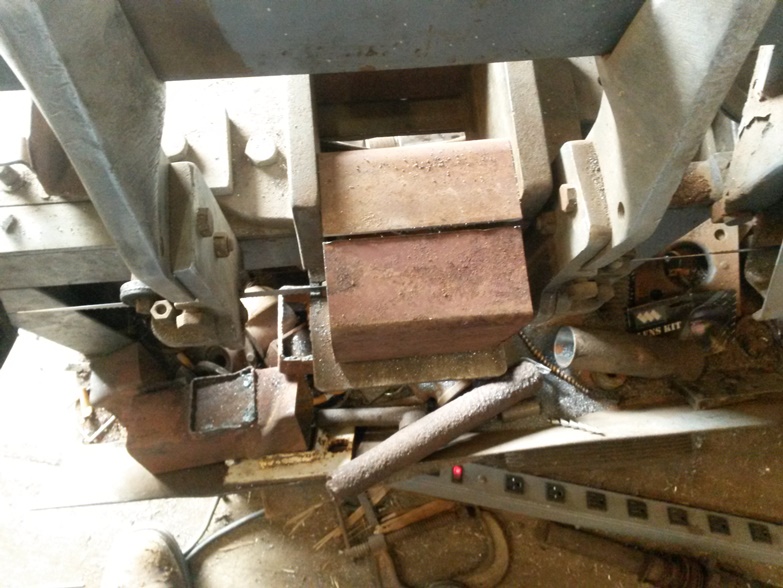
    The pockets are made out of 4x4 x1/8" sq tube split in half
    side kit for my 5x9 trailer-20180213_114353.jpgd.jpg
    Much better only now the front and rear sections are too wide
    side kit for my 5x9 trailer-20180213_162042.jpgd.jpg
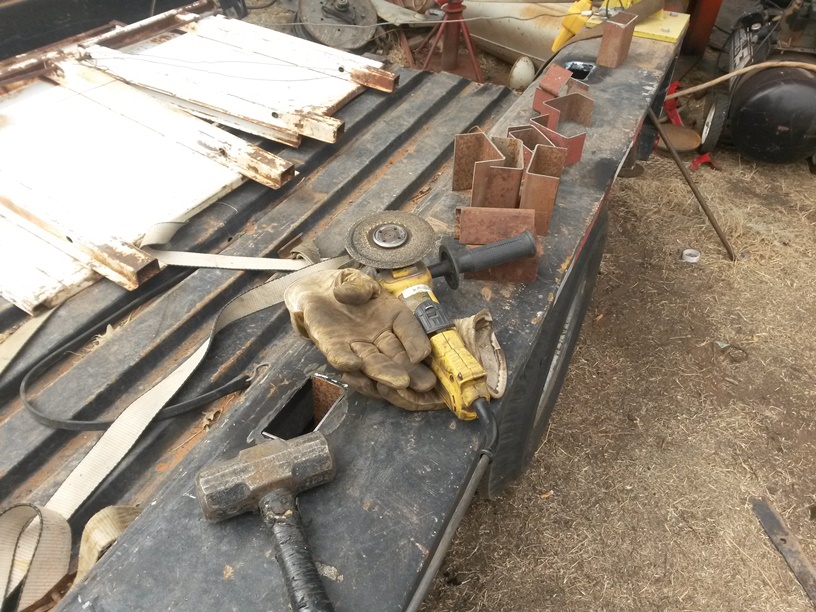
    time to break out MR Victor fit all tool
    side kit for my 5x9 trailer-20180213_164949.jpgd.jpg
    the Front is done I fabricated new end troughs using 1 3/4" 1/8" angle on the inside salvaged from part of an old exercise bench
    And 2x2x1/8" angle salvaged from the old shop building I took down where I used to live
    side kit for my 5x9 trailer-20180214_120834.jpgd.jpg
    Next to make the kit as long as the trailer as providence was holding for me the sections I removed from the front end section fit perfectly on the rear making the kit exactly the correct length. My wife thought I had measured and planned it that way but I assure you I did not.I am often that blind squirrel that finds the acorn.
    side kit for my 5x9 trailer-20180214_140337.jpgd.jpg
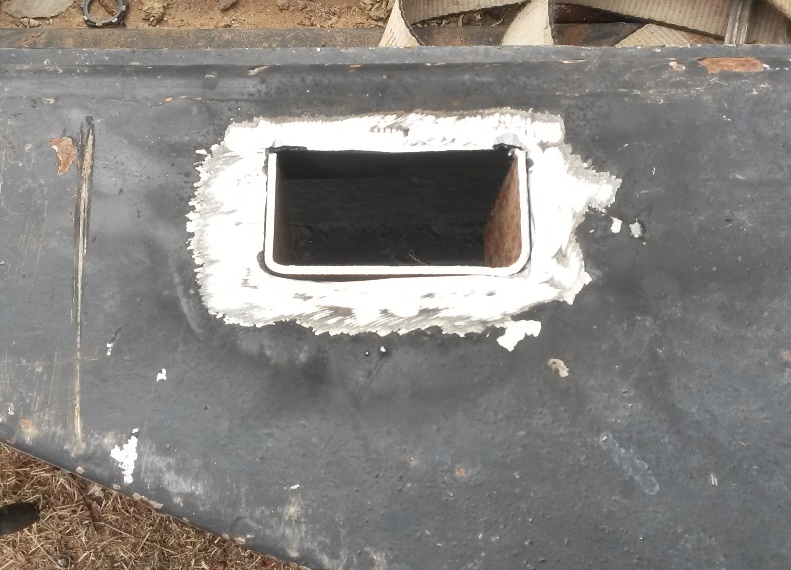
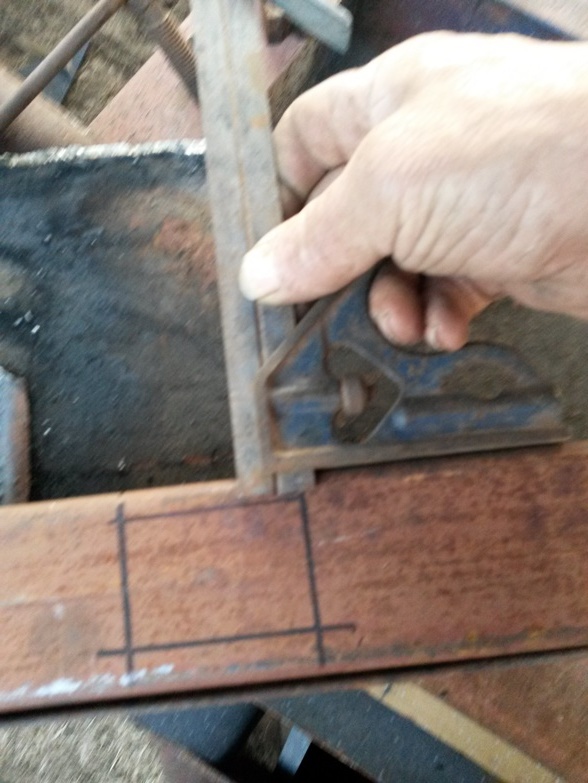
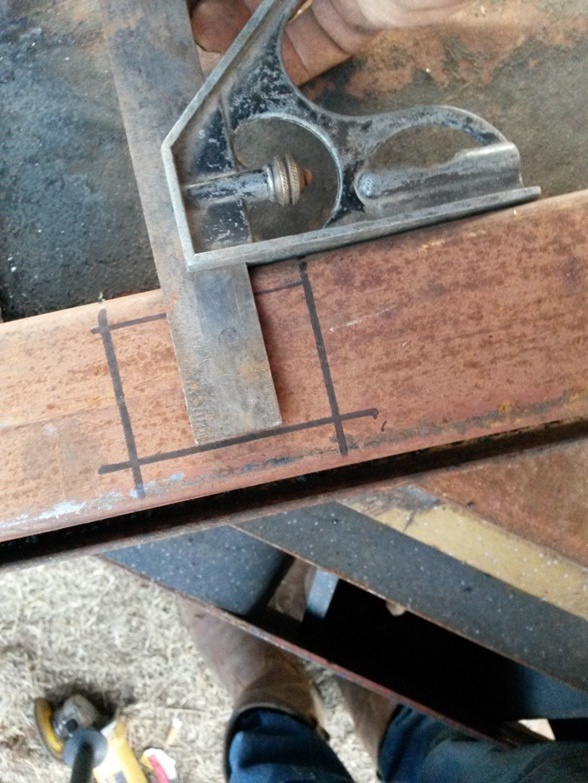
    Next it was time to construct a functional tail gate Something I have needed for the trailer since I made it.I put a second trysquare head on my square that I always use for fab work so I could do the layout for the pockets in a piece of salvaged 2 1/2 x 2 /1/2 x 14 ga sq tube from that same building.
    side kit for my 5x9 trailer-20180214_180300.jpgf.jpg
    by setting both ends I was able to completely layout the pockets slightly off center without the need to re adjust it
    side kit for my 5x9 trailer-20180214_180329.jpgf.jpg
    side kit for my 5x9 trailer-20180214_180347.jpgf.jpg
    continued next post

    186 More Best Homemade Tools eBook
    Never try to tell me it can't be done
    When I have to paint I use KBS products

  2. The Following 3 Users Say Thank You to Frank S For This Useful Post:

    KustomsbyKent (Feb 16, 2018), Scotsman Hosie (Apr 1, 2019), Seedtick (Feb 16, 2018)

  3. #2
    Supporting Member Frank S's Avatar
    Join Date
    Aug 2015
    Location
    Peacock TX
    Posts
    11,179
    Thanks
    1,974
    Thanked 8,766 Times in 4,195 Posts

    Frank S's Tools
    Checking fit of the 2 side pieces for the rear section
    side kit for my 5x9 trailer-20180214_183200.jpgd.jpg
    Next it was time to cut down the center section which has sliding door which was probably used as a grain dispenser

    side kit for my 5x9 trailer-20180215_142102.jpgd.jpg
    sliced apart with the victor
    side kit for my 5x9 trailer-20180215_145729.jpgd.jpg
    Checking for fit
    side kit for my 5x9 trailer-20180215_151144.jpgd.jpg
    Now it is time to create some kind of latch for the tailgate that can be used even without the side kit.
    I decided to use a horizontal sliding cane bolt style latch However at the same time I wanted to make it so that the rear sections of the side kit would be secured as well also the latches should be designed so that if the tailgate was closed even if someone forgot to latch it it would not come open
    I started out with sleeve receptacles which would be embedded inside the tailgate I welded a washer on a piece of 3/4 Sch 80 pipe then torched it square to fit inside the tailgate top tube
    side kit for my 5x9 trailer-20180215_162151.jpgd.jpg
    side kit for my 5x9 trailer-20180215_162220.jpgd.jpg
    Something you wont often see is gloves on my hands To be fair I didn't bother cooling the assembly before inserting it in the tube and I am holding everything in place to tack the outside washer the gloves are deerskin size xxlg driver's gloves
    side kit for my 5x9 trailer-20180215_162512.jpgd.jpg
    here you can see how the latch bar can protrude into the socket area for the end gate pieces
    side kit for my 5x9 trailer-20180215_170739.jpgd.jpg
    This is the mating hole in the Stanton
    side kit for my 5x9 trailer-20180215_170744.jpgd.jpg
    one latch in the closed position
    side kit for my 5x9 trailer-20180215_180752.jpgd.jpg
    the handle must be lifted above straight out before is can be slid open
    side kit for my 5x9 trailer-20180215_180829.jpgd.jpg
    in this position the tailgate is still latched
    side kit for my 5x9 trailer-20180215_180840.jpgd.jpg
    it must be slid all the way before the tailgate will open
    side kit for my 5x9 trailer-20180215_180829.jpg
    continued next post

    2000 Tool Plans
    Never try to tell me it can't be done
    When I have to paint I use KBS products

  4. The Following 3 Users Say Thank You to Frank S For This Useful Post:

    KustomsbyKent (Feb 16, 2018), Scotsman Hosie (Apr 1, 2019), Toolmaker51 (Feb 17, 2018)

  5. #3
    Supporting Member Frank S's Avatar
    Join Date
    Aug 2015
    Location
    Peacock TX
    Posts
    11,179
    Thanks
    1,974
    Thanked 8,766 Times in 4,195 Posts

    Frank S's Tools
    the latch system is redundant on the other side
    side kit for my 5x9 trailer-20180215_180856.jpgd.jpg
    Center section removed
    side kit for my 5x9 trailer-20180215_180921.jpgd.jpg
    center section closed
    side kit for my 5x9 trailer-20180215_180948.jpgd.jpg
    inspection door open
    side kit for my 5x9 trailer-20180215_180959.jpgd.jpg
    Tail gate open with side kit end gate still installed
    side kit for my 5x9 trailer-20180215_181046.jpgd.jpg
    inside of the trailer 63" average width overall height 40" length 9ft and if need be I can always add side boards bows and tarp to increase volume
    side kit for my 5x9 trailer-20180215_182359.jpgd.jpg
    this is the hitch I use to pull it I am showing the trailer light connector un plugged to show the type of connector
    side kit for my 5x9 trailer-20180212_165236.jpgg.jpg
    Hope you enjoyed the build By the way the bottom section of the tailgate was made from left over 10" junior I beam that I used to make the trailer from the beams was salvaged from a mobile home.the tailgate has 4 hinges made out of 3/4" sch 80 pipe and sucker rod and when fully open I can slide it sideways and remove it. it can not be removed unless fully open.
    Never try to tell me it can't be done
    When I have to paint I use KBS products

  6. The Following 5 Users Say Thank You to Frank S For This Useful Post:

    haz (Feb 17, 2018), KustomsbyKent (Feb 16, 2018), PJs (Feb 16, 2018), Scotsman Hosie (Apr 1, 2019), Toolmaker51 (Feb 17, 2018)

  7. #4
    PJs
    PJs is offline
    Supporting Member PJs's Avatar
    Join Date
    Sep 2014
    Location
    Northern CA
    Posts
    1,841
    Thanks
    8,333
    Thanked 1,118 Times in 718 Posts

    PJs's Tools
    Looks like 4 runs to me Frank. Nice savings and salvage build you can use for a multitude of purposes around your place!
    Last edited by PJs; Feb 16, 2018 at 06:56 PM.

  8. #5
    Supporting Member thehomeengineer's Avatar
    Join Date
    Nov 2017
    Location
    Berkshire UK
    Posts
    705
    Thanks
    720
    Thanked 2,062 Times in 406 Posts

    thehomeengineer's Tools
    Hi Frank
    Nice job. That is a lot of mulch.

  9. #6
    Supporting Member KustomsbyKent's Avatar
    Join Date
    Dec 2014
    Location
    South Dakota
    Posts
    241
    Thanks
    2,330
    Thanked 180 Times in 107 Posts

    KustomsbyKent's Tools
    Looks great! Now lets see that thing full of mulch, and how big of a pile it makes! I bet you can stack & pack a lot in there!

  10. #7
    Supporting Member Frank S's Avatar
    Join Date
    Aug 2015
    Location
    Peacock TX
    Posts
    11,179
    Thanks
    1,974
    Thanked 8,766 Times in 4,195 Posts

    Frank S's Tools
    We will have to wait until they make another grind I have my order reserved went and renewed the plate for the trailer today Man I got to get my agg. exemption on this place I could have saved $50.00 on the cost of the plate if I had it today.
    it is nearly 90 miles to where I will have to pickup the mulch When I called the yard boss and told him the dimensions of the trailer he said you will need either 2 or 3 loader buckets full to fill it. We are hoping to get some rain tonight because the 30 yards of dirt I spread in the back yard is so loose you can't even walk on it without sinking I really need about 3" of rain but will settle for anything right now.
    Never try to tell me it can't be done
    When I have to paint I use KBS products

  11. #8
    Content Editor
    Supporting Member
    DIYer's Avatar
    Join Date
    Aug 2013
    Posts
    3,056
    Thanks
    772
    Thanked 1,850 Times in 1,652 Posts


    Thanks Frank S! We've added your Trailer Side Kit to our Trailers and Towing category,
    as well as to your builder page: Frank S's Homemade Tools. Your receipt:


  12. #9
    Jon
    Jon is online now Jon has agreed the Seller's Terms of Service
    Administrator
    Supporting Member
    Jon's Avatar
    Join Date
    Jan 2012
    Location
    Colorado, USA
    Posts
    25,451
    Thanks
    7,928
    Thanked 38,621 Times in 11,284 Posts

  13. #10
    Supporting Member Frank S's Avatar
    Join Date
    Aug 2015
    Location
    Peacock TX
    Posts
    11,179
    Thanks
    1,974
    Thanked 8,766 Times in 4,195 Posts

    Frank S's Tools
    Thank's Jon Judging from this one might get the idea that I am obsessed with trailers.Here are some more of my trailer work or re builds and mods
    48 ft Trail Eze hydraulic flip tail rebuild and mod
    Hard to tell by the pick but the front of the deck is open and the neck is bent up 8 inches
    side kit for my 5x9 trailer-dscf5690.jpgd.jpg
    After blocking the trailer up on cribbing in 6 places and loading several tons of scrap on the deck and clamping large I beams to the neck,I sectioned out the front and the step of the neck
    side kit for my 5x9 trailer-dscf6037.jpgd.jpg
    [ATTACH=CONFIG]22240[/ATTACH)
    With Beams supporting the bottom frame flange I replaced the damaged webs and top flanges with ASTM 514 T1 steel
    side kit for my 5x9 trailer-dscf6036c.jpg
    With the frame now back to factory arch and the neck pulled down to the proper height I made a cardboard template to layout the web sections for the neck, all work has to be duplicated for both sides of the trailer
    side kit for my 5x9 trailer-dscf6110z.jpg
    T1 steel part for the neck
    side kit for my 5x9 trailer-dscf6113.jpgdd.jpg
    Rebuilding the tail
    side kit for my 5x9 trailer-dscf6800.jpgdd.jpg
    side kit for my 5x9 trailer-dscf6805.jpgdd.jpg
    By the time I was finished I had added rub-rails replaced all 96 hydraulic hoses replaced the brakes re wired the whole trailer with LED lights repacked the cylinders and put on 8 new tires in addition to the other repairs like grinding out and welding up any cracks and there were many through out the trailer Removed the steel deck and replaced the wood floor

    side kit for my 5x9 trailer-dscf6948c.jpg
    Attached Thumbnails Attached Thumbnails side kit for my 5x9 trailer-dscf6104.jpgd.jpg  


    186 More Best Homemade Tools eBook
    Last edited by Frank S; Feb 17, 2018 at 03:47 PM.
    Never try to tell me it can't be done
    When I have to paint I use KBS products

  14. The Following 2 Users Say Thank You to Frank S For This Useful Post:

    Jon (Feb 18, 2018), Toolmaker51 (Feb 17, 2018)

Thread Information

Users Browsing this Thread

There are currently 1 users browsing this thread. (0 members and 1 guests)

Bookmarks

Posting Permissions

  • You may not post new threads
  • You may not post replies
  • You may not post attachments
  • You may not edit your posts
  •