Free 186 More Best Homemade Tools eBook:  
Get 2,000+ tool plans, full site access, and more.

User Tag List

Page 1 of 2 1 2 LastLast
Results 1 to 10 of 11

Thread: Vacuum clamping system

  1. #1
    Supporting Member Christophe Mineau's Avatar
    Join Date
    Jul 2014
    Location
    France, Brittany !
    Posts
    913
    Thanks
    826
    Thanked 1,691 Times in 481 Posts

    Christophe Mineau's Tools

    Cool Vacuum clamping system

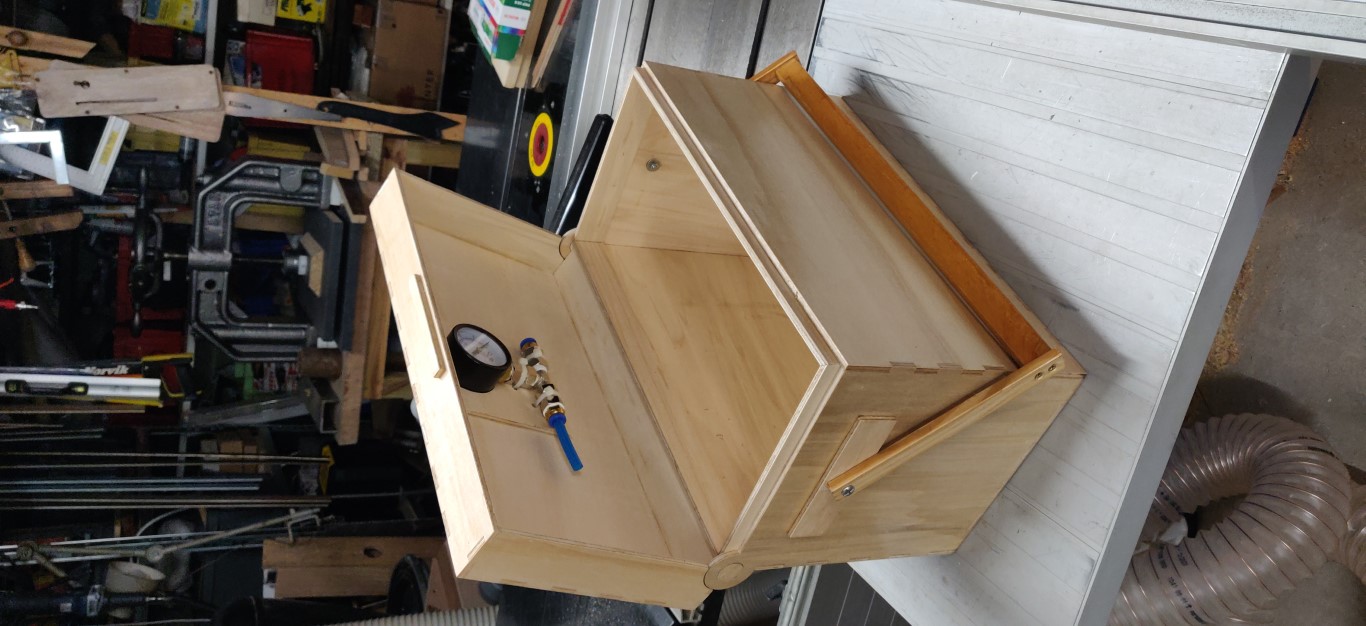
    Hi, here is my new vacuum clamping system,
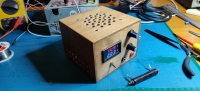
    I designed an electronic vacuum control, arduino based, in order to maintain the vacuum level, I integrated all the parts in a wooden transport box, together with the pump itself.
    I explained everything in this article on my website, all the details are there, including the code, and an example of application.
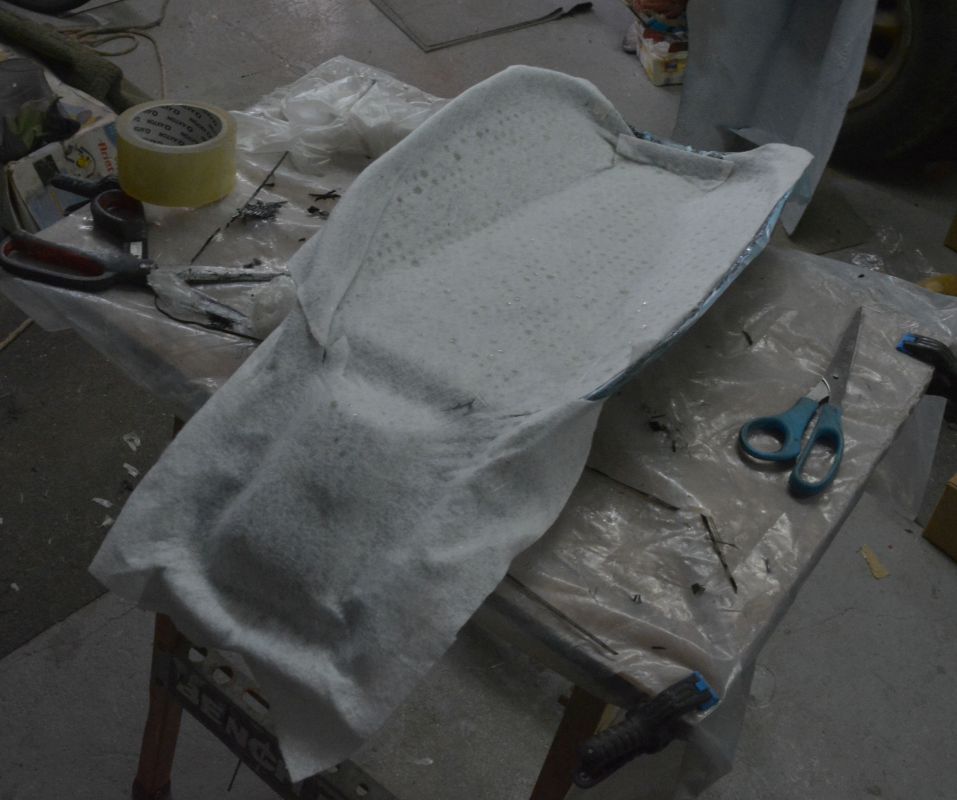
    I also explain how to make the vacuum bag and the connector for the bag.
    Please check it out.

    Here are the main parts :
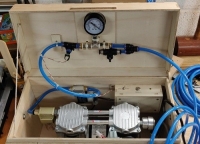
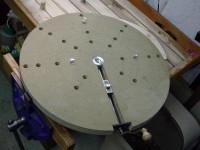
    The Box setup


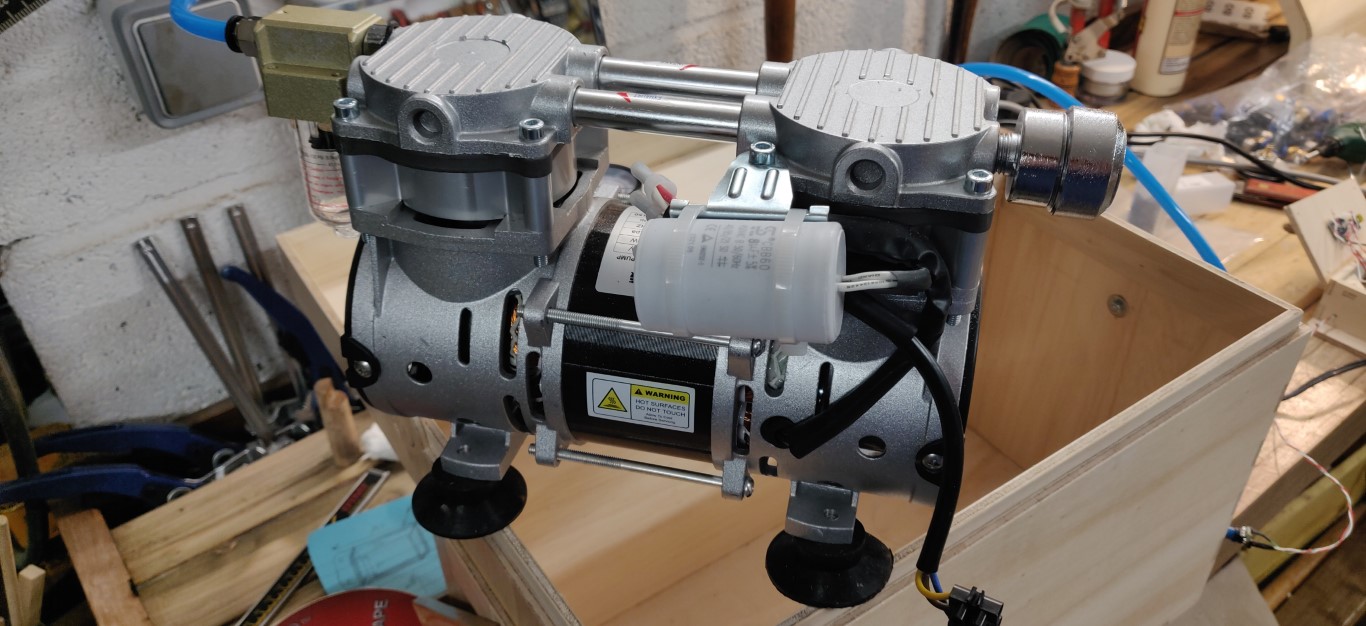
    The pump I am using:
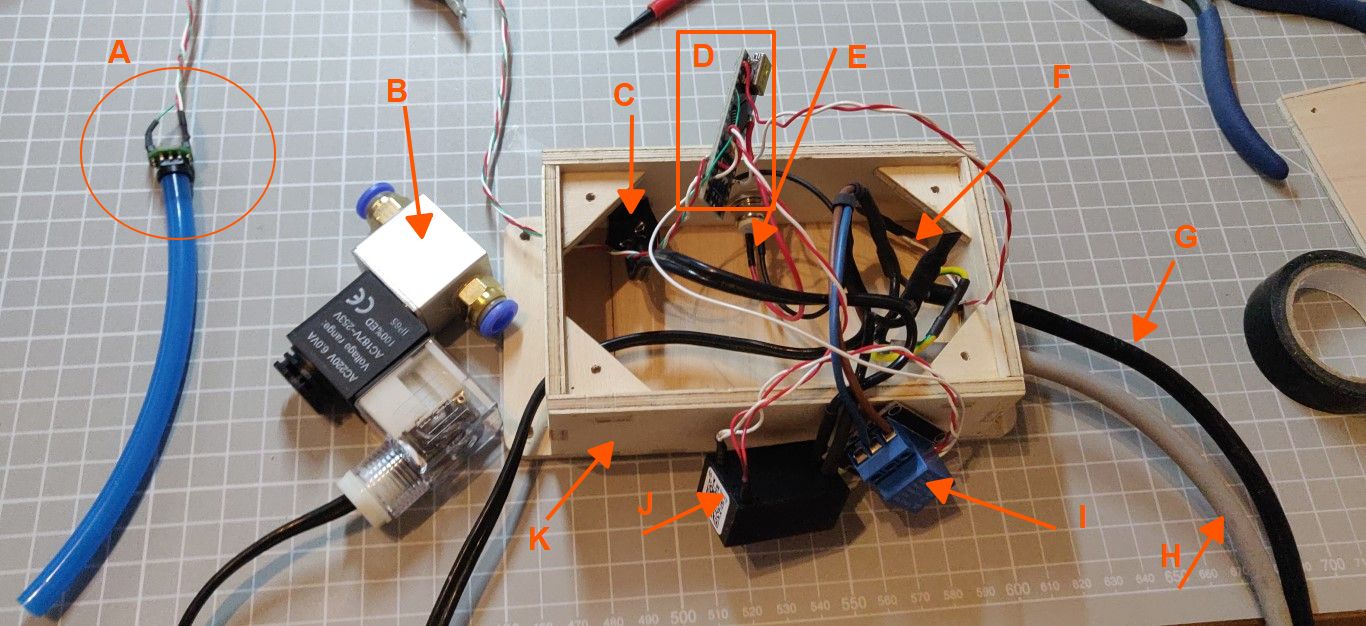
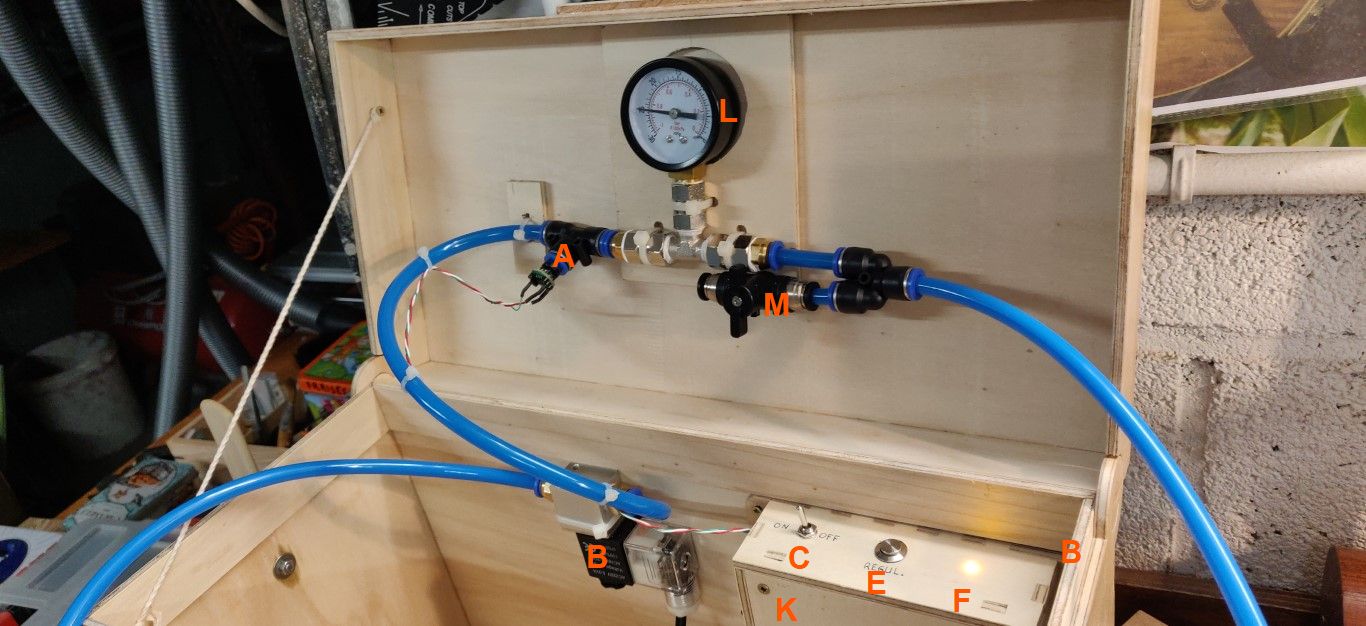

    The control system:
    A - Negative pressure sensor -100Kpa < 0Kpa: 0.5V - 4.5V, model XGZP6847A100KPGN
    B - Pneumatic solenoid valve - 220V solenoid - normally closed
    C - Main ON/OFF switch
    D - Arduino Nano Board
    E - push button: regulation start/stop.
    F - Led: regulation activated
    G - 220V power supply
    H - Pump power supply - 220V
    I - Relay module: controls the pump and the solenoid valve in parallel.
    J - Converter 220V AC - 5V DC
    K - “Electronics” box generated with Boxes.py, see below
    L - Negative pressure gauge -1 bar (-100Kpa) < 0 bar
    M - Relief valve, allows the circuit to be brought back to atmospheric pressure


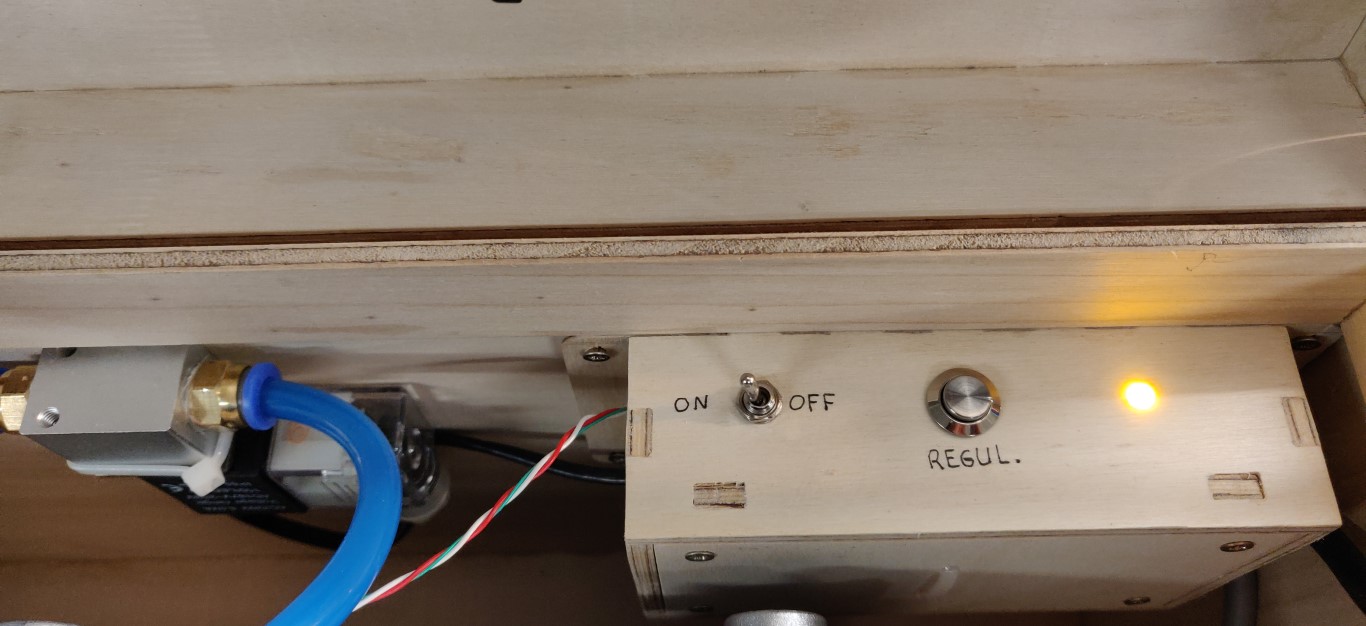
    The controls, integrated in a small box in the box :
    When the switch is turned ON, the pump runs continuously. When the REGUL button is pressed, the pupmp stops, the solenoid valve is closed and the vacuum is maintained. If ever there are small leaks and the pressure climbs up, the pump reactivates and restores the wanted level of vacuum.
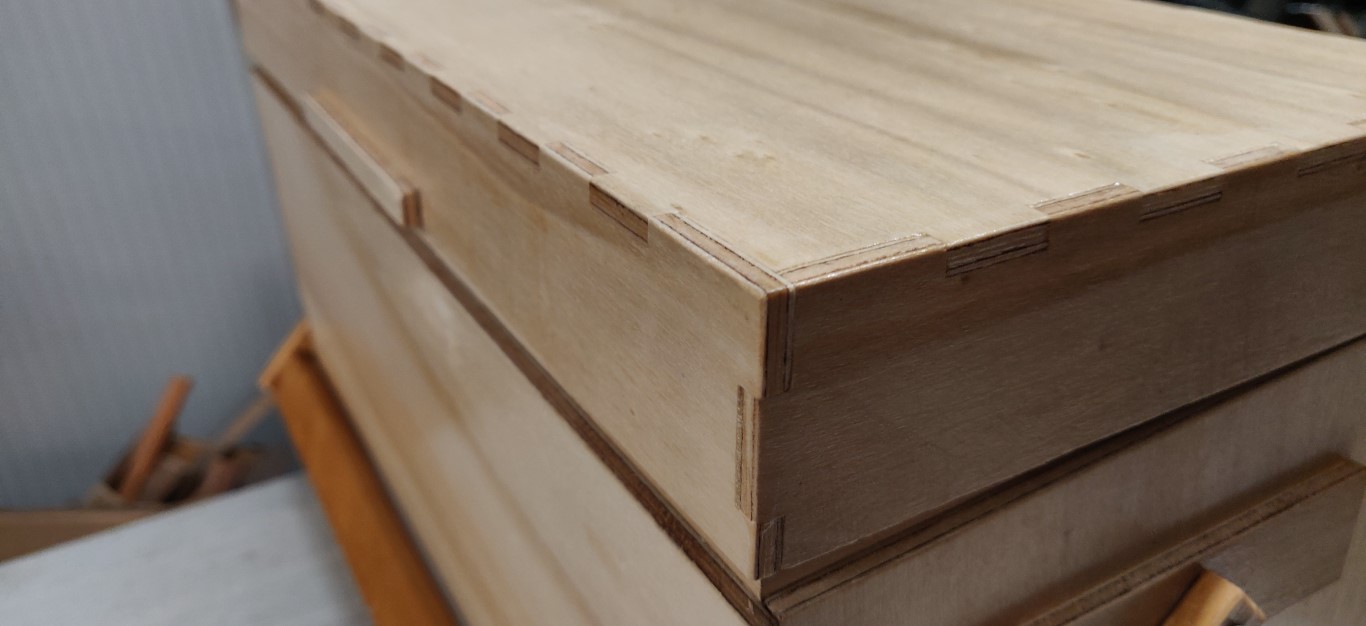
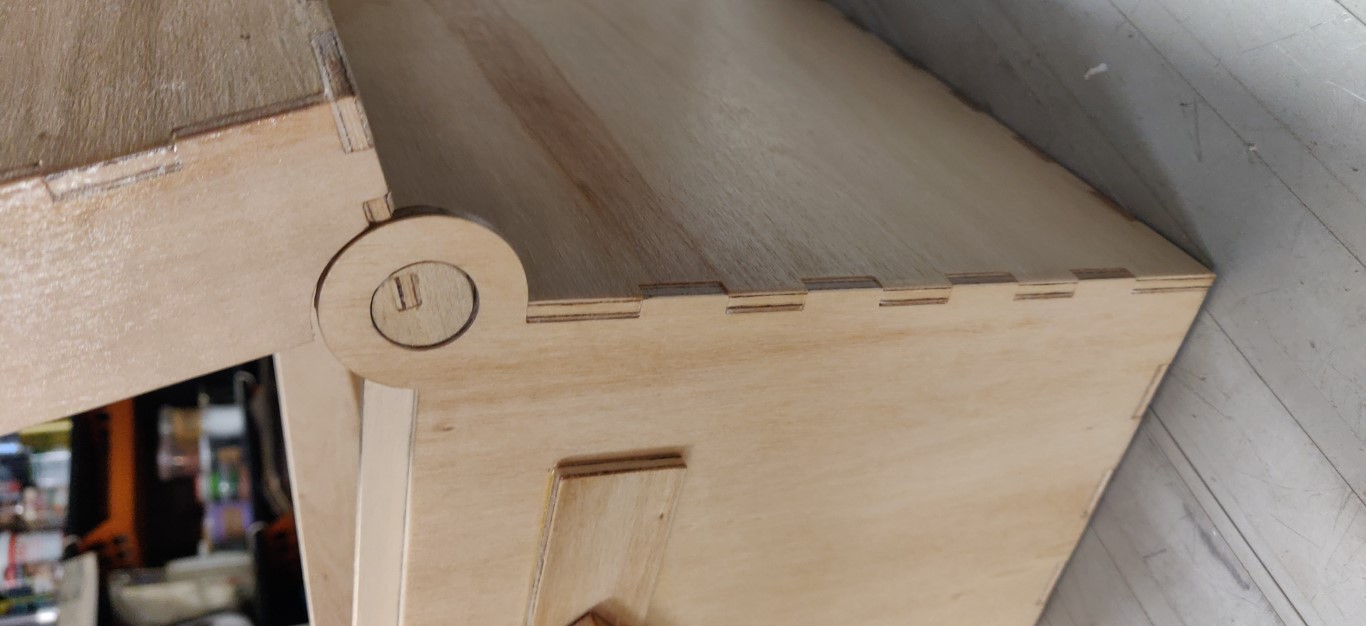

    Some views of my nice (yes I like it ) poplar transport case:
    It's an integrated hinge all wooden case. It's quite unusual and works very well.


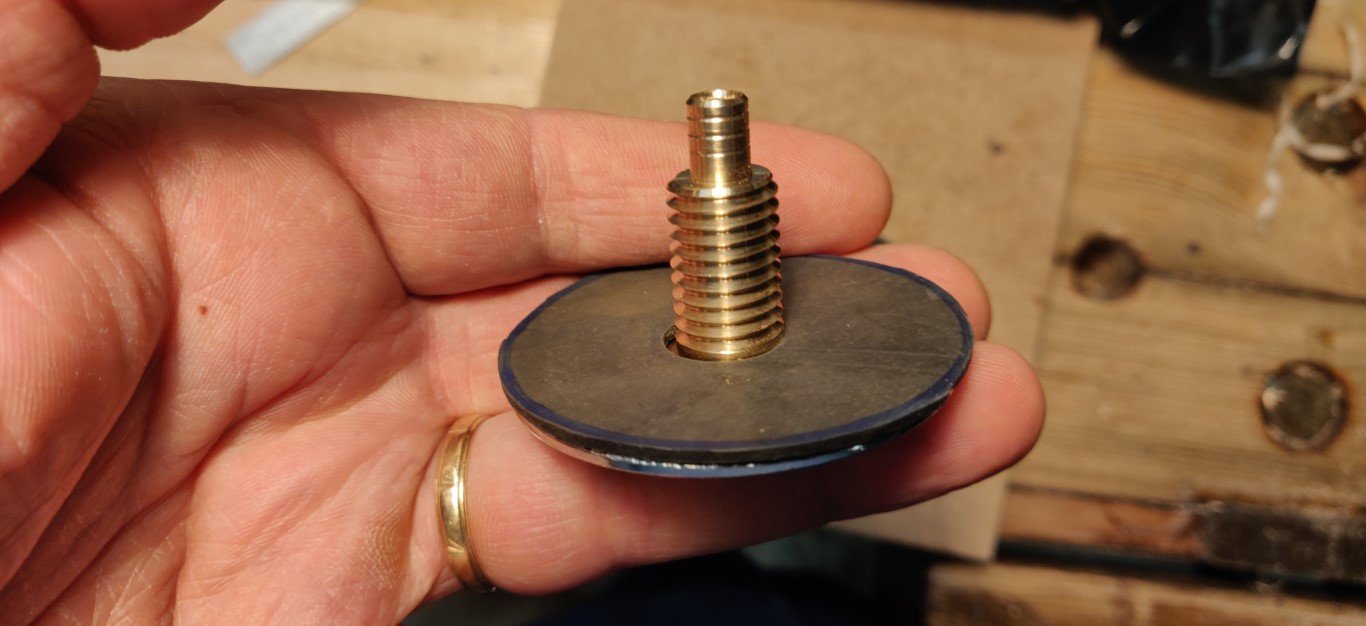
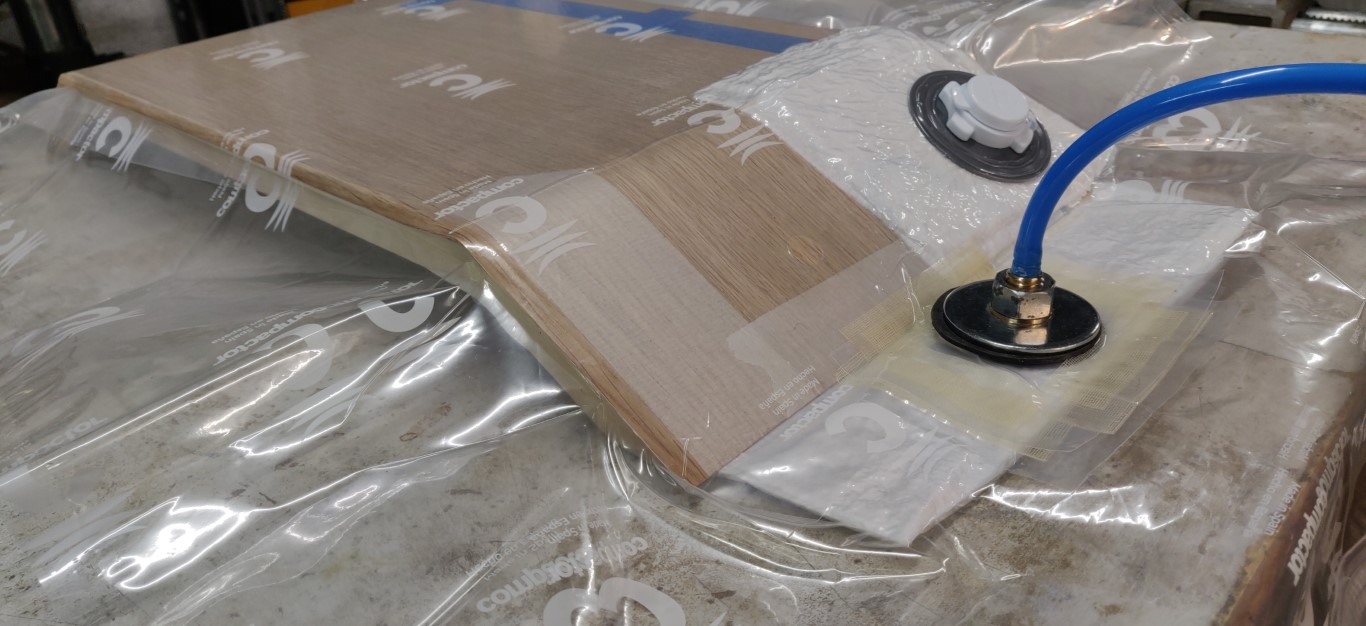
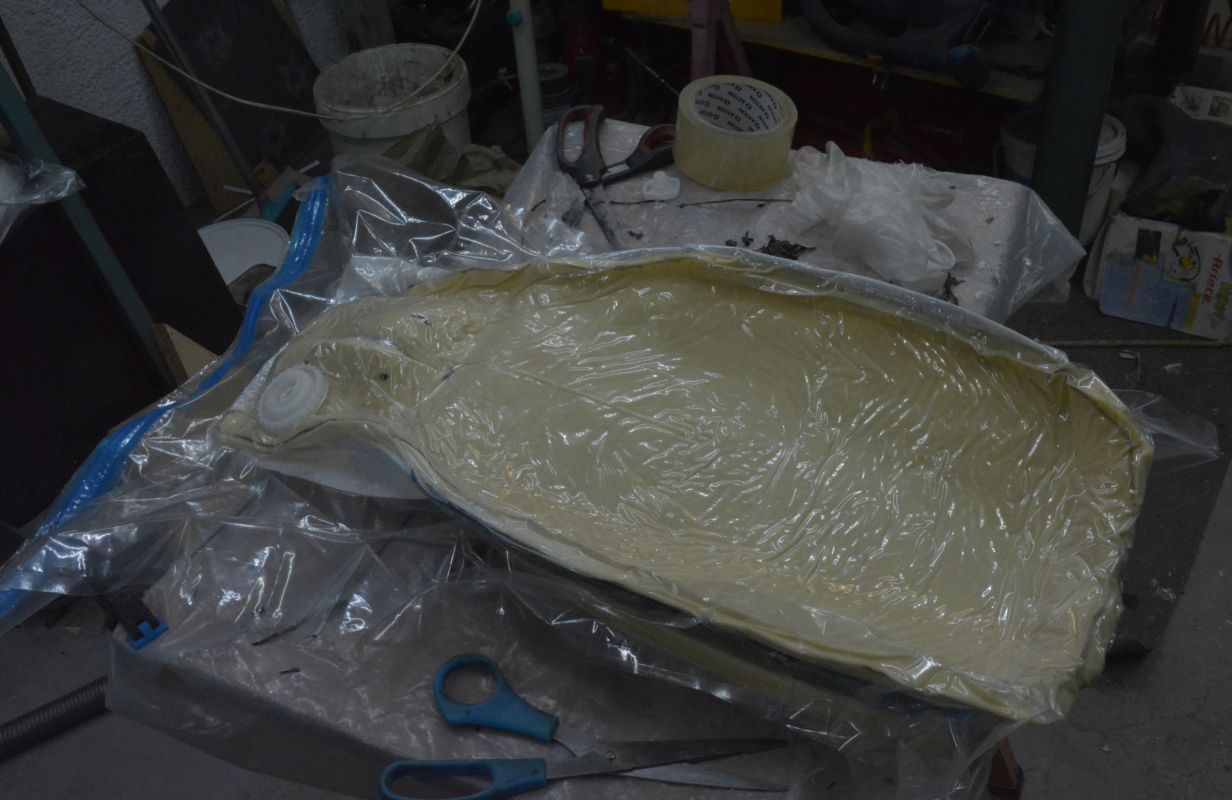
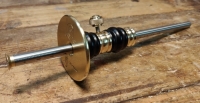
    The homemade connector to the bag:


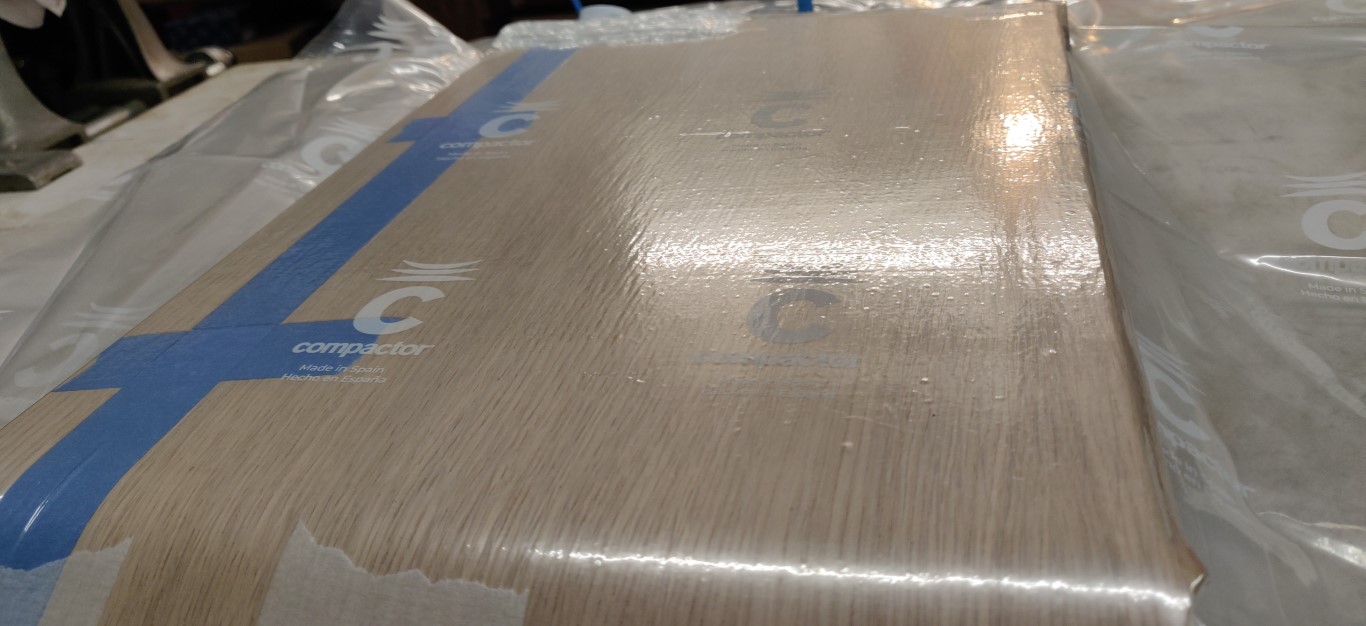
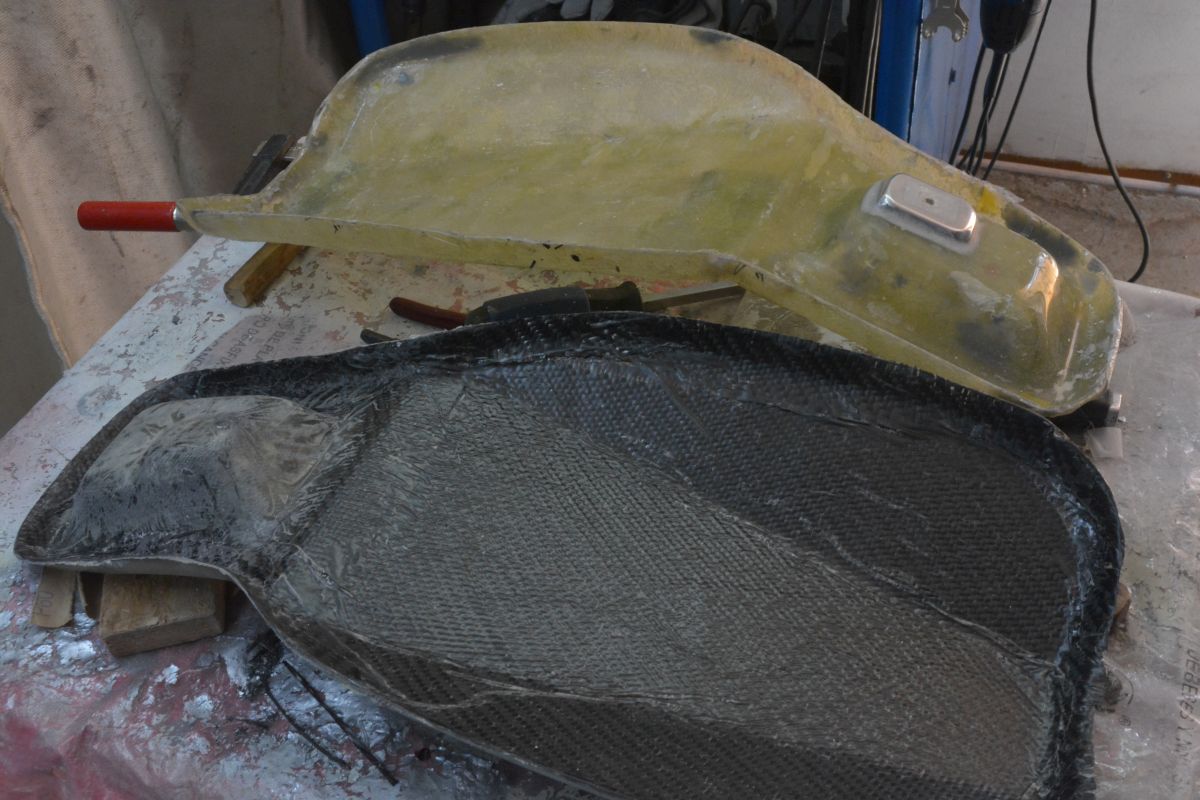
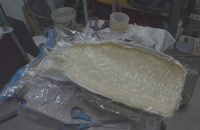
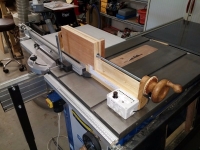
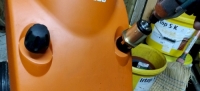
    The thing in action:


    For more details, please see the article (link given above)

    186 More Best Homemade Tools eBook
    Cheers !
    Christophe
    ________________________________________________________________
    Visit my Website : http://www.labellenote.fr/
    Facebook : La Belle Note
    All my personal works, unless explicitly specified, are released under
    Creative Commons BY-NC-SA license.

  2. The Following 14 Users Say Thank You to Christophe Mineau For This Useful Post:

    Altair (Jul 11, 2023), baja (Jul 12, 2023), fizzloid (Jul 12, 2023), HobieDave (Jul 14, 2023), Jon (Jul 11, 2023), mr mikey (Jul 11, 2023), nova_robotics (Jul 11, 2023), rebuilder1954 (Jul 13, 2023), rgsparber (Jul 14, 2023), Saltfever (Jul 15, 2023), Scotsman Hosie (Jul 12, 2023), Sleykin (Jul 28, 2023), tonyfoale (Jul 11, 2023), Tonyg (Jul 12, 2023)

  3. #2
    Content Editor
    Supporting Member
    Altair's Avatar
    Join Date
    Aug 2013
    Posts
    11,964
    Thanks
    1,363
    Thanked 29,825 Times in 9,927 Posts


    Thanks Christophe Mineau! We've added your Vacuum Clamping System to our Workholding category,
    as well as to your builder page: Christophe Mineau's Homemade Tools. Your receipt:


    2000 Tool Plans

  4. #3
    Supporting Member tonyfoale's Avatar
    Join Date
    Nov 2016
    Location
    Spain
    Posts
    1,566
    Thanks
    690
    Thanked 2,649 Times in 710 Posts

    tonyfoale's Tools
    Christophe,

    Your work is of a high standard as usual. I sometimes use vacumn bagging when moulding carbon fibre composite. With hand layup it is usual to have too much resin in the layup and vacumn bagging can squeeze this out. The pressure requirements are lower than you would need for veneering and for simple shapes I use a shopvac to provide the "vacumn". I find that once I suck it out I can leave it and remove the shopvac. As long as the pressure is applied up to the time that the resin starts to cure then slow leaks are not important.

    Vacuum clamping system-tank-011.jpg Click to see full size.

    The first stage just after the layup is to fit a perforated plastic sheet on the non-mould side. This allows the excess resin to ooze through into an absorbent layer (shown above, and the plastic stops the absorbent material from sticking to the work. I cover that layer with a sheet of non-perforated plastic sheet and then some soft plastic foam to even out the pressure on the work.

    Vacuum clamping system-tank-008.jpg

    This shows the final bagging, after being evacuated. This a simple near flat item for the bottom of a petrol tank and this lends itself to using a vacumn bag sold for compressing and storing clothes. They work very well for suitably shaped and sized items.

    Vacuum clamping system-tank-014.jpg

    The mould and the rough side of the tank bottom, there are a few creases but that is unimportant because it is not seen..

  5. The Following 9 Users Say Thank You to tonyfoale For This Useful Post:

    baja (Jul 14, 2023), brianp (Jul 14, 2023), Christophe Mineau (Jul 12, 2023), freddo4 (Jul 13, 2023), nova_robotics (Jul 11, 2023), Saltfever (Jul 15, 2023), Scotsman Hosie (Jul 12, 2023), Sleykin (Jul 28, 2023), Tonyg (Jul 12, 2023)

  6. #4
    Supporting Member Tonyg's Avatar
    Join Date
    Apr 2016
    Location
    Centurion, South Africa
    Posts
    185
    Thanks
    1,635
    Thanked 69 Times in 56 Posts
    Hi Christophe, great work as always. Really enjoyed the hinge.

  7. The Following User Says Thank You to Tonyg For This Useful Post:

    Christophe Mineau (Jul 12, 2023)

  8. #5
    Supporting Member Christophe Mineau's Avatar
    Join Date
    Jul 2014
    Location
    France, Brittany !
    Posts
    913
    Thanks
    826
    Thanked 1,691 Times in 481 Posts

    Christophe Mineau's Tools
    Thanks Tony for sharing your experience, that's very informative.
    Yes I also find that these storage bags are a treat for such projects, their seal is very good. In the house, they can hold the vacuum for monthes, see years without any leak.
    I think the micro-leaks I have may come from the connections, the hose connectors or the solenoid valve, but it's not dramatic.

    Interesting this white layer you add to receive the resin squeeze out. It looks like geotextile as well ?

    Thanks for the comment Tony
    Cheers !
    Christophe
    ________________________________________________________________
    Visit my Website : http://www.labellenote.fr/
    Facebook : La Belle Note
    All my personal works, unless explicitly specified, are released under
    Creative Commons BY-NC-SA license.

  9. #6
    Content Editor
    Supporting Member
    DIYer's Avatar
    Join Date
    Aug 2013
    Posts
    3,056
    Thanks
    773
    Thanked 1,853 Times in 1,654 Posts


    Thanks tonyfoale! We've added your Vacuum Forming Method to our Miscellaneous category,
    as well as to your builder page: tonyfoale's Homemade Tools. Your receipt:


  10. #7
    Jon
    Jon is offline Jon has agreed the Seller's Terms of Service
    Administrator
    Supporting Member
    Jon's Avatar
    Join Date
    Jan 2012
    Location
    Colorado, USA
    Posts
    25,577
    Thanks
    7,960
    Thanked 38,860 Times in 11,343 Posts
    Congratulations Christophe Mineau - your Vacuum Clamping System is the Homemade Tool of the Week!

    Very thorough build and documentation, complete with a beautiful transport box.

    Some more good builds from this week:

    String Trimmer Clutch by Frank S
    Vacuum Forming Method by tonyfoale
    Swivel Vise Modification by rgsparber
    Vise Mount by Frank S
    Micro Drill by My MiniCrafts
    Shop Press V-die by Frank S
    Lathe Spindle Locking Pin by Guy Marsden
    Mower Lift Extension by Gadgeteer
    Lathe Tailstock Die Holder by Cazual Haze
    Non-Standard Nuts by rgsparber
    Egg Incubator by Mr.DK DIY
    Storage Shelving by The Hobby Machinist NZ
    Lathe Compound Driver by Improvised DIY

    Christophe Mineau - you'll be receiving a $100 online gift card, in your choice of Amazon, PayPal, or bitcoin. Please PM me your current email address and gift card choice and I'll get it sent over right away.

    This is your 16th Homemade Tool of the Week win. Here are all of your Homemade Tool of the Week winning tools. Congrats again


  11. #8
    Supporting Member Christophe Mineau's Avatar
    Join Date
    Jul 2014
    Location
    France, Brittany !
    Posts
    913
    Thanks
    826
    Thanked 1,691 Times in 481 Posts

    Christophe Mineau's Tools
    Thanks you very well Jon and to all who have liked this work.
    It was a pleasure for me to make it, and this is really encouraging.
    Let's think about the next tool now ...
    Cheers !
    Christophe
    ________________________________________________________________
    Visit my Website : http://www.labellenote.fr/
    Facebook : La Belle Note
    All my personal works, unless explicitly specified, are released under
    Creative Commons BY-NC-SA license.

  12. #9
    Supporting Member tonyfoale's Avatar
    Join Date
    Nov 2016
    Location
    Spain
    Posts
    1,566
    Thanks
    690
    Thanked 2,649 Times in 710 Posts

    tonyfoale's Tools
    Quote Originally Posted by Christophe Mineau View Post
    Thanks Tony for sharing your experience, that's very informative.
    Yes I also find that these storage bags are a treat for such projects, their seal is very good. In the house, they can hold the vacuum for monthes, see years without any leak.
    I think the micro-leaks I have may come from the connections, the hose connectors or the solenoid valve, but it's not dramatic.

    Interesting this white layer you add to receive the resin squeeze out. It looks like geotextile as well ?

    Thanks for the comment Tony
    As, like me, you are in europe I suggest that you look here https://www.easycomposites.eu/ . They have a lot of vacumn bagging supplies but perhaps the most valuable resource is their instructional videos all spoken in very clear english. I think that this would help non-native english speakers follow easily.
    They are based in England but due to Brexit they opened a european branch in NL. They are easy to deal with and answer questions quickly, may be not always as fully detailed as you might like but always quickly.
    Vacuum clamping system-dsc_8394.jpg Click for full size.

    This is a seat in its mould ready for vacumn bagging. This is a shape that is not so suitable for using the ready made storage bags and it needs custom made bags from plain flat sheet taped at the joints.


    PS. Most solenoid valves are designed to switch pressure, maybe they are not so good on vacumn, just a thought.


    On another subject. In late August I plan to drive up through France with no particular destination in mind. Where are you based? I would love to drop by to have a chat and see your work, if that would not be too great an inconvenience. Send me a PM if you want to keep your location private.

  13. #10
    Supporting Member tonyfoale's Avatar
    Join Date
    Nov 2016
    Location
    Spain
    Posts
    1,566
    Thanks
    690
    Thanked 2,649 Times in 710 Posts

    tonyfoale's Tools
    Quote Originally Posted by Christophe Mineau View Post
    Thanks you very well Jon and to all who have liked this work.
    It was a pleasure for me to make it, and this is really encouraging.
    Let's think about the next tool now ...
    Very well deserved.

  14. The Following User Says Thank You to tonyfoale For This Useful Post:

    Christophe Mineau (Jul 16, 2023)

Thread Information

Users Browsing this Thread

There are currently 1 users browsing this thread. (0 members and 1 guests)

Bookmarks

Posting Permissions

  • You may not post new threads
  • You may not post replies
  • You may not post attachments
  • You may not edit your posts
  •