Free 186 More Best Homemade Tools eBook:  
Get 2,000+ tool plans, full site access, and more.

User Tag List

Page 1 of 4 1 2 3 4 LastLast
Results 1 to 10 of 35

Thread: DIY surface grinder

  1. #1
    Supporting Member tonyfoale's Avatar
    Join Date
    Nov 2016
    Location
    Spain
    Posts
    1,549
    Thanks
    679
    Thanked 2,627 Times in 705 Posts

    tonyfoale's Tools

    DIY surface grinder

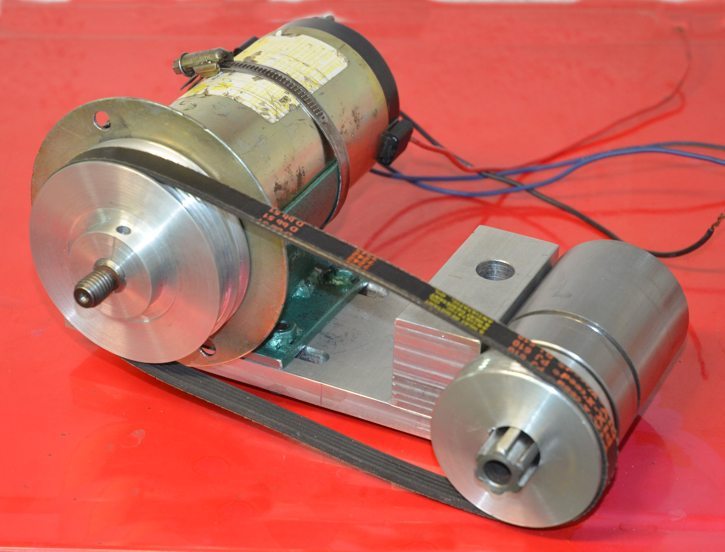
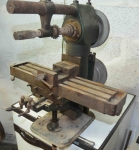
    A while back I made a toolpost grinder for my lathe from a treadmill DC motor and the spindle from a small mill/drill that I found at a flea market.

    DIY surface grinder-tp-grinder-10.jpg DIY surface grinder-tp-grinder-12.jpg Click thumbnails for full size.

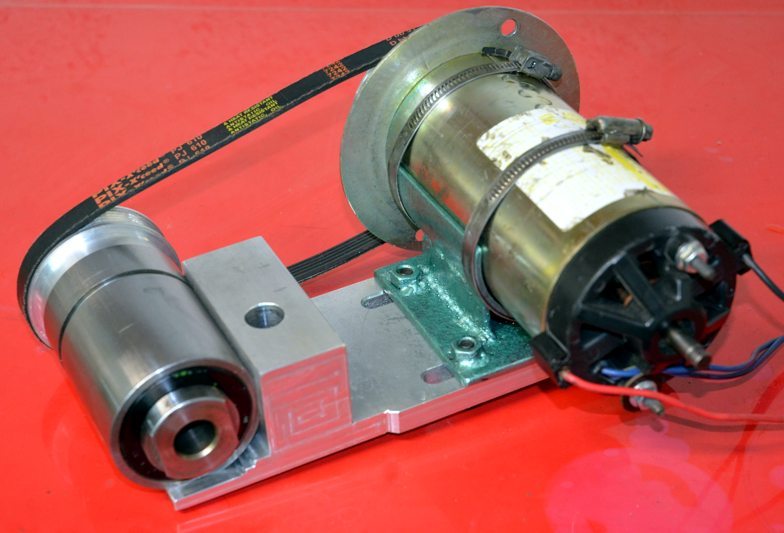
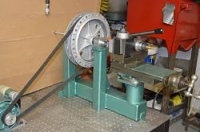
    I also used it on my T&C grinder which was featured here
    http://www.homemadetools.net/forum/h...6205#post83247

    DIY surface grinder-tandc-grinder-02.jpg DIY surface grinder-tandc-grinder-15.jpg
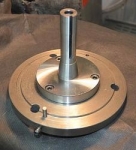
    T&C grinder with same head.

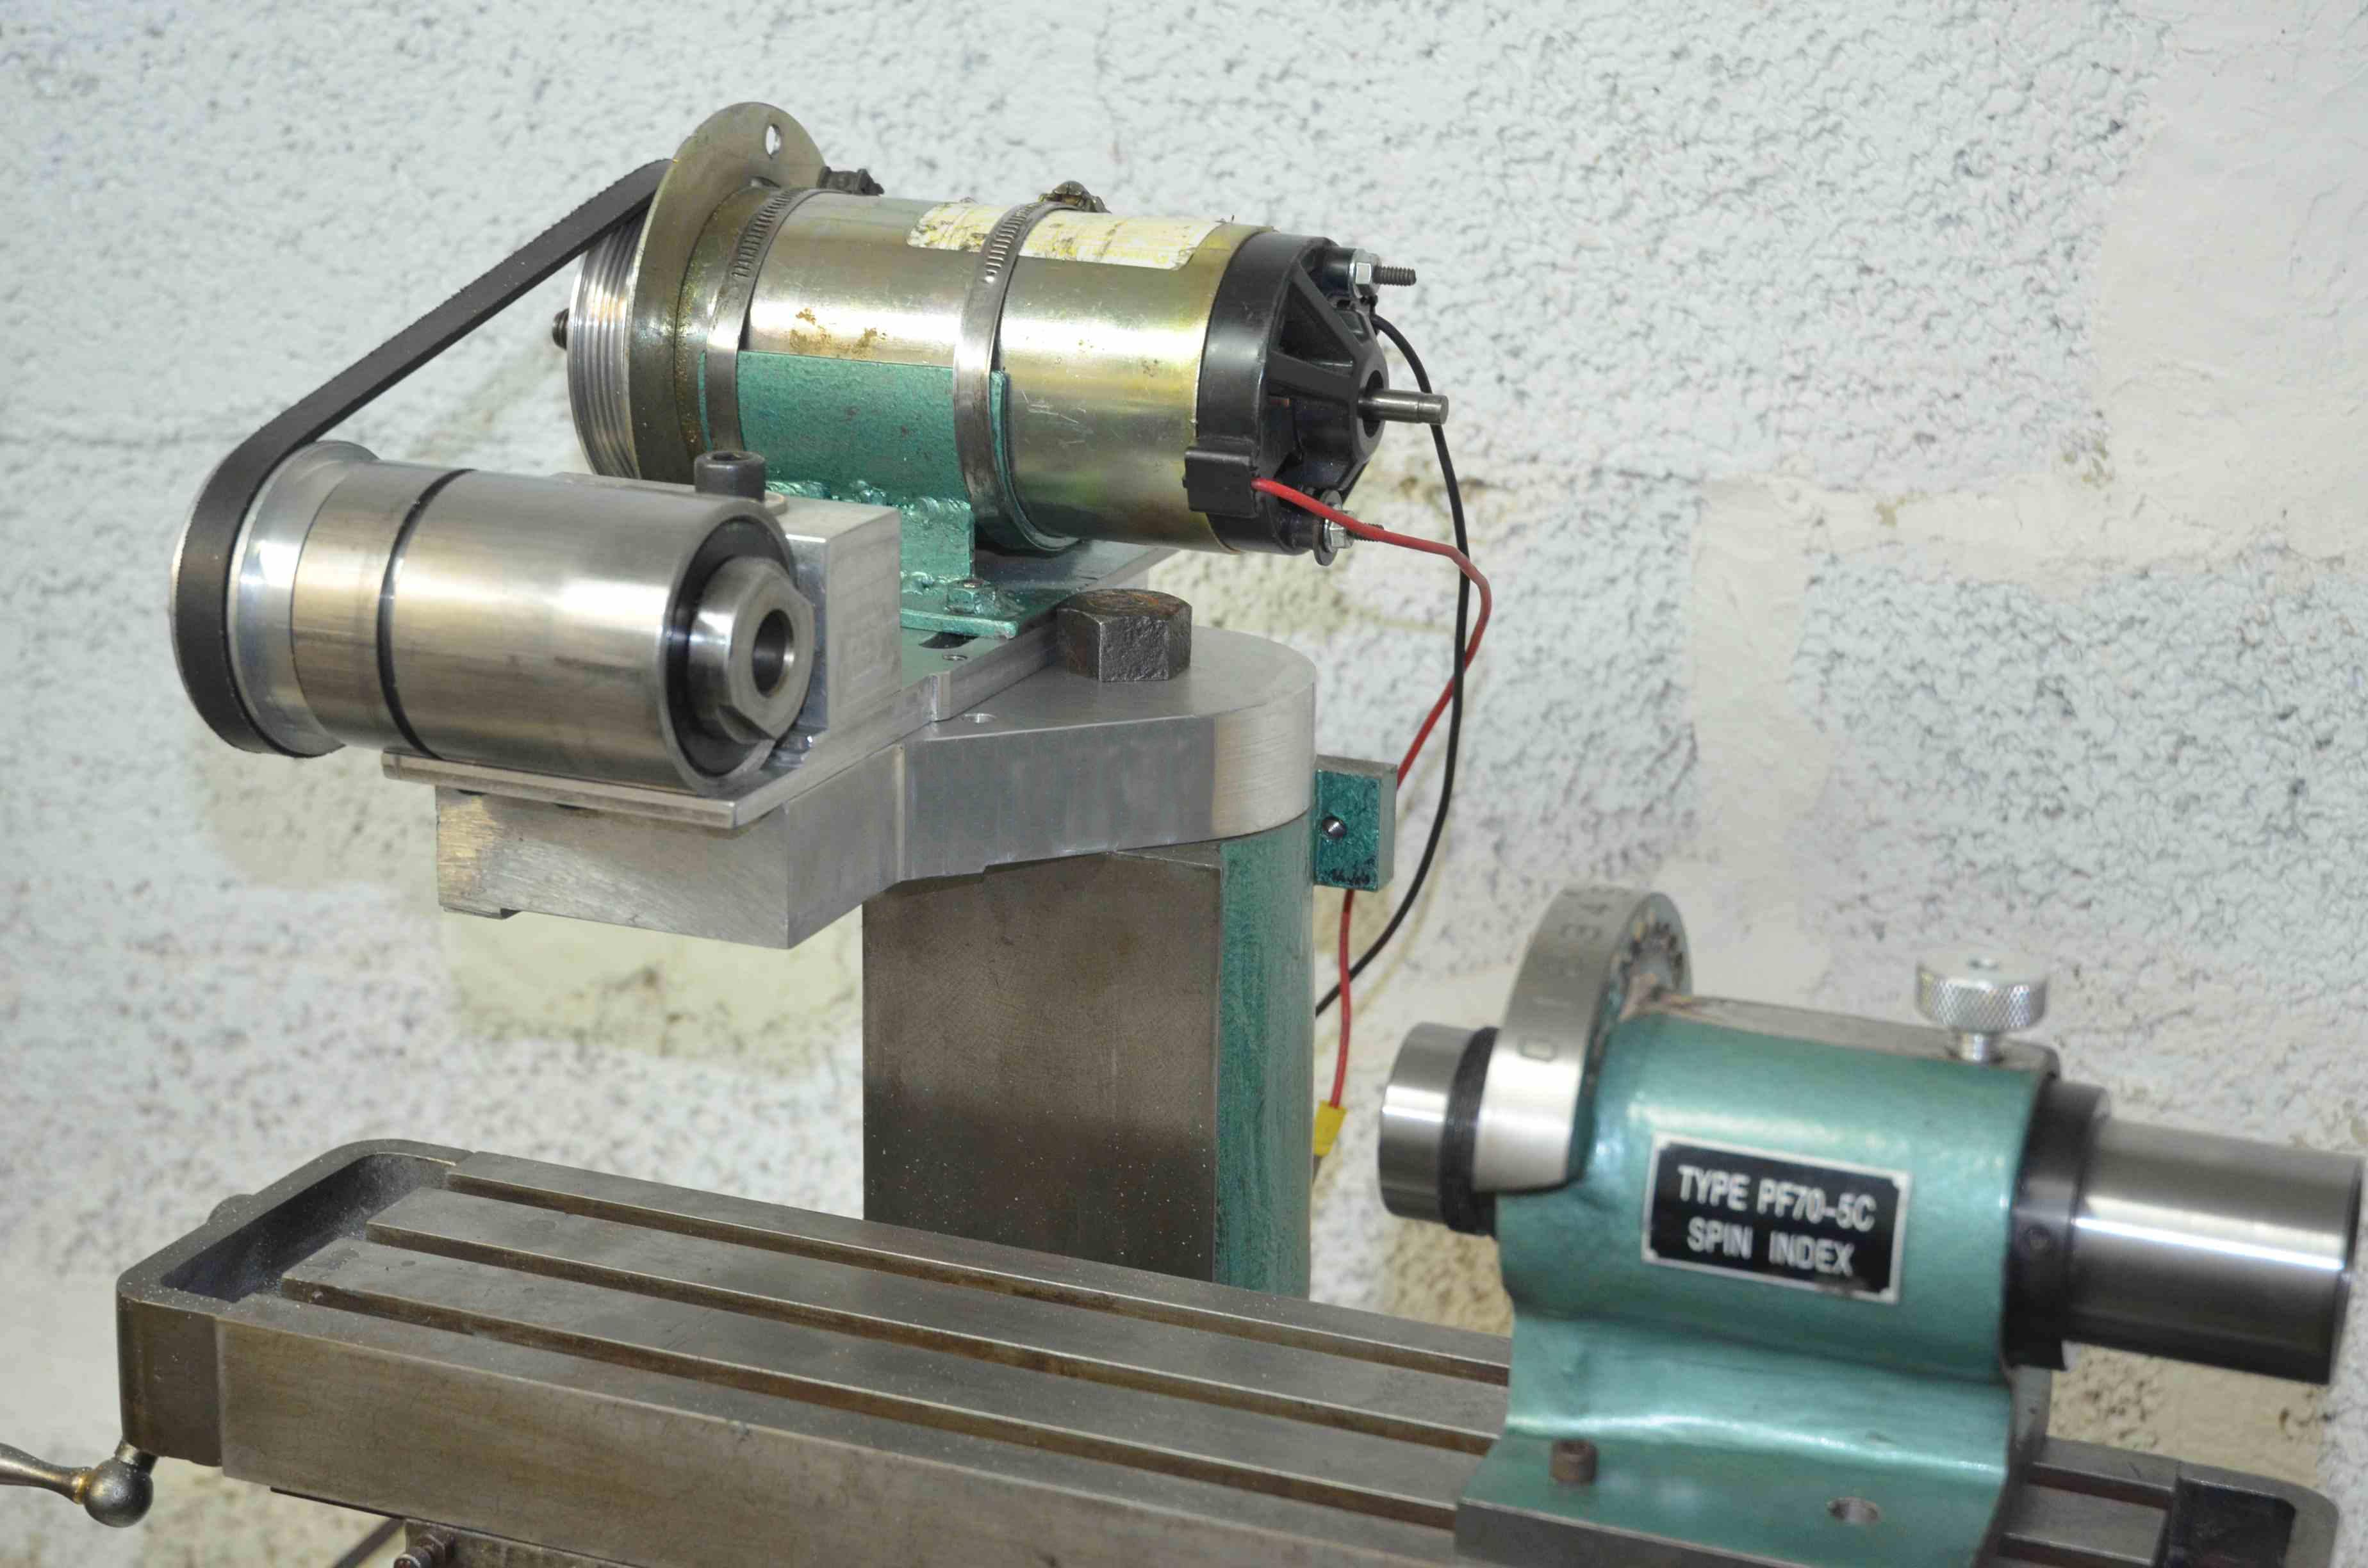
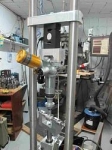
    For some time I have needed a surface grinder and have been thinking about attaching the same grinding head to my mill. My Bridgeport was fitted from new with an early Anilam CNC system which I have ungraded to PC control. The CNC would allow for automatic X and Y traverse and Z depth of cut adjustment. I had put this job off because I thought that I had more pressing jobs and I thought that it would take more time than I wanted to spend on it.

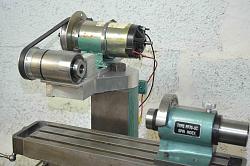
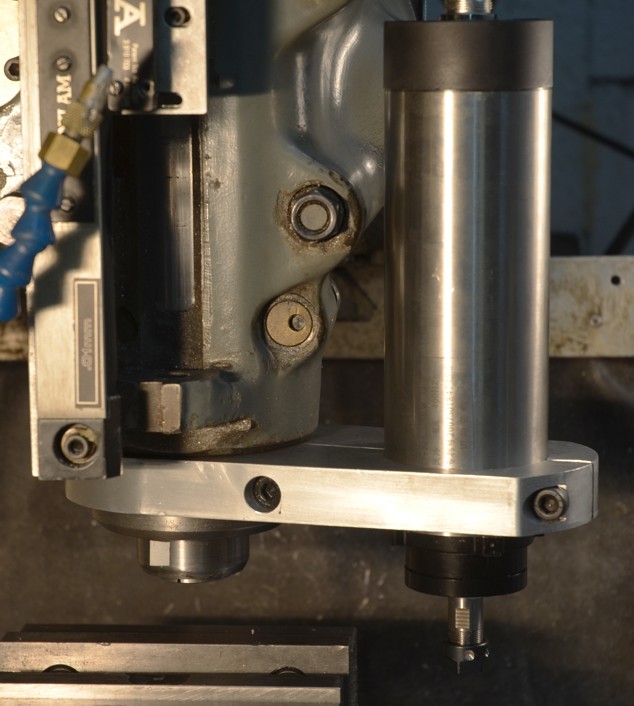
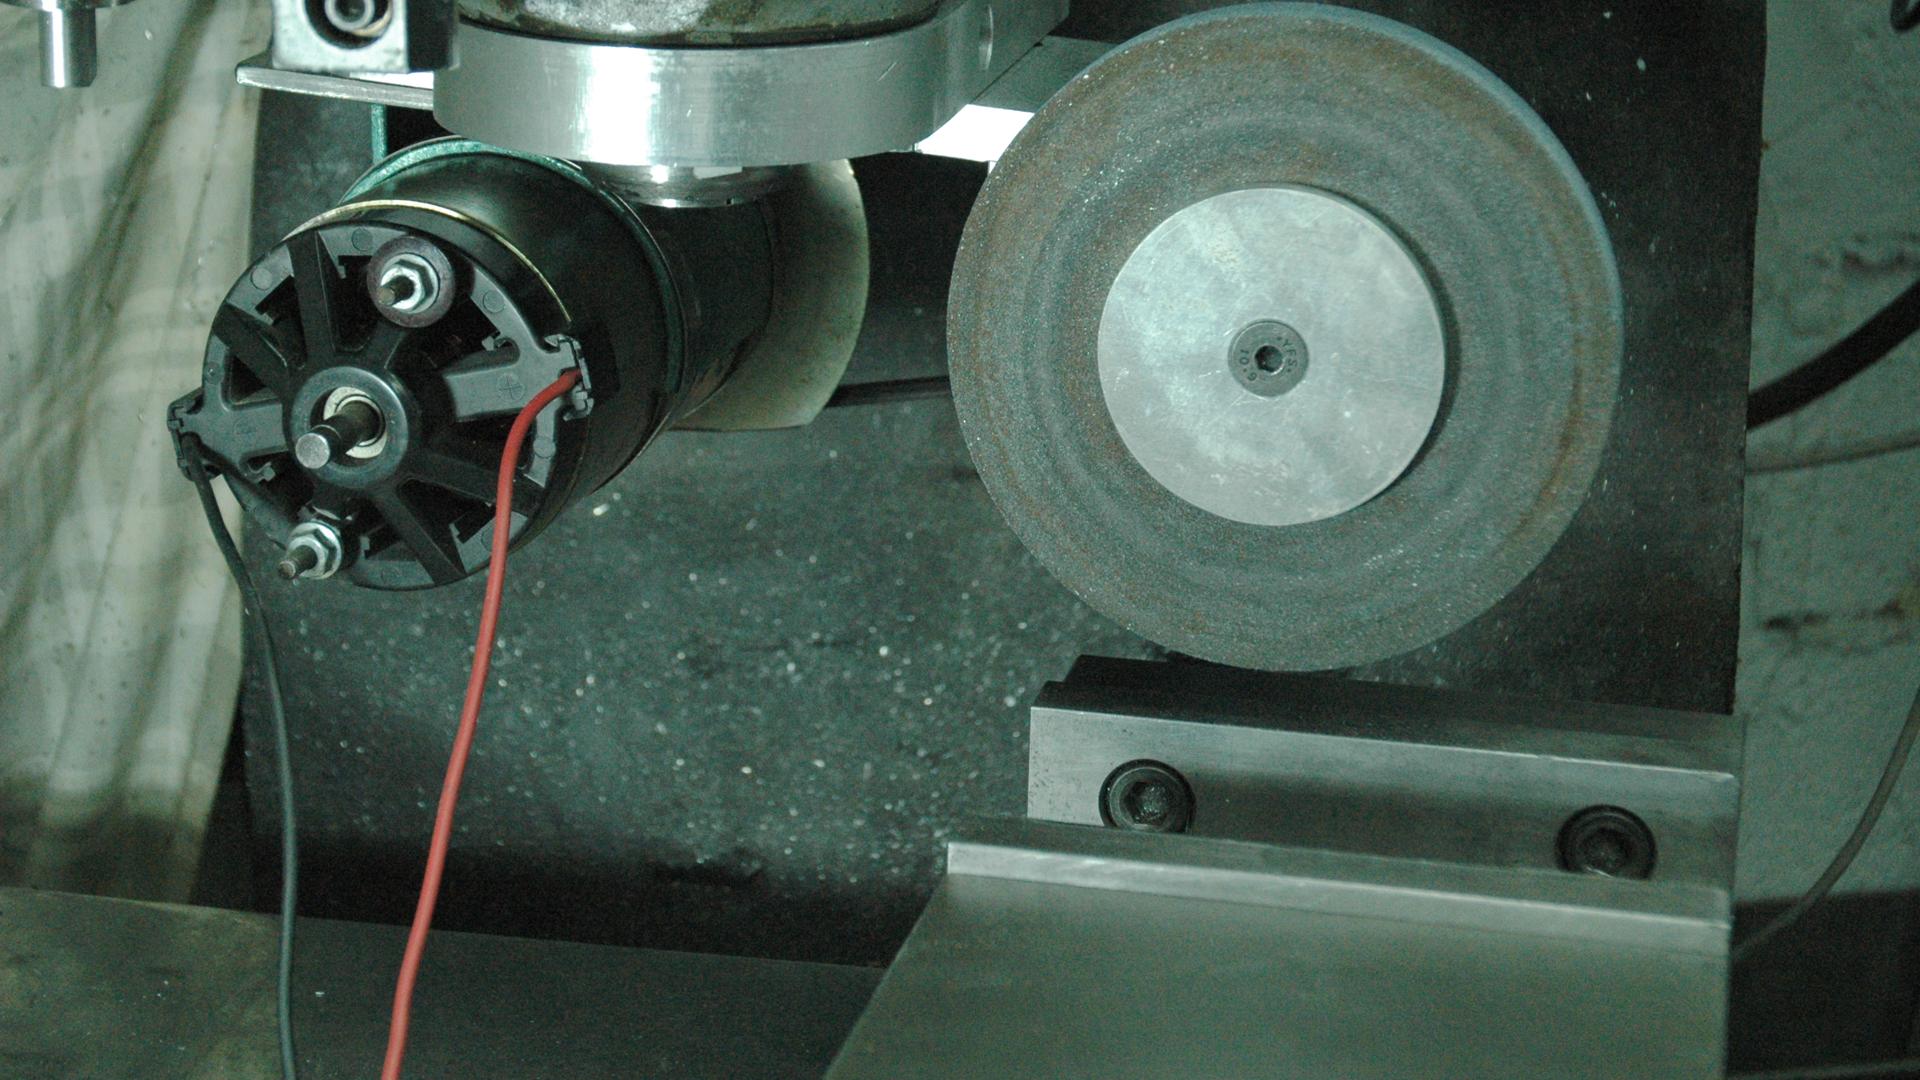
    Attaching a grinder to a mill for this purpose is not a new idea in this forum, but others I have seen have fixed the grinder to the frame structure of the mill. I wanted to attach it to the quill for depth control.

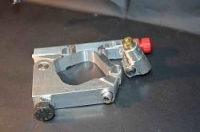
    I realised that I would need to make a clamp around the quill but I had already made a couple to hold a high speed air spindle and later an electric spindle. Looking at those I saw that if I turned the grinding head upside down I could bolt it to the electric spindle clamp. Drill 4 mounting holes in the clamp and drill and tap 4 holes in the grinding head base plate. That didn't seem like it would take too long, a reasonable price to remove an item from my todo list.

    DIY surface grinder-spindle-mill.jpg DIY surface grinder-makingclamp-01.jpg
    High speed spindle clamp.

    DIY surface grinder-grinder-04a.jpg
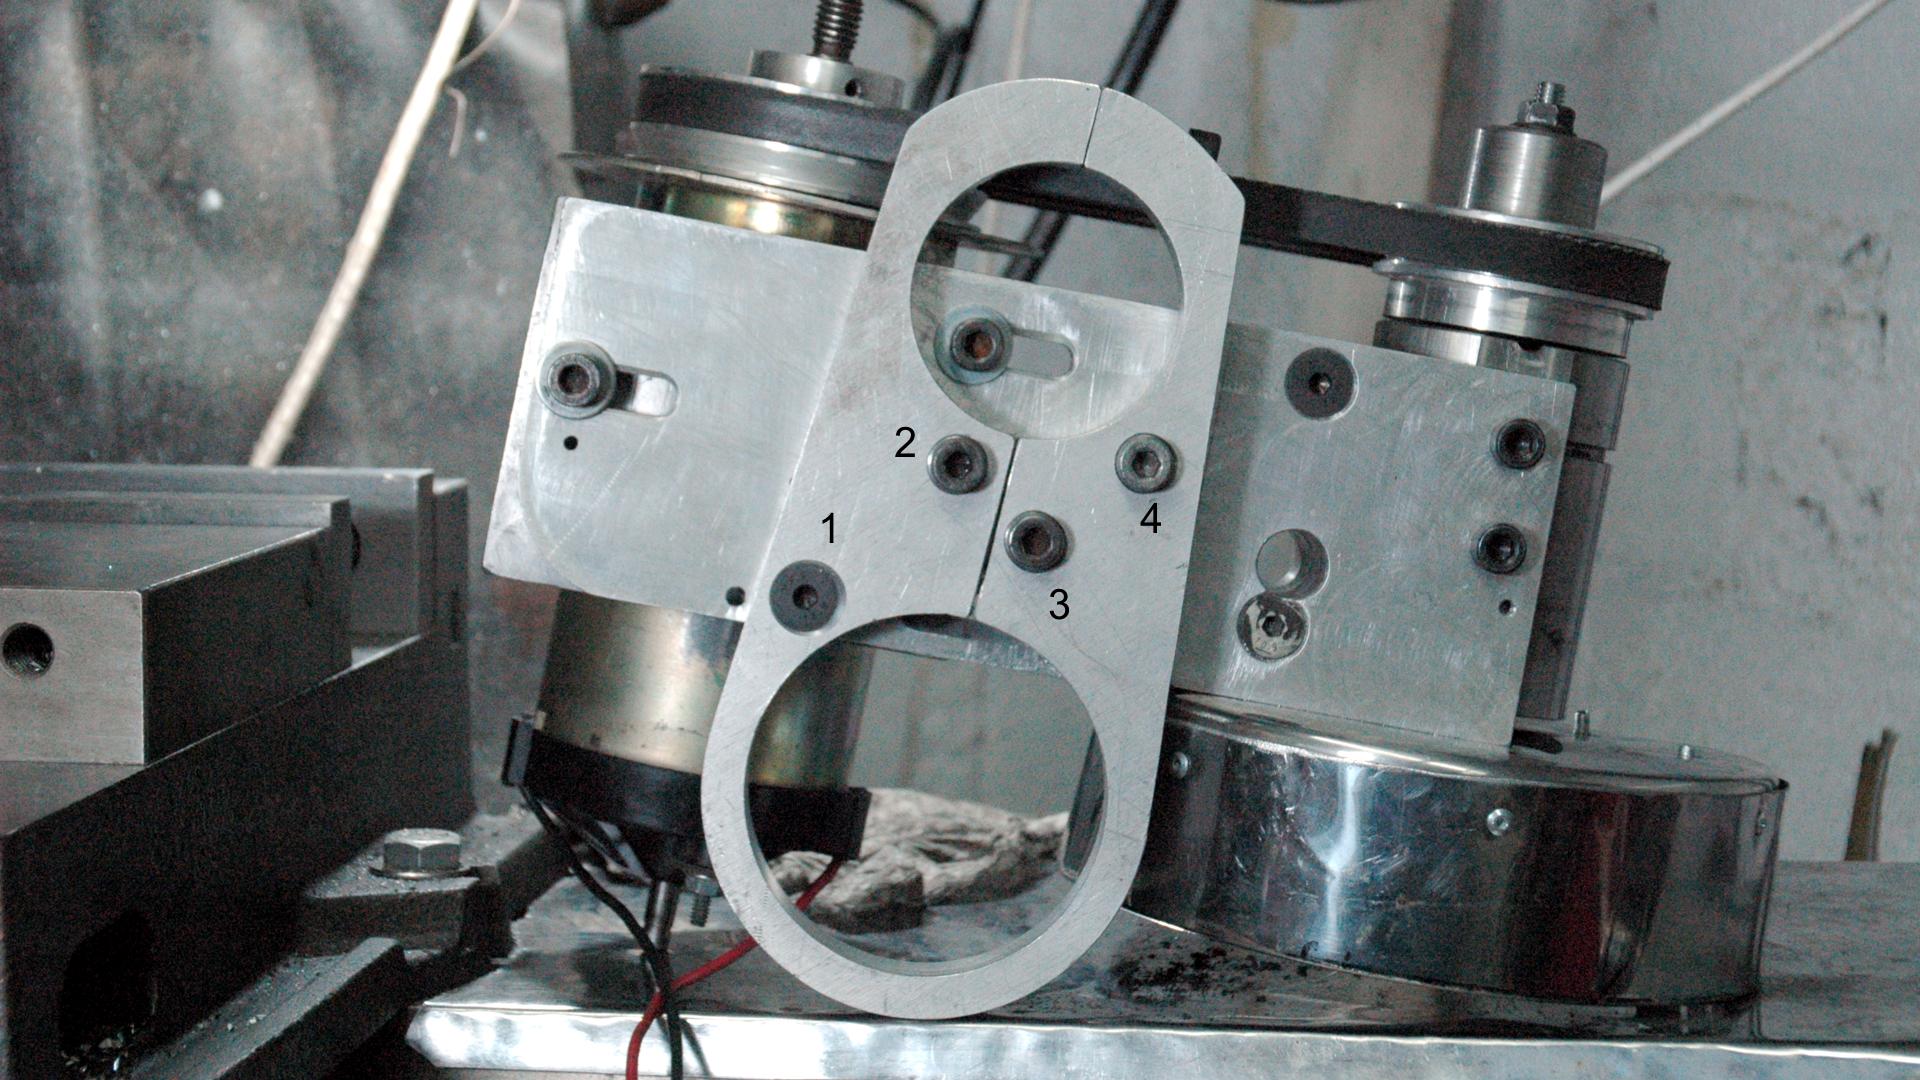
    Showing the four bolts holding the grinding head to the quill clamp. 1. is countersunk to avoid fouling the quill housing, 2. is a close fit for repeatable location, 3 & 4 are in oversize holes to allow some movement to permit the clamp to close up on the quill without resistance. 3 & 4 are tightened after the clamp. The asymmetric bolt pattern was to fit in with the bracket clamping bolt and other obstacles.

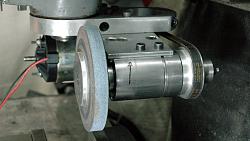
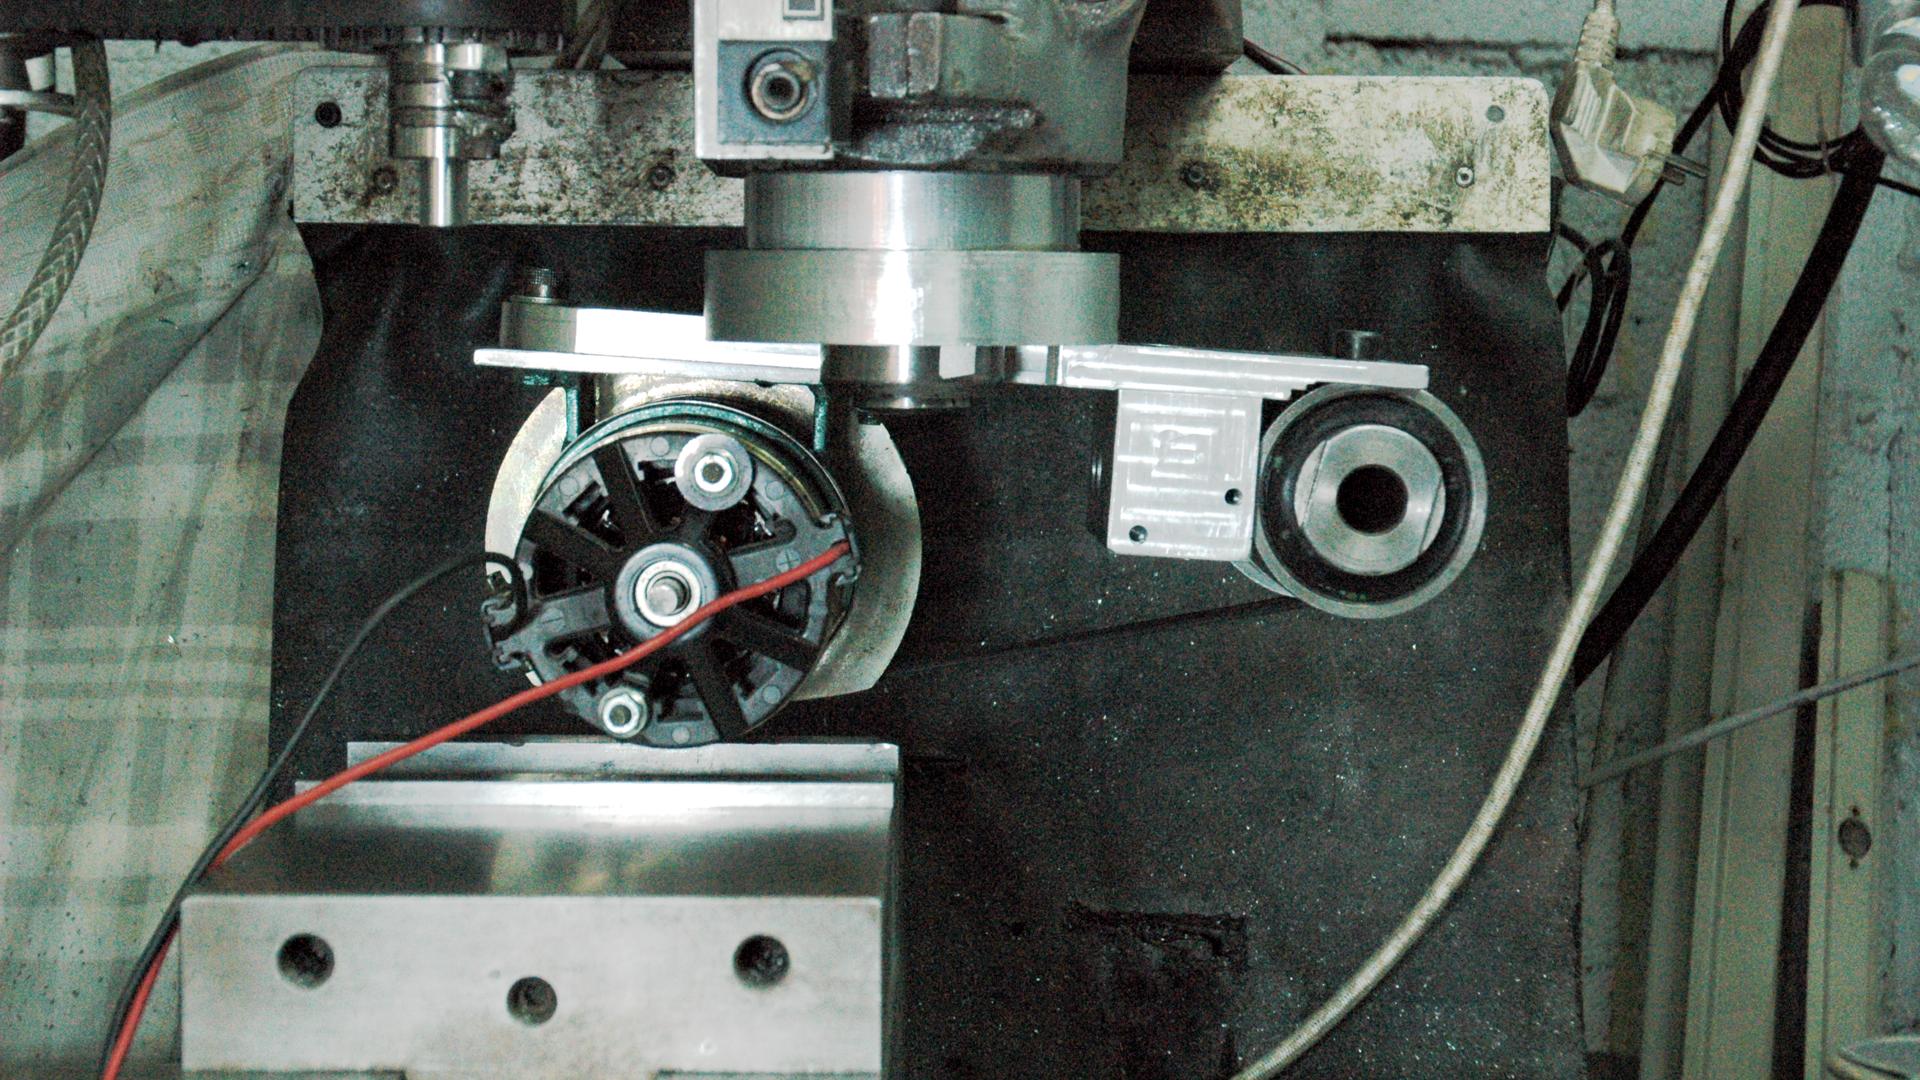
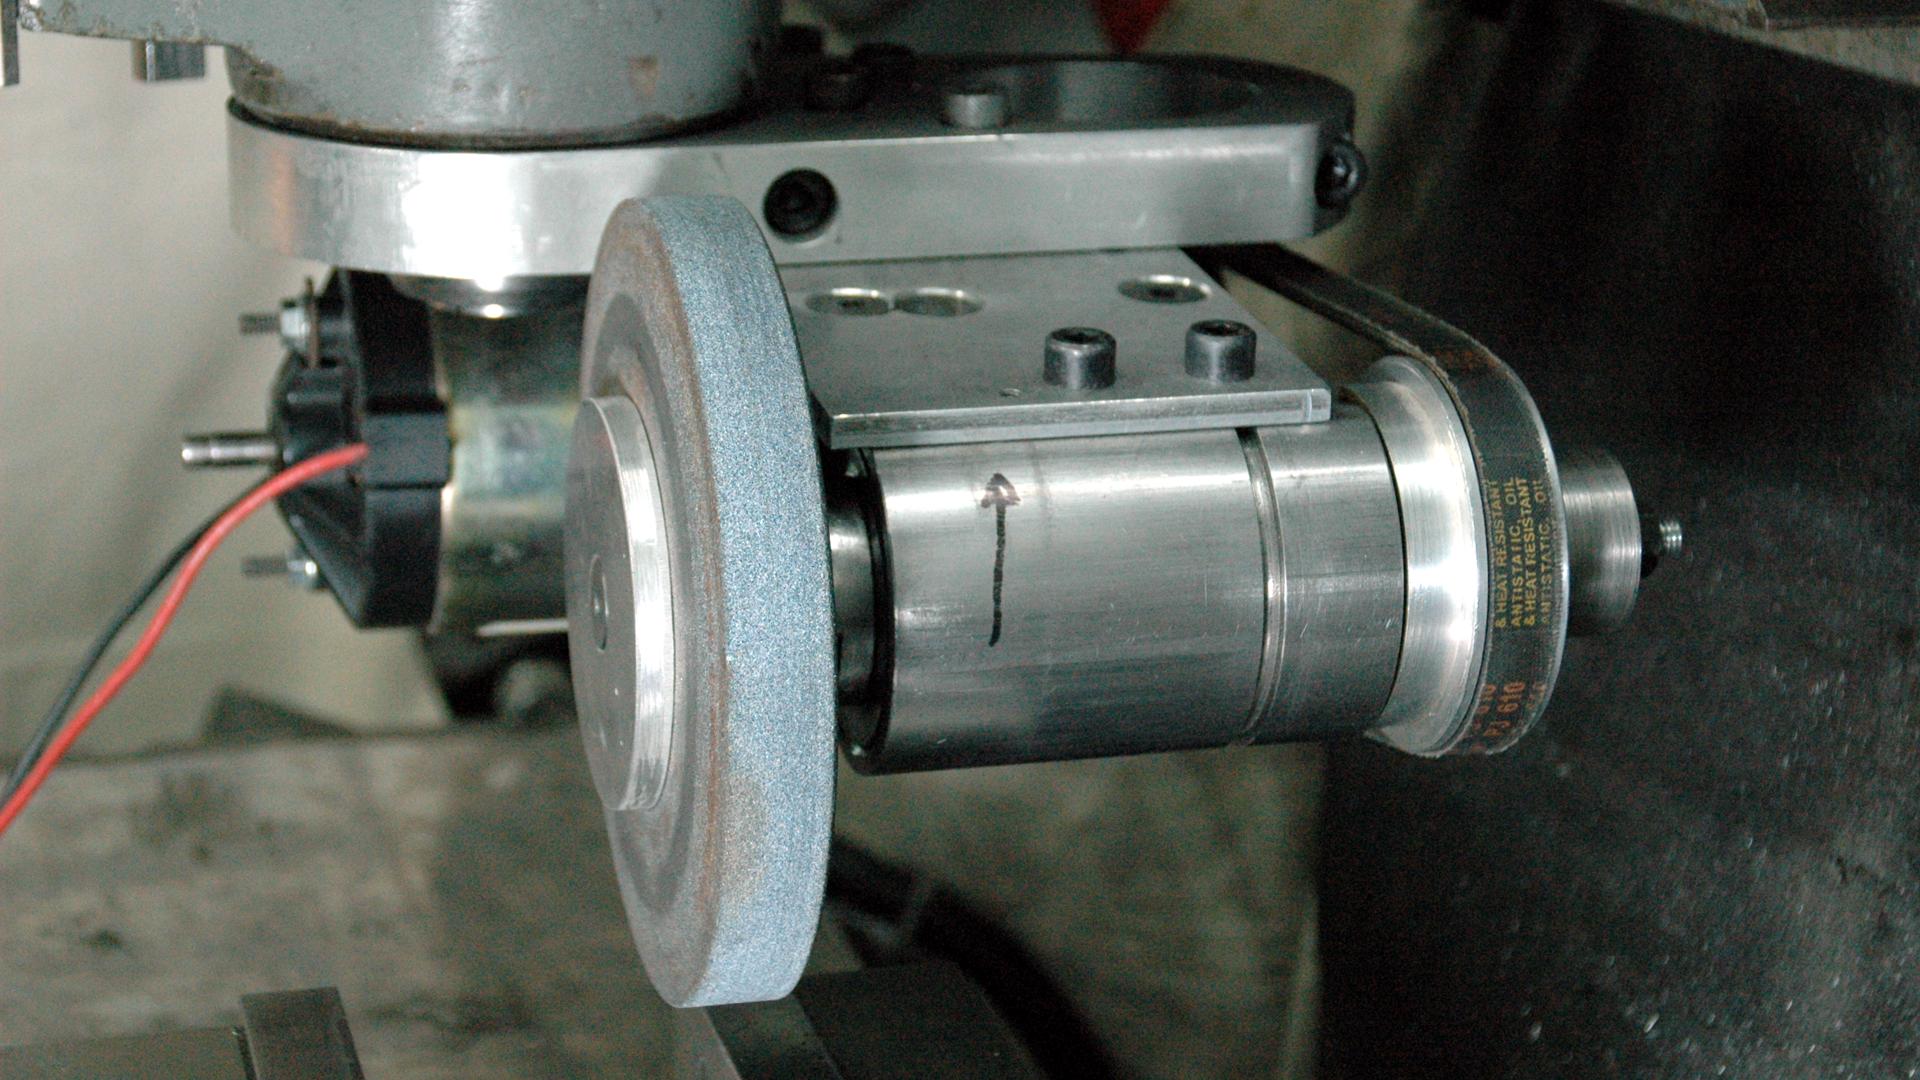
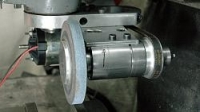
    Luckily, I realised that if I mounted the base plate horizontally then the motor would be lower than the wheel surface, which would prevent the grinding of long work pieces. A solution would be to angle the base plate down at the wheel end by 3.5 deg. So I milled an angled surface on the quill clamp. The clamp is substantial enough so that the holes and milled surface have next to no effect on strength nor stiffness. It would have been easy to have overlooked this problem and it was pure luck that made me check.

    DIY surface grinder-milling-angle.jpg DIY surface grinder-grinder-05.jpg
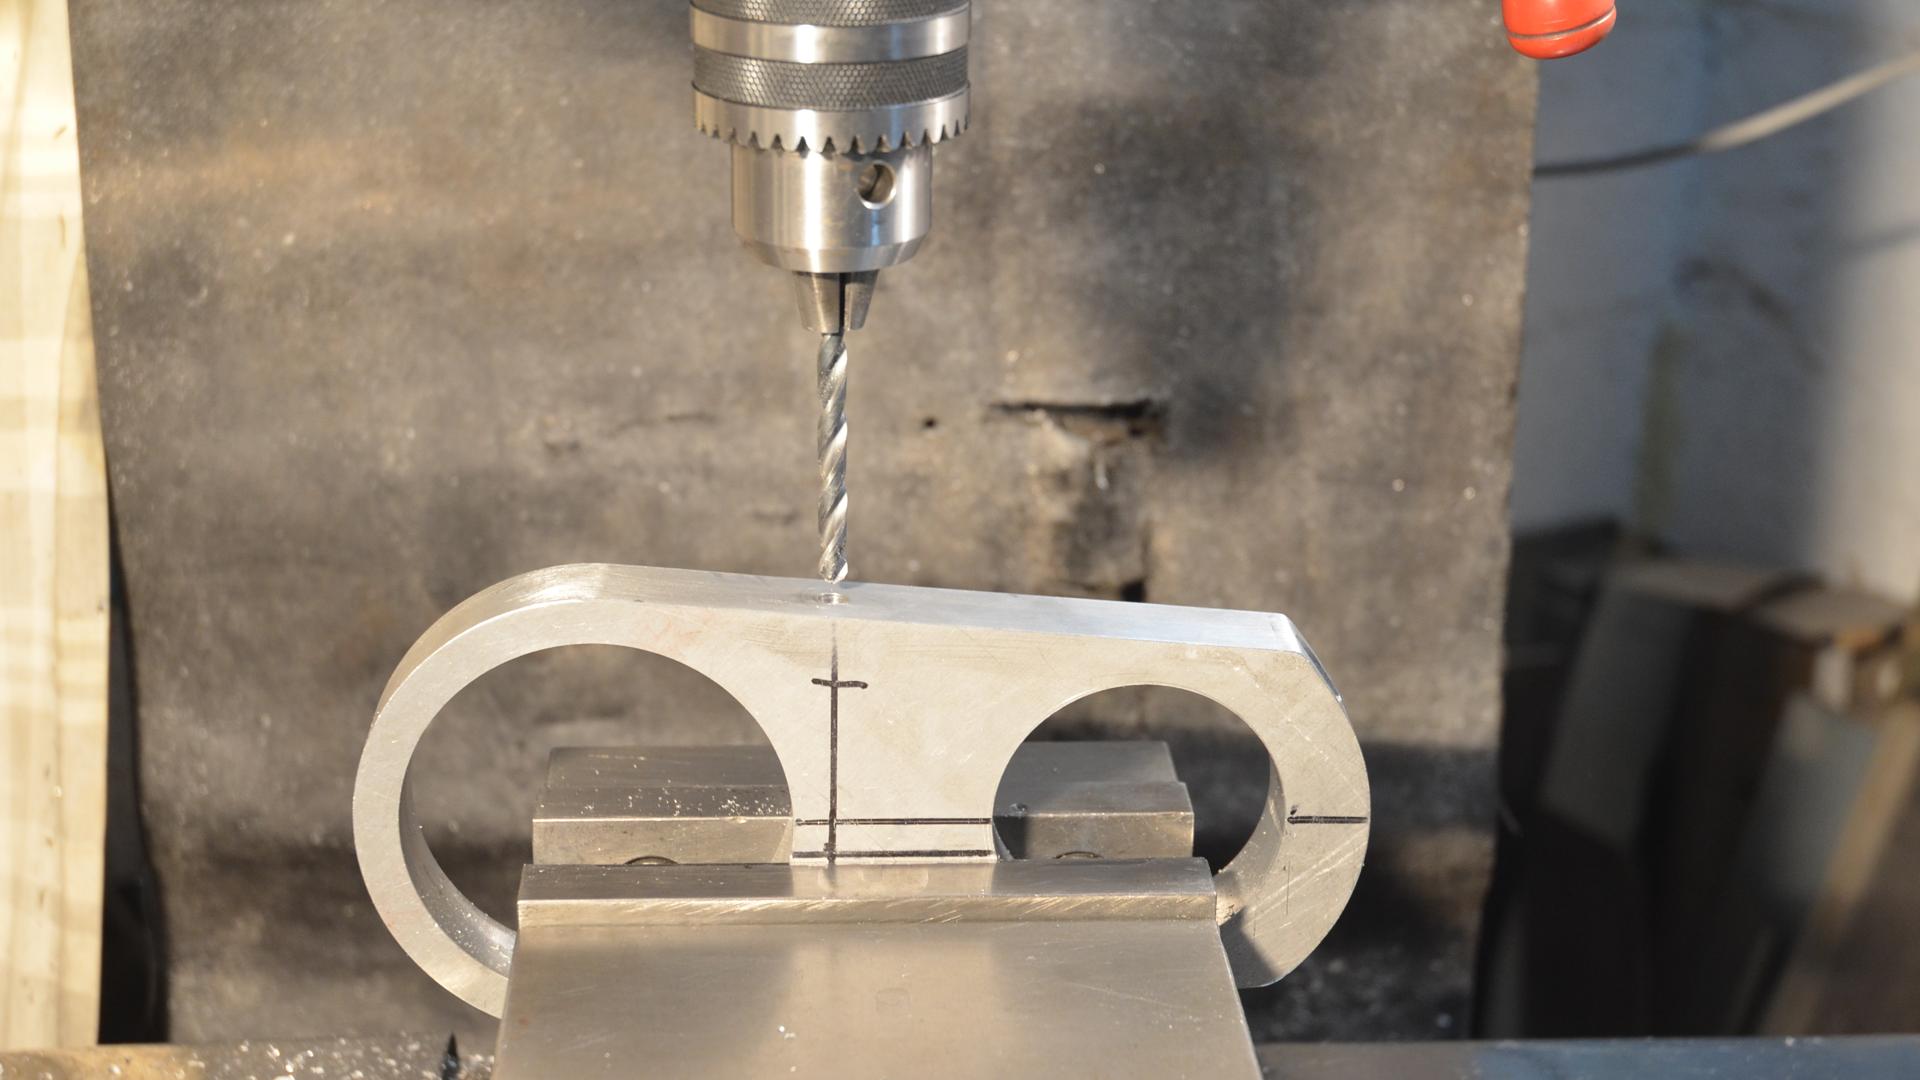
    On the left, milling the clamp for the 3.5 deg angle. On the right we can be seen how the grinder base tilts downward at the wheel end.

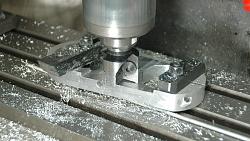
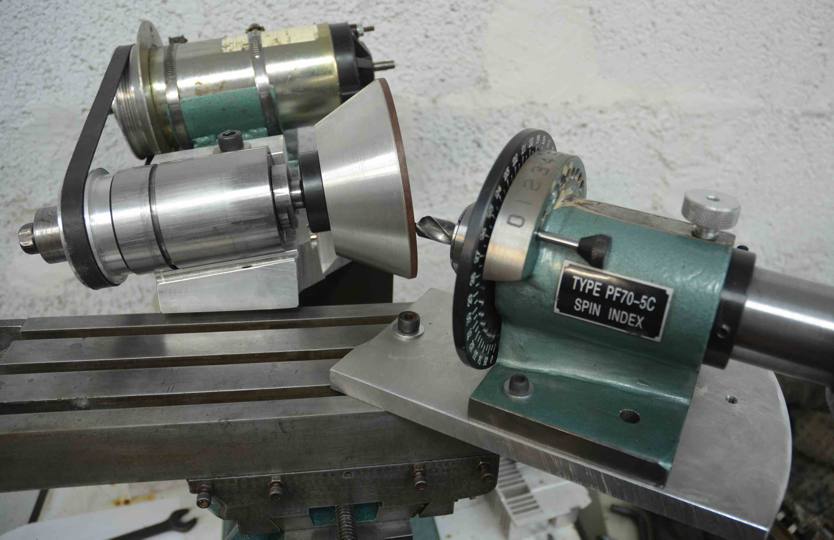
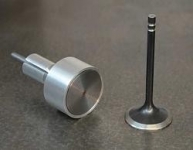
    A couple of hours later and I did my first test grind and was very pleased with the finish, I did it dry but will try mist in future. I used a cheap bench grinder wheel, because it is the only one that I have with a 1.25" hole in it to fit my mandrels. I can fit wheels between 5.5" and 6.5", larger will foul the clamp and less leaves the motor lower, which only matters for long work pieces. I have a CBN 6" wheel that I got for cam grinding, that is narrower and would need more passes but it will be interesting to see the finish.

    DIY surface grinder-grinder-01.jpg DIY surface grinder-grinder-02.jpg DIY surface grinder-grinder-03.jpg
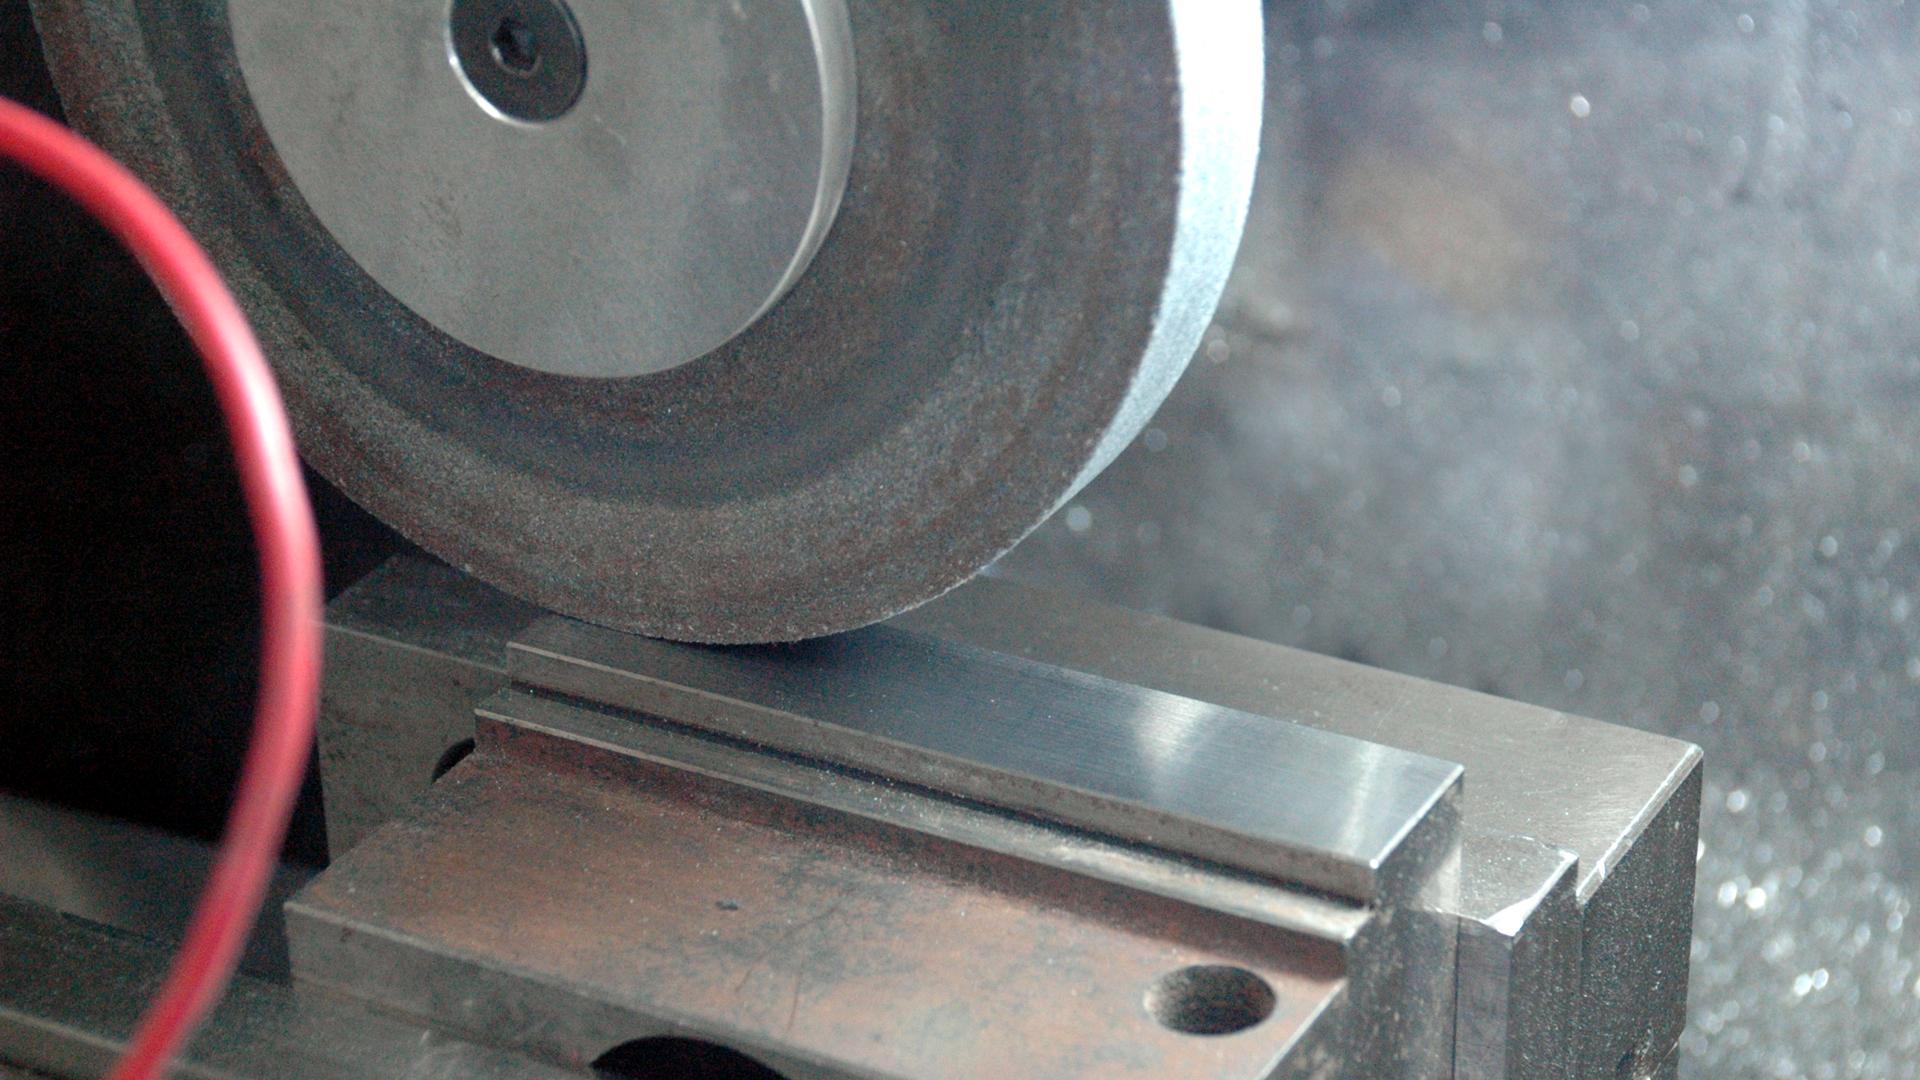
    A couple views of the grinder before it had a wheel cover and after doing the first test grind on a piece of hardened steel. I was very pleased with the results.

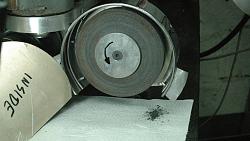
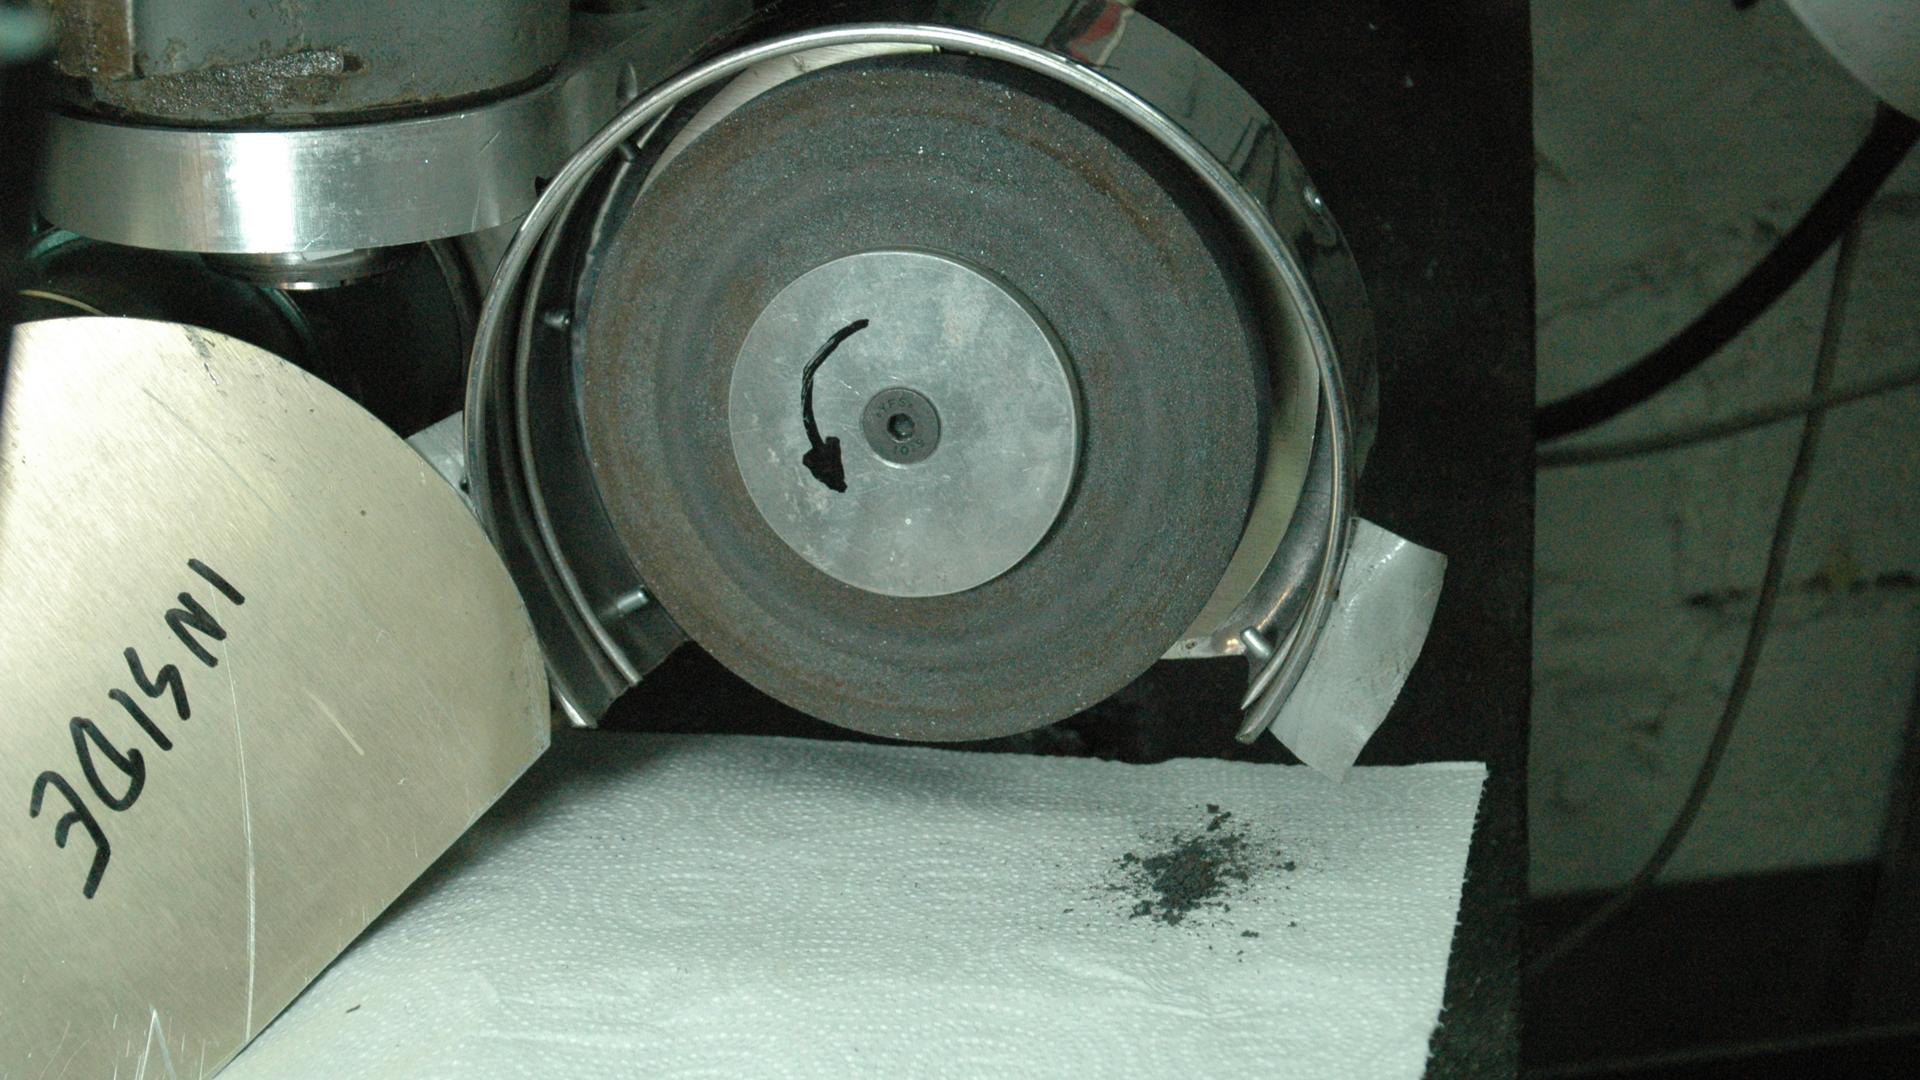
    After I made a Q&D wheel cover I started to think about a dust funnel to connect to a shopvac, but in the preceding day or two I had been discussing magnets with a couple of friends and that lead me to think about using one or more magnets to collect most of the swarf. Afterall if you are grinding properly with the correct wheel then almost all of the dust is steel although many people think that it is abrasive grit. Imagine how fast the wheel would wear if that were the case. So I firstly did a quick test, I hand held a magnet to the outside of the cover and did a test grind. As can be seen in the first pic below, when I removed the magnet the collected swarf fell down. The second pic shows the swarf that I wiped off magnets, which I had taped to the cover, after I had ground the top of the hardened jaws of my mill vice. Almost 100% of the swarf was captured. It was interesting to watch from work surface height. Without the magnets the sparks would be shot off horizontally at a tangent to the contact point, also some sparks would be carried around with the wheel and exit at the rear end. With the magnets in place the spark trajectory would curl around and head for the magnets, no more exited from the rear, I had a catch system to try and collect any dust that got missed and I collected nothing.

    So now I need to make a proper system for mounting the magnets. I am thinking that I should make it an eletromagnet, then when I want to clean the swarf out I'll just have to switch it off and catch the falling dust.

    DIY surface grinder-magnettest-01.jpg DIY surface grinder-magnettest-02.jpg

    Now I have to write a simple programme to output G-code to move the table longitudinally by the required amount and then step over for the next pass. A simple bit of software that would take the need for thinking out of the equation. I also need to look for a magnetic chuck but that is not so easy to find used here in Spain, shipping would kill it from Germany or UK. I really don't want to have to make one because that WOULD take more than a couple of hours. If I have to make one then it will be an electromagnetic chuck made from surplus transformers.

    I have made videos of most of the process and will post a link as soon as I get around to editing it.

    186 More Best Homemade Tools eBook

  2. The Following 37 Users Say Thank You to tonyfoale For This Useful Post:

    aphilipmarcou (Aug 2, 2018), bigtrev8xl (Mar 31, 2018), Canobi (Aug 2, 2018), CookieCrunch (Mar 31, 2018), davesrepair (Jan 24, 2024), davidhoneybadger (Apr 6, 2018), DIYer (Mar 31, 2018), drivermark (Aug 3, 2018), emu roo (Nov 12, 2020), freddo4 (Nov 15, 2020), high-side (Feb 20, 2019), Home-PC (Nov 13, 2020), HUMARIA (Feb 19, 2019), Inner (Aug 3, 2018), JoeH (Nov 22, 2018), Jon (Mar 30, 2018), JRock (Apr 6, 2018), Kevic (Nov 21, 2018), LMMasterMariner (Mar 30, 2018), marksbug (Mar 10, 2024), Moby Duck (Aug 4, 2018), mr mikey (Mar 10, 2024), mwmkravchenko (Mar 30, 2018), Neil Jensen (Apr 6, 2018), NortonDommi (Apr 11, 2018), nova_robotics (Nov 12, 2020), olderdan (Mar 31, 2018), Paul Jones (Mar 31, 2018), Rayonger (Apr 6, 2018), rlm98253 (Mar 10, 2024), rossbotics (Apr 1, 2018), that_other_guy (Dec 31, 2018), thehomeengineer (Apr 6, 2018), Trojan Horse (Apr 15, 2018), Tule (Mar 31, 2018), Tuomas (Apr 9, 2018), volodar (Nov 21, 2018)

  3. #2
    Supporting Member ncollar's Avatar
    Join Date
    Oct 2012
    Posts
    354
    Thanks
    23
    Thanked 180 Times in 126 Posts
    Tony
    WOW, you the man. What a beautiful job and show how you did it all. Very nice work.
    Keep them coming and the video soon.
    Nelson

    2000 Tool Plans

  4. The Following User Says Thank You to ncollar For This Useful Post:

    tonyfoale (Apr 2, 2018)

  5. #3
    Content Editor
    Supporting Member
    DIYer's Avatar
    Join Date
    Aug 2013
    Posts
    3,056
    Thanks
    772
    Thanked 1,850 Times in 1,652 Posts


    Thanks tonyfoale! We've added your Surface Grinder to our Grinding category,
    as well as to your builder page: tonyfoale's Homemade Tools. Your receipt:


  6. The Following User Says Thank You to DIYer For This Useful Post:

    tonyfoale (Mar 31, 2018)

  7. #4
    Supporting Member tonyfoale's Avatar
    Join Date
    Nov 2016
    Location
    Spain
    Posts
    1,549
    Thanks
    679
    Thanked 2,627 Times in 705 Posts

    tonyfoale's Tools
    Quote Originally Posted by ncollar View Post
    Tony
    WOW, you the man. What a beautiful job and show how you did it all. Very nice work.
    Keep them coming and the video soon.
    Nelson
    Glad you like it.

  8. #5
    Supporting Member Paul Jones's Avatar
    Join Date
    May 2014
    Location
    Del Mar, California
    Posts
    1,231
    Thanks
    5,810
    Thanked 1,440 Times in 655 Posts

    Paul Jones's Tools
    Tony,

    Thank you for sharing all the photos and details to the making of your "DIY surface grinder". This is a very useful and versatile for many shop operations. I am inspired by your work and may attempt to do this on a smaller scale for smaller machining/finishing operations.

    Regards,
    Paul Jones

  9. The Following User Says Thank You to Paul Jones For This Useful Post:

    tonyfoale (Mar 31, 2018)

  10. #6
    Supporting Member olderdan's Avatar
    Join Date
    Jun 2016
    Posts
    781
    Thanks
    1,456
    Thanked 1,531 Times in 463 Posts

    olderdan's Tools
    Tony, what a great idea to get more out of your cutter grinder head.
    If it is any help we used to do all our tool steel form grinding dry as our optical dividing heads would not tolerate coolant, the wheels were white oxide 80 grit for hard steel and they held up well without generating too much heat, the CBN wheels were always used with coolant. I like the magnet swarf catching idea.

  11. The Following 2 Users Say Thank You to olderdan For This Useful Post:

    Paul Jones (Mar 31, 2018), tonyfoale (Apr 1, 2018)

  12. #7
    Supporting Member tonyfoale's Avatar
    Join Date
    Nov 2016
    Location
    Spain
    Posts
    1,549
    Thanks
    679
    Thanked 2,627 Times in 705 Posts

    tonyfoale's Tools
    Quote Originally Posted by olderdan View Post
    Tony, what a great idea to get more out of your cutter grinder head.
    If it is any help we used to do all our tool steel form grinding dry as our optical dividing heads would not tolerate coolant, the wheels were white oxide 80 grit for hard steel and they held up well without generating too much heat, the CBN wheels were always used with coolant. I like the magnet swarf catching idea.
    I must get some proper surface grinding wheels, the one that I used is just a bench grinding wheel. IIRC you have a lot of grinding experience so I'd appreciate any advice on wheels etc. I do not have much grinding experience at all.
    I have so far only used CBN wheels for HSS tool sharpening, and as the actual cutting time and depth of cut are both minimal i have had no heat problems doing it dry.

    I think that the magnet idea is the most important thing that anyone could gain from my post. Especially when grinding on a mill or lathe where the ways are not properly protected against grinding swarf. I wish that I had thought of it ages ago.

  13. The Following User Says Thank You to tonyfoale For This Useful Post:

    olderdan (Mar 31, 2018)

  14. #8
    Supporting Member olderdan's Avatar
    Join Date
    Jun 2016
    Posts
    781
    Thanks
    1,456
    Thanked 1,531 Times in 463 Posts

    olderdan's Tools
    You guessed it, over 40 odd years in the grinding shop, the last ten I charge of it, it is what I did most of. You would leave me behind on cutter grinding though.
    Being in a rural area we would recruit some unskilled workers and I could write a book on some of the things I have seen them do. The classic was a guy trying to mike a shaft while it was grinding and ending up with half a micrometer, somehow he kept all his fingers.
    Last edited by olderdan; Mar 31, 2018 at 12:32 PM. Reason: spelling

  15. The Following 3 Users Say Thank You to olderdan For This Useful Post:

    mwmkravchenko (Jan 24, 2024), Paul Jones (Mar 31, 2018), tonyfoale (Apr 1, 2018)

  16. #9
    Supporting Member tonyfoale's Avatar
    Join Date
    Nov 2016
    Location
    Spain
    Posts
    1,549
    Thanks
    679
    Thanked 2,627 Times in 705 Posts

    tonyfoale's Tools
    Quote Originally Posted by Paul Jones View Post
    Tony,

    Thank you for sharing all the photos and details to the making of your "DIY surface grinder". This is a very useful and versatile for many shop operations. I am inspired by your work and may attempt to do this on a smaller scale for smaller machining/finishing operations.

    Regards,
    Paul Jones
    Paul,
    Thanks. You do pretty well with your own projects also.

  17. #10
    Jon
    Jon is online now Jon has agreed the Seller's Terms of Service
    Administrator
    Supporting Member
    Jon's Avatar
    Join Date
    Jan 2012
    Location
    Colorado, USA
    Posts
    25,451
    Thanks
    7,928
    Thanked 38,619 Times in 11,284 Posts
    Congratulations tonyfoale - your Surface Grinder is the Homemade Tool of the Week!

    Another big week around here, with multiple nice builds. Some good picks from this week:

    1" Belt Sander by Bellevue Woodshop
    Low Profile Milling Vise by editor@glue-it.com
    Truck Wheel Ring Straightener by Frank S
    Electrolytic Rust Removal by thehomeengineer
    Disc Sander by Bricoleando
    Cutting Torch Roller by oldtimer
    Die Holder Adaptor by Paul Jones
    Workshop Light by Tuomas
    Box Section Milling Method by thehomeengineer
    Extra Long QCTP Handle by Paul Jones
    Gas Bottle Garden Roller by Steved53
    Paint Bungs by thehomeengineer
    Large Fly Cutter by athomp
    Small Part Paint Booth by thehomeengineer
    Trailer Hook Up Aid by garage nut
    Dual Drill Press by threesixesinarow
    Circle Cutting Jig by athomp
    Clamp Screw Modification by thehomeengineer


    tonyfoale - we've added your tool entry to our All Homemade Tool of the Week winners post. And, you'll be receiving a $25 online gift card, in your choice of Amazon, PayPal, or bitcoin. Please PM me your current email address and gift card choice and I'll get it sent over right away.


    This is your 8th Homemade Tool of the Week win! Here are all of your winning tools:


  18. The Following 3 Users Say Thank You to Jon For This Useful Post:

    JRock (Aug 2, 2018), rlm98253 (Apr 6, 2018), tonyfoale (Apr 6, 2018)

Thread Information

Users Browsing this Thread

There are currently 1 users browsing this thread. (0 members and 1 guests)

Tags for this Thread

Bookmarks

Posting Permissions

  • You may not post new threads
  • You may not post replies
  • You may not post attachments
  • You may not edit your posts
  •