Free 186 More Best Homemade Tools eBook:  
New: 300+ fresh build posts/day from 275 forums → BuildThreads.com

User Tag List

Results 1 to 2 of 2

Thread: Finishing Castings

Threaded View

  1. #1
    Supporting Member hemmjo's Avatar
    Join Date
    Feb 2017
    Posts
    3,301
    Thanks
    410
    Thanked 2,132 Times in 1,230 Posts

    hemmjo's Tools

    Finishing Castings

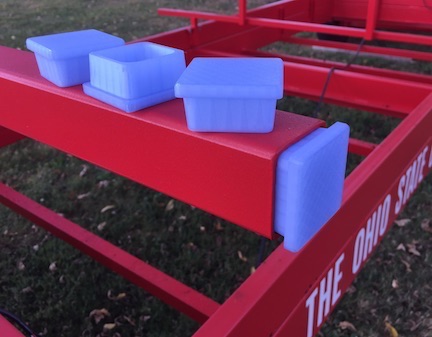
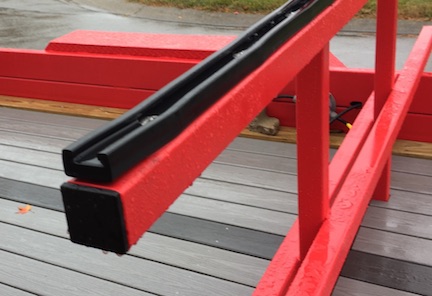
    My son is refurbishing a rowing shell trailer for a team he used to row with.
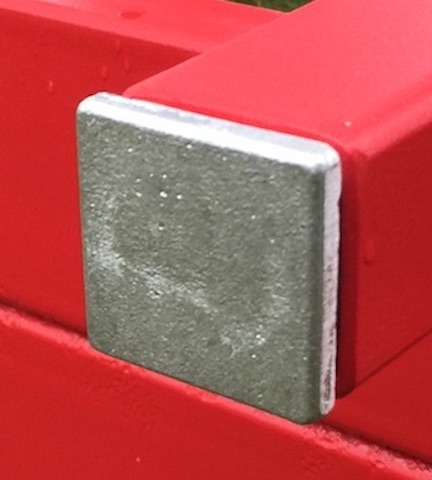
    When loaded the shells rest on 2” square steel tube. It is amazing how
    many critters use those tubes to build nests. Plastic tube plugs slow them
    down, but the critters easily chew through them. Sun degrades them leaving
    the tube open for rodents to inhabit.

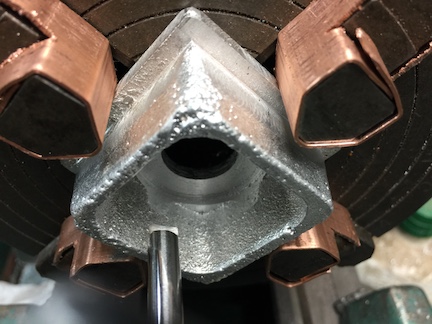
    Friends helped me up with 3D printed patterns for making some cast aluminum plugs
    (Thanks to Carl and Steve)
    Click image for larger version. 

Name:	01 3D printed patterns.jpg 
Views:	43 
Size:	40.4 KB 
ID:	49942

    Another thread described how these patterns were used to make aluminum castings
    Link Casting Aluminum Parts
    Click image for larger version. 

Name:	02 raw.jpg 
Views:	41 
Size:	59.9 KB 
ID:	49943

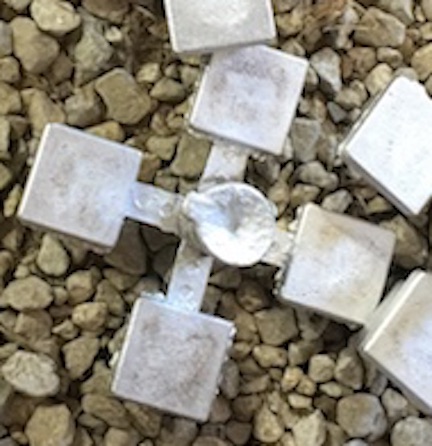
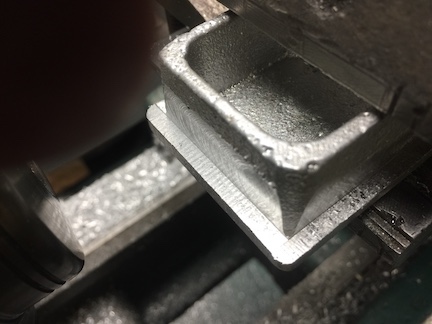
    After casting, the parts were separated from the sprue.
    Parting line defects were removed with a belt sander
    Link Lathe Belt Sander Attachment
    Click image for larger version. 

Name:	03 Casting flash.jpg 
Views:	34 
Size:	31.2 KB 
ID:	49944

    Click image for larger version. 

Name:	04 Trimmed Castings.jpg 
Views:	34 
Size:	52.8 KB 
ID:	49945

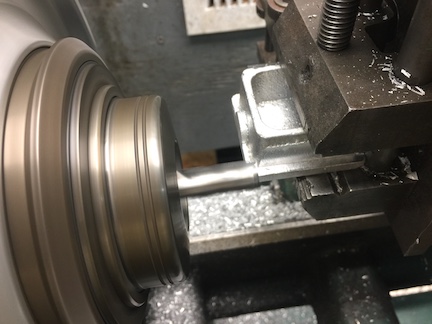
    The parts then required some milling to remove the runner
    remnant and some of the casting draft angle.
    This was done using a lathe milling adapter.
    Link Simple lathe milling adapter

    Click image for larger version. 

Name:	05 Milling runner.JPG 
Views:	35 
Size:	55.2 KB 
ID:	49946

    Click image for larger version. 

Name:	06 milling runner.JPG 
Views:	38 
Size:	52.2 KB 
ID:	49947

    Click image for larger version. 

Name:	07 cutting runner.JPG 
Views:	38 
Size:	51.6 KB 
ID:	49948

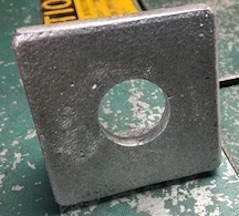
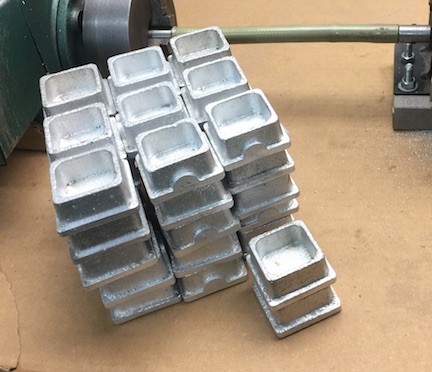
    All 4 sides are milled for good fit in the tubes
    Click image for larger version. 

Name:	08 milled edge.jpg 
Views:	43 
Size:	48.7 KB 
ID:	49949

    Test fit
    Click image for larger version. 

Name:	09 Test Fit.jpg 
Views:	39 
Size:	41.1 KB 
ID:	49950

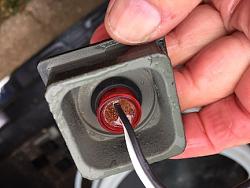
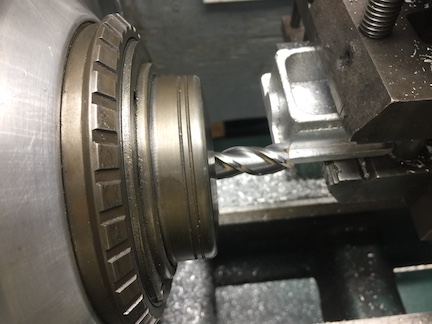
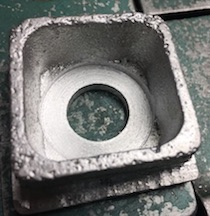
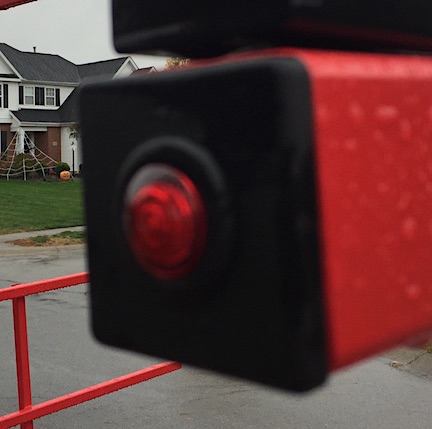
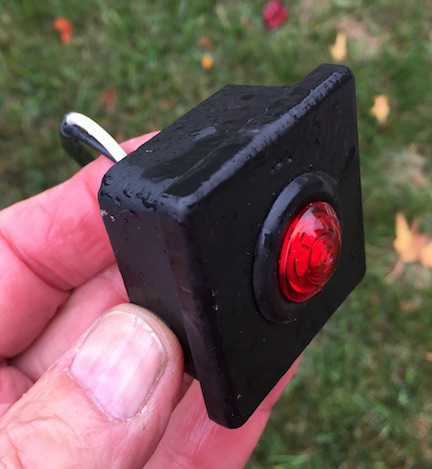
    Six of the plugs are drilled to for clearance lights.
    This operation required soft jaws for my chuck.
    LINK Lathe Soft Jaws
    Click image for larger version. 

Name:	10 drill.jpg 
Views:	40 
Size:	71.4 KB 
ID:	49951

    The backs bored to reduce thickness for the light grommet.
    Click image for larger version. 

Name:	11 bored.jpg 
Views:	39 
Size:	65.4 KB 
ID:	49952


    Name:  12 front.jpg
Views: 167
Size:  22.2 KB Name:  13 back.jpg
Views: 166
Size:  21.0 KB


    The plugs were sprayed with etching printer and painted
    Click image for larger version. 

Name:	14 Soid plug.jpg 
Views:	41 
Size:	40.2 KB 
ID:	49955

    LED clearance lights press into a rubber grommet
    Click image for larger version. 

Name:	17 Clearance light.jpg 
Views:	48 
Size:	38.6 KB 
ID:	49958 Click image for larger version. 

Name:	16 light back.JPG 
Views:	39 
Size:	56.2 KB 
ID:	49957 Click image for larger version. 

Name:	15 Light front.jpg 
Views:	40 
Size:	53.5 KB 
ID:	49956

  2. The Following 3 Users Say Thank You to hemmjo For This Useful Post:

    emu roo (Nov 4, 2025), nova_robotics (Nov 5, 2025), thevillageinn (Nov 4, 2025)

Thread Information

Users Browsing this Thread

There are currently 1 users browsing this thread. (0 members and 1 guests)

Bookmarks

Posting Permissions

  • You may not post new threads
  • You may not post replies
  • You may not post attachments
  • You may not edit your posts
  •