
 LinkBack URL
 About LinkBacks


I have not fewer than 5 electrical connector kits and not one of them had the connector I needed.
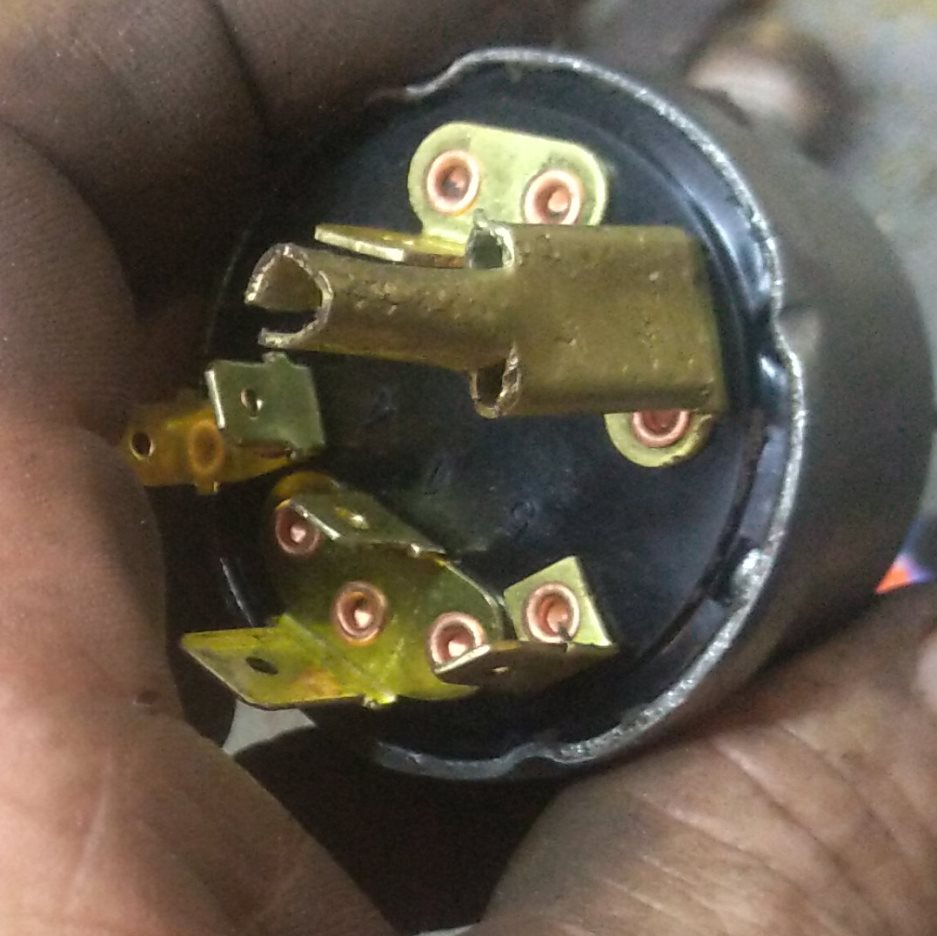
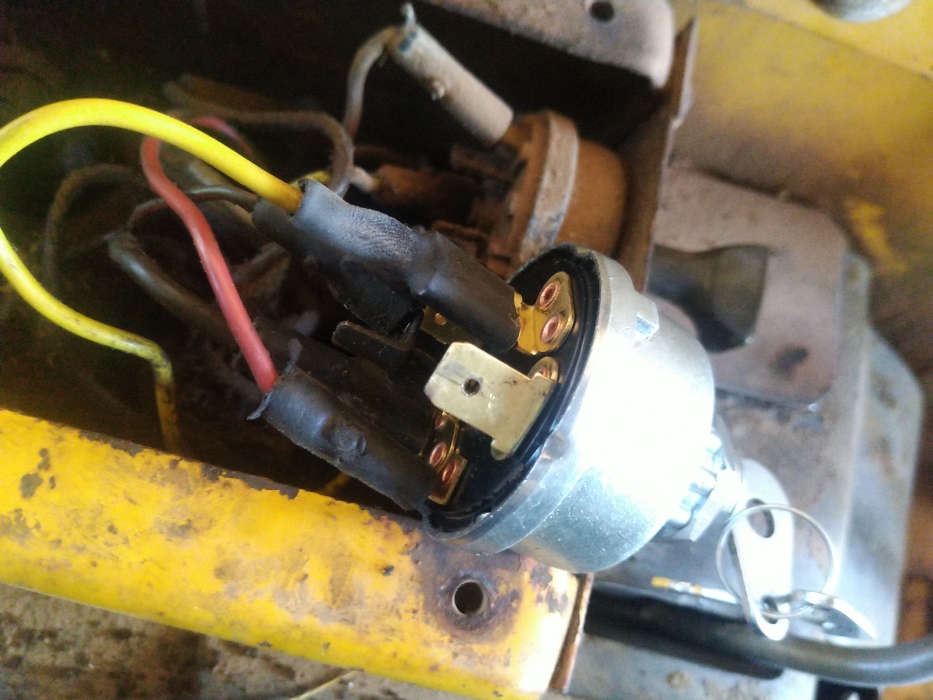
I finally was going to get around and change the key switch on my Backhoe since the key broke off in it 6 months ago I have been using pliers to turn the switch. Only the new switch has 3/8" blade connectors the old switch had 1 of the large connectors but for the new one I needed a second large connector.
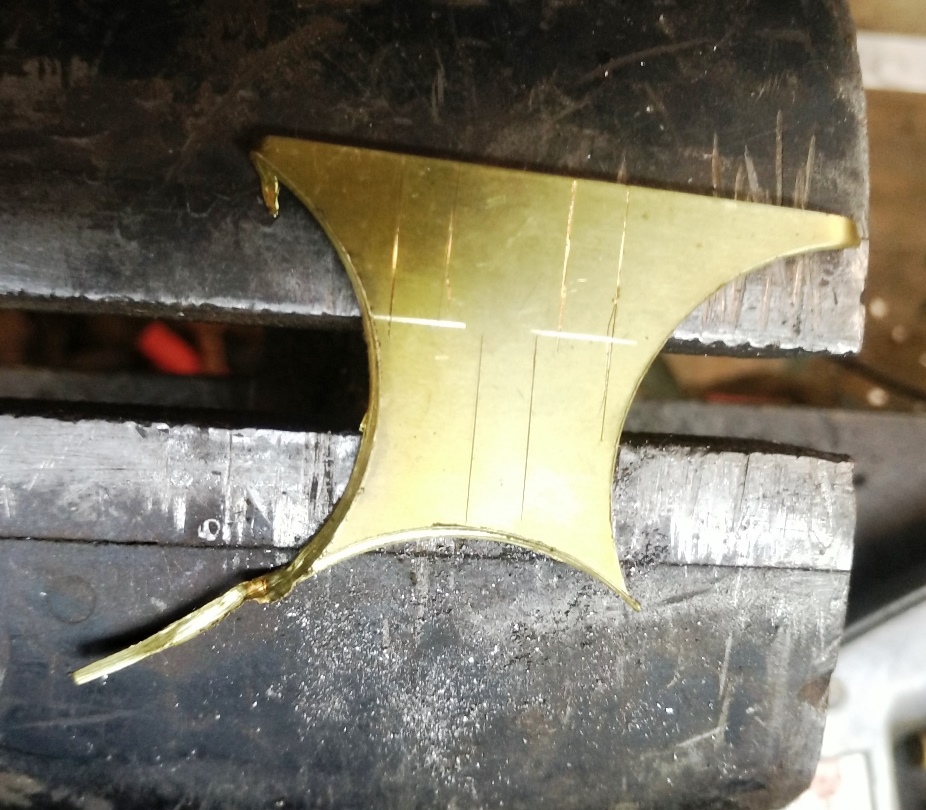
I solved this problem with a piece of .030" brass drop from the shim washers I made a while back
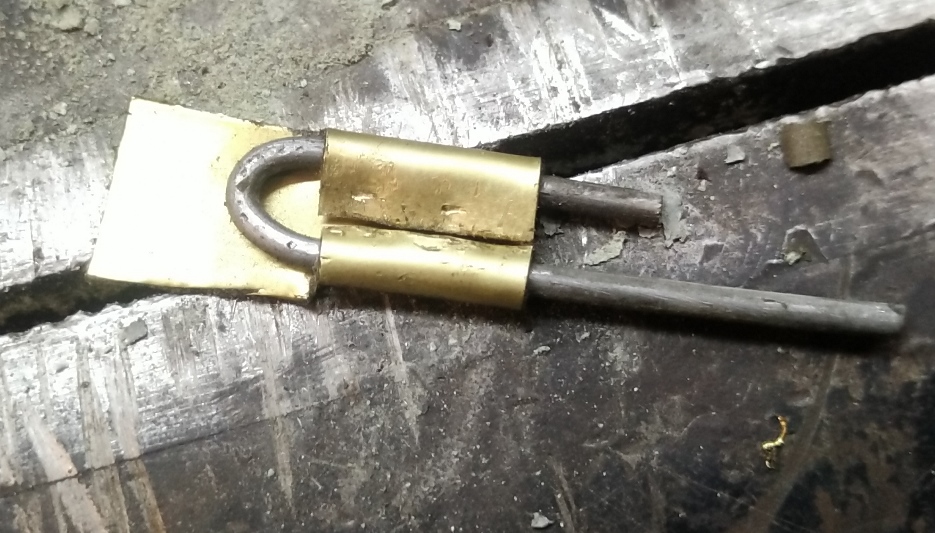
her is how I made the connector I scribed a rough layout on the brass then cut with snips, no concern with getting too critical with size I just needed it to carry current not be pretty for sale.
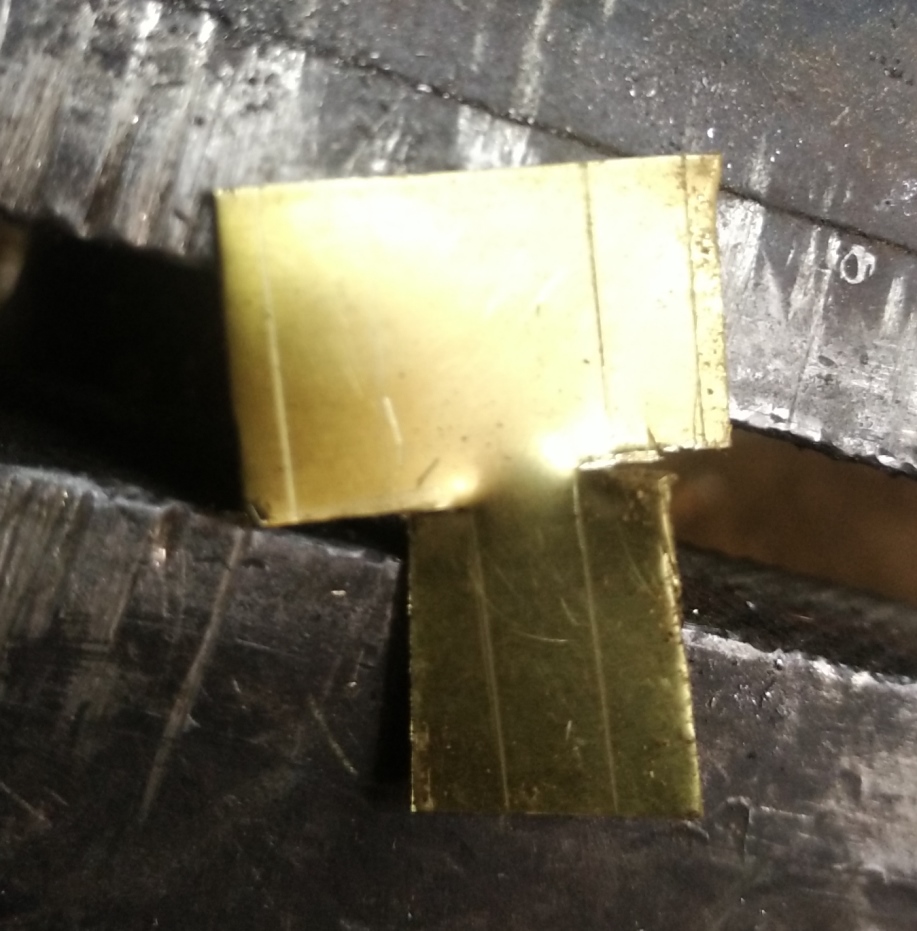
After the initial forming over a piece of 3/8 HSS I checked for size against the spade on the switch
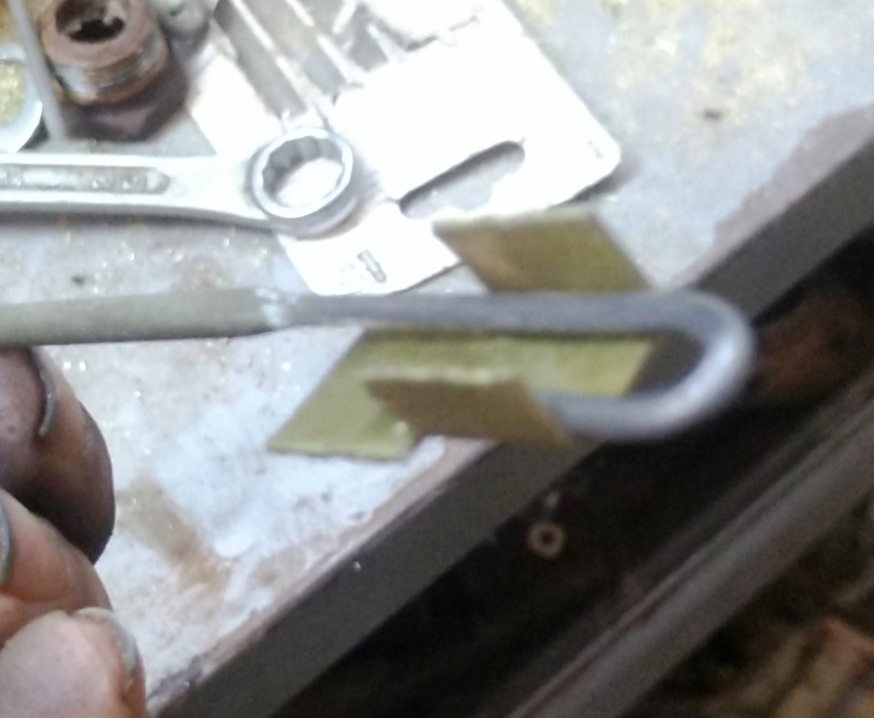
I then made a forming jig out of a 3/32 welding rod to roll the sides of the connector over this would make the spring type holding clamp of the connector
The shape of the connector after forming over the rod
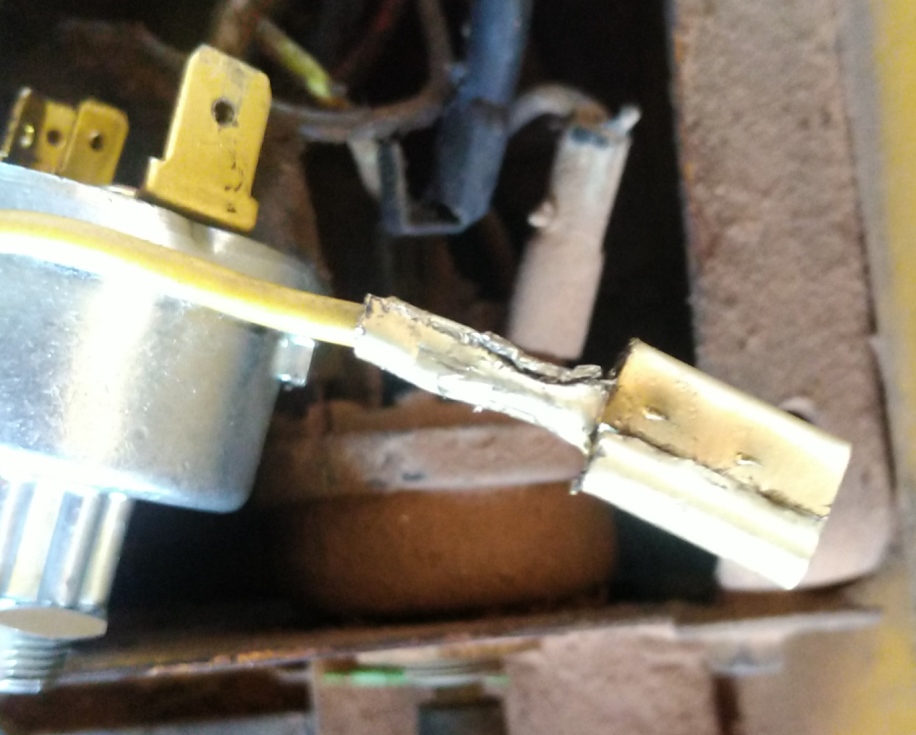
It will now lock onto the blade the next step will be to form the crimp tube end
the wire now crimped in place
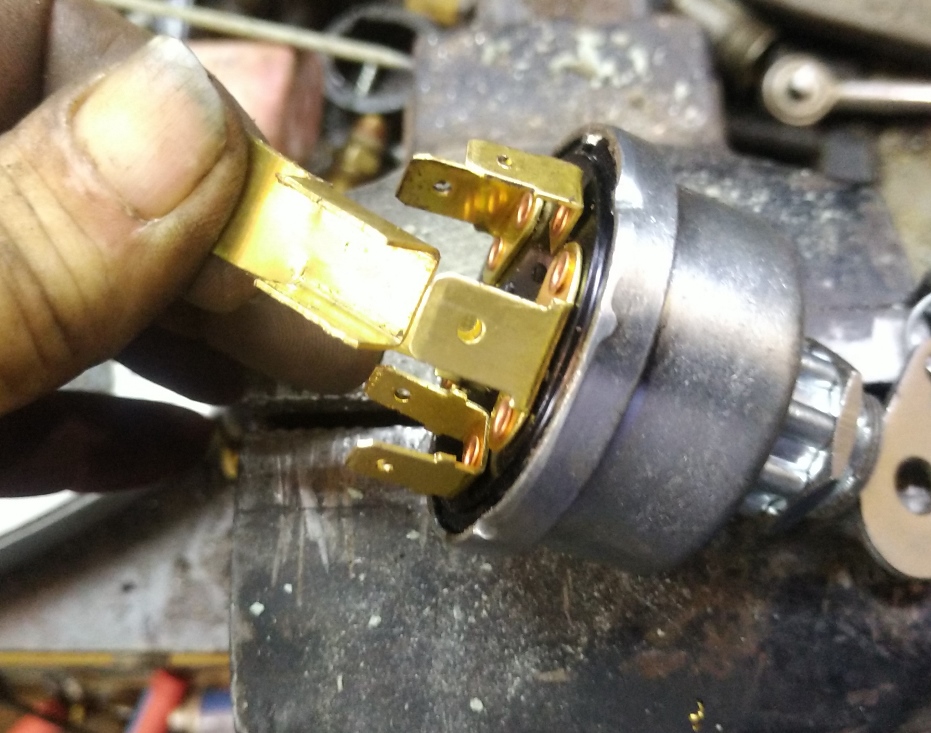
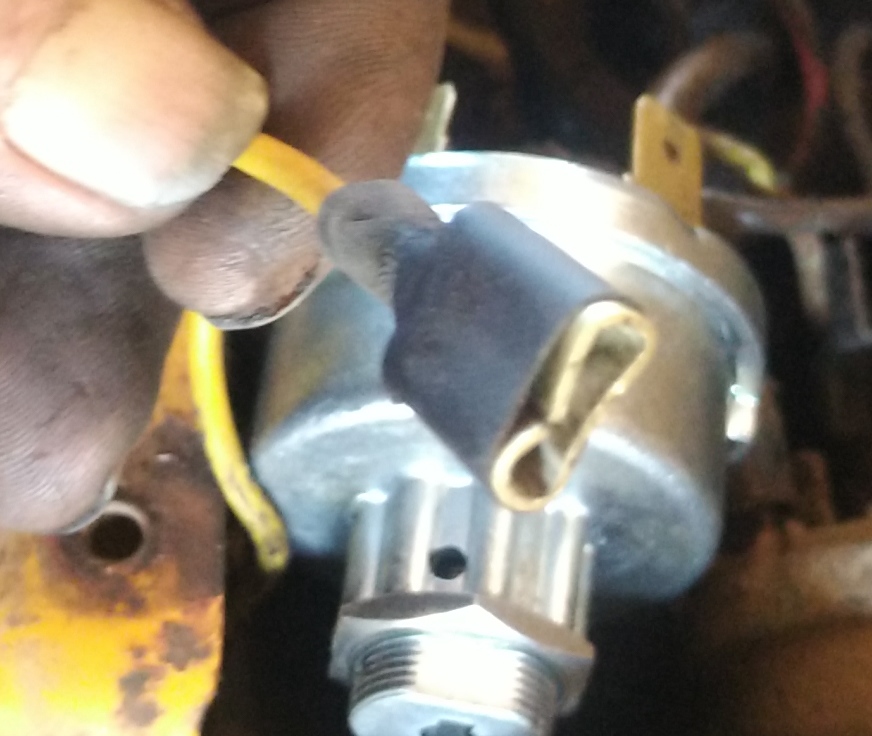
the completed connector attached to the switch with shrink tube insulator


 Reply With Quote


 I have probably half a million projects here that are AWP (or my getting a round-tuit) as we called it in the Air Force. It took me something like two years to finish rewiring my Atlas TH42 lathe when I had to wait for a part for it. The switch I had didn't fit the space I needed it to fit in, so had to order another. Only took a few days to get it, but I kept having other stuff pop up that had to be done RFN. Which led to the switch getting put somewhere I couldn't find it so delaying the repair further. When I finally found it, again, I dropped everything else to install it and finish the wiring job. And the crapstorm actually let me do it! I was SO surprised by that.


Bookmarks