-
3 Attachment(s)
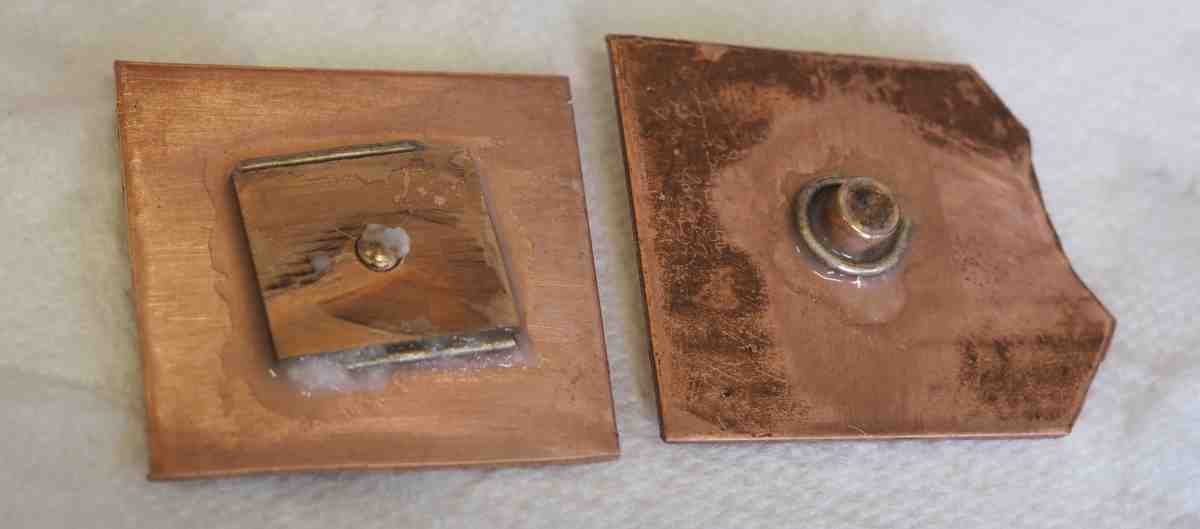
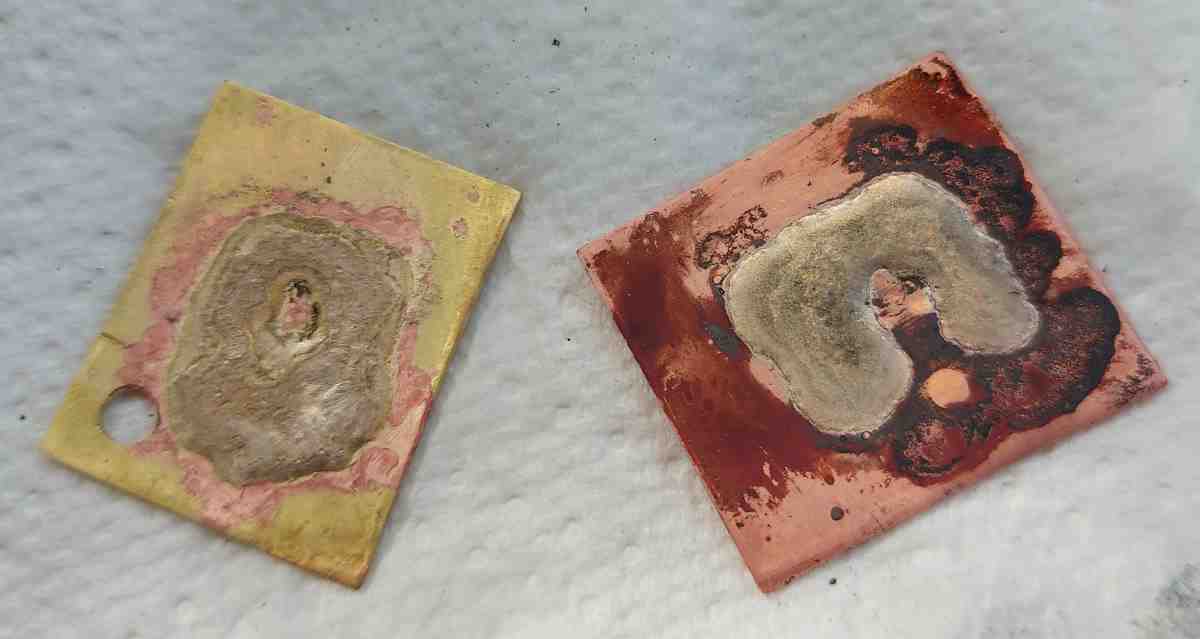
In preparation for silver soldering the phosphor bronze saddle to the boiler I've been running some coupon tests.
Effectively looking at applying silver solder in different locations on the bolted sandwich of copper and phosphor bronze.
Attachment 40359
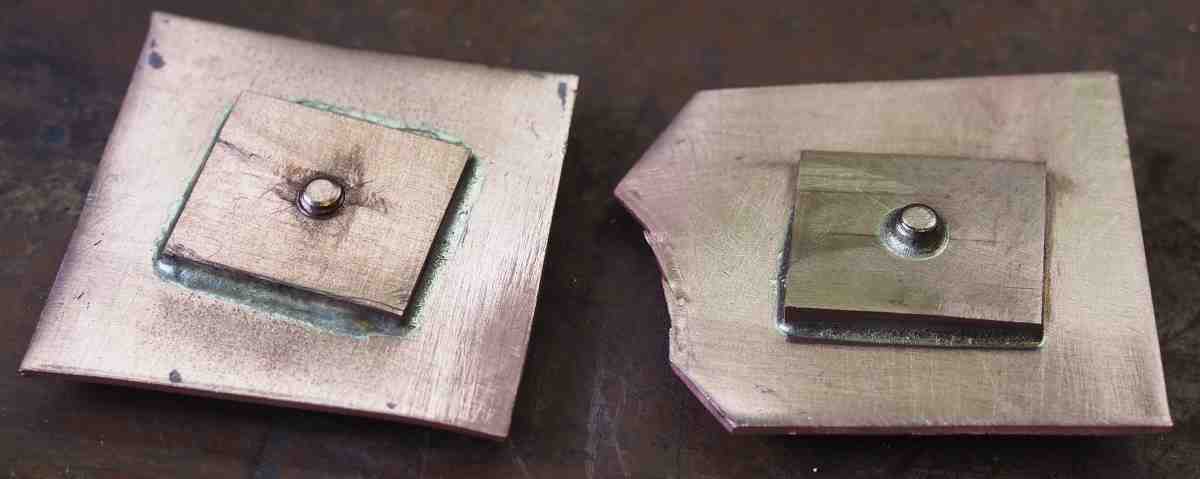
Interestingly the silver solder happily tracks (capillary action) through the joint, including through the threaded section.
Attachment 40360
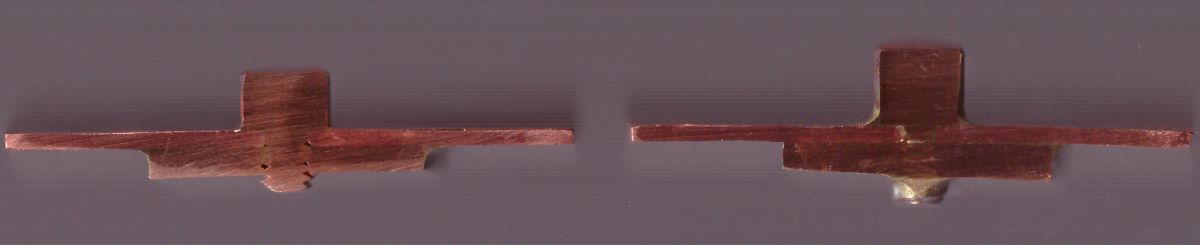
The right hand side configuration appears to have given the most complete joint. I then sectioned the joints:
Attachment 40361
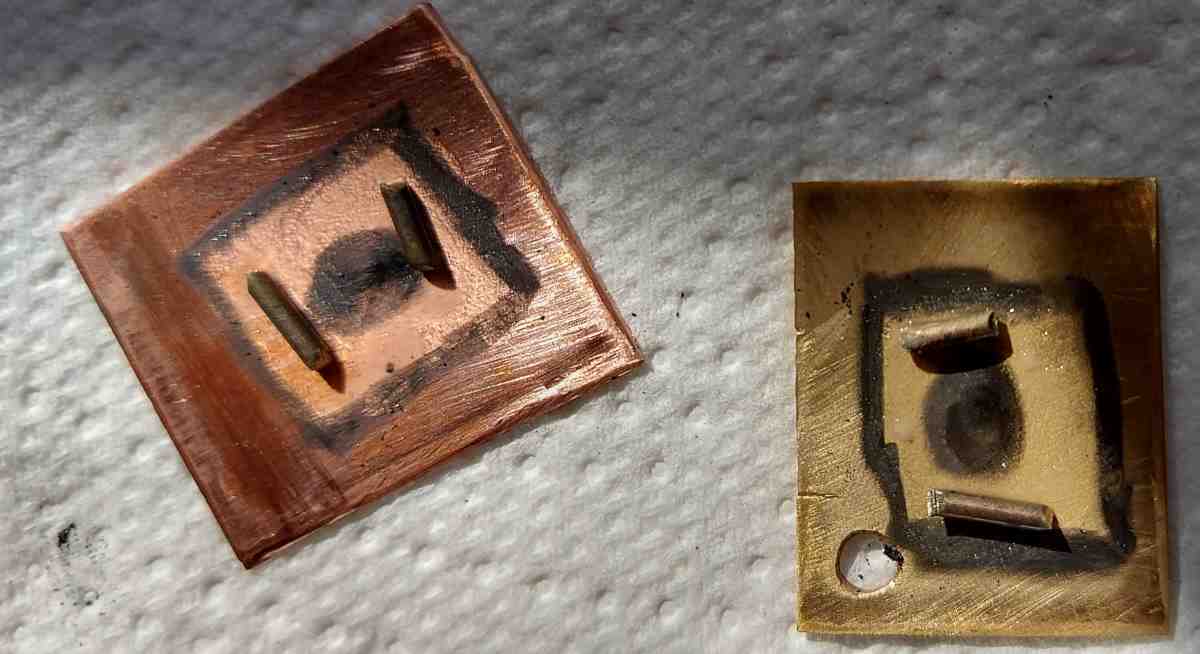
You can see that on the LHS the thread of the bolt has voids where silver solder has not tracked completely through all interfaces.
Left and right hand side parts are consistent through the images, although I have had to mirror some of the images to make this consistent (this doesn't affect the results).
-
2 Attachment(s)
Around the saddle I want to mask so that I can control how far the silver solder goes. I did some research and there are lots of options from liquid paper to yellow ochre. However, the option readily available is the graphite pencil:
Attachment 40382
Attachment 40383
This appears to have worked ok.
-
I've been stuck for a few months, a total roadblock on how to make the steam valve. Especially as I have machine this into the PB saddle that itself has had lots of hours put into it. But, after a clean up of the workshop it is back on the bench. I will solve this problem.
https://youtu.be/3imqu2B5IiM
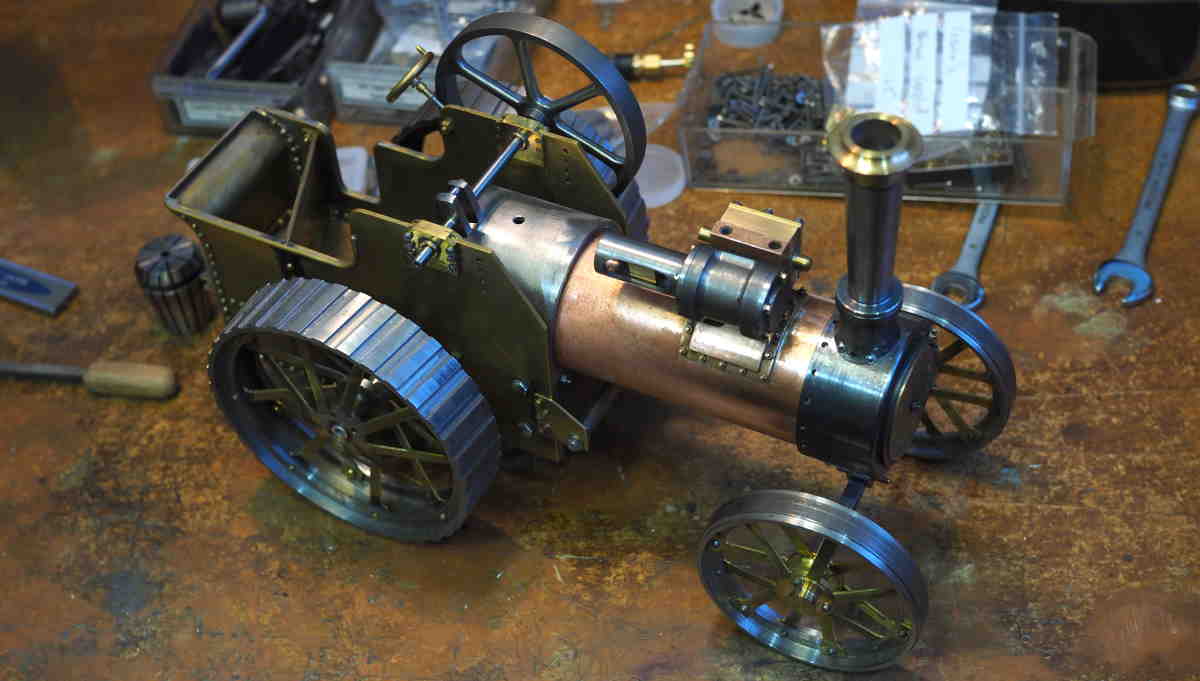
There are a few more items on the list of next things to do on the Burrell
-
1 Attachment(s)
I made the decision to make the steam control valve a remote valve.
https://youtu.be/dOuayWSH-A0
The best bit is I made a decision and this allowed me to move forwards. So I could then silver solder the saddle to the boiler.
Attachment 40944
-
-
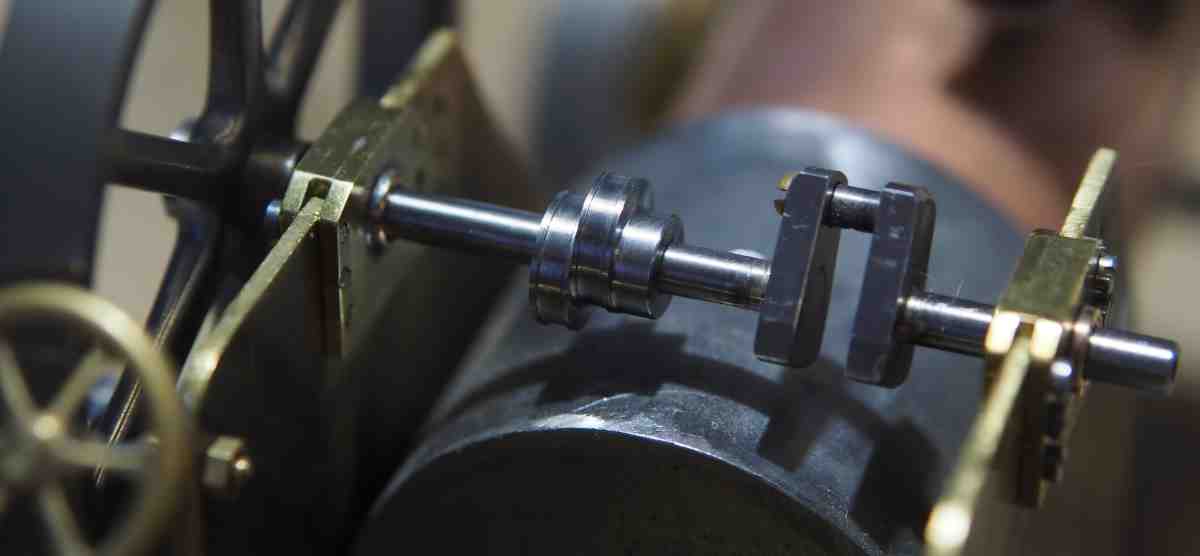
1 Attachment(s)
The double eccentric will give me forward and reverse, however, I thought it was going to be tricky machining it. I think it turned out ok.
Attachment 40969
https://youtu.be/M1iXq4brYsc
-
1 Attachment(s)
For the vertical boiler I came up with a multi-layered insulation. For the Burrell traction engine this needs to be shrunk down to 1.5mm in thickness, quite a challenge.
So, I have built a boiler thermal new test object.
Attachment 41054
It's heated in the centre using a 50W ceramic heater (4mm diameter). I will then use the cooling curves to estimate the heat loss.
I will look at the maximum insulation and then a few more sensible options.
-
A short video showing the setup with the end supports:
https://youtu.be/6-Im3rfMguA
Interesting to see the thermal conductivity of wood and where balsawood sits on the curve.
-
1 Attachment(s)
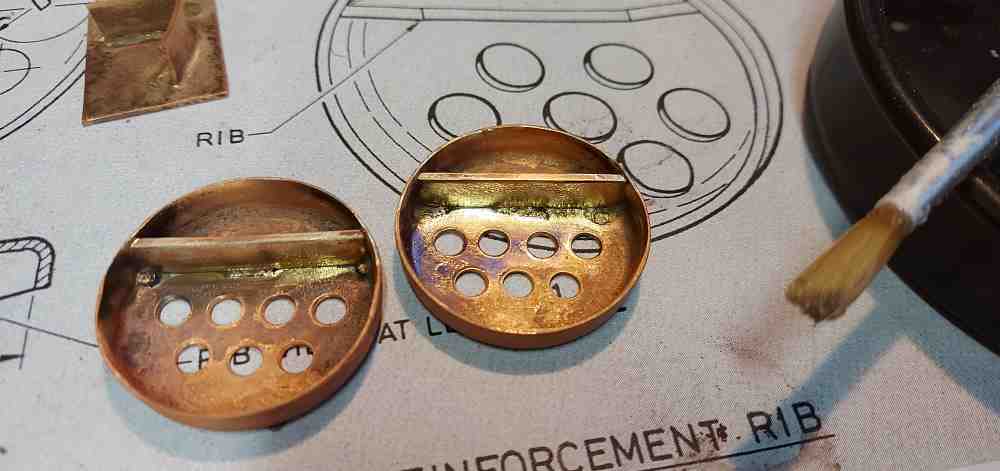
After a lot of help from a fellow steam model engineer I've managed to make and silver solder the boiler end plate stiffeners in place.
Attachment 41069
I think I'm a gluten for punishment pursuing the silver soldering in a kiln. The Easy Flo 24 did not flow as well as some of the lower temperature silver solders.
-
5 Attachment(s)
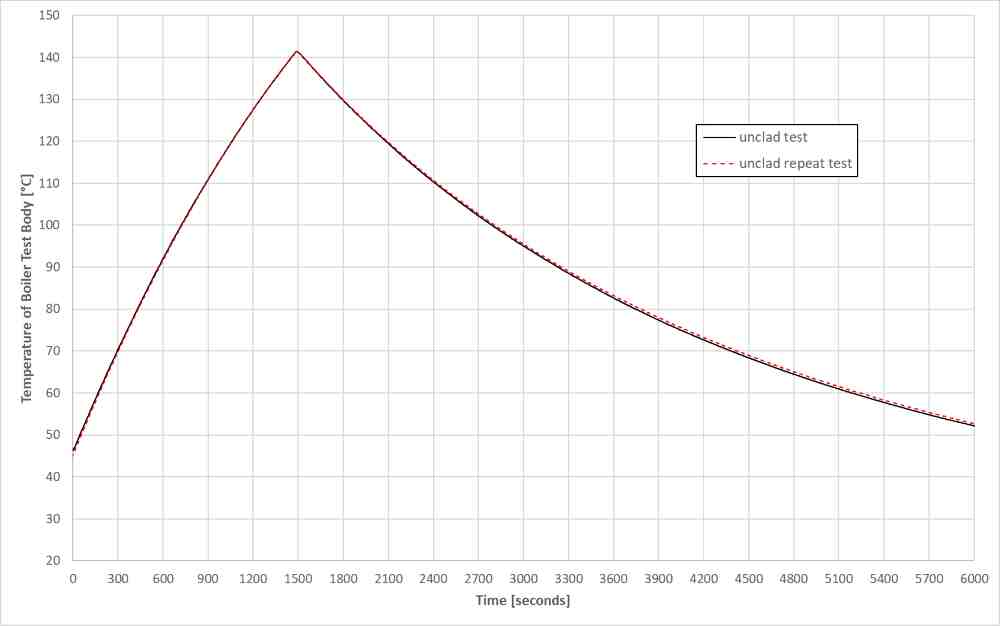
The boiler test object is generating repeatable cooling curves
Attachment 41111
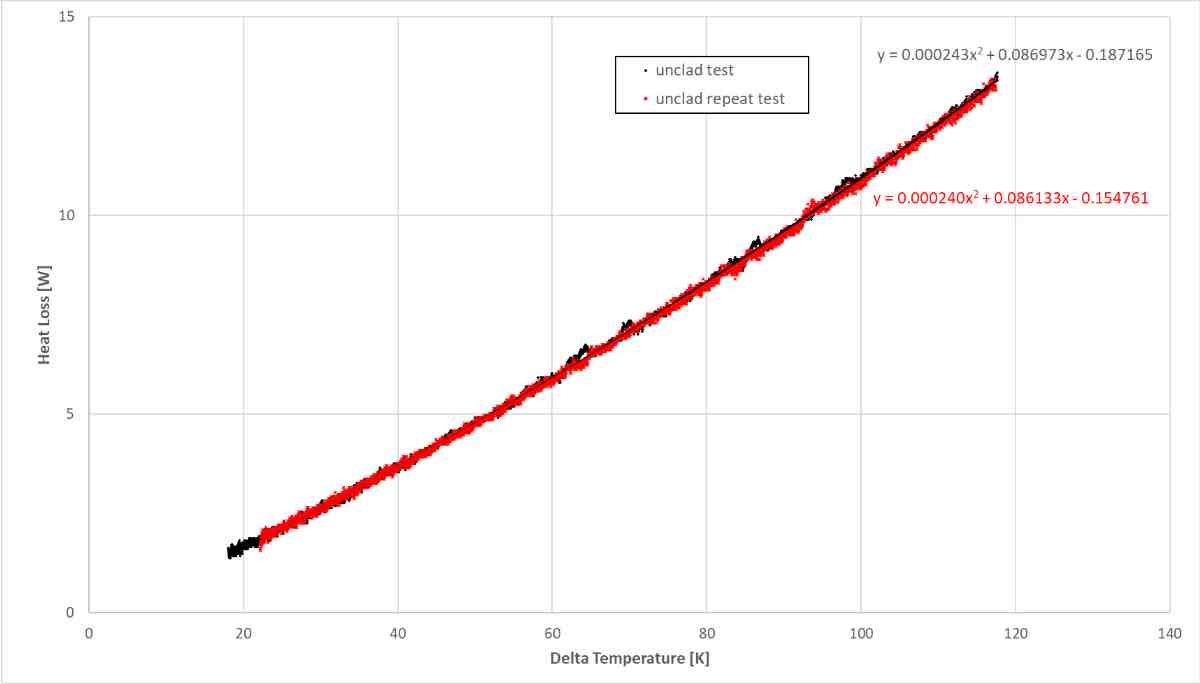
This is great, but what is the heat output of the object
Attachment 41112
So I now have a curve that gives me heat output against a delta temperature compared to ambient.
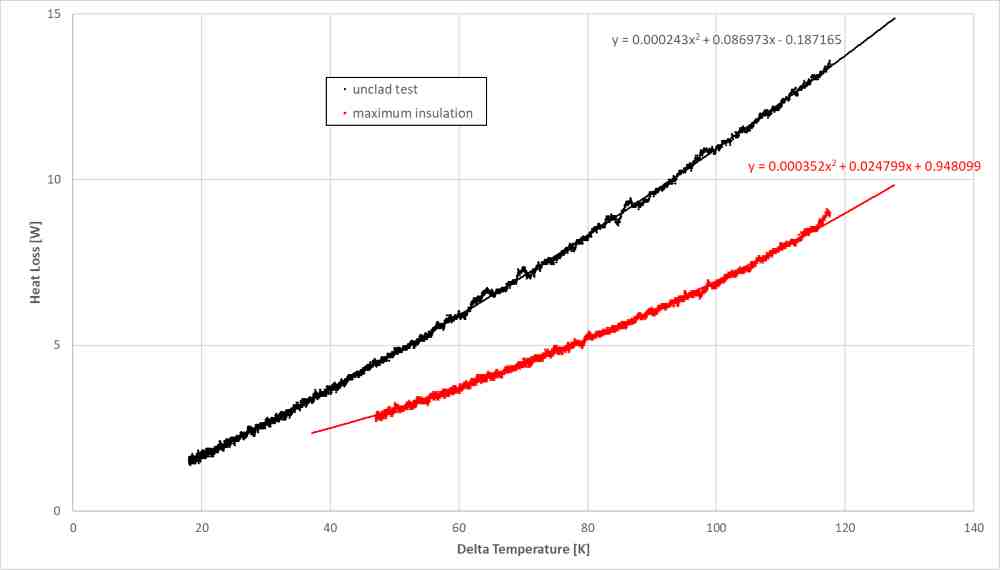
Next is the maximum insulation versus the unclad boiler:
Attachment 41113
This shows quite a significant difference:
Attachment 41114
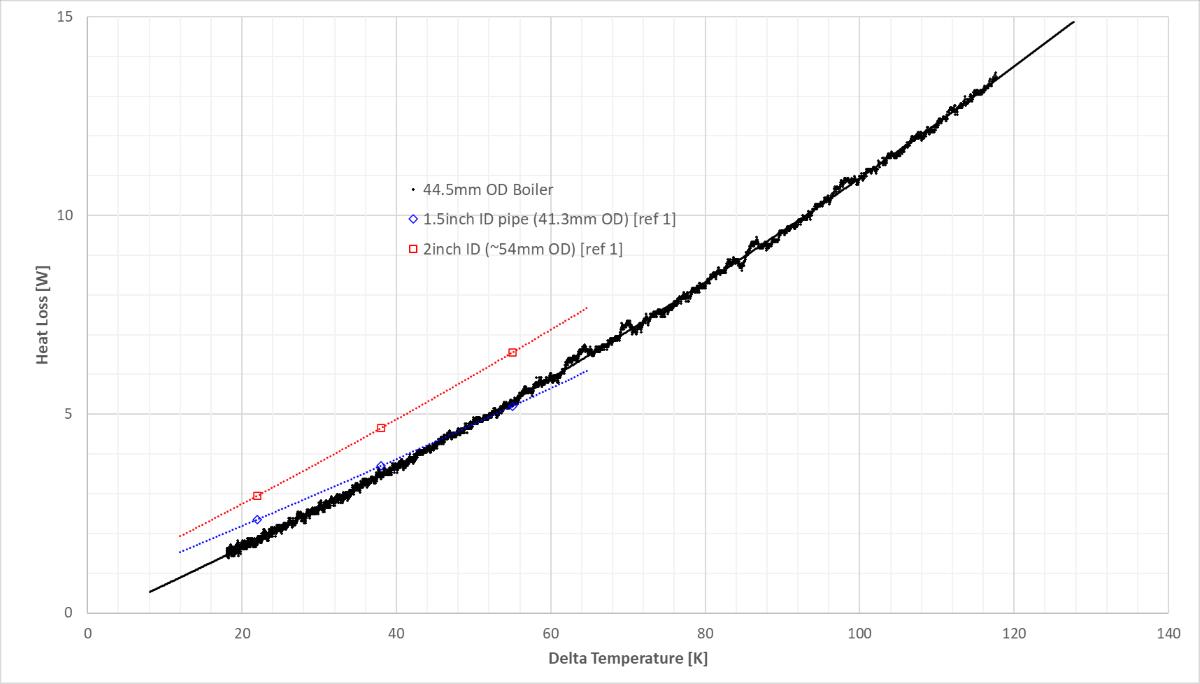
Interestingly this boiler is just a piece of copper pipe and so I can compare my heat loss data of the unclad boiler to published heat loss data of copper pipes:
Attachment 41115
That looks like not a bad match considering we don't know the surface condition of the copper pipe.