-
1 Attachment(s)
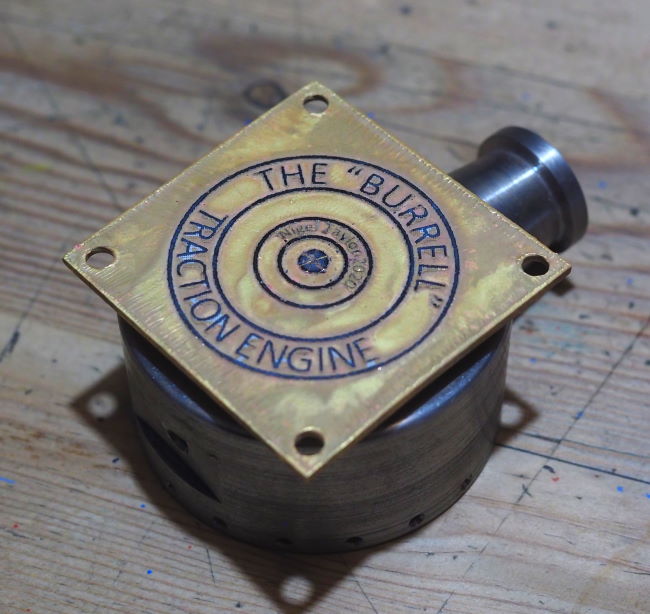
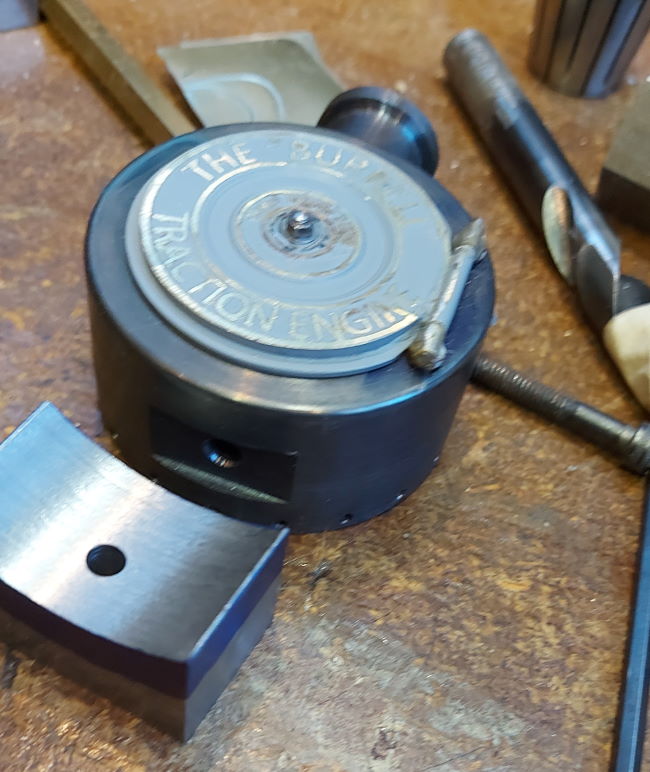
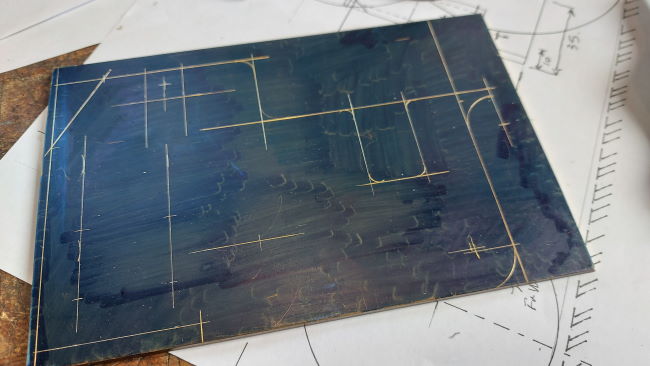
The smokebox door has taken me in a number of directions in my pursuit to create the lettering. Finally I might have got the process and now just need to hone it, but as the outer ring on this image is just 35mm in diameter I am rather pleased with the result to date
Attachment 37343
I've detailed the process of brass etching using inkjet paper and a laser printer so I can share it with everybody. Great for everything from making name tags, keyrings and miniature parts.
-
3 Attachment(s)
Creating the hinge for the door has been a bit scary, so much has now gone into the parts. So, I created an elongated hinge and a jig to ensure alignment.
Attachment 37438
This next image shows the result
Attachment 37439
Once silver soldered the brass tube was then cut into the sections, this just ensured it was all aligned.
Attachment 37440
It's not perfect, but at this small scale I'm pleased.
-
<!-- BEGIN /var/www/html/homemadetools/protected/modules/zeus/views/tool/postUpdate.php -->
Thanks editor@glue-it.com! We've added your Hinge Jig to our Model Making category,
as well as to your builder page: editor@glue-it.com's Homemade Tools. Your receipt:
<div id="blocks">
<div class="block b1 pngfix">
<div class="bimg">
<div>
<a href="https://www.homemadetools.net/homemade-hinge-jig-3">
<img src="/uploads/241507/homemade-hinge-jig-3.jpeg"/>
</a>
</div>
</div>
<div class="head pngfix"></div>
<div class="left pngfix"></div>
<div class="right pngfix"></div>
<div class="blockover b1 pngfix">
<div class="title">
<a href="https://www.homemadetools.net/homemade-hinge-jig-3">Hinge Jig</a>
<span> by <a href="https://www.homemadetools.net/builder/editor%40glue-it.com">editor@glue-it.com</a></span>
</div>
<div class="tags">tags:
<a href='https://www.homemadetools.net/tag/jig'>jig</a>, <a href='https://www.homemadetools.net/tag/soldering'>soldering</a> </div>
</div>
</div>
</div>
<!-- END /var/www/html/homemadetools/protected/modules/zeus/views/tool/postUpdate.php -->
-
2 Attachment(s)
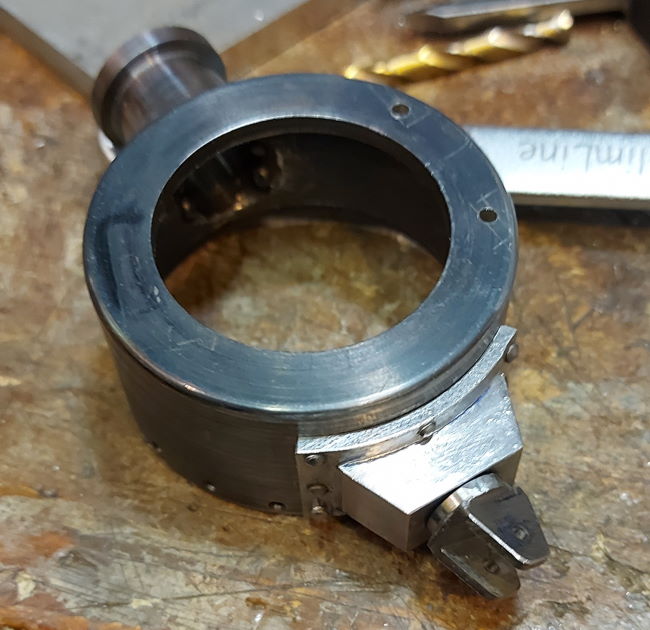
I squared up the ends of a piece of square mild steel, set a flycutter to the diameter of the smokebox and so machined one surface.
Attachment 37759
Then some work on the rotary table and finally I riveted it to the smokebox
Attachment 37760
the axle is next
-
3 Attachment(s)
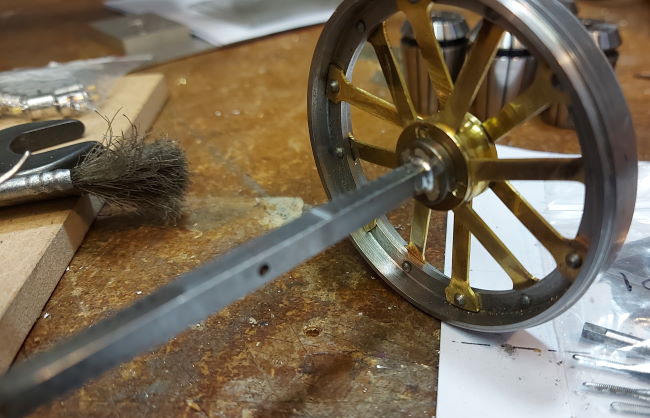
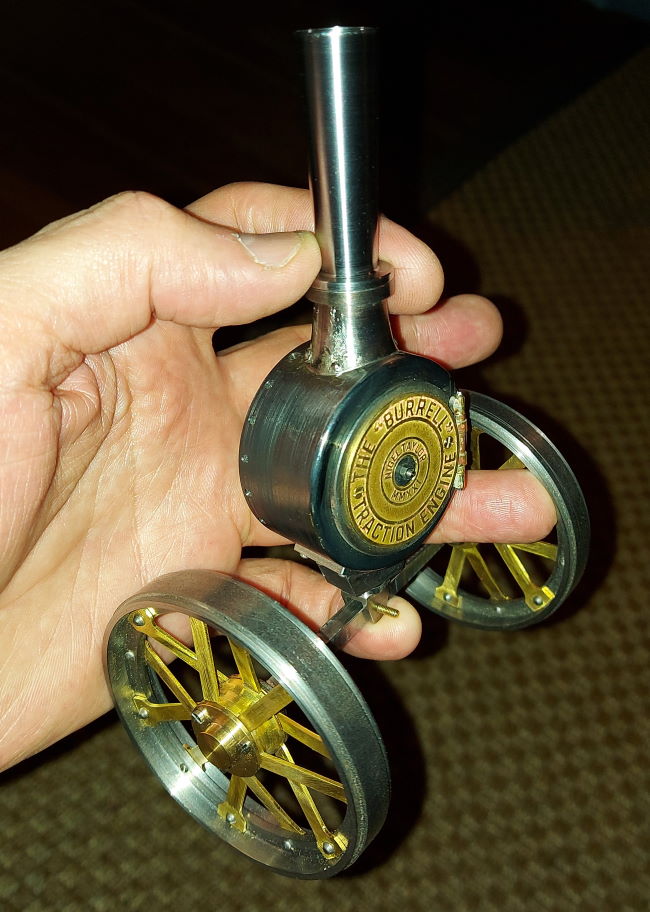
The axle is 3/16" square mild steel, machined with a 6° taper on each face from just off-centre to the hub.
Attachment 37873
The wheel is held on the axle with a 6BA bolt and washer in the end of the axle. The hub cap fits over the top and is secured with 3 off 10BA bolts
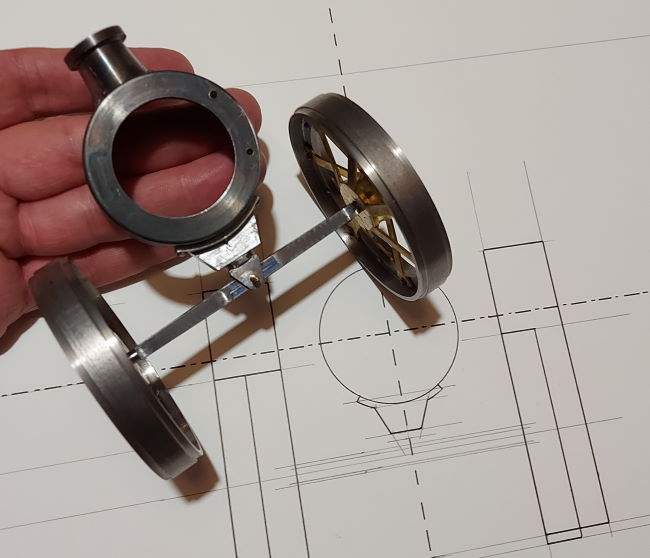
Attachment 37875
This all now rotates and rocks on the steering bracket under the smokebox.
Attachment 37874
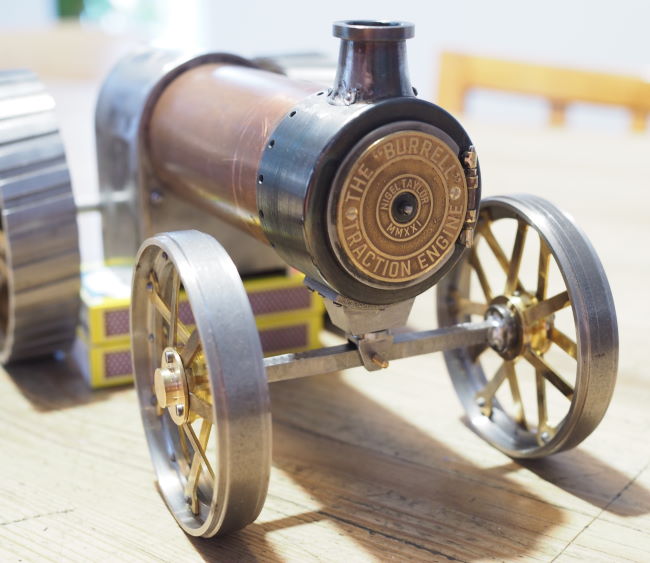
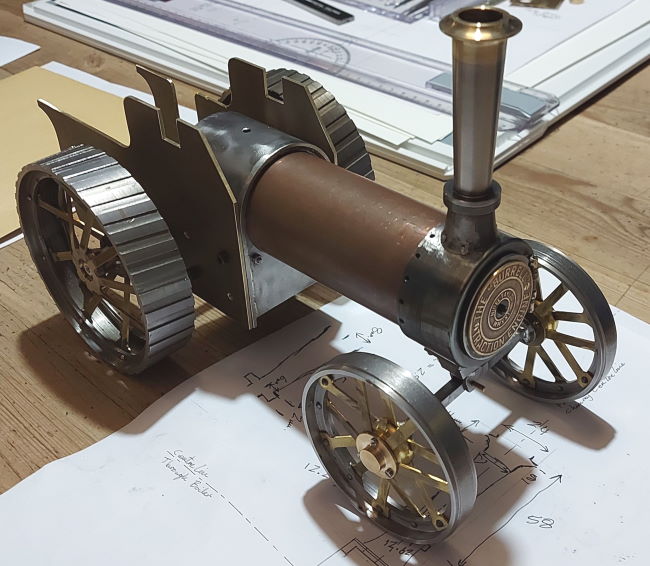
I will piece together another video to show the parts and build to date of this 1/20th Scale Burrell
-
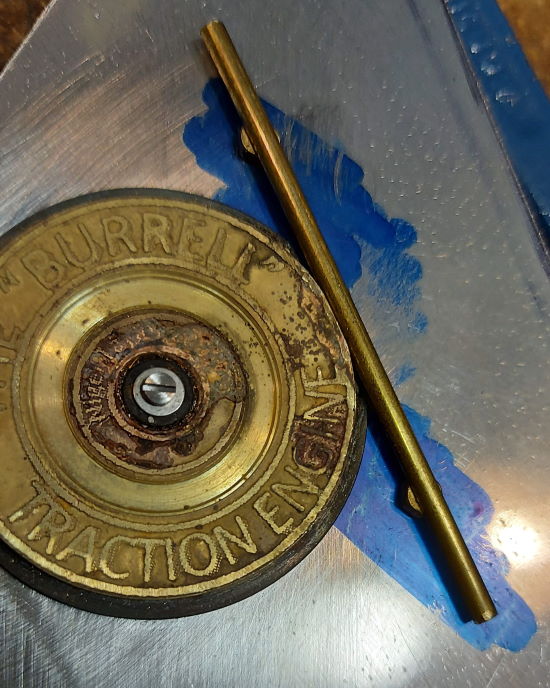
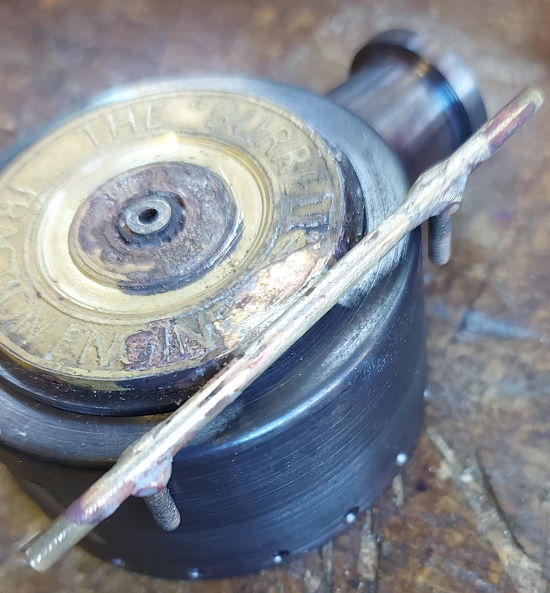
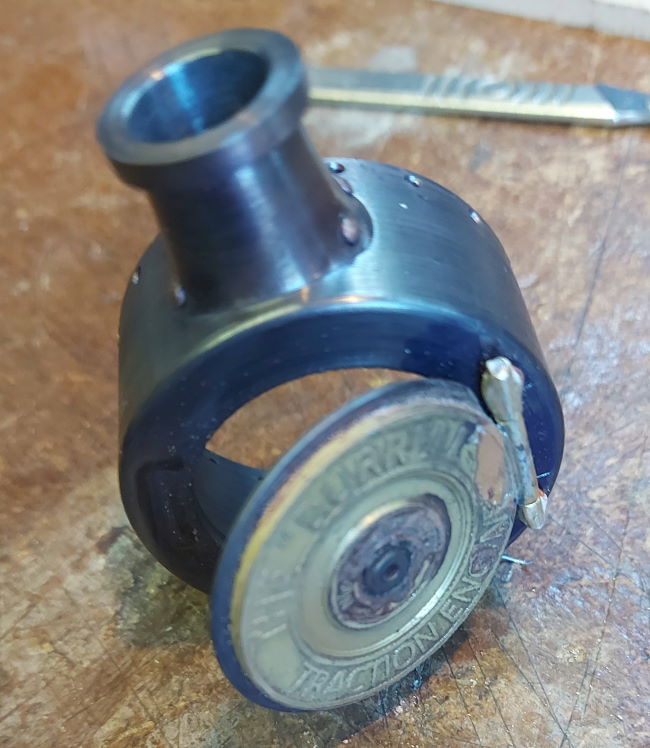
1 Attachment(s)
Brass plaque etched again and this time nearly perfect, this time I used acetone to clean the plate before applying the resist.
Attachment 37929
The brass plaque is fixed with two countersunk bolts, these will be nearly hidden by paint in the end.
-
2 Attachment(s)
How many times do you machine something and afterwards think "I wish I had done that the other way around"?
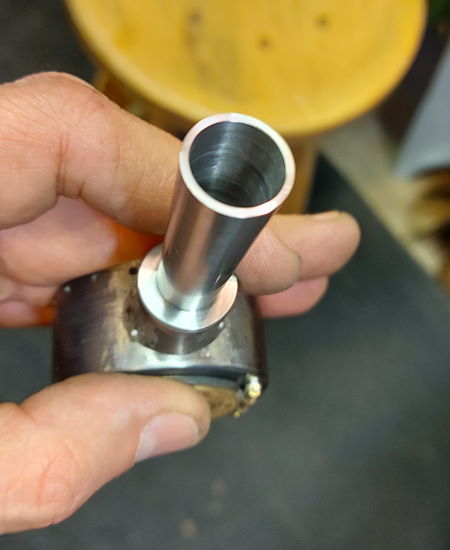
Well, this was the case with the chimney for the Burrell
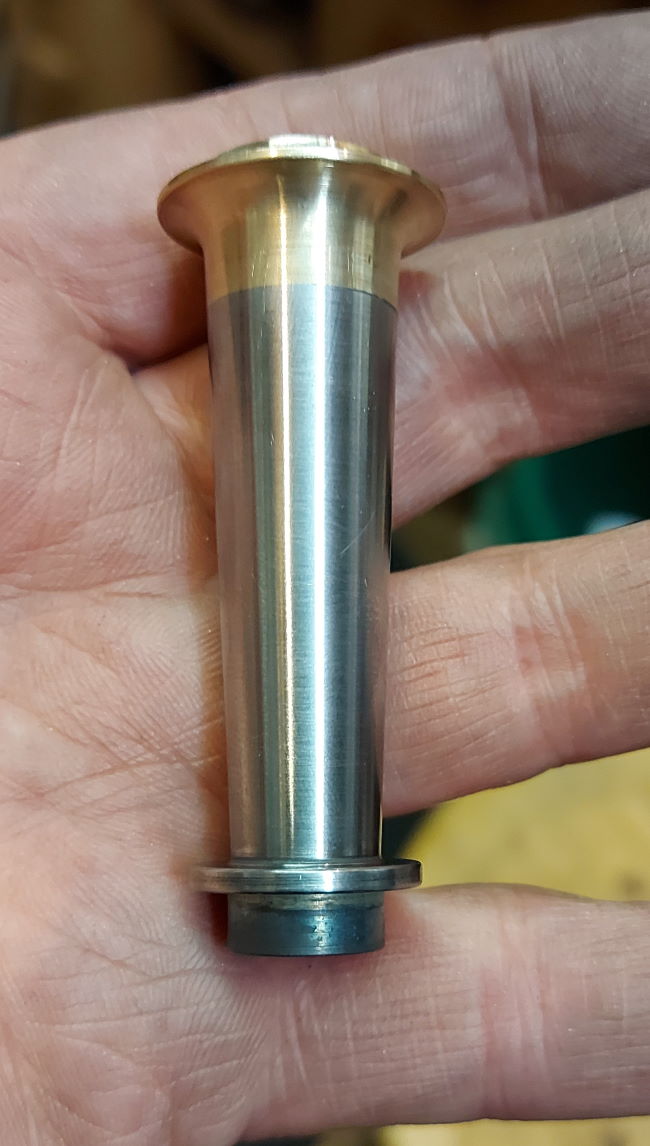
Attachment 37970
I machined this from 3/4" round mild steel with a 2.5° taper. The issue is I machine the outside first which meant the whole thing was then supported by a narrow neck section with a thin wall. So the inner surface cut at the same taper with a boring bar did chatter quite a lot. Issue is the bar was small (this part is not very big) and had quite an overhang.
Attachment 37971
The good side is the outer surface is very clean and this is the one you will see more of, maybe I go it right.
-
1 Attachment(s)
Managed to make the brass top for the chimney and silver solder it in place
Attachment 38014
-
2 Attachment(s)
Just marked out the hornplates in brass, I extended them further to include the main body. This was mainly down to the scale.
I use a large blue permanent marker rather than engineers blue and on brass it works really well
Attachment 38057
I then cut them out on the bandsaw - I back the brass with MDF when cutting on the bandsaw, this works really well
Attachment 38058
Finally just assembled the parts to show progress and how the hornplates/body works
-
2 Attachment(s)
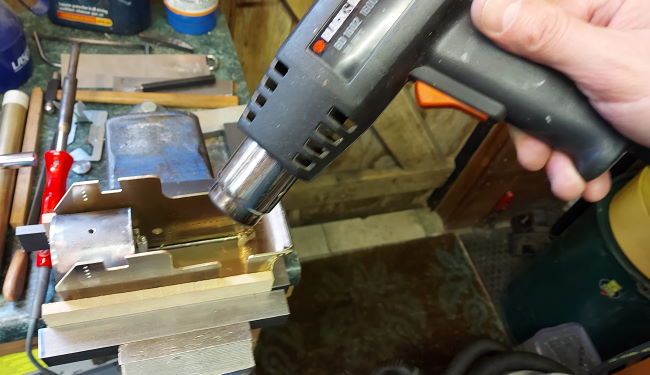
I wanted to solder the hornplates and tub together. I'd already used some rivets, but wanted to lock it and stop any rotation to improve the accuracy. However, even though this is a very small traction engine I found the 75 Watt soldering iron a bit inadequate. So, what about soldering with a hot air gun? It's quite normal in the electronics industry.
Attachment 38210
I used a hot air paint stripper, in this case a 1600 Watt unit. Lots more heat and it works over a bigger area.
Well, this worked really well and I found it much better than an open flame torch as these can create oxides on the surface.
Attachment 38211
I have some more baffles to add to create a floor, water tank etc and I think I will be going back and using this approach again.