-
<!-- BEGIN /var/www/html/homemadetools/protected/modules/zeus/views/tool/postUpdate.php -->
Thanks machiningfool! We've added your Model Train Mold to our Model Making category,
as well as to your builder page: machiningfool's Homemade Tools. Your receipt:
<div id="blocks">
<div class="block b1 pngfix">
<div class="bimg">
<div>
<a href="http://www.homemadetools.net/model-train-mold">
<img src="/uploads/150555/model-train-mold.jpeg"/>
</a>
</div>
</div>
<div class="head pngfix"></div>
<div class="left pngfix"></div>
<div class="right pngfix"></div>
<div class="blockover b1 pngfix">
<div class="title">
<a href="http://www.homemadetools.net/model-train-mold">Model Train Mold</a>
<span> by <a href="http://www.homemadetools.net/builder/machiningfool">machiningfool</a></span>
</div>
<div class="tags">tags:
<a href='http://www.homemadetools.net/tag/molds'>molds</a> </div>
</div>
</div>
</div>
<!-- END /var/www/html/homemadetools/protected/modules/zeus/views/tool/postUpdate.php -->
-
<!-- BEGIN /var/www/html/homemadetools/protected/modules/zeus/views/tool/postUpdate.php -->
Thanks machiningfool! We've added your Rail Truck Pattern to our Model Making category,
as well as to your builder page: machiningfool's Homemade Tools. Your receipt:
<div id="blocks">
<div class="block b1 pngfix">
<div class="bimg">
<div>
<a href="http://www.homemadetools.net/rail-truck-pattern">
<img src="/uploads/150559/rail-truck-pattern.jpeg"/>
</a>
</div>
</div>
<div class="head pngfix"></div>
<div class="left pngfix"></div>
<div class="right pngfix"></div>
<div class="blockover b1 pngfix">
<div class="title">
<a href="http://www.homemadetools.net/rail-truck-pattern">Rail Truck Pattern</a>
<span> by <a href="http://www.homemadetools.net/builder/machiningfool">machiningfool</a></span>
</div>
<div class="tags">tags:
<a href='http://www.homemadetools.net/tag/molds'>molds</a> </div>
</div>
</div>
</div>
<!-- END /var/www/html/homemadetools/protected/modules/zeus/views/tool/postUpdate.php -->
-
2 Attachment(s)
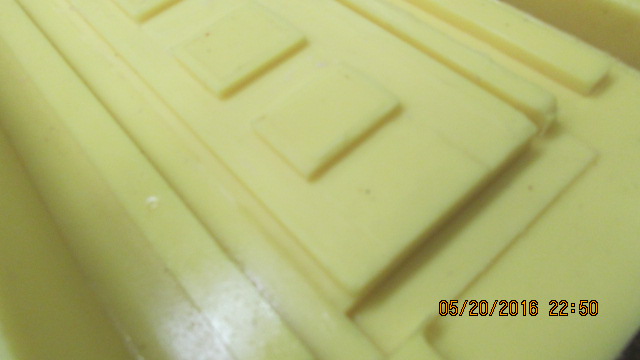
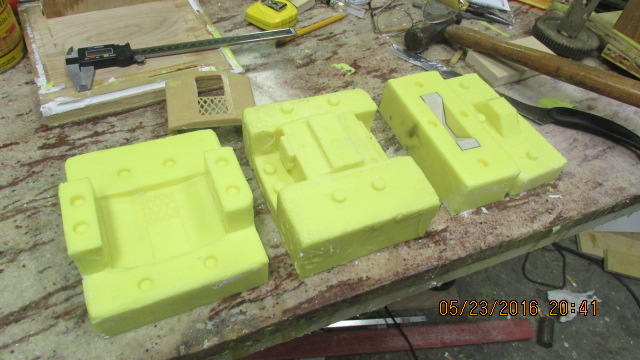
Here is a part that I made to establish the body or thickness of the part and then I will make the second part of the mold. Bob.Attachment 10803Attachment 10804
-
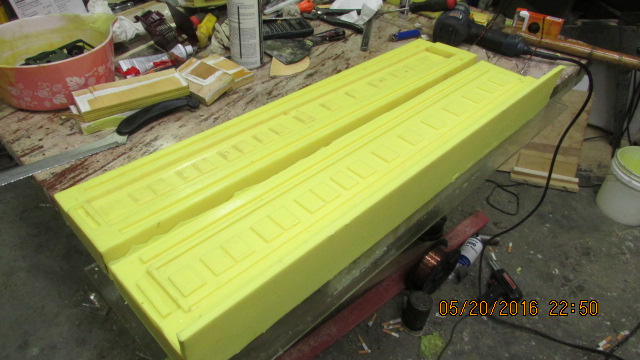
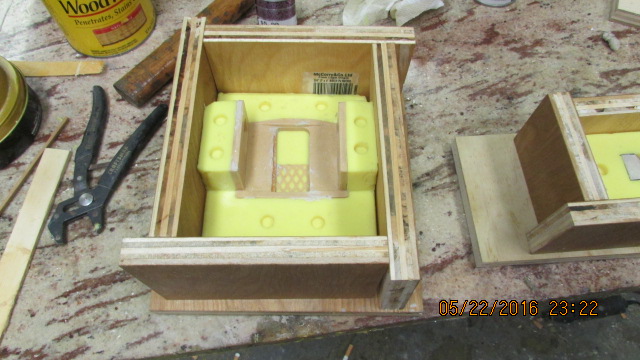
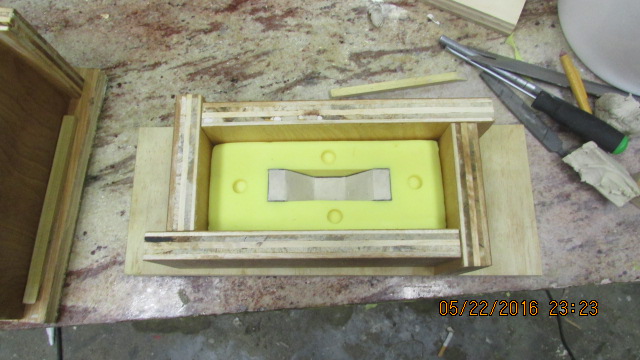
4 Attachment(s)
These are pictures of the mold ready for the second part for the steps and ends, and also the finished two part mold for the sides, Bob.Attachment 10820Attachment 10821Attachment 10822Attachment 10823
-
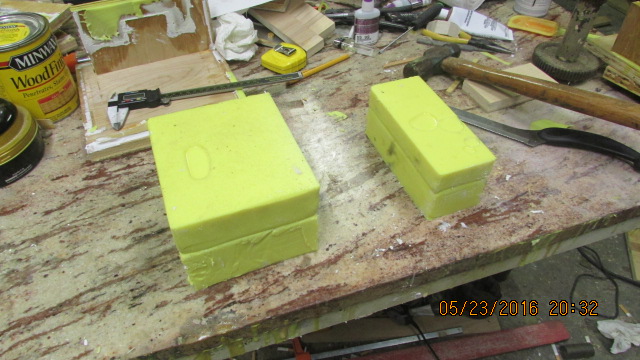
3 Attachment(s)
Some more molds
Here is the second part of the molds poured and ready to make a part. Today I will get back to the trucks and program the spring arms for the truck, and am looking for bearing for the trucks, any ideas? Bob.Attachment 10838Attachment 10839Attachment 10840
-
I had to check the shape of the spring arm for the trucks, so I used my handy pen tool that is inserted into a collet of my mill to trace the part to compare. I made it to be able to use a store bought ball point pen refill. Bob.https://youtu.be/fP-bSMxhuNs
-
2 Attachment(s)
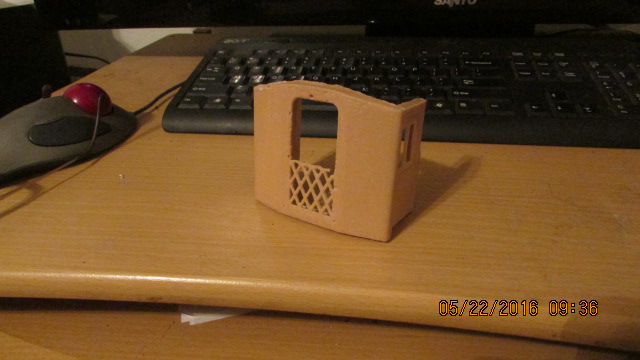
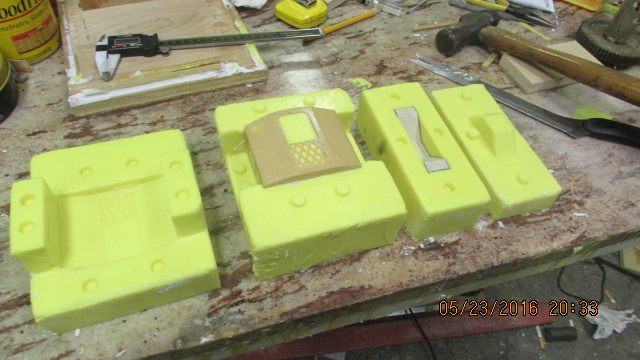
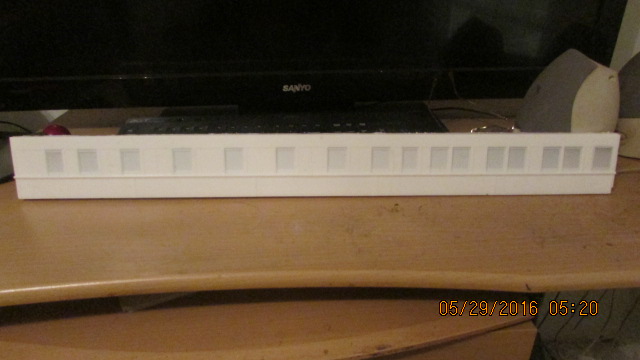
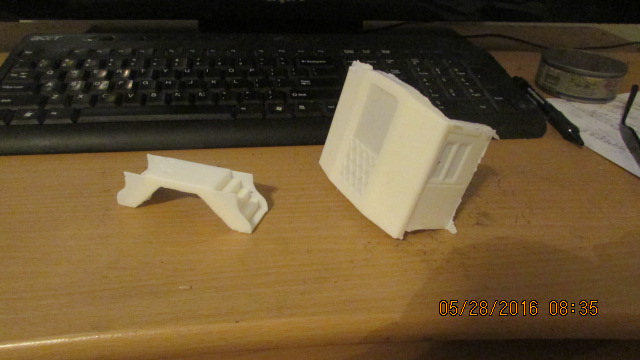
I poured some parts and they came out good, here are some pictures. Bob.Attachment 10941Attachment 10942
-
Bob,
Thanks for the tip about using a spring loaded pen for doing your part QC. The cast sides, ends and steps look crisp and well made. How do you open-up and clean-up the car window openings? What do you use for paints now that the fine scale Testors “Floquil” line of paints has been discontinued?
Thank you for your progress report.
Paul
-
Hi Paul. I cut the flashing out with a knife, cuts easily. I get the paint wherever I can find it, mainly on Ebay. I am using a hard plastic from Bity mold supplies and it seems to be very strong and as strong as the epoxy that I was using. This plastic flows better and fewer bubbles, so I really like it. Thanks, Bob.
-
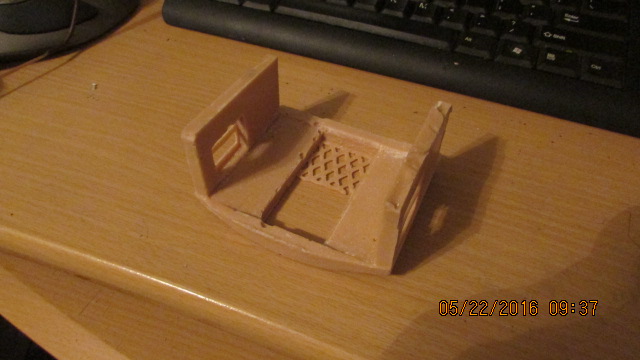
3 Attachment(s)
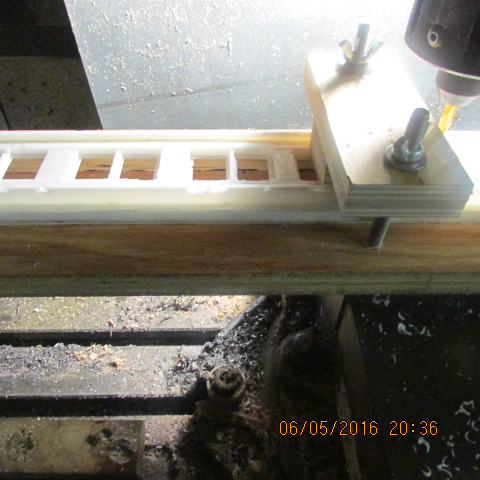
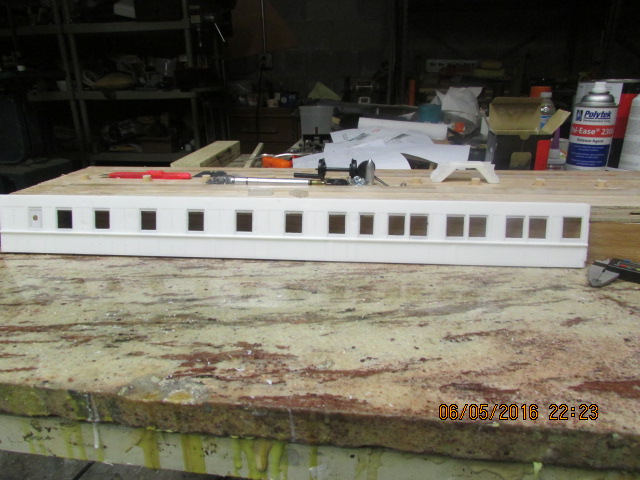
Well Paul, it wasn't as easy as I thought to cut the flashing out of the windows.
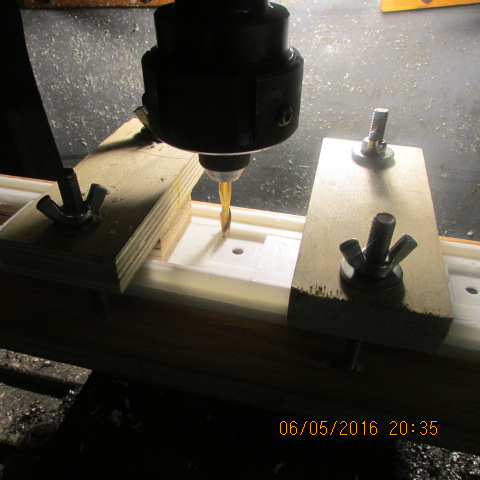
Attachment 11118Attachment 11119Attachment 11120 Here is something that I had to go through to get the correct thickness of the window frames because of the plastic setting up as I was installing the second part of the mold. The stuff was setting so fast that it made the window frames too thick so I had to machine them down on the mill. This probably wouldn't have happened if I had used the epoxy that I am used to, but I am trying new things. Here are some pictures of the setup on the mill, cutting the inside of the frames for consistent thichness. Bob.