-
Bob,
Thank you for the all the details and especially the hints about what might go wrong. The whole process has been very interesting and universal for other types of model procedures for model work. I am interested in seeing more about your 'Gauge One' models scaled at 1:32.
Regards,
Paul
-
Thanks for your comments Paul. I spend more time building molds than I do making parts, so sometimes, even when I know my procedures, I forget some important steps, such as making sure that the resin, when pouring, gets into the small nooks and crannies. That is the nice thing about a mold, you can always make another part. I have made molds for smooth side, and fluted Pullman Standard passenger cars, including a boat-tailed observation, a dome car, an eF-7, a and b, an E-8, a and b EMD locomotive, working diaphragms, and now the heavyweight car. Bob.
-
I mentioned in a previous post that a couple of bolt heads didn't come out because of bubbles, well the nice thing about using real bolts and rivets in the pattern is that I can grind the heads off, drill a hole and replace with a bolt or rivet, so the first side frames are saved. Bob.
-
2 Attachment(s)
Here is the roof mold about to be poured. Also continuing on the truck, making attach brackets for attaching truck sides. There will be a second mold to make these. BoAttachment 11412Attachment 11413
-
3 Attachment(s)
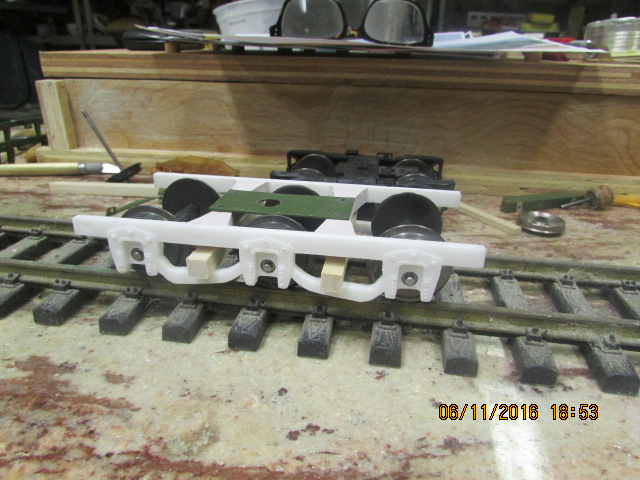
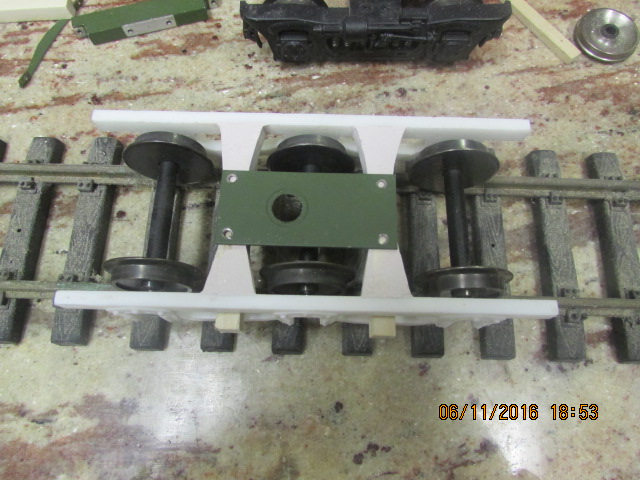
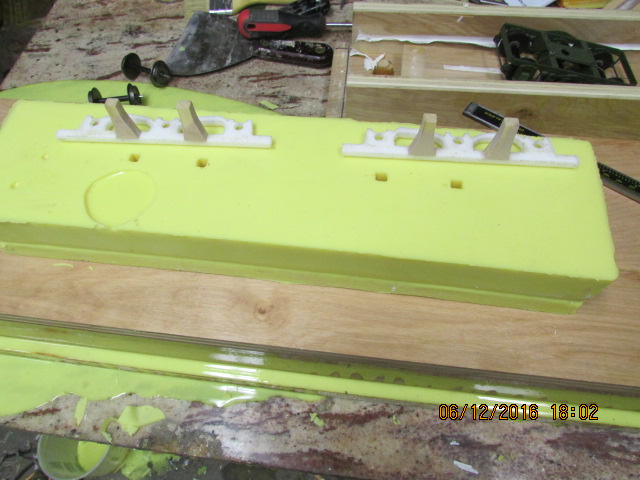
More truck
Here is the way I will attach the two sides together. The square piece lying on the spring bar will be bolted on each side with two bolts. Shortly I will make the second part of the mold to add these cross bars. Just the spring holders, bearing boxes, some brakes and the bolster bar and It's pretty much done.Attachment 11434Attachment 11435Attachment 11436
-
1 Attachment(s)
Here is the setup for the second part of the mold for the truck, waxed, sealed, and sprayed with 2300 mold release. Bob.Attachment 11437
-
1 Attachment(s)
The upper part of the mold came out good and you are probably wondering how I get the plastic to flow into the upper mold, well there is a hole, so when I pour the first part, I install the upper mold and fill with plastic through the hole. Bob.Attachment 11455
-
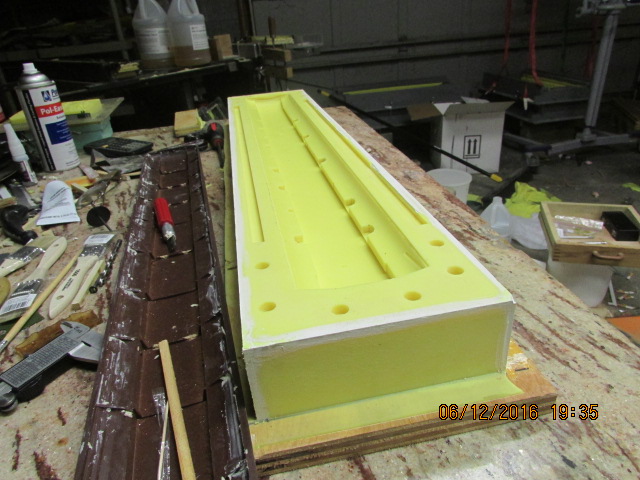
1 Attachment(s)
The first part of the roof mold came out good and now I am preparing for the upper part of the mold. Bob.Attachment 11456
-
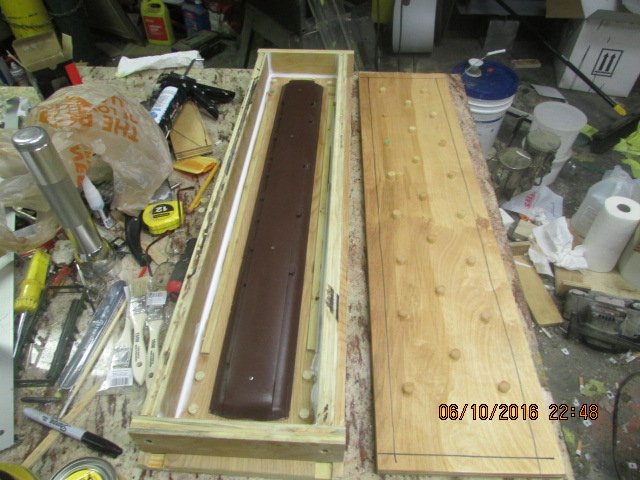
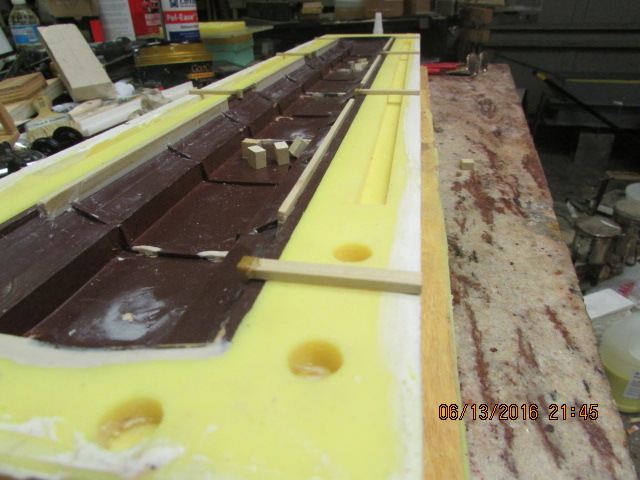
1 Attachment(s)
Thanks Paul. While pouring the sides, I noticed that since the plastic sets so fast, it doesn't allow the top part of the mold to seat properly. I think one reason for that is that it is restricted by the fit of the mold, nowhere for the plastic to go, so won't allow the weight to push it down. So, as you can see in the picture I have added vents or sprues to allow the plastic to go somewhere and relieve pressure and allow the top part of the mold to seat. If, after trying it this way, there is too much relief, I can always put some clay in the vents to restrict it some. I will know if this works either today or tomorrow, when I pour it. Bob.Attachment 11493
-
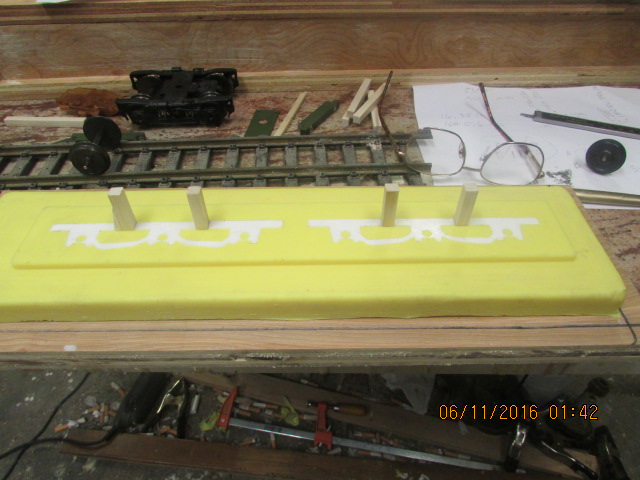
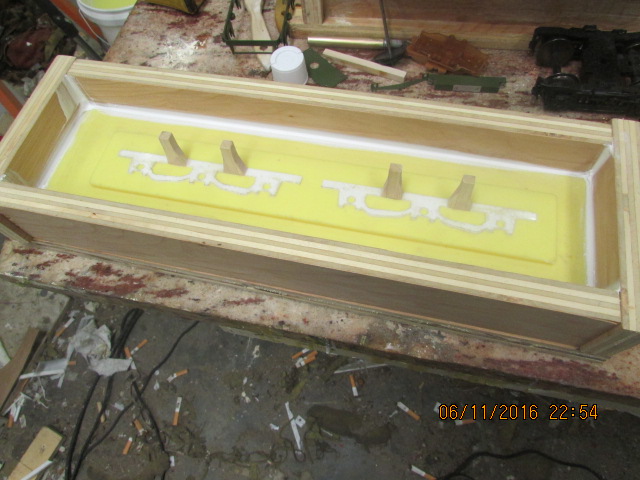
1 Attachment(s)
This is the last part of the large molds, as the rest are small stuff. I will be pouring the top of the roof mold tomorrow morning when it is cooler. The ladder that you see in the photo is to keep the top mold from sagging, it will be a part of the mold. The side parts of the ladder will be removed after the mold sets up, so the mold will actually bend longitudinally. This urethane is heavy, so this keeps the mold in the proper position. In the case of the side mold, the window portions of the mold contact each other, so no rigidity is needed. If anyone has any questions or comments , feel free. Bob.Attachment 11499