-
Bob,
Thanks for follow-up on cutting out the window flashing. When you said you cut the window flashing with knife (I though something like an Exacto knife), I could only think of how sore your fingers would be after doing just one side of the car :brickwall:.
The car side looks very good.
Thanks for the update, Paul
-
4 Attachment(s)
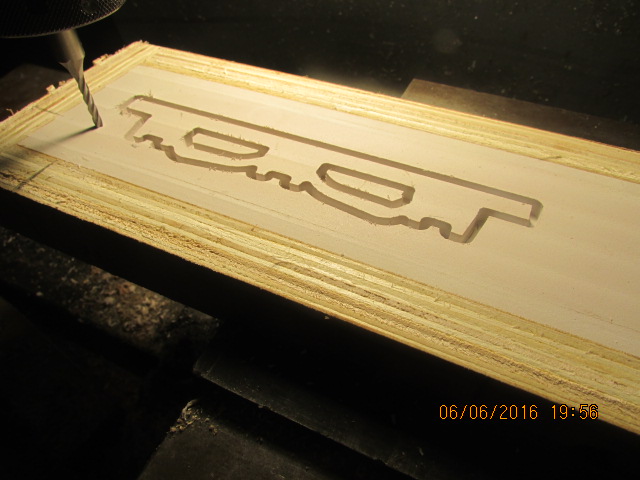
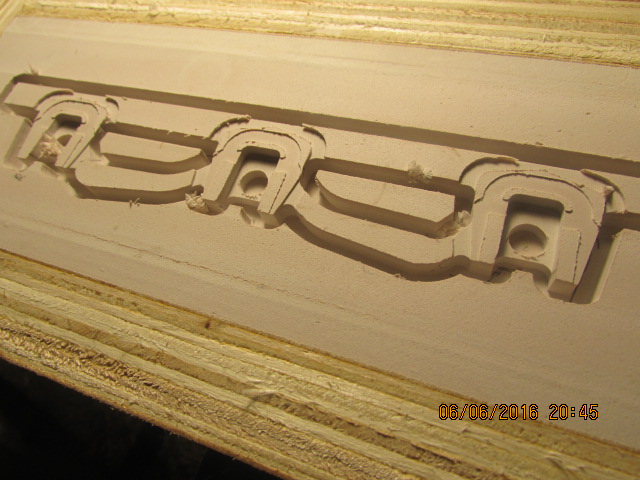
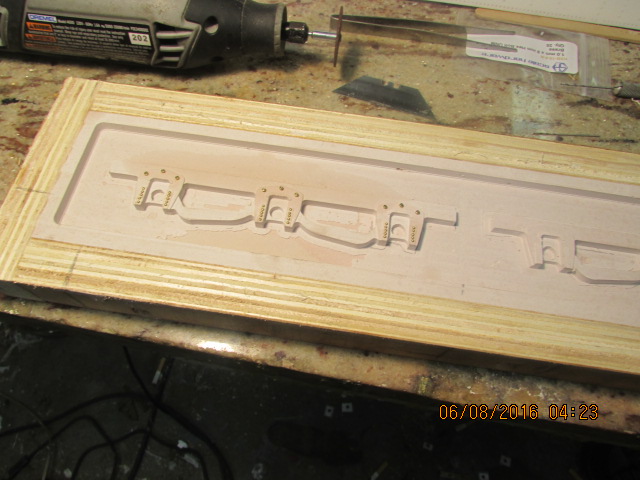
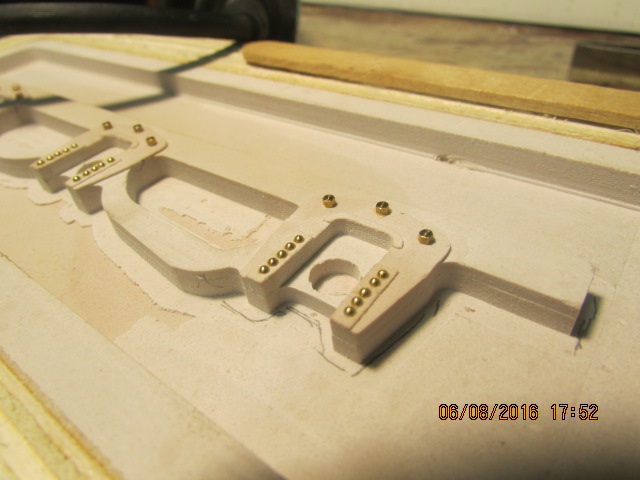
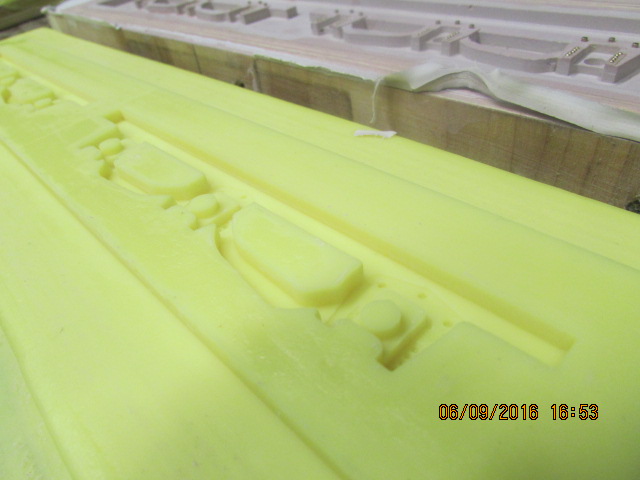
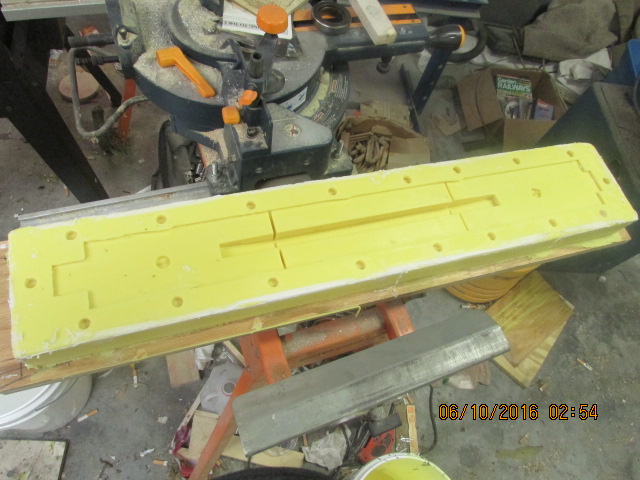
OK, back on the trucks. Here are a few pictures of the pattern cut out of Bondo, in steps. The hole is the hole for the 6mm bearing. The journal bearing cap will go on later. I have marked the locations of the bolts and rivets. Bob.Attachment 11244Attachment 11245Attachment 11246Attachment 11247
-
Bob,
Knowing the three holes are only 6mm in diameter certainly makes the scale of the fine details pretty amazing.
Thanks for the updates.
Paul
-
Thanks Paul. I am machining the bearing holes into the pattern for the mold, so that I don't have to drill later, saves quite a bit of time.
-
1 Attachment(s)
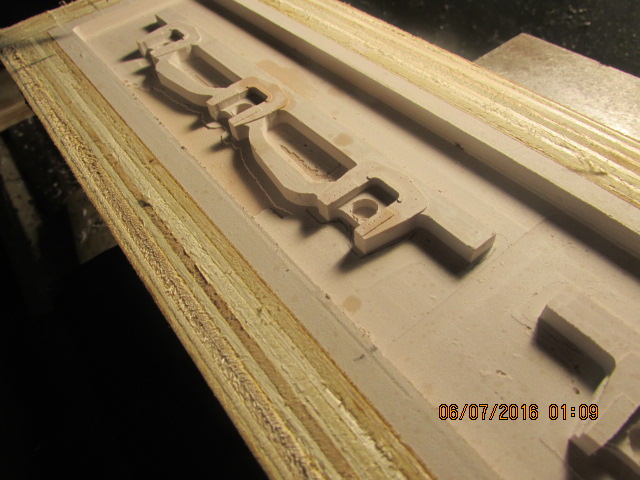
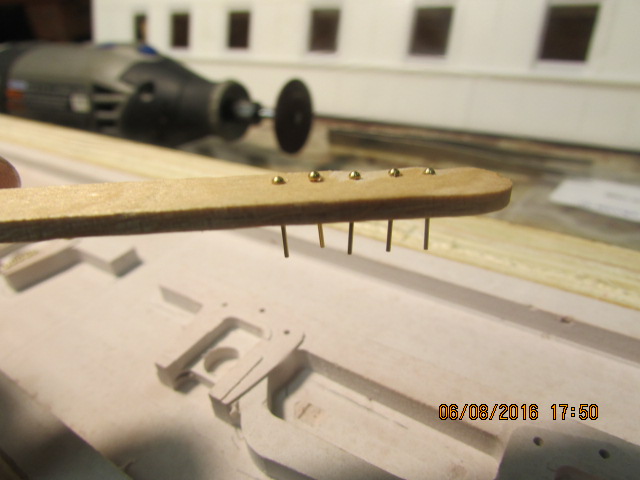
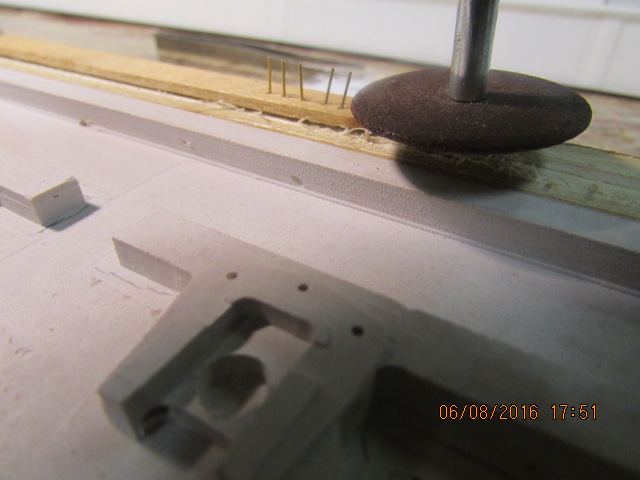
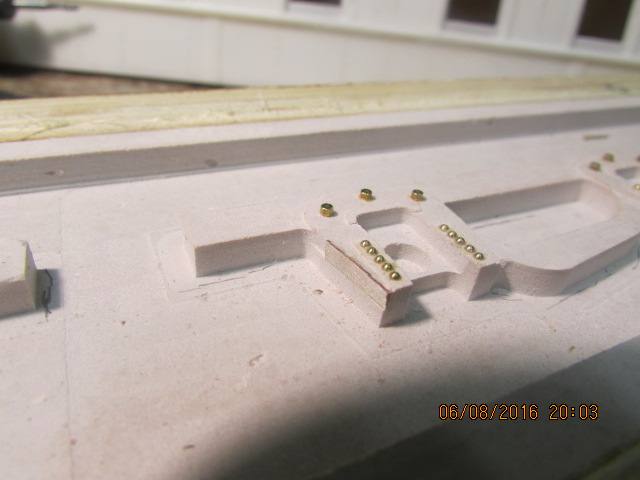
Here is one side of the truck with the bolts and rivets installed for the mold. I am talken tweezers. Bob.Attachment 11296
-
6 Attachment(s)
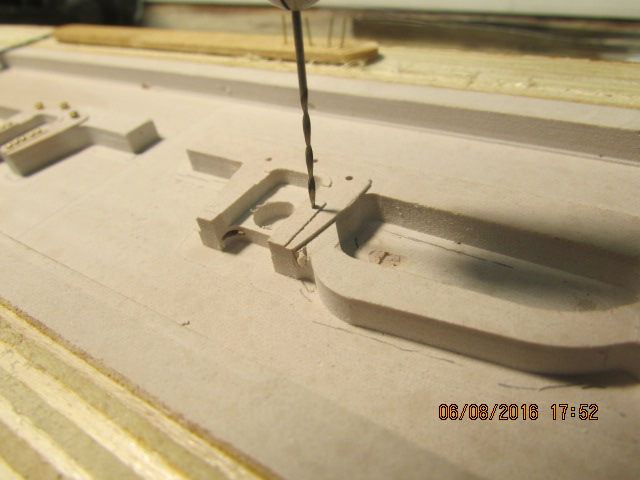
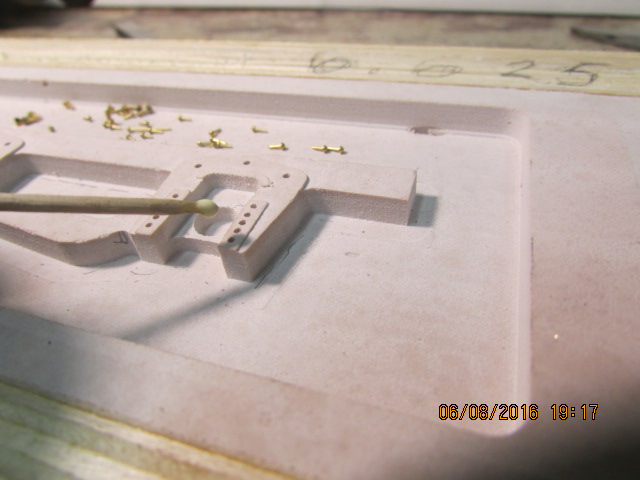
Thanks Paul.Here are some hints on my methods of installing small rivets and bolts. I used a popsicle stick to hold the rivets before cutting, turned it over and held, and then used a grinder to cut to size. I used Elmers glue to hold in place. The one photo is to remind that even cnc machines can have a brain fart. In Mastercam, there is a varify screen to see if everything is cutting as programmed. I run that, and if everything looks good, I put it on a floppy and install it on the Anilam controls and run it, without any failures, except on this one. The first copy of the truck frame cut without any errors, but I discovered, as you can see in the picture, the first program, out of seven, the outline which required two depth cuts, the first cut error, about .0265 inches varied from the program, not in the first truck frame, but in the second one. Very interesting, shouldn't have happened, but it did, so all that I am saying is to be aware of rare happenings that could occur. Since I didn't notice it while it was mounted on the machine, 0,0,0, was lost, so I couldn't just fill whith Bondo and recut, so I added a piece of 1/32 ply to repair the pattern, so, there you have it, I am now ready for some wax and then pour some urethane molds.Attachment 11314Attachment 11315Attachment 11316Attachment 11317Attachment 11318Attachment 11319
-
1 Attachment(s)
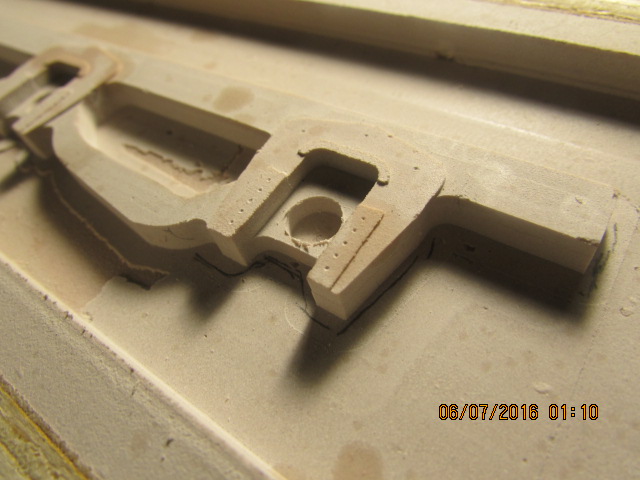
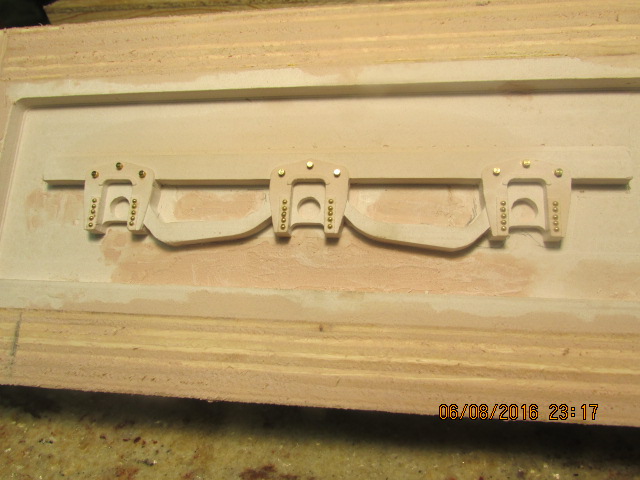
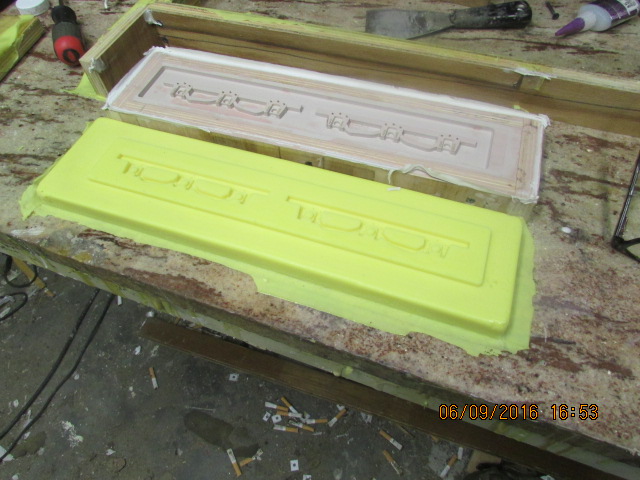
I forgot something, to cut out the radii of the cuts, here is the final version before waxing and molding. Bob.Attachment 11320
-
2 Attachment(s)
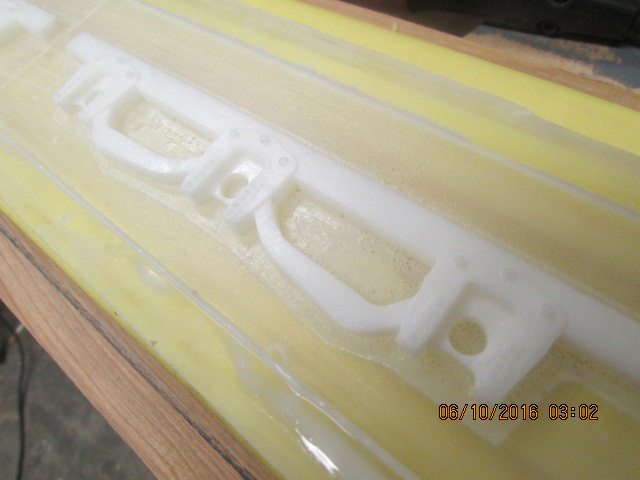
The mold is done and later today I will make some parts. It came out perfectly and will make some good parts, not finished yet, have to add some stuff. Bob.Attachment 11334Attachment 11333
-
4 Attachment(s)
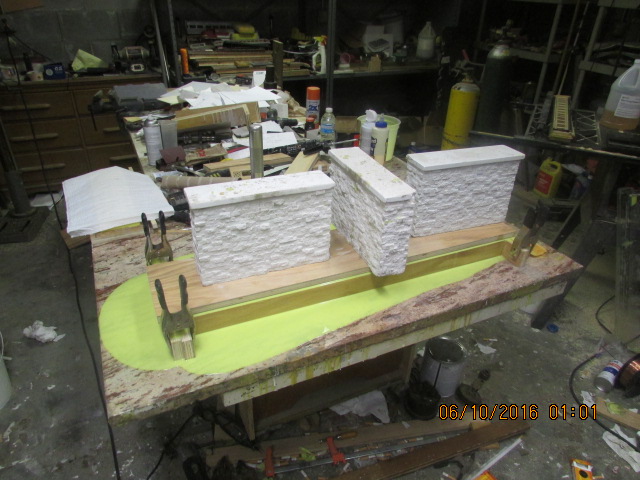
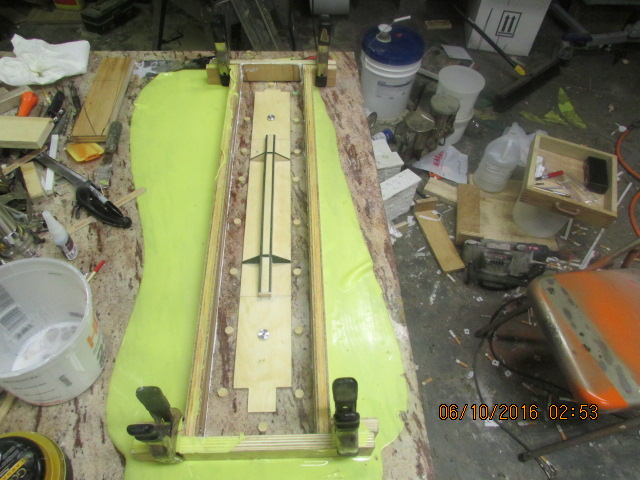
I poured the truck faces and the frame and everything went well with the exception of some bubble around the bolts in the truck frame, I forgot to drag a toothpick in the holes where the bolt heads are to release any air, but I will next time and also, I used too much spray mold release, caused a rough finish. The frame mold turned out good. I have changed how I pour my molds in that I pour directly on the granite and border the soon to be poured mold with plywood and clamps. Lot easier, also can reuse the plywood borders and comes apart easier. The excess urethane on the table just comes right up in several pulls. I will pour some better truck frames and post them later. Next, tomorrow, I will pour the first part of the roof mold. Bob.Attachment 11361Attachment 11362Attachment 11363Attachment 11364
-
2 Attachment(s)
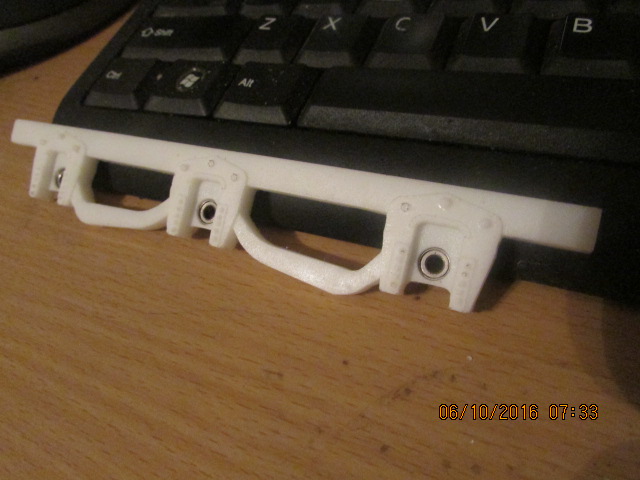
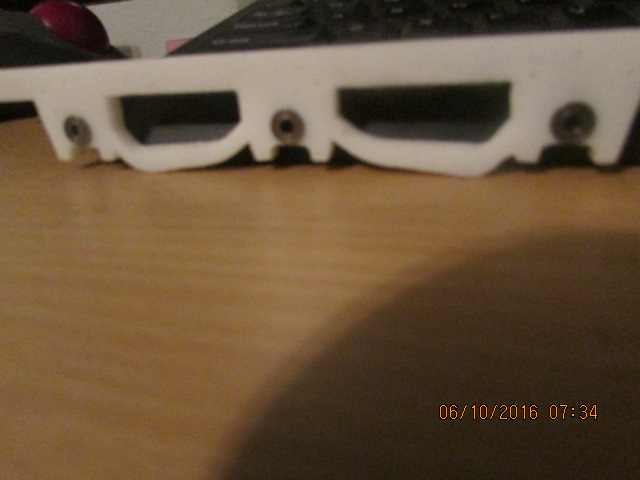
Here is what I was after. The bearings slip right in with no back drilling. Bob.Attachment 11393Attachment 11394