
 LinkBack URL
 About LinkBacks


I got the inspiration for this screw modification from the thread Rossbotics posted back on June 4, 2018.
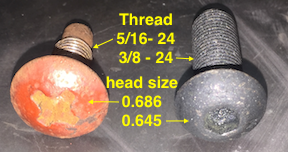
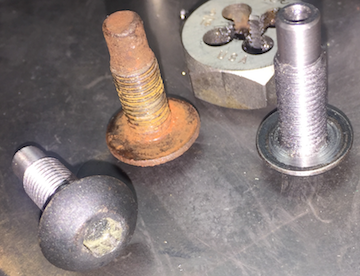
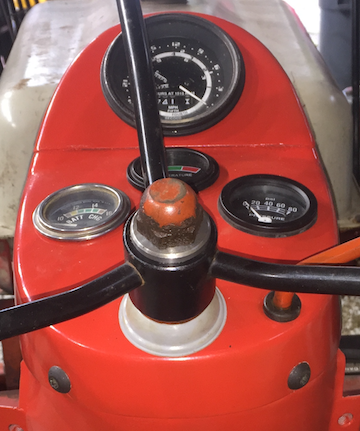
I am getting my old tractor back together. Some of the sheet metal is held together with 5/16-24 phillips truss head screws. Many were rusted in place, and the phillips slots are twisted out. Socket drive button head screws would work well, but the head is much smaller on 5/16 button heads than the original screws. A 3/8 button head is only 0.040 smaller than the original screws, so I am going with those.
All I had to do was to modify the Rossbotics process a little to utilize the tooling I have on hand.
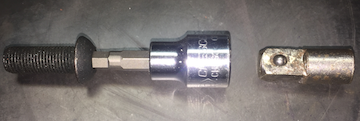
To drive the screw I had a 7/32 hex, 3/8 drive socket to hold in the lathe chuck. To hold that socket the tail stock I have a 1/4 x 3/8 square adapter that fits into the 1/2 drill chuck in the tail stock.
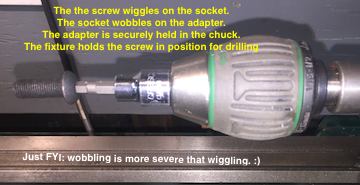
When holding the screw and socket in the tail stock, there is a too much axial play between all of the components. To deal with that play I made a fixture to hold the screw steady while drilling the center holes. To make that fixture I found a small piece of stout angle. I trued the ends so it can be held securely in my lantern tool post. It was then center drilled. Then drilled to 0.368" with a U drill . The 3/8 screw threads measured 0.367.

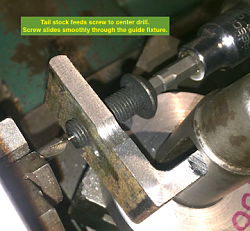
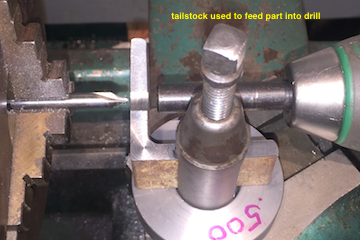
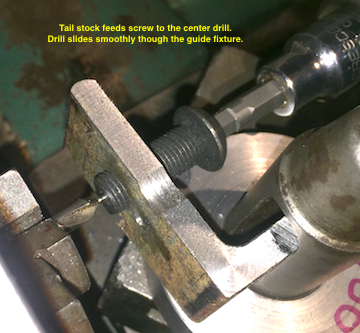
Next the center drill was mounted in the chuck. The fixture lined up with the center drill. The drive components assembled in the tailstock. The tail stock was used to feed the screw into the center drill.


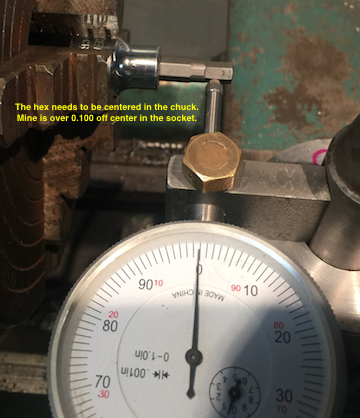
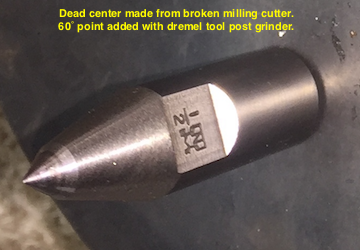
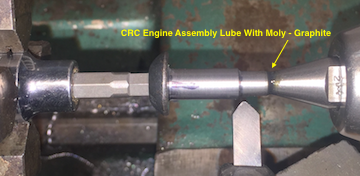
To resize the screws the socket was mounted and carefully centered in the 4 jaw chuck to assure the hex was centered as close as possible. (With the socket in 3 jaw chuck, the hex was over 0.100 off center.) For the tailstock, I have a small center that is from my dads machinist tool box. It is actually the shank from a broken milling cutter that was ground to a point to use as an accurate prick punch. I broke the tip long ago and reground it to 60˚. I used moly/graphite engine assembly lube on the center.
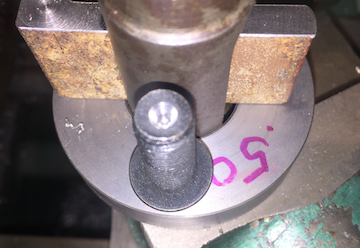
With this set up I turned the screws to 0.310. Then turned the tip to 0.250 like the originals.


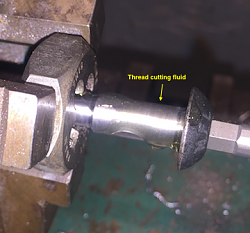
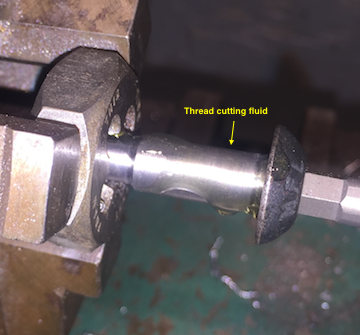
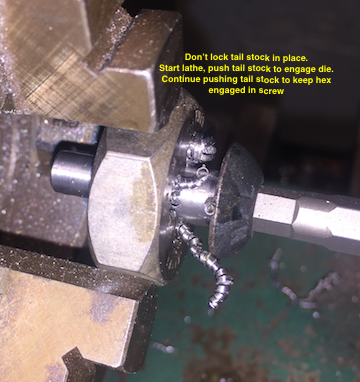
To thread the screws, I mounted a die in the 3 jaw chuck. Take some time to make sure the die is running true in the chuck. Put the drive socket in the tail stock. I use Tap Magic deep taping fluid. It reminds me of good ole STP. It is thick and sticky and does not run off the screw. Set the lathe to LOW speed. Start the lathe an PUSH the tailstock forward to engage the die. Stop when it got close to the head. Finish with a ratchet handle.
Might be better than original.

They stlll need to be painted. Only made two since that was all they had at the hardware store. Have to order more online.
Here is the corrected image. The screw slides though the guide, not the drill.


 Reply With Quote

Bookmarks