
 LinkBack URL
 About LinkBacks

The second major modification I made to my mini mill was to add X-axis power feed. It is one of my most-used mods. (Adding the DRO was first.)
I had a few important design considerations.
- All components must be below table level
- Clutch and other controls must be easy to use / service
- Speed / direction / activation controls should not be mounted on the table (to reduce weight)
I thought a lot about limit switches, and finally decided against adding them. There were many factors involved with this decision. My particular model of mini mill does not have a T-slot on the front edge of the table, so mounting limit switches would be complicated. Also, when I installed the X-Axis DRO, I decided to install it on the front of the table. (The mini mill comes with the pre-installed "not enough Y-axis table travel" feature and mounting the DRO on the back of the table would only enhance this feature.) To compensate for the lack of safety offered by limit switches, I decided that table movement would be controlled by a momentary switch rather than a toggle switch. This means that you cannot turn it on and leave the area. It also makes "emergency stop" of the table very easy -- just let go of the switch. Having to hold the switch also reinforced the decision to not mount the controls on the table because you shouldn't have to hold a switch (or try to grab a speed control knob) that is moving.
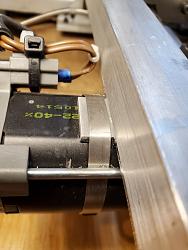
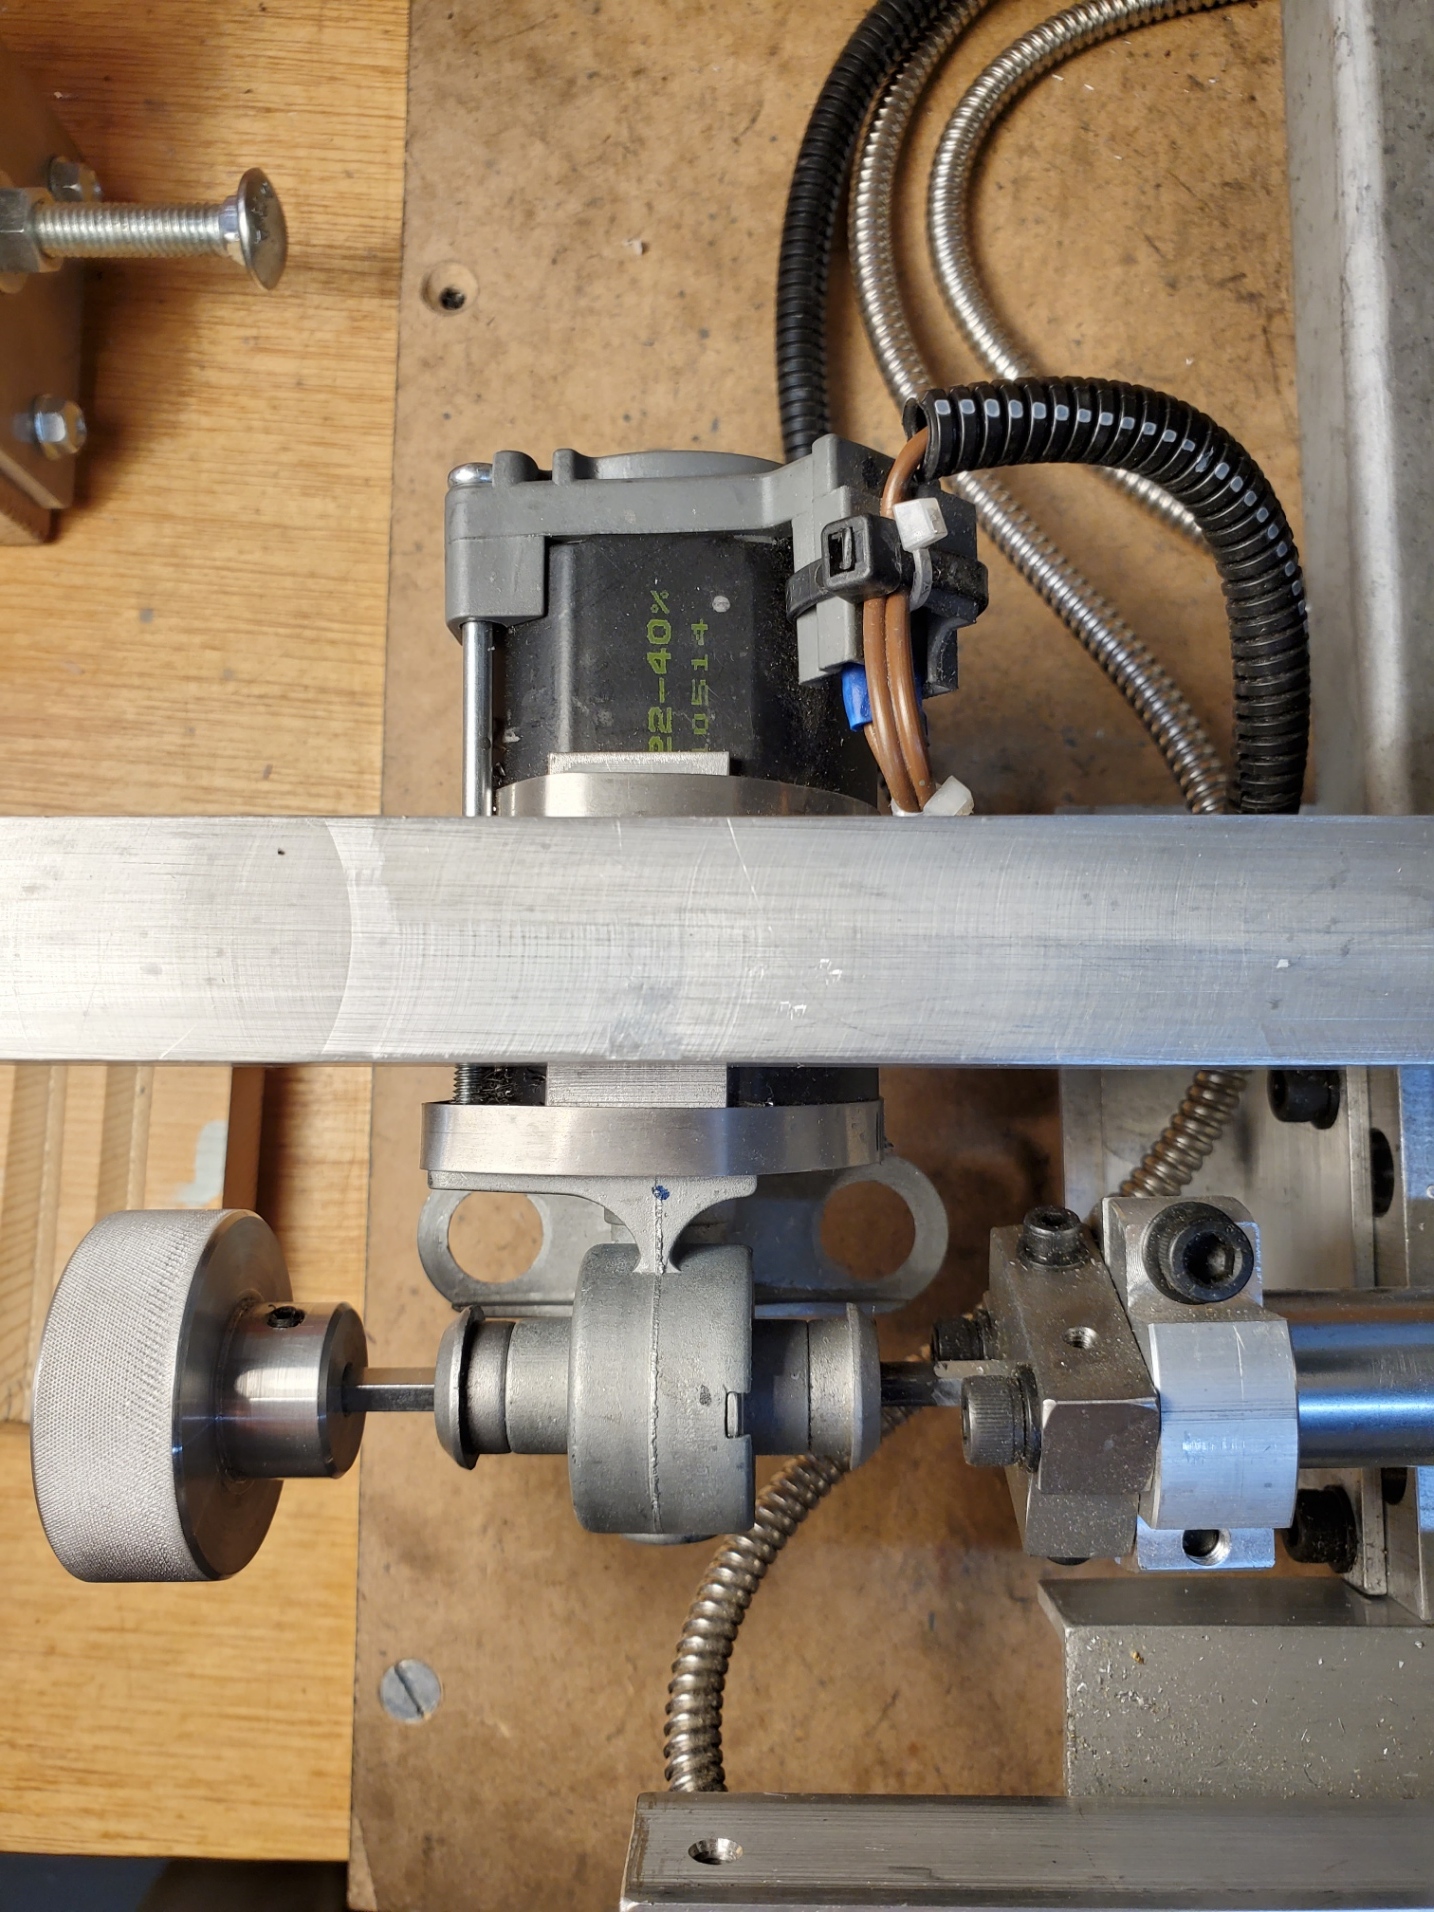
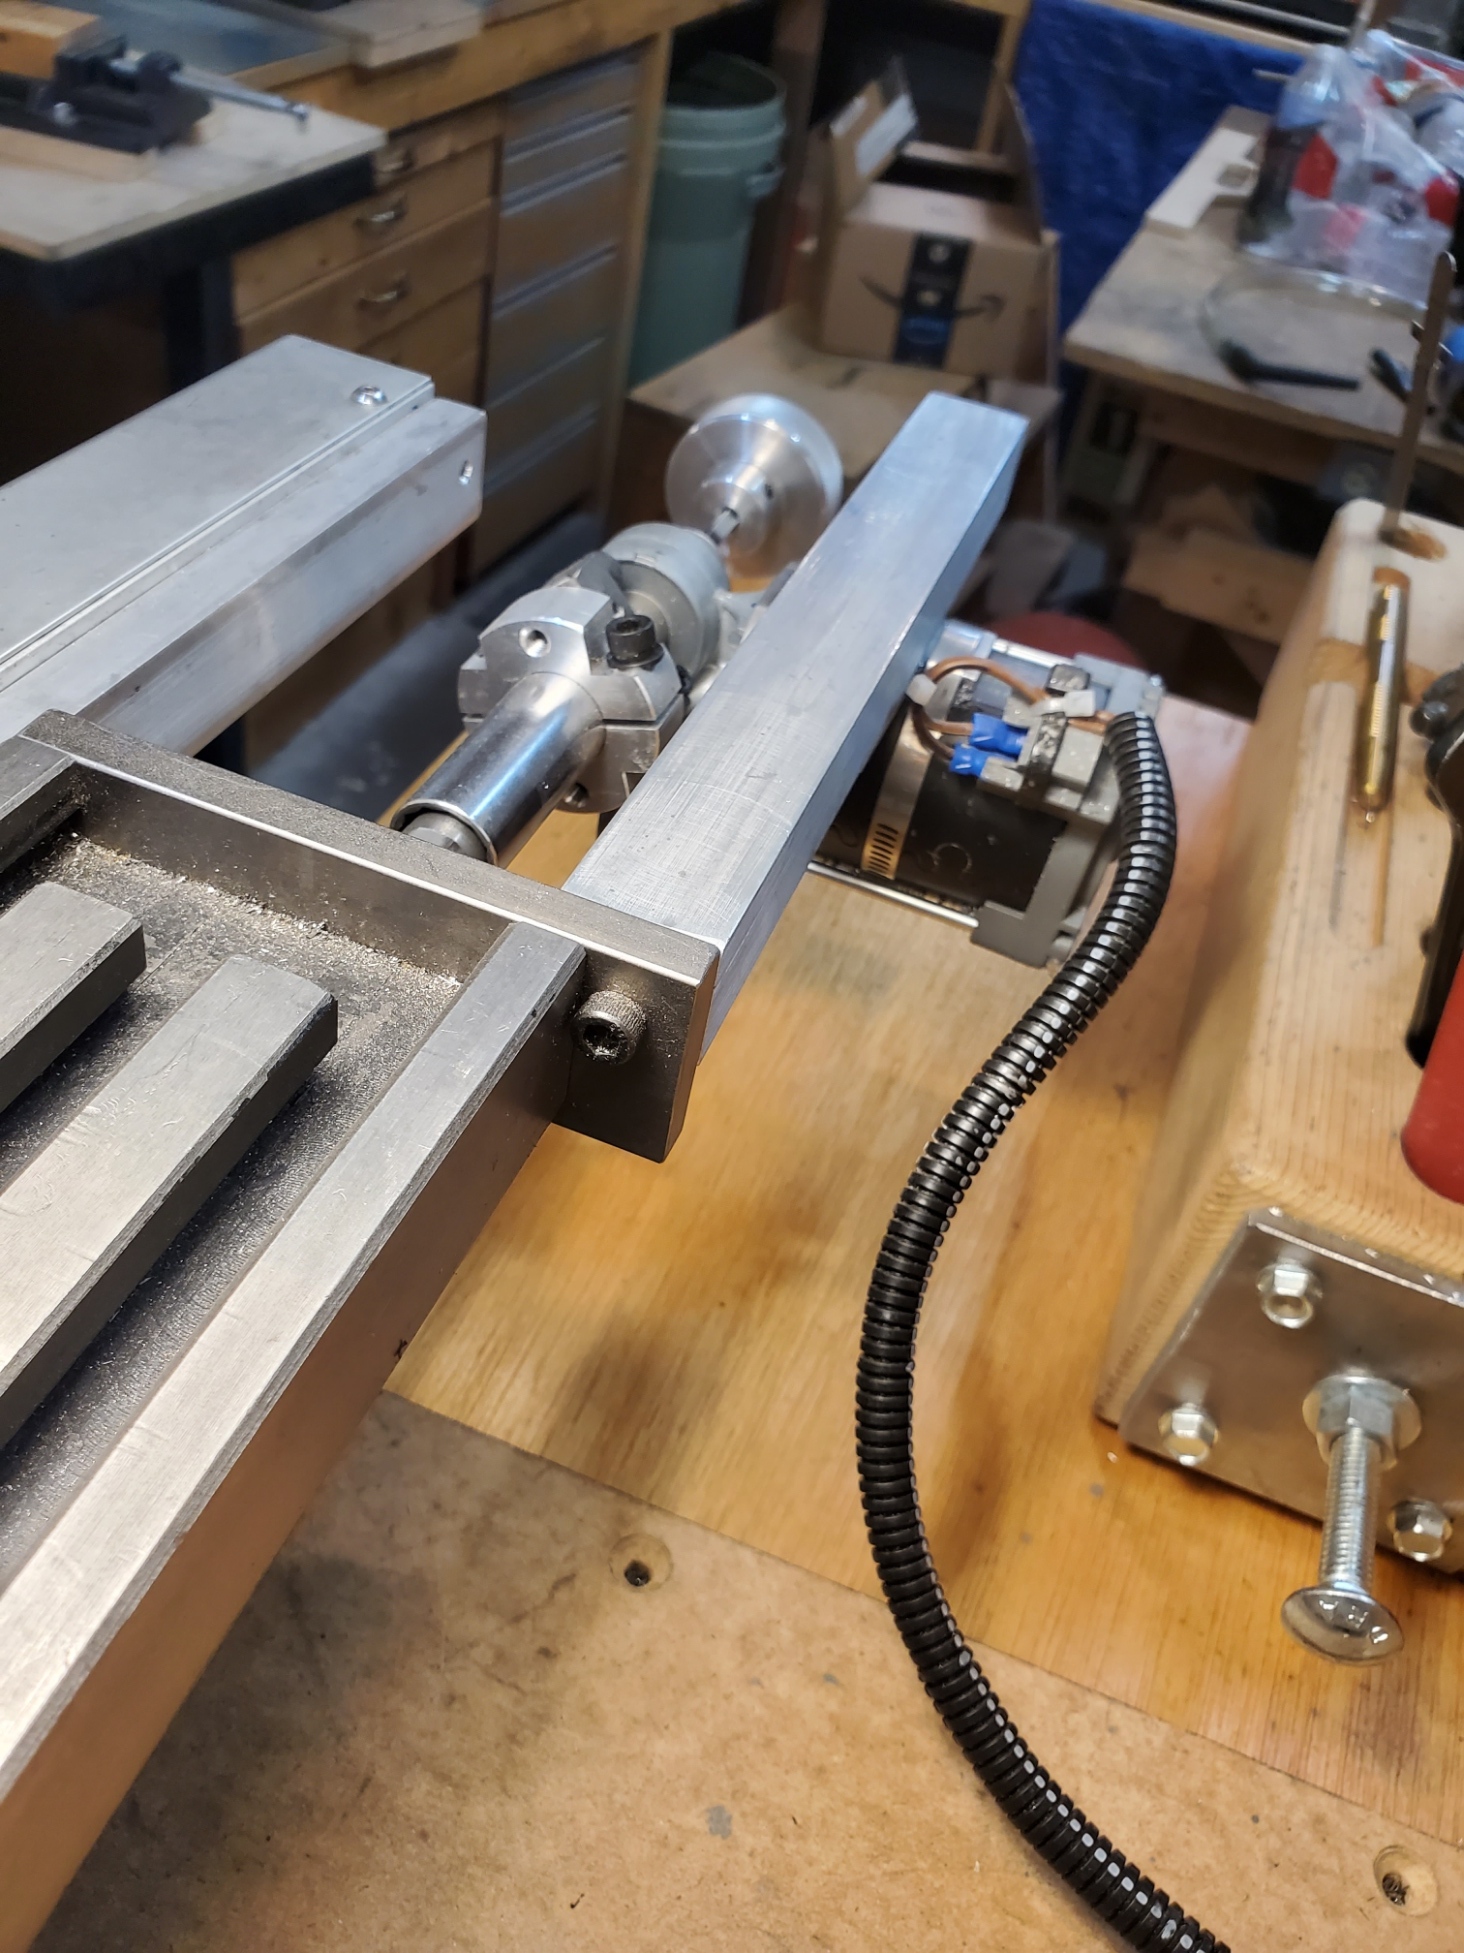
I selected a motor based on the recommendation of another power feed project. (The motor is no longer available from the recommended sources, so I don't have links to share.) The motor is 12V DC, worm drive, and right-angle output. Instead of the motor turning a shaft, the final drive gear has a 4mm square thru-hole in the center. I think that this motor was originally made to operate the electric seat adjustment feature of an automobile.
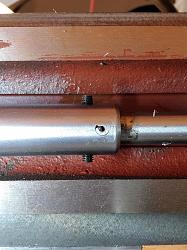
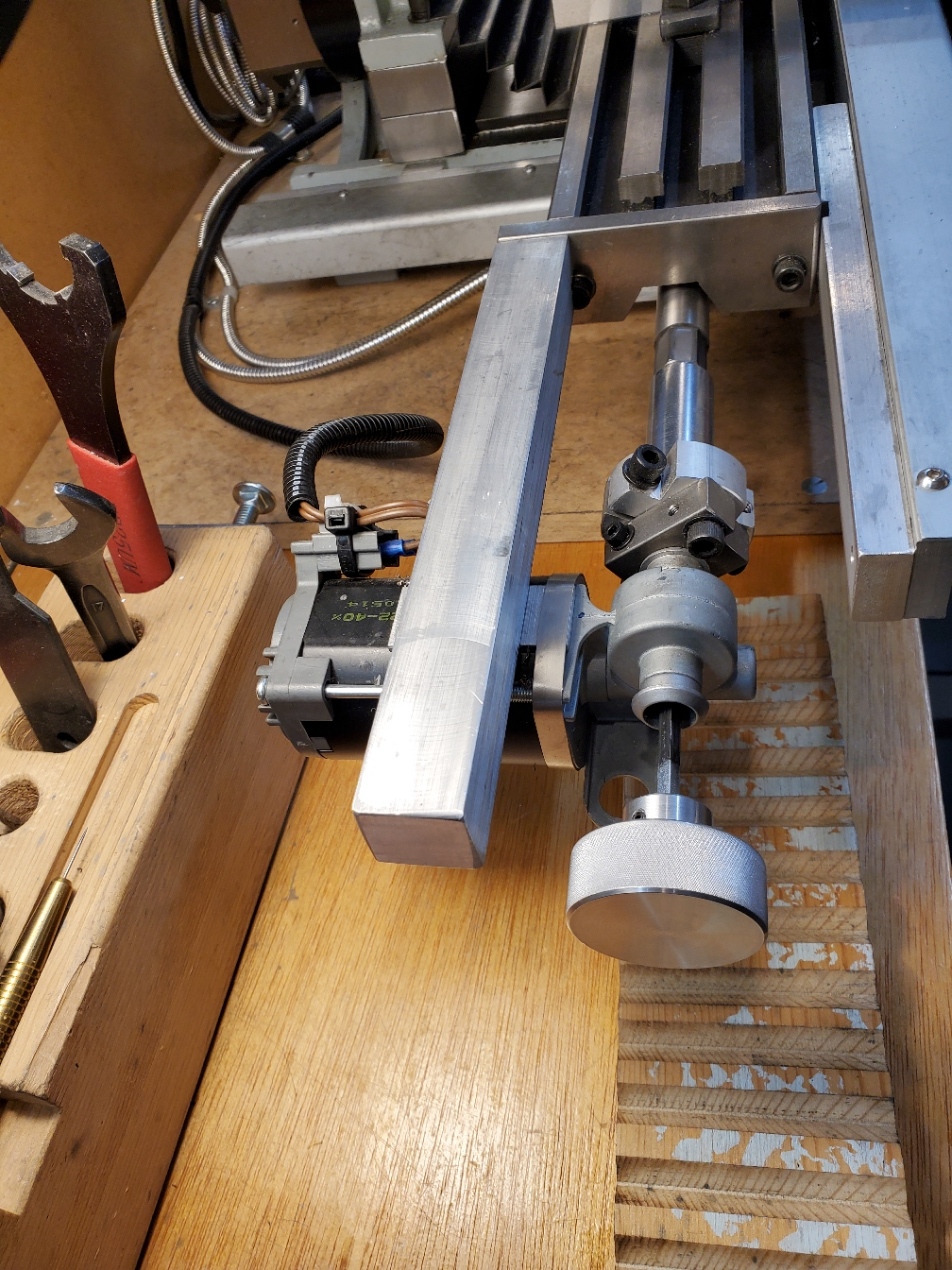
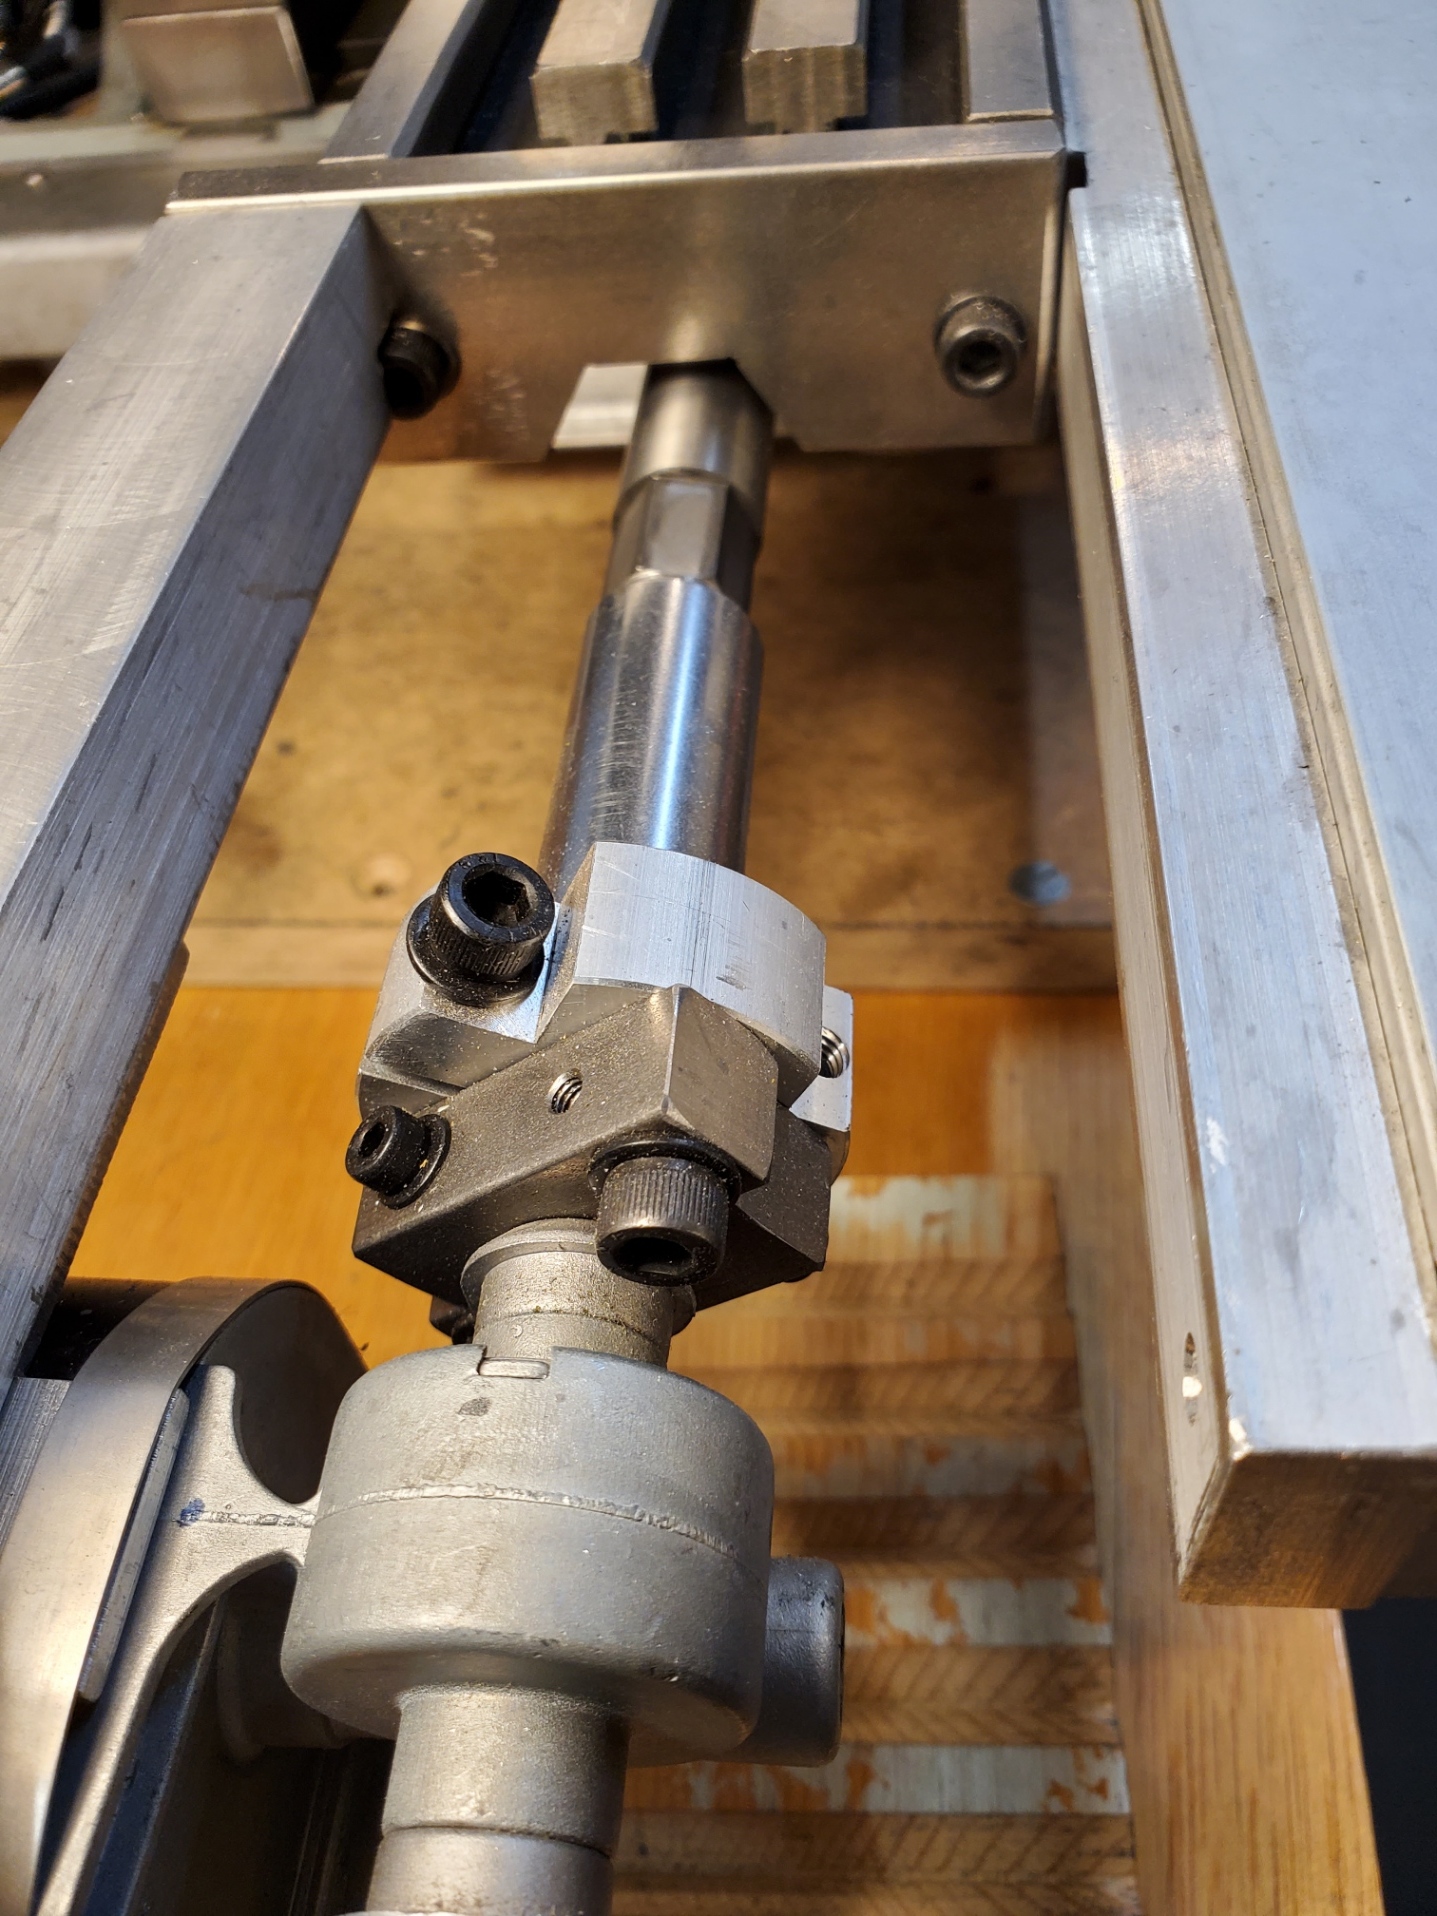
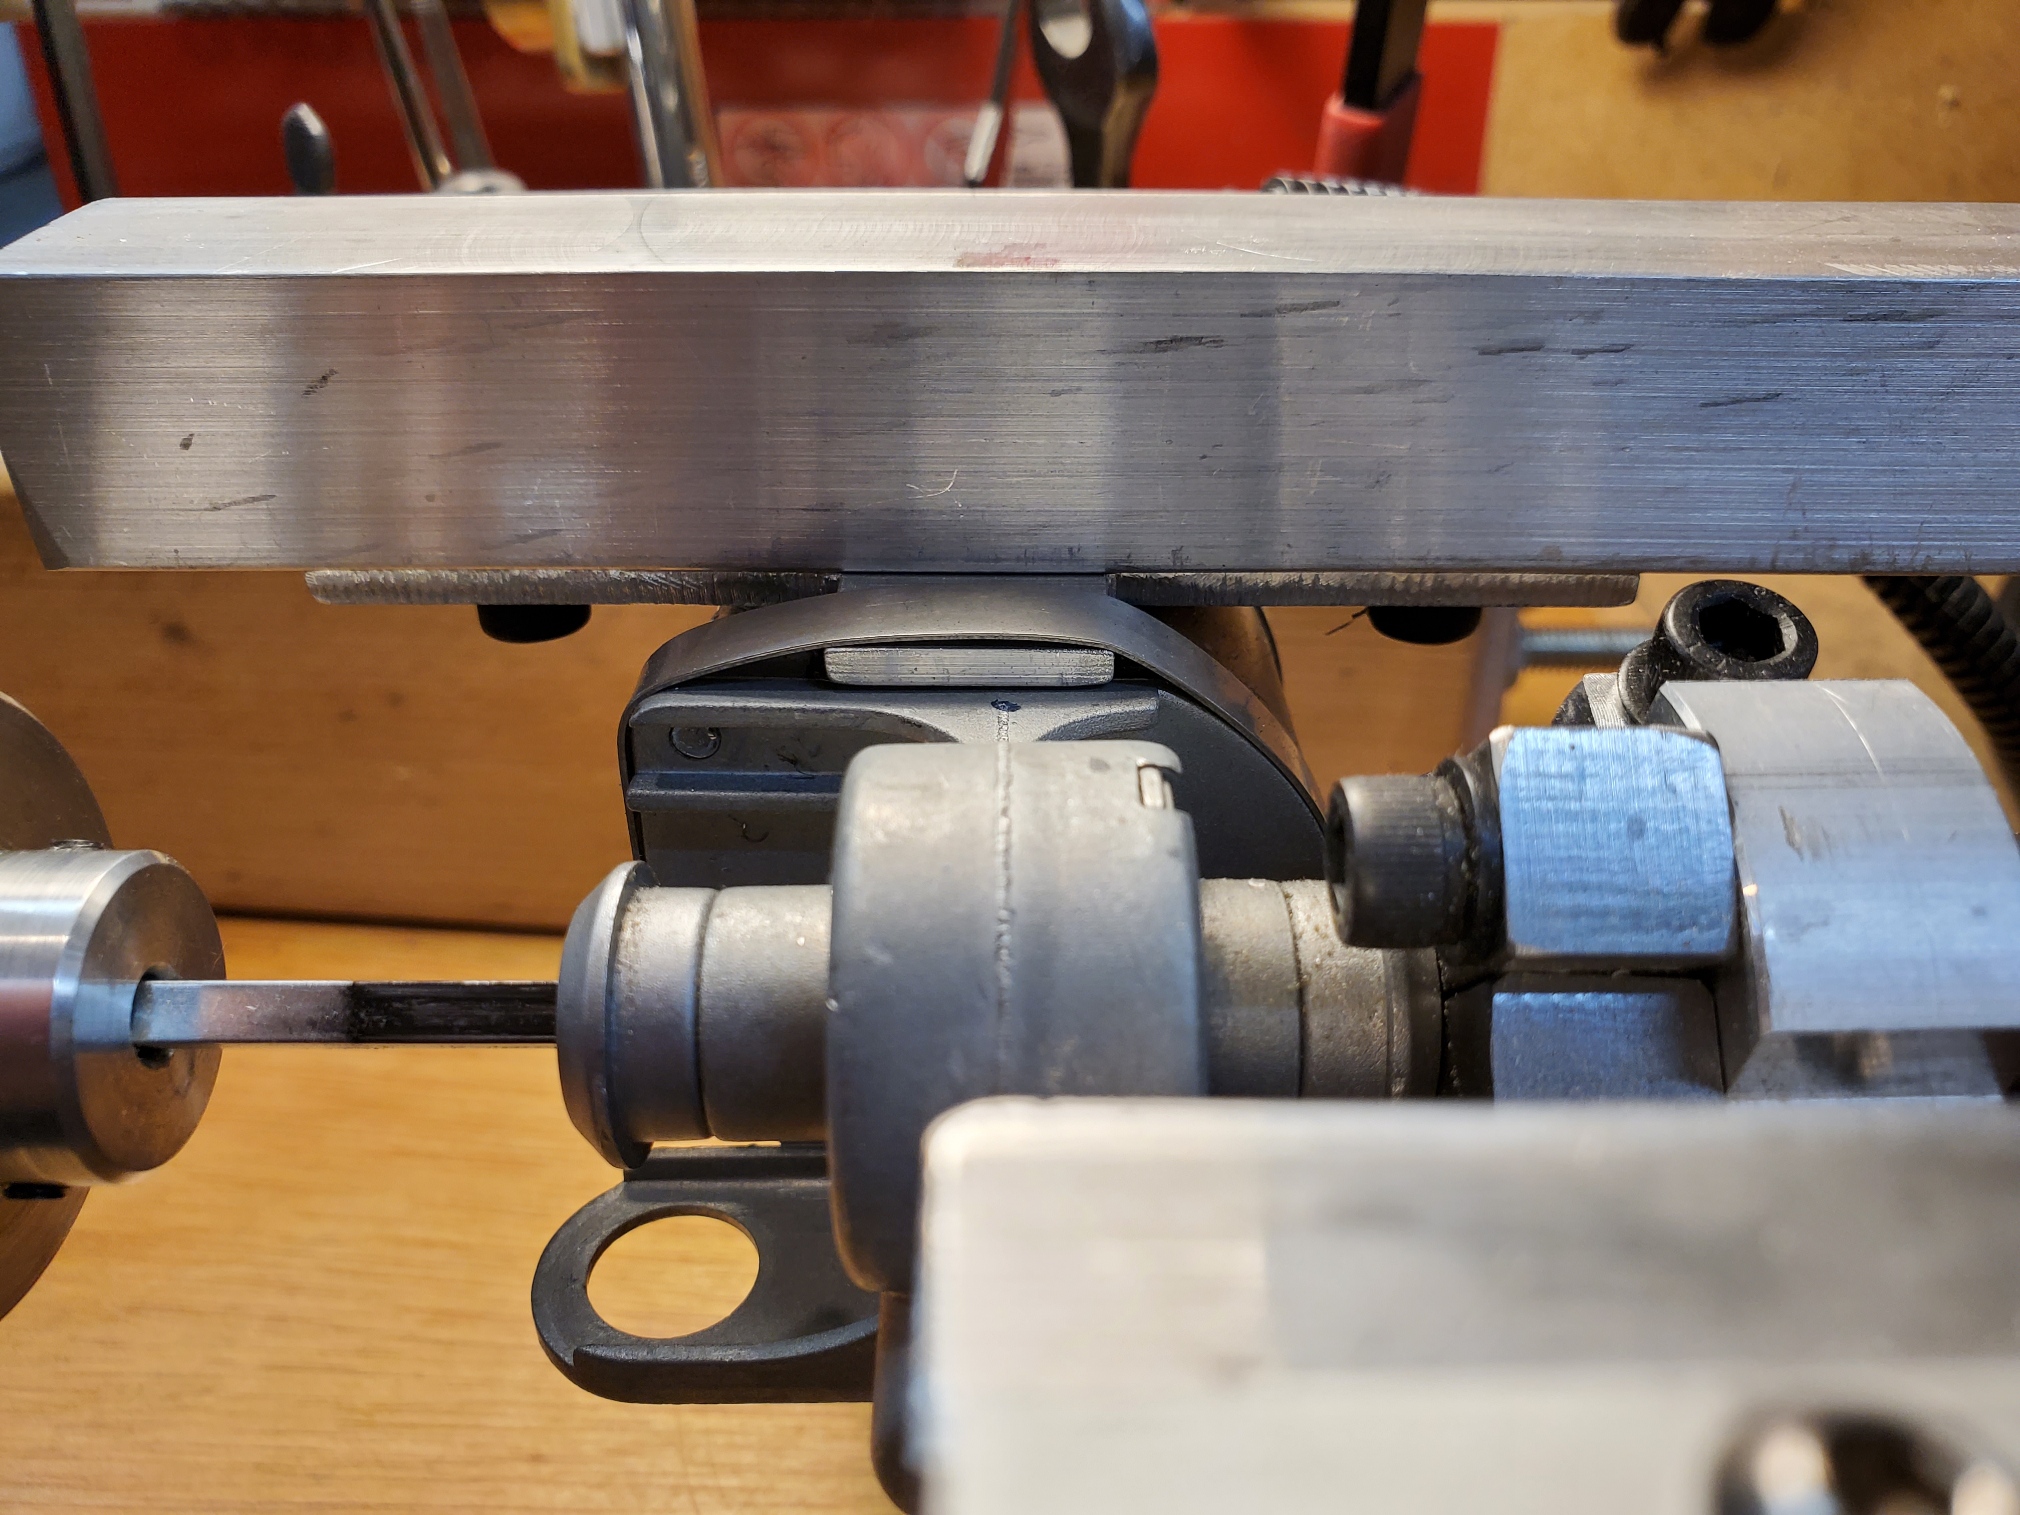
Commercially made X-axis power feed kits are available for most mini mill models. The X-axis lead screw comes with a slot cut in left end to facilitate attachment of the power feed. These kits replace the left-side table endplate with the clutch assembly, and the motor unit is then mounted to the clutch. For my project, I made a new endplate. The new plate has a cutout for access clearance to the end of the lead screw, and a mounting location behind the rear edge of the table for the motor boom mount.
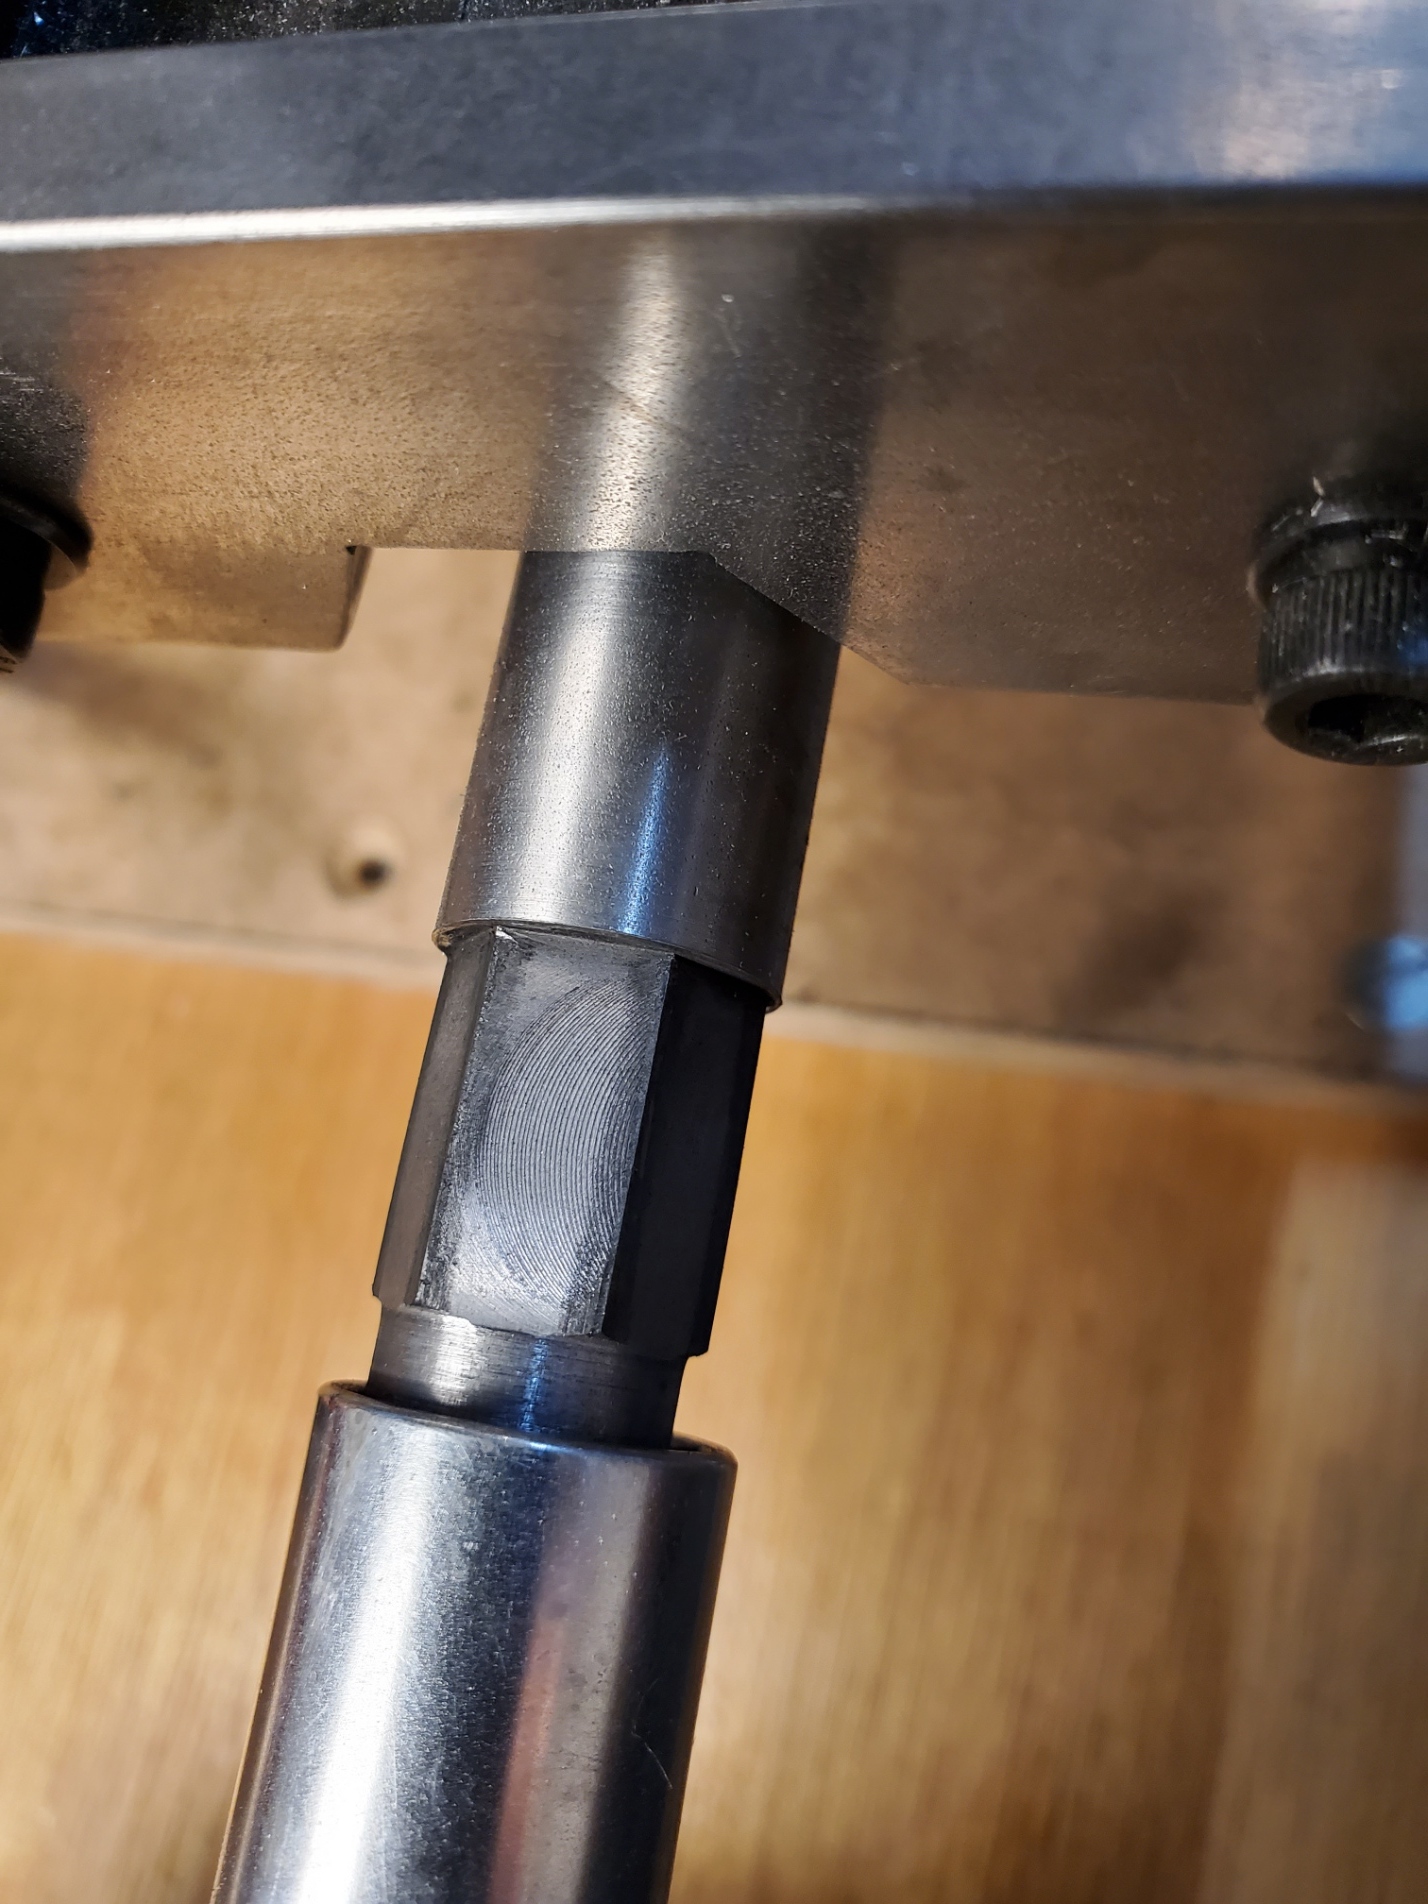
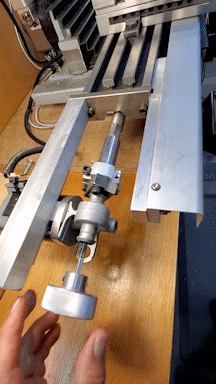
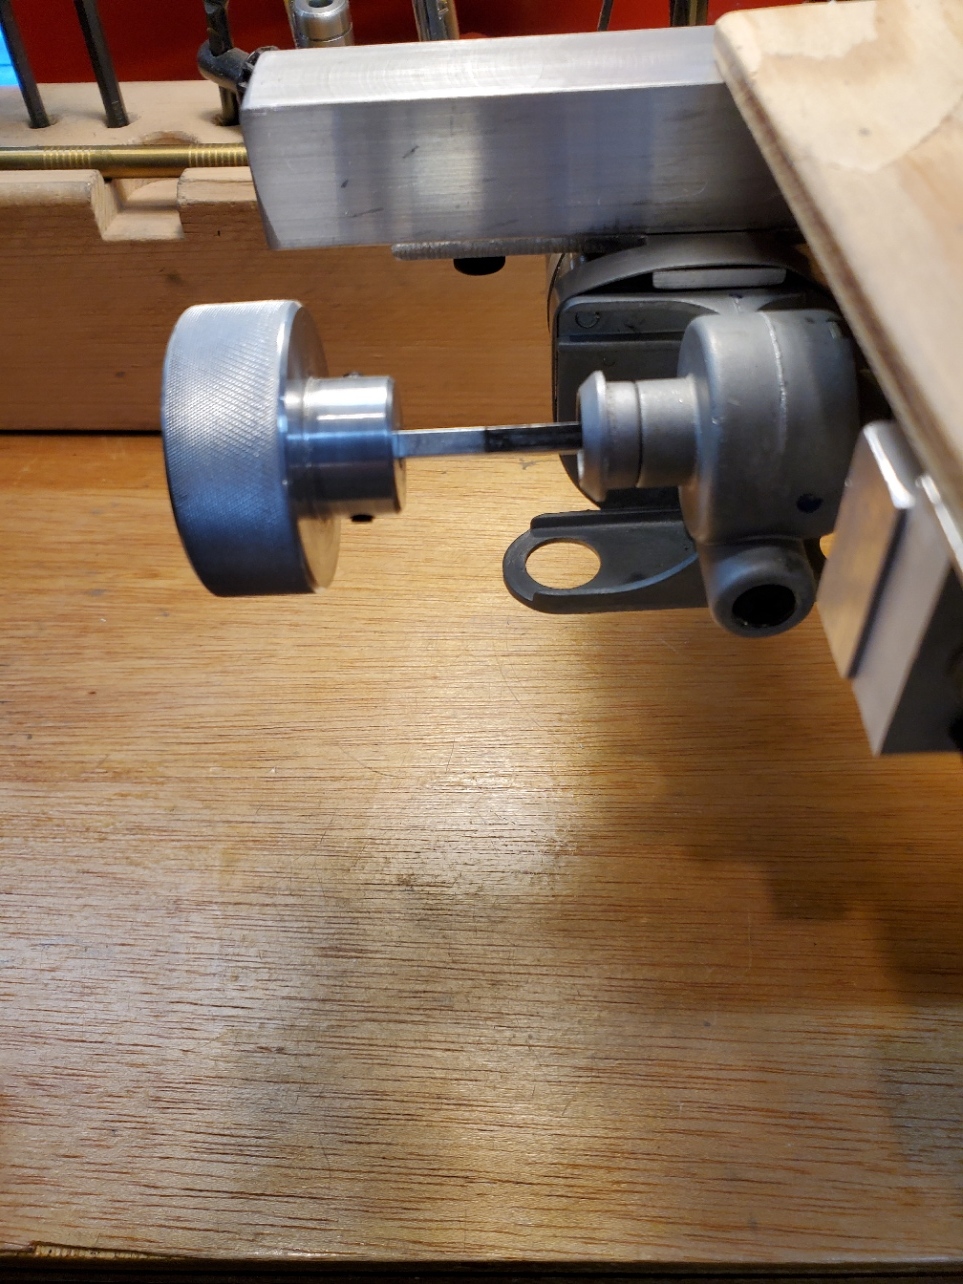
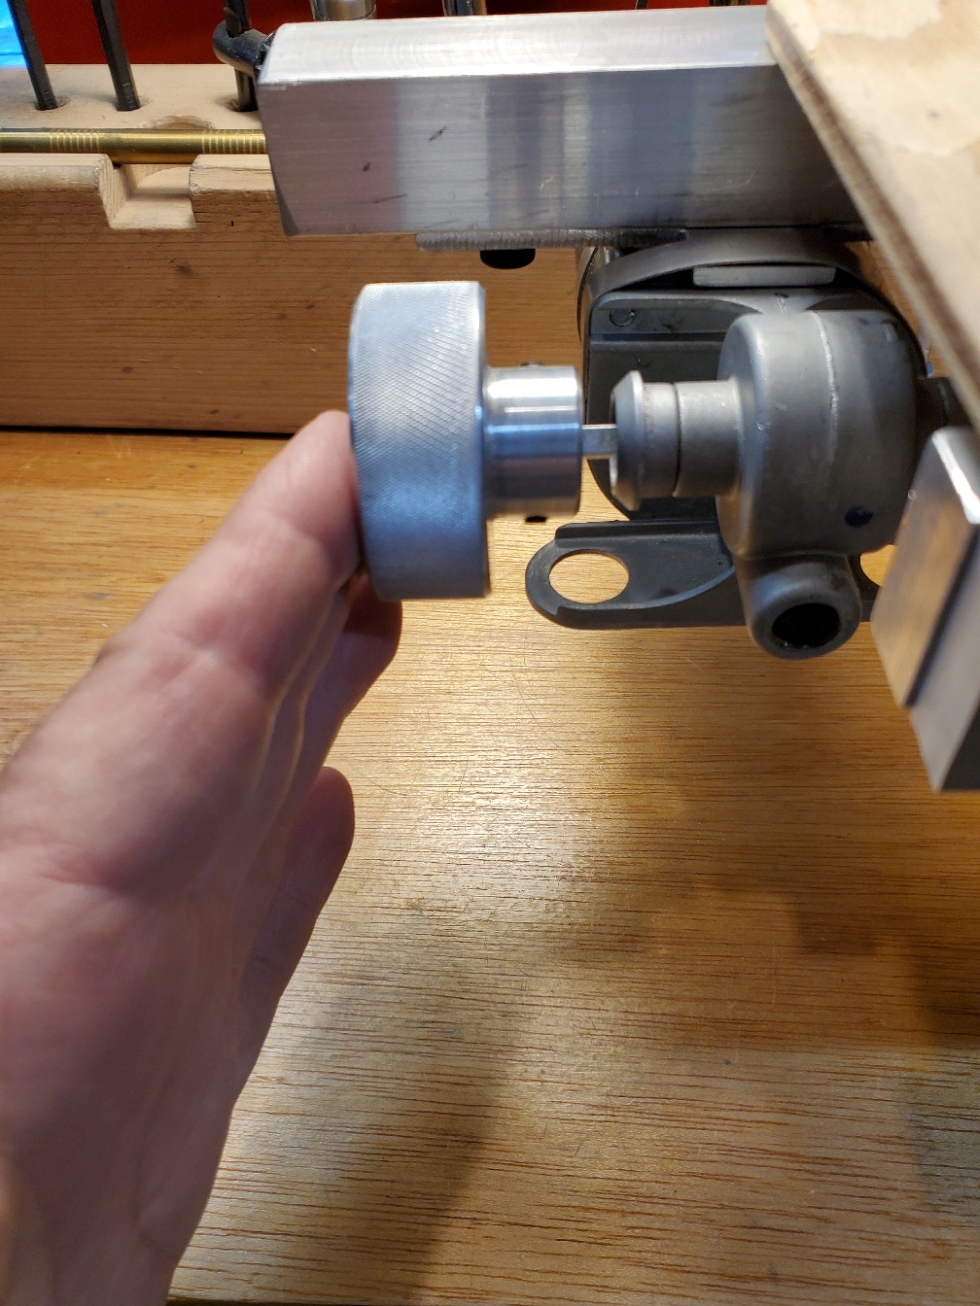
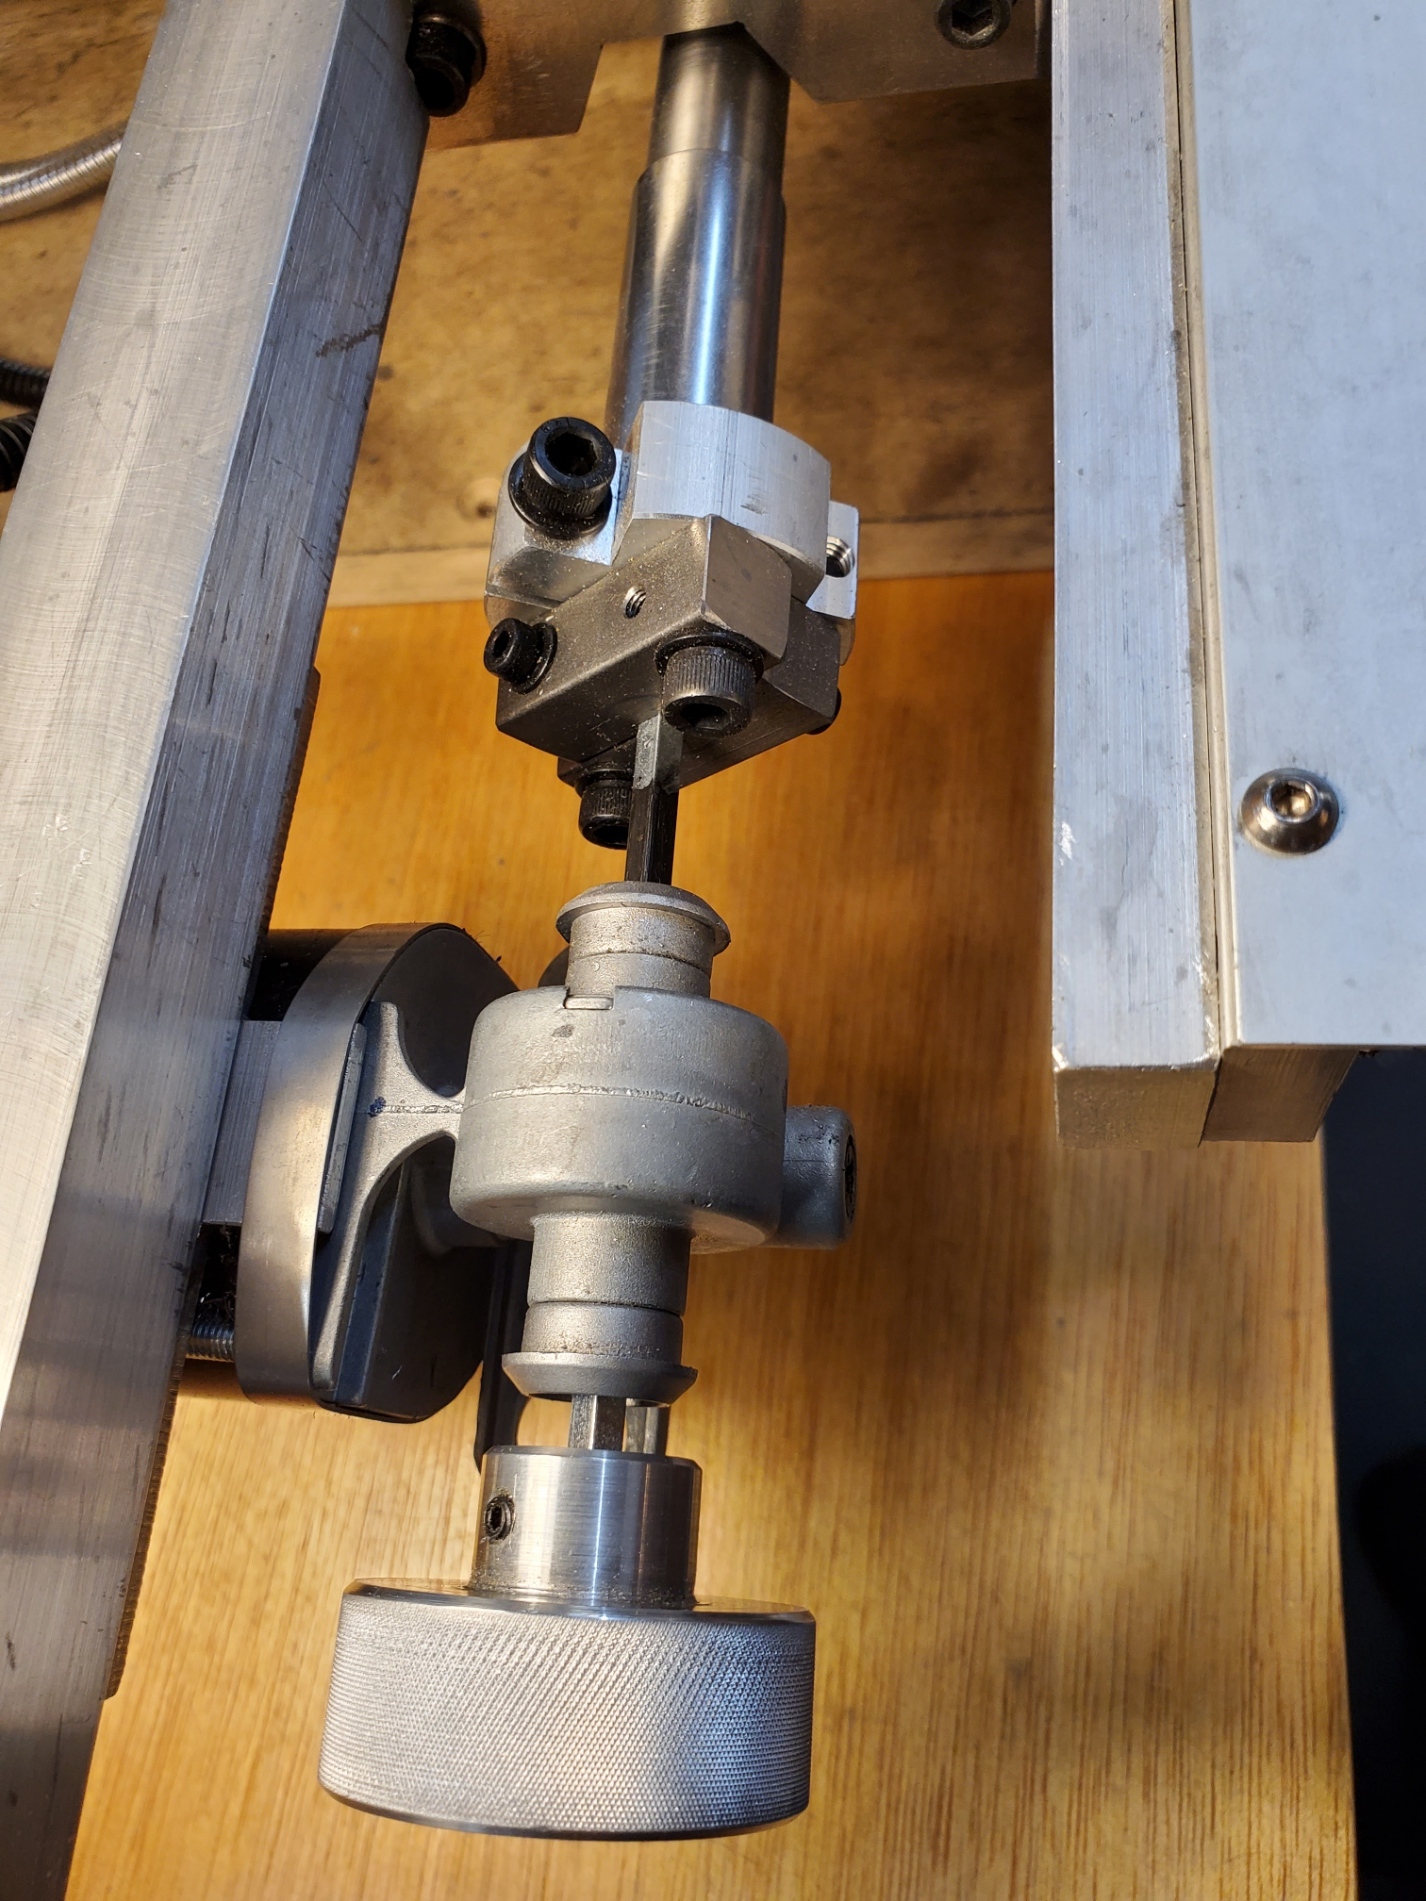
To connect to the motor output, I purchased a piece of 5/32" square key stock. This was a good slip fit in the 4mm square drive hole in the motor output gear. I made the clutch using an inexpensive 5/8" 12-pt deep socket and attached it to the end of the key stock with a coupler.
I made the lead screw extension from a piece of steel round bar. I drilled a close-fit hole in the right end to fit over the left end of the lead screw. I installed a roll pin across the hole to engage the slot in the end of the lead screw. I used 2 set screws to secure the extension to the lead screw. (I used 2 set screws because I thought that a single screw might tend to misalign the extension.) In the middle section of the extension, I cut a hex that was a close fit to the inside of the 12-pt socket. (Flats are 0.615" across.) The left end of the extension was machined round to a relatively loose fit inside the 12-pt socket, about an inch long. There is enough depth in the socket to slide fully over the round section and the hex. When disengaged, the round portion of the extension remains inside the socket to keep it aligned for easy re-engagement.
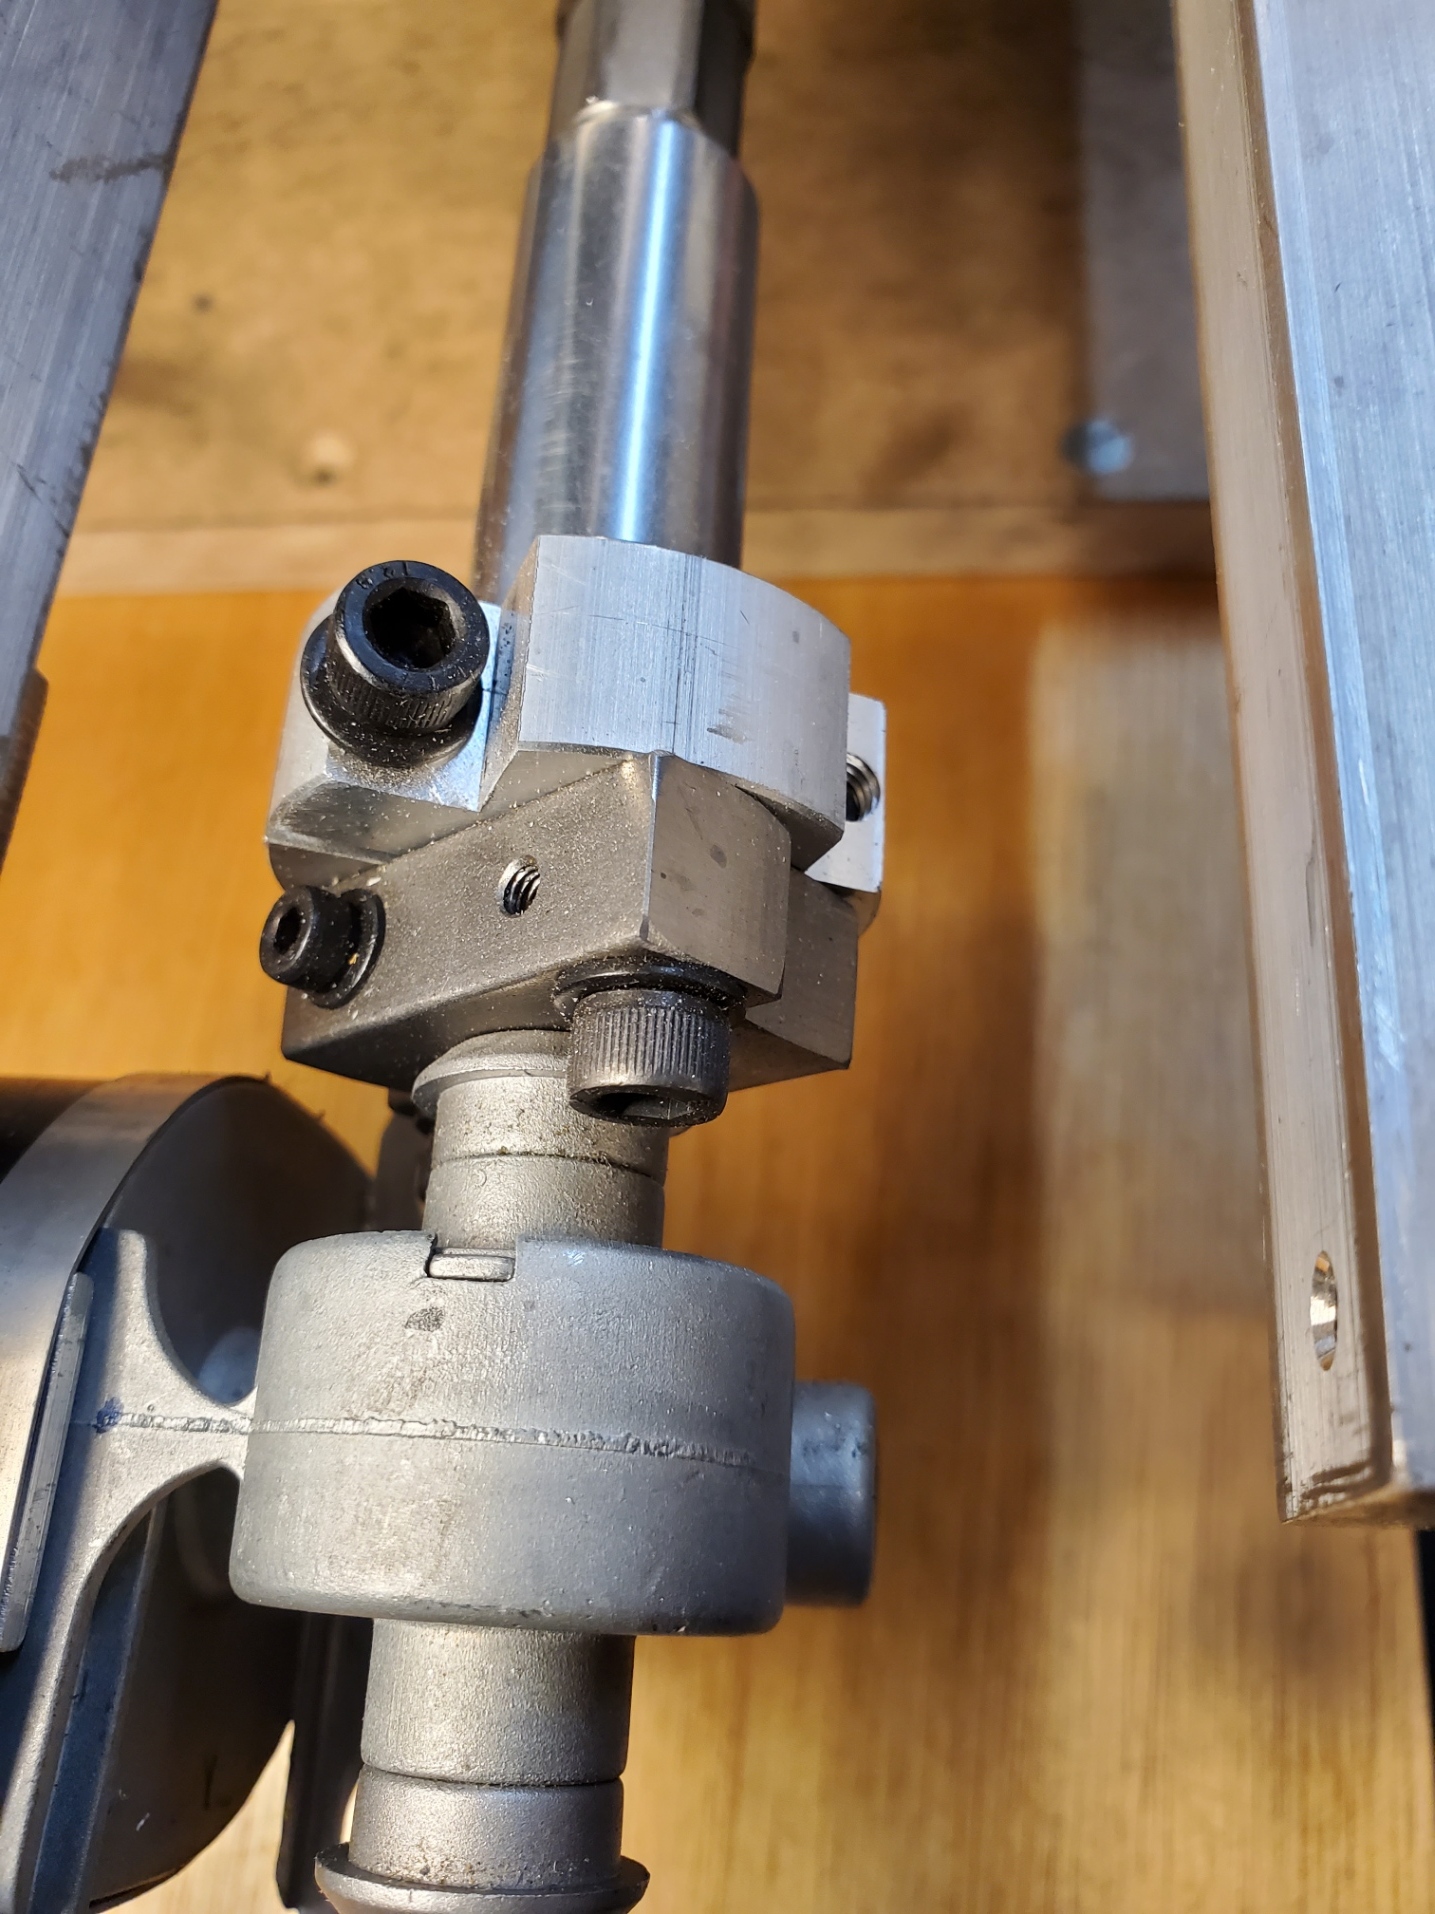
I made a coupler to join the square key to the 12-pt socket. The socket end of the coupler was made from aluminum round bar. I cut a tight fit hole in the center, split it in half, cut flats and made threaded holes to clamp tightly onto the socket. The square key end of the coupler was made from two pieces of steel square bar. I milled a slot and drilled / threaded holes in each such that it would tightly clamp onto the square key stock. I then centered the two adapters and drilled and threaded holes to join the two adapters to each other.
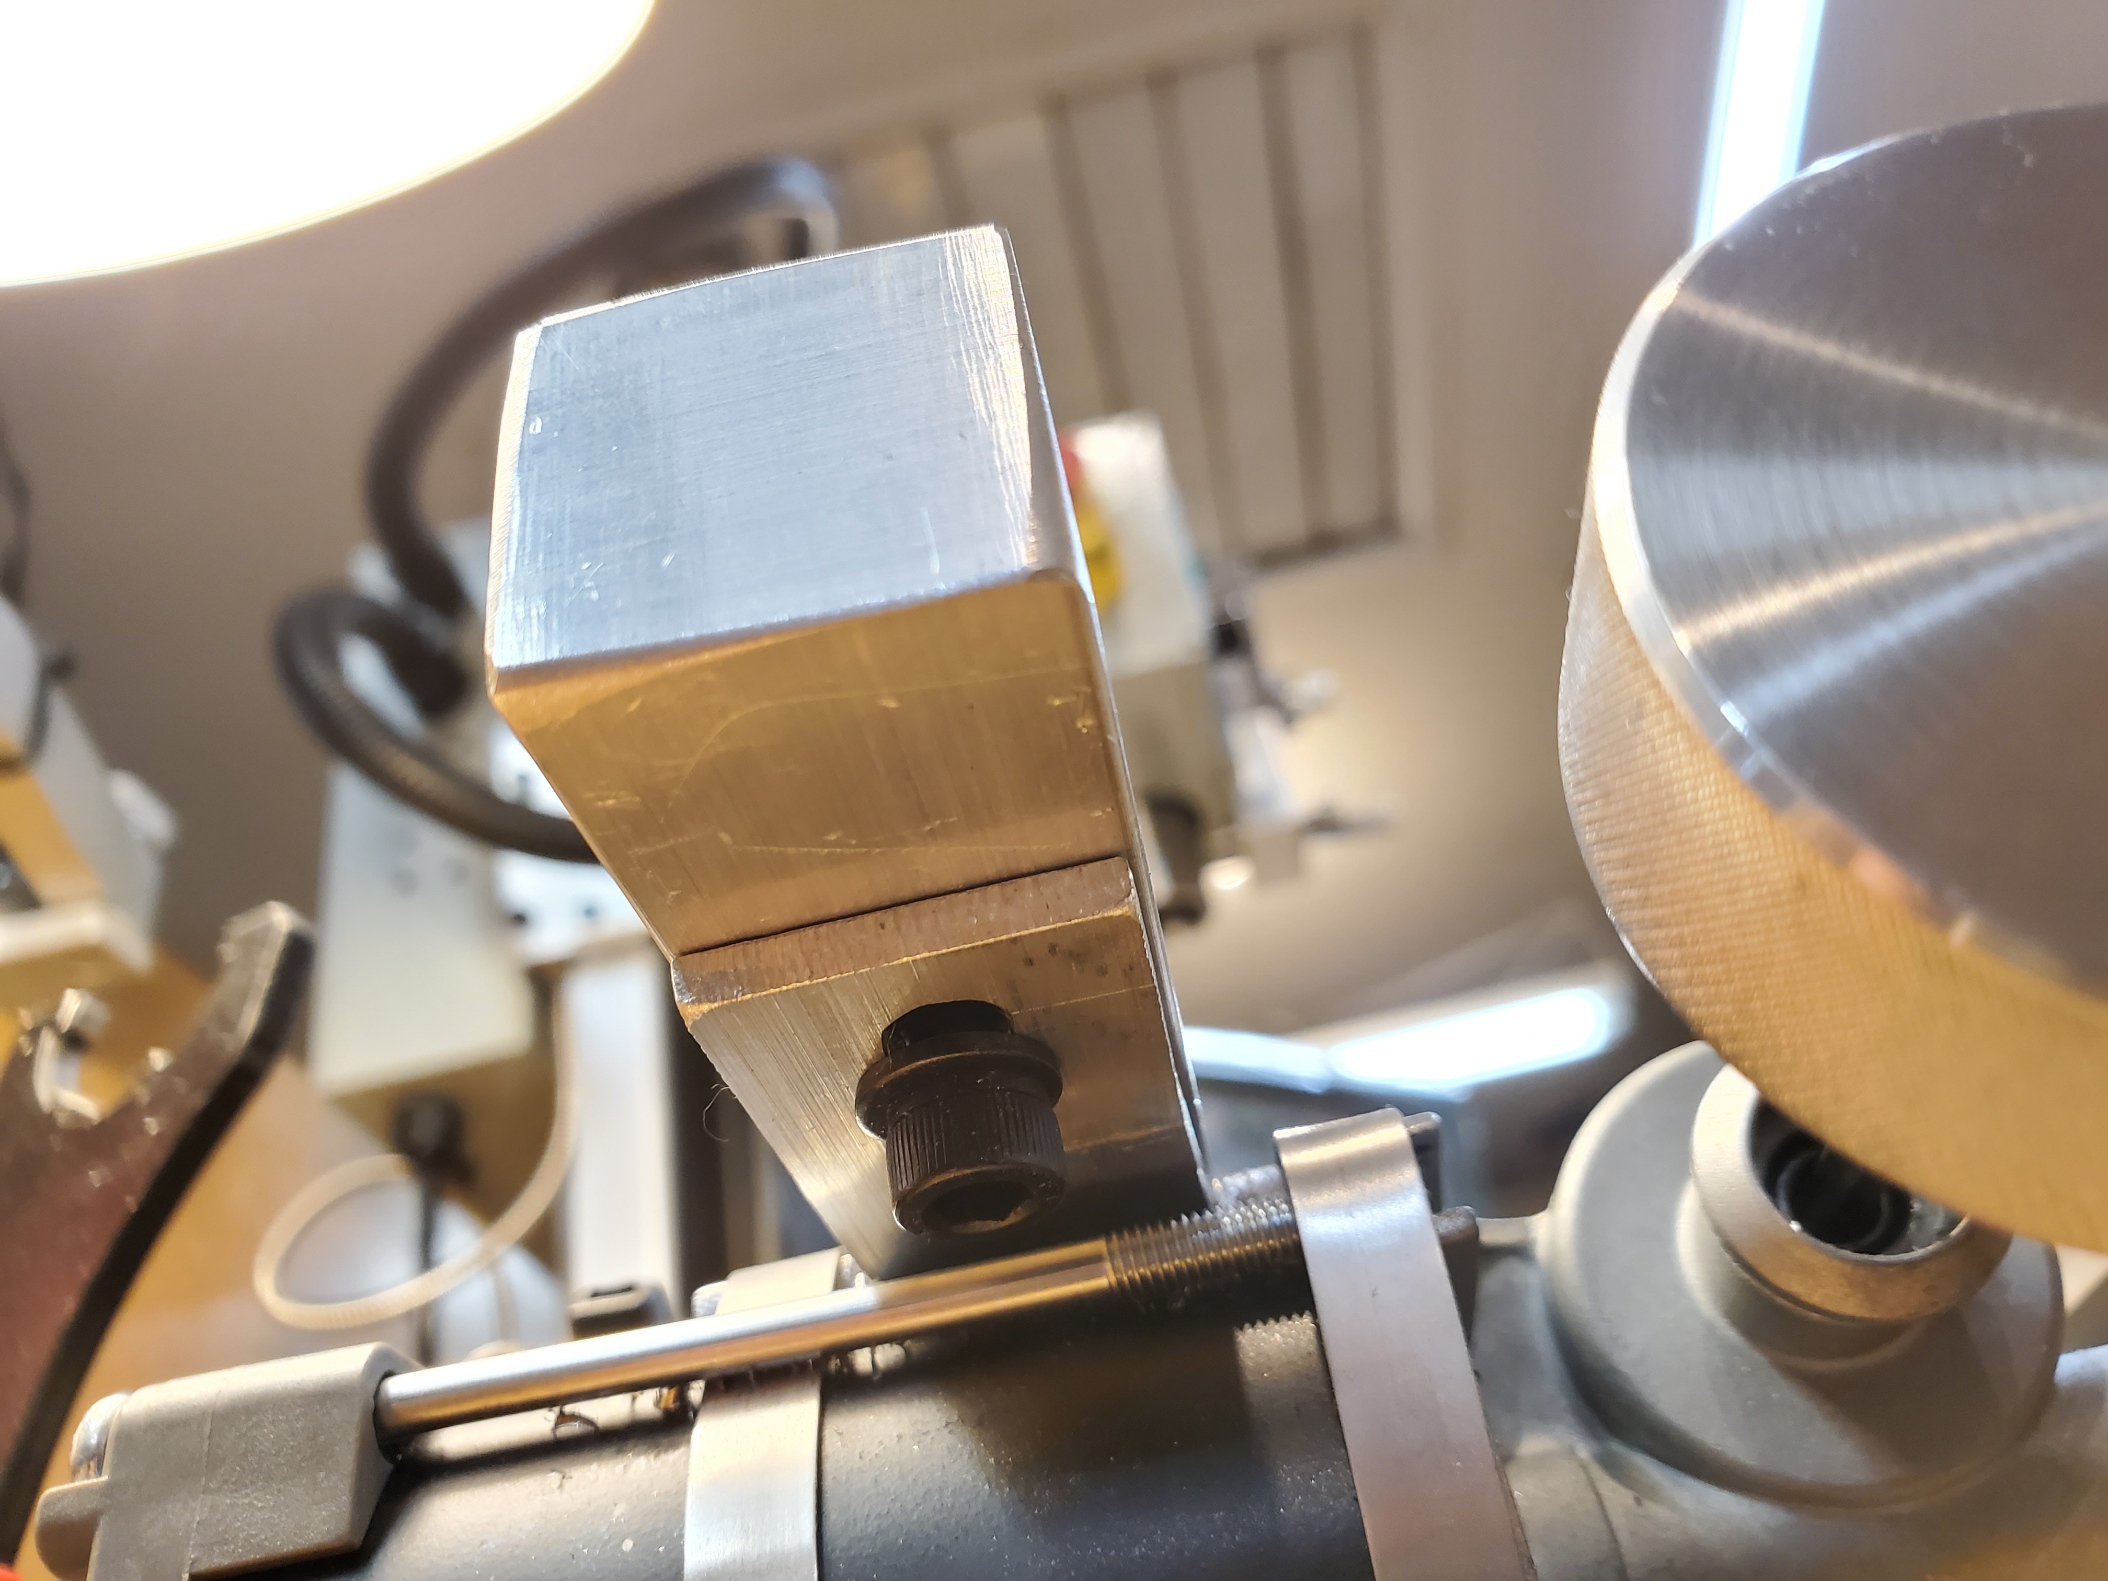
The boom mount for the motor is aluminum square bar. The mounting holes on the motor were not useful for my installation, so instead I used screw-type hose clamps around the motor body and made a "+" shaped mount. The mount was attached at the appropriate X location on the boom mount with screws. Vertical (Z) adjustment was made using shims. Y location adjustment was made by moving the motor body and hose clamps along the arms of the "+" mount.


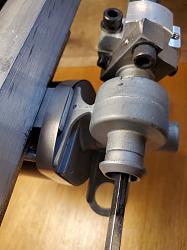
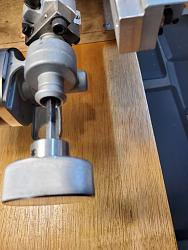
I made an aluminum knob for the end of the square key stock secured with two set screws (square shaft in a round hole). The knob makes it easy to slide the key stock to engage / disengage the clutch. It also makes it easy to turn the motor shaft slightly in the (relatively rare) instance where the 12-pt socket doesn't line up smoothly with the hex section of the extension. The coupling limits movement of the drive assembly to the left (disengaged) while the socket engagement of the extension shaft limits movement to the right (engaged).
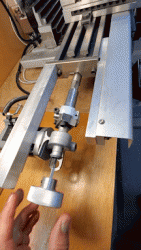


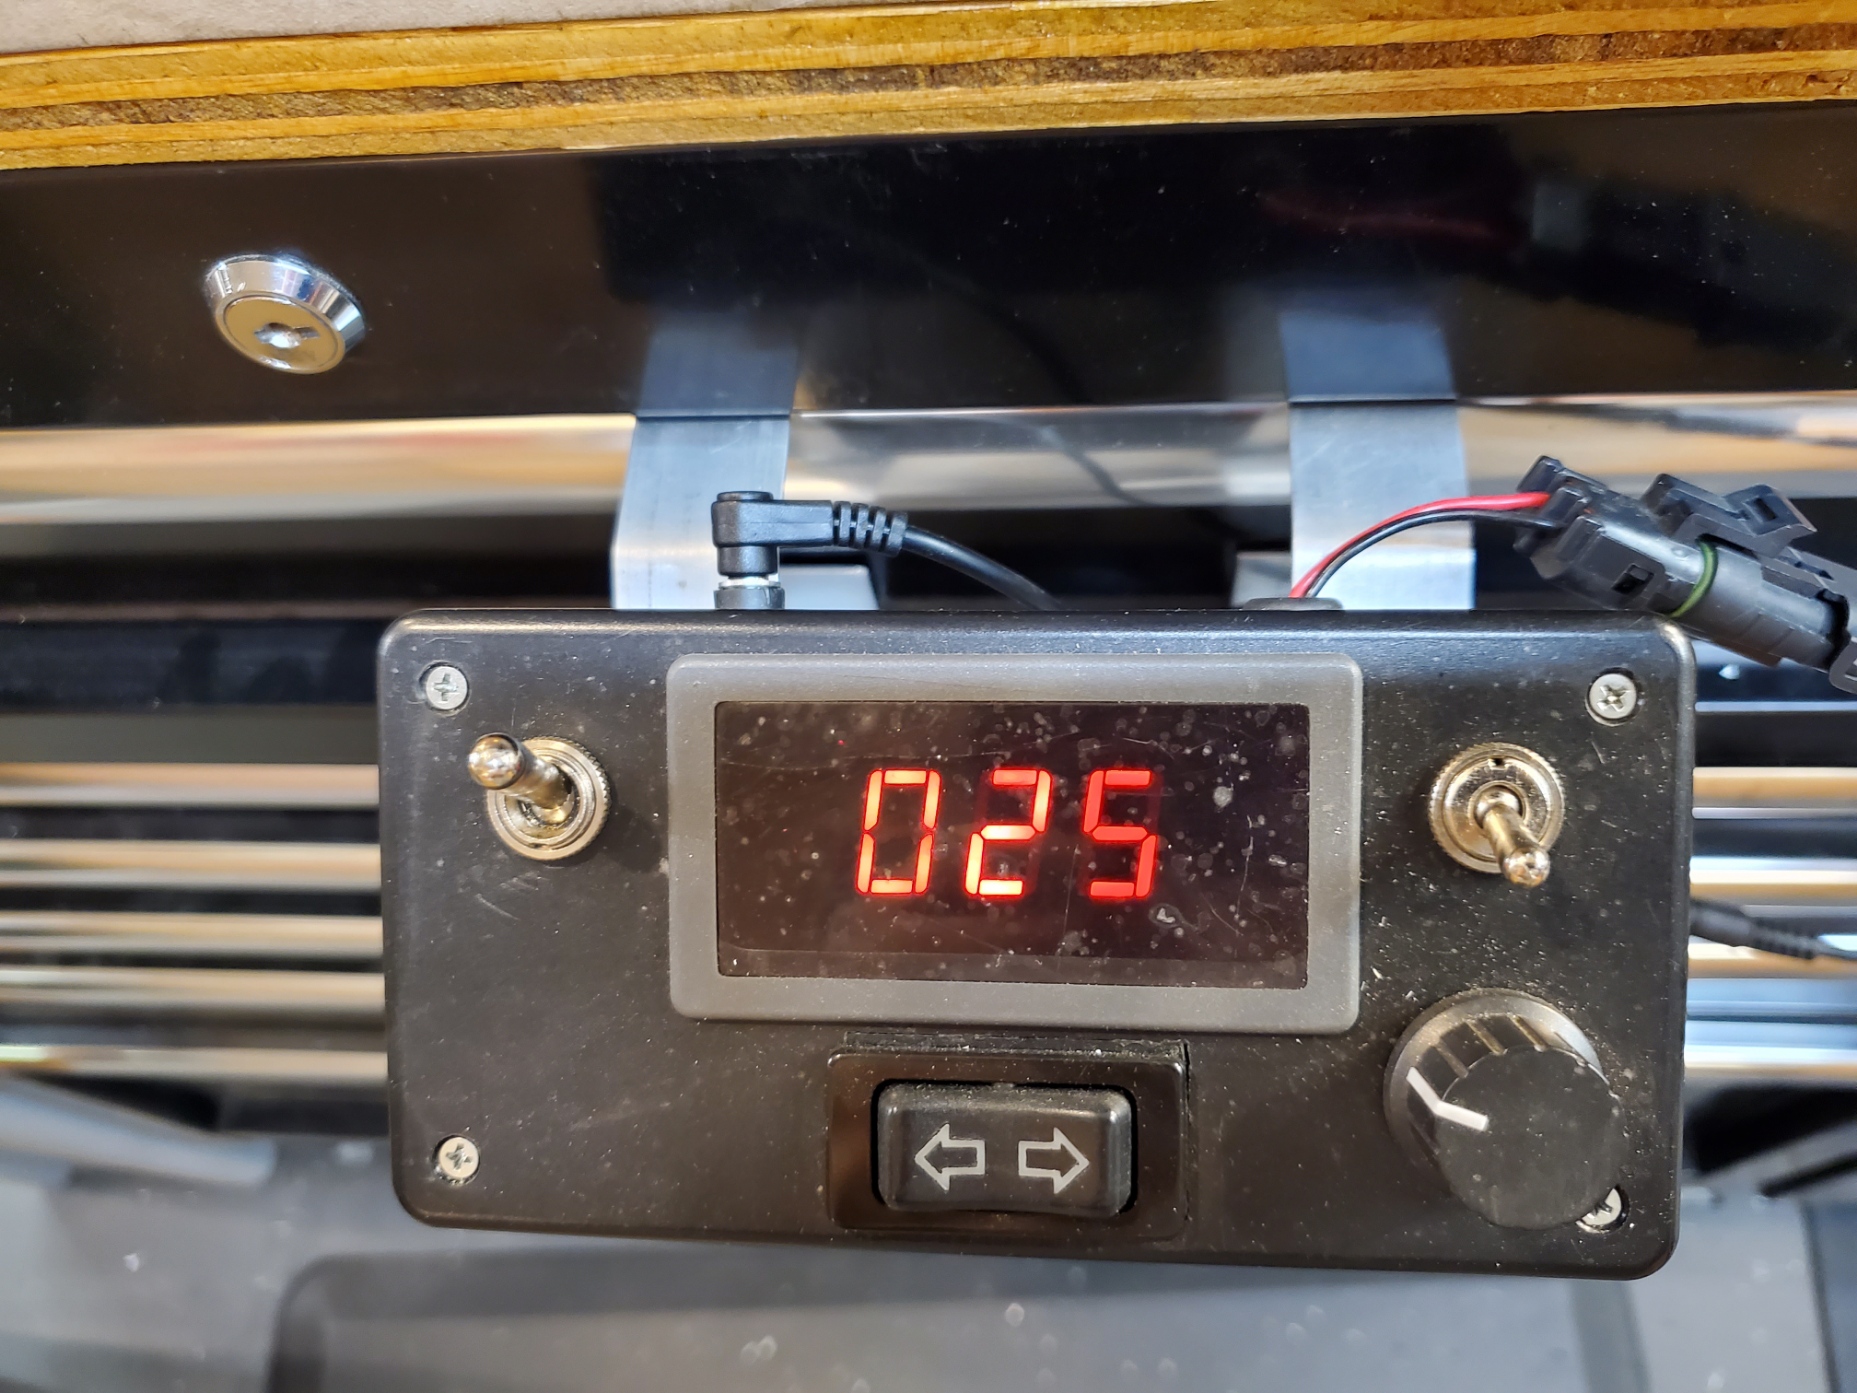
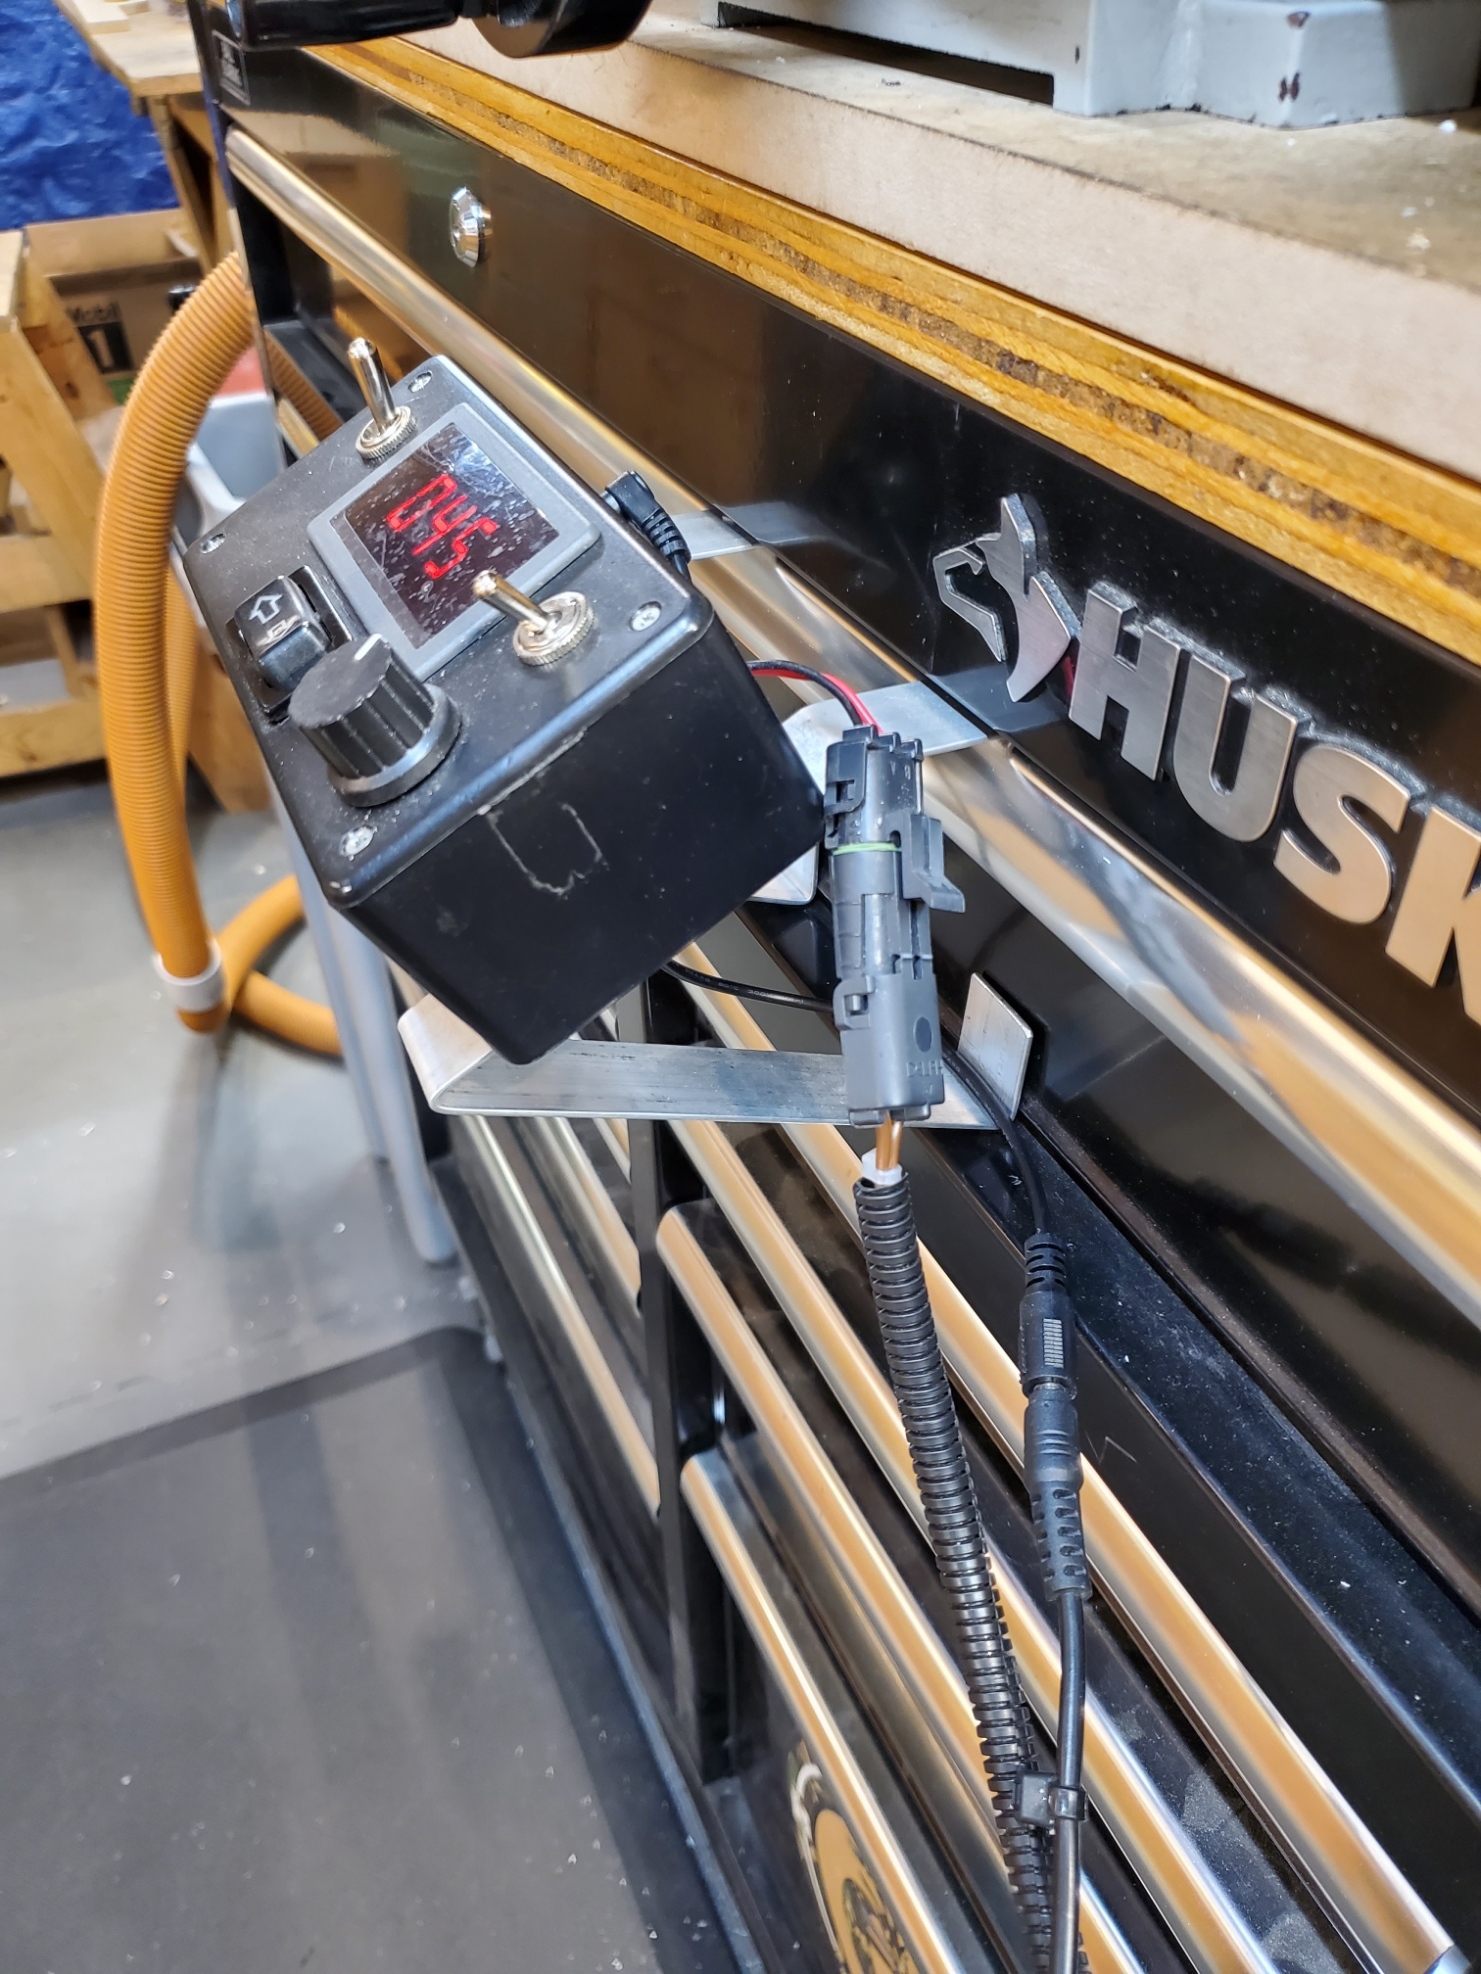
The control unit was made from a PWM control with display and a 12VDC power supply (Amazon). The control box mounts an on-off switch (left), speed display (0 - 100%), directional switch (below display), a fast movement switch (upper right), and a speed control knob (lower right). I was not able to configure the fast movement switch to change the display to 100, so I just bypassed the speed control to connect full unmodulated current to the motor. The directional switch is a common car power window switch. To move the table to the right, you press (and hold) the right side of the window switch. Left side moves table left.
I made mounting brackets to hold the control unit on the front of the top drawer of the tool cabinet / stand for my mini mill. When not in use, the motor feed and power supply are disconnected, and the control box can be stored out of the way.
Then I re-made my left-side table cover to completly cover everything but the knob.
What I would do differently:
When I was making the coupling adapter for the square key stock, I spent a lot of time making the slots the appropriate size for a tight fit. I should have milled a "V" groove in each, instead of a square slot
Links & Credits:
I purchased the motor from AllElectronics.com
As I mentioned, the motor I used is no longer offered by them.
Motor speed control:
https://www.amazon.com/Digital-Displ...l+with+display
Power Supply:
https://www.amazon.com/Adapter-Trans...t+power+supply
Clutch ideas:
https://littlemachineshop.com/images...Connnector.pdf
Commercial products:
https://www.littlemachineshop.com/pr...5111&category=
https://www.micromark.com/POWER-FEED
As always, I am happy to discuss (and post more pictures if needed).


 Reply With Quote

Bookmarks