
 LinkBack URL
 About LinkBacks


I like the fold out display/sales shelves. The hinge had to be somewhat beefy to support all that product while going down the road. I understand there is a parked/stowed condition, so the cantilever load is not active during driving. Took some engineering to make this sturdy for the long term use.
I've done something similar with 2x4 foot sheets of peg board, that are hinged so both sides of the 2x4 peg boards are used over the work bench. The peg board material is 1/8", and I assembled them into 2"x4" stud lumber wood frames. I used a saw kerf to hold the edges of the peg board in the stud lumber frame (there are two peg boards spaced an inch apart). I've not had problems with this thin of board. This was supposed to be a prototype, but it worked too good, even the 2x4s were weathered scrap. I've always wanted to add another layer with hinges that accommodate that movement in front of these. I just wish my organization was better, they seem to collect odd things over the work bench not used that often, outside of hammers, pliers, and screw drivers.
Today's task is repair the horrible fright parts washer. The outlet pump tube just flops. I found they did a weld from a hose barb to the sheet metal box the pump is in, which was horrible in quality, and broke, This then stressed the pump, and it broke its plastic mount. So I fabbed an aluminum mount. And I was going to use a lock nut on the threaded end of the hose barb where an elbow is fitted that then connects the flexible tube that delivers the solvent. Pipe thread, right? Thread pitch is 1.25mm, and straight (not tapered) threads 12.8mm diameter. WTF is this? 1/4 male pipe fitting will start on it, but wrong thread pitch. So now I need to fab this as single point on the lathe. I don't want to weld it again, but that may be easier. I don't stock any metric pipe taps or dies in my tools.....yet.
.
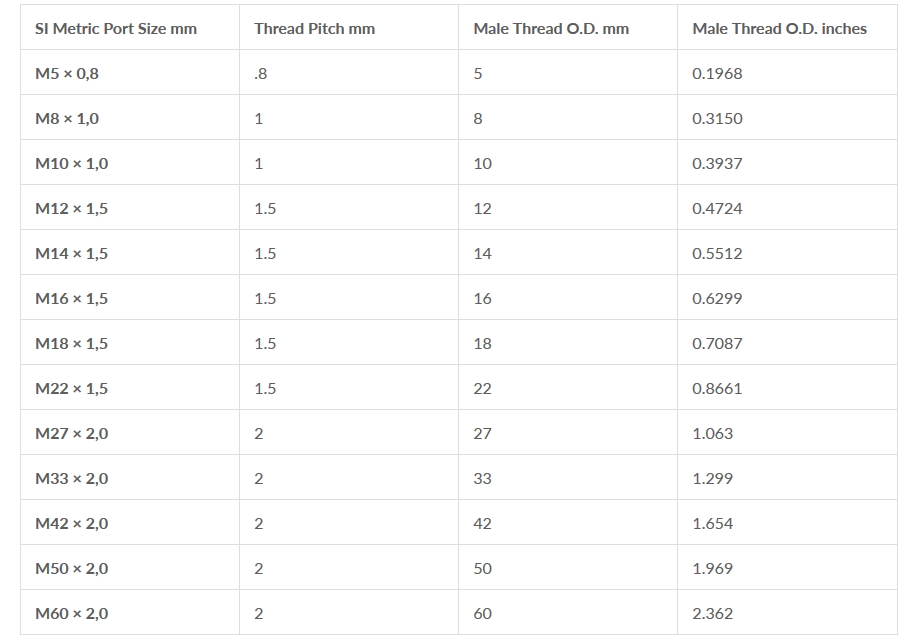
So 12.8mm 1.25mm pitch, what is even close in this chart?;
So it's some sort of Frankenstein bastard thread. And the chart is incomplete as the taper angle is not specified.
It's looking like a weld will be done.
Or I should just break down and buy a better parts washer. After this truck, then I have a 1924 model TT 1ton with a Ruckstell rear axle.

 Reply With Quote

Bookmarks